Archive for the ‘Handyman’ Category


Aging At Home

Thursday, May 19th, 2016

aging man and young woman

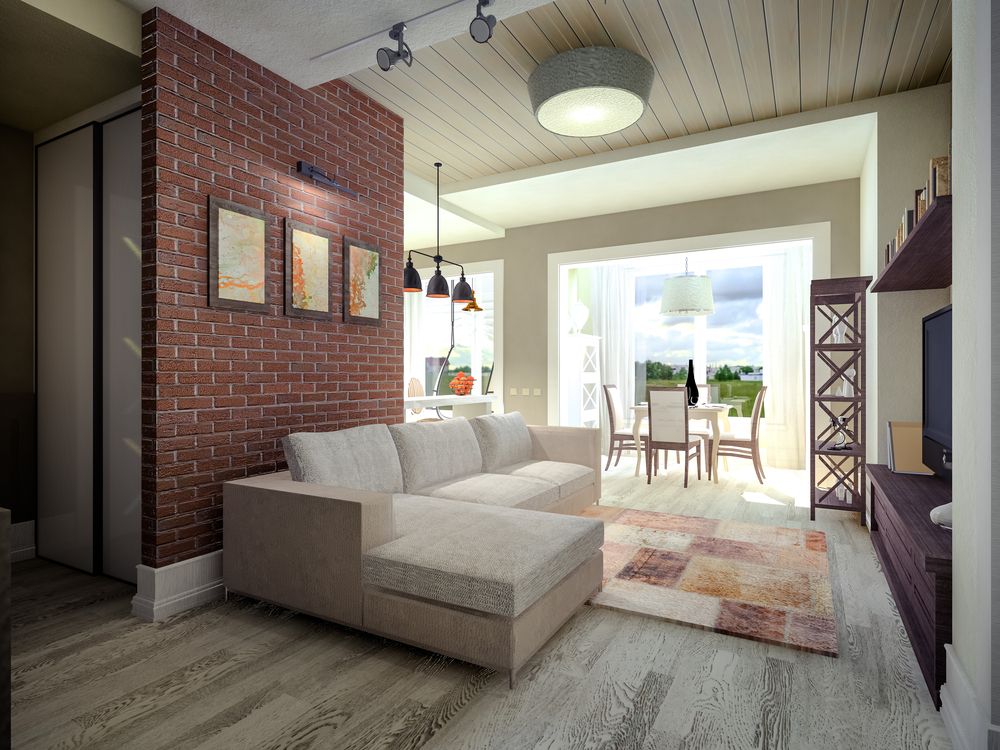
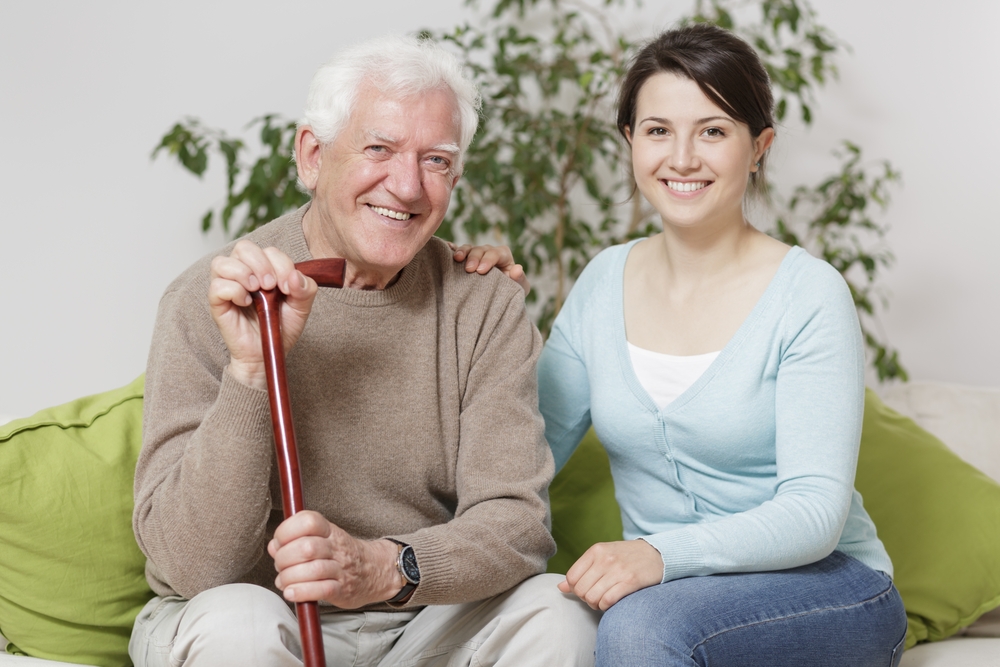
When planning for retirement, we often think about how much money we need to save to retire comfortably. That’s great financially, but what about physically? It takes a lot of time and energy to maintain a home and as we age, we may not have the same amount of energy to dedicate to it due to health reasons. If you or a loved one plan on aging at home, here a few things to consider to make your “golden years” as enjoyable as possible.

Hand rails. Adding hand rails near the toilet and bath tub add extra security when standing up, helping to prevent falls.

Non-slip bath mat. A non-slip bath mat is always a good idea in the shower or bathtub to help prevent slips and falls.

Ramps. If your loved one uses a wheelchair or walker, adding a ramp to the front door will make entering and exiting the home much easier.

De-clutter. Sell or donate unnecessary items around the house. Keep hallways and floors free from extras to prevent an accidental fall.

Medical Alert Device. Having one of these can make a big difference in the case of an emergency, medical or otherwise, especially if your loved one is a fall risk.

Standing Tub. These can be a bit pricey but offer all of the benefits of a hot bath with the convenience/safety of a shower stall.

Lawn Care Professional. Yard work can be physically demanding, especially if you have a large one. Hiring someone to take care of the manual stuff leaves you with more time and energy to enjoy the outdoors.

Check Wiring. Your home’s wiring should be checked every few years to make sure everything’s up to standard; the average lifespan of your home’s wiring is 40 years.

Tack down rugs. Make sure you tack down the corners of rugs to help prevent falls. Adding shelf lining underneath rugs and carpet prevents sliding.

Stair Lift. Walking up and down the stairs can become a real chore in one’s later years. A stair lift helps to make the entire home accessible.

Widen Doors. This is especially helpful if a wheelchair is needed in the home. The cost for this type of project varies greatly. Pricing depends on the number of doors as well as other home structure factors, such as load-bearing walls.

Lever Style Door Knobs. Something as simple as turning a knob can be quite painful for someone who suffers from arthritis. Something as simple as changing door knobs makes a huge difference.

Lighting. Our eyes tend to weaken as we age, so having a well-lit home is important. Adding trellis/tracking lights to the stairs as well as night lights to the bedroom makes things safer for that nightly visit to the restroom.

Security System. Not only do security systems deter burglars from breaking and entering, they help put your loved one’s mind at ease, especially if they live alone.
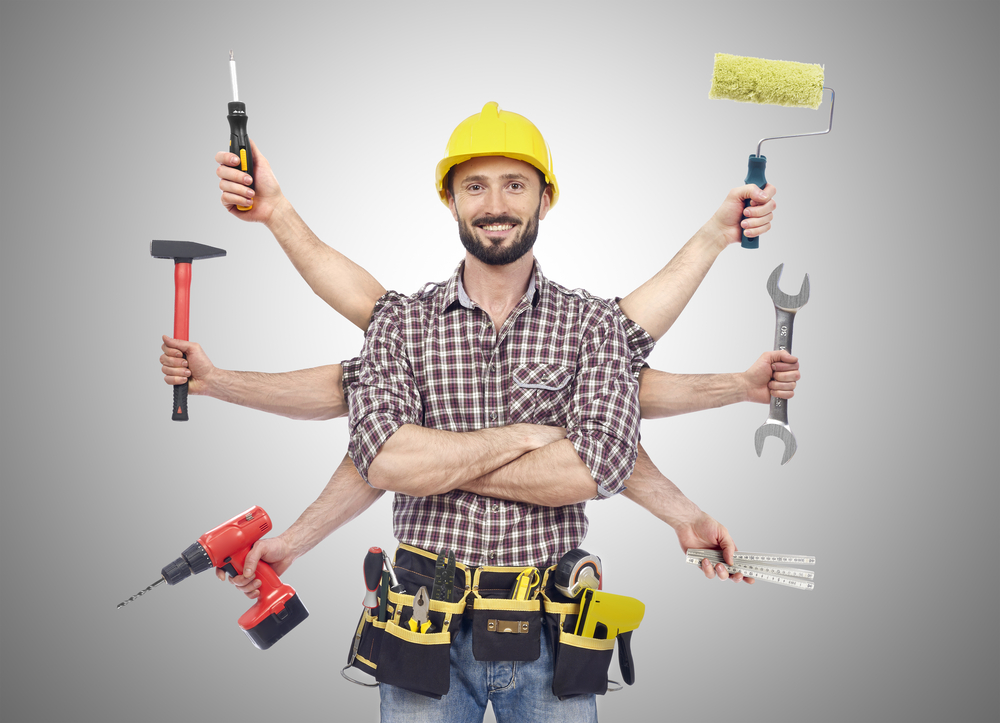
If you find that you or a loved one could benefit from these home updates, you don’t have to go it alone. Call TalkLocal and we’ll connect you with a local pro who can help.

Keep Your Water Cooler Running

Friday, May 13th, 2016

keep your water cooler running

The water cooler is the hub of all things fun at the office. It’s a place to exchange ideas and jokes amongst co-workers. It’s the lifeline to the outside world. Well… wouldn’t it be terrible if your water dispenser suddenly broke down? Suddenly, you’re left with nothing but a giant bottle of water, sitting there and mocking you. Here’s some tips on how to avoid accidents and keep your water cooler in tip-top shape:

– Clean tray. Keep things hygienic by cleaning your water dispenser place with multiple hands and bottles in. Make sure to clean the tray where the water is dispensed. Use a household disinfectant or make your own (2 teaspoons of bleach per gallon of water) to clean this area to prevent mold growth.

– Change the filter. If your dispenser has a filter, make sure to change it regularly as directed by the packaging. It’ll keep the water fresh and free of impurities.

– Flush out the system. Add 1 tablespoon of baking soda to 1 gallon of warm water to flush out the drained system. This helps to disinfect your system and keeps your water tasting fresh.

– Reboot. If there seems to be a problem with your machine, such as not having cold water, you should unplug and replug the water cooler. Also, make sure that the cold water switch is on.

– Call a handyman. If something’s wrong with your dispenser and you’re not quite sure what it is or how to fix it, it may be time to call a handyman to fix the problem. Let TalkLocal help connect you with a local pro for free.

– Buy a new one. If all else fails, buy a new one. You can buy a best selling water cooler for $99.99 on Amazon as of April 29, 2016.

We hope these tips help keep your water cooler running and the conversations flowing.

Essential DIY Tools for Your Toolbox

Monday, August 31st, 2015

shutterstock_324217205

There are more useless money-suckers than good products these days; this is especially visible in the market for household maintenance tools. You search for cool DIY tools, expecting something at the crossroads of utilitarian and innovative, but all you seem to find are Allan keys with vice grips, PSI gauges, and sextants attached.

Here at TalkLocal, we think a sextant sounds like something nobody is interested in, so we’ve compiled a list of DIY tools to help you declare independence from your contractor and feed your increasingly addictive DIY hobby.

Essential DIY Tools

These should be in any toolbox:

– Adjustable wrench
– Screwdriver set
– Tape measure
– Electric drill (worth the price, trust us)
– Level
– Hammer
– Nailset
– Pliers
– Utility knife
– Flashlight
– Sandpaper and sanding block (whenever dealing with wood)
– Safety goggles and gloves
– Super glue
– Duct tape and WD-40 (seriously)

Useful Extras (Your pipes won’t burst without them but they’re not superfluous):

– Crowbar
– Staple gun
– Rubber mallet (good for tapping together laminate)
– Dremel
– Hot glue gun
– Automatic nailer and circular saw (useful for woodworking projects)
– Jigsaw (another useful woodworker’s tool)
– Multi-tool (those Swiss Army knife-things with a million tools – if you think they look unwieldy and useless, consider that these are essentially whole toolboxes you can fit in your pocket!)

Gather these together over time; they’re too expensive to buy all at once, and you might not end up needing all of them. Instead, get the ones that seem necessary for the project at hand, and make sure it’s a project you actually can tackle yourself so you don’t waste money

For all of those tasks too big, too onerous, or too time-consuming for a mere mortal with a toolbox, let us handle it. Go onto TalkLocal and our unique search system will put an end to that obnoxious research-call-repeat headache.

Fixing Warped Hardwood Floors is Easier than It Looks

Friday, August 14th, 2015

Warped hardwood floors are troubling. Nobody wants to see their beautiful wood floor bulging at the center (crowning) or lifting at the edges (cupping) – but luckily, these issues can be solved without ripping up the whole floor. Warping happens when wood absorbs an uneven amount of moisture; the more saturated areas will expand and protrude. This is why the first of the four techniques we’ll show you for fixing warped hardwood floors involves warping them back into place!

Counter-Warping (For Minor Warps):

This technique can only be used if the warp is minor and the wood still somewhat pliable. All you need to do is wet down the warped area and place a cinder block or two over it for 24 hours. The weight of the cinder blocks (which you can get at your local Lowe’s or Home Depot) should force the wood to press back into uniformity with the rest of the floor.

Sanding Down (For Minor to Intermediate Warps):

It’s a little more labor-intensive, but more severe warps can be handled by fitting a drum sander with 20-grit paper and vigorously sanding in a diagonal motion. You’d be surprised how much of the thickness of the wood can be removed with this technique. Because you’ll need to apply a new finish afterwards, try to use progressively finer sandpaper as you grind the wood down further.

Replacement (For Severe Warps):

You should only rip up and replace the wood after exhausting all other options. Start by finding a suitable replacement, and then get up the old floor. This procedure will vary depending on what type of wood your floor is made of and how it’s been fixed to the floorboards. Fix the new wood in its place, and then treat it so it looks uniform, using paint, stain, or finish.

TalkLocal (For Extreme Warps):

The nastiest of warps are best handled by a professional. Let us take care of that for you. Head over to TalkLocal, where we’ll give you free, full access to our unique search system; with our help, the experience of finding a handyman will be smoother than your beautiful new floor.

How To Repair Concrete Steps and Curbs: Fixing A Crack Won’t Break Anyone’s Back

Friday, July 31st, 2015

Whether or not you’re the type of person who’s bothered by slight blemishes like a crack in concrete, those little fractures need your attention – ice, dirt, and roots can deepen the crack until it becomes both hazardous and unsightly. Fortunately, learning how to repair concrete steps and curbs isn’t always backbreaking.

Here are some tips for DIY repair of three common problems: crack large and small, chipped stairs, and damaged curbs.

The required materials, standard fare at any local hardware store, include:

How to Repair Cracks in Concrete

Small cracks don’t require concrete to repair; instead, you can just grab masonry crack filler, which can be used with a caulking gun. Brush the area clear of dust and debris and wash it down with a hose. After it’s dry, just apply the filler and trowel off any excess.

Bigger cracks require a hammer and chisel. These are used to undercut the edges of the crack, which will allow the vinyl patching compound or mortar to set in more securely. After undercutting, sweep away debris and wash the crack down. Mix the patching compound per manufacturer instructions and tamp it in with the trowel, then smooth it down. As it sets, scrub with wire brush until it matches the surrounding area..

How to Repair Chipped Concrete Steps

If your steps are significantly damaged or chipped on a corner, the procedure is the same as repairing a crack, but it will require mixed concrete, a trowel, and straight planks to use as a form. Just place the planks flush the planks against the steps, clean up the steps with the brush and hose, and apply the concrete and bonding agent.

How to Repair a Concrete Curb

If the curb is too damaged, you’re going to need a jackhammer to clear up the broken pieces. After breaking up the blemished areas, sweep away debris and apply the concrete as previously instructed.

More extensive damages may require replacement of the whole curb – in this case, contact a contractor or your local government.

Want to hire a handyman restore your concrete curbs and steps to their maximum appeal? TalkLocal matches and connects you by phone to a top ranked handyman who knows your problem and wants to help on your schedule. And it’s free! Just describe the task you need done, when, and where. Then stand by until you hear from a handyman near you. Visit TalkLocal to get started.

How To Fix a Kicked In Door (we don’t need to know why)

Wednesday, July 29th, 2015

Someone in your household has decided that life is too short to be stopped by a hinged block of wood and, as a result, has delivered terrible wrath upon your door. Whether you’re a frat boy doing damage control before your chapter’s president does his rounds or an irritated homeowner seeking to save money, you might be able to fix a kicked in door yourself – it just requires a bit of time and a few materials from your local hardware store. (If you’re the victim of a break-in, be sure to call the police before attempting to fix your door, as it might become evidence in a criminal investigation.)

Here are a few steps to restore your door to its former glory:

1) Obtain all the necessary materials. You will need a putty knife, diagonal pliers, a screwdriver, wood glue, clamps, chisel, 11/4-inch finish nails, a hammer, a set of nails, a putty crayon, and a stain marker. In some cases, you may also need replacement casing, and a miter saw…and it’s not a bad idea to get thick gloves for safety.

2) Determine specifically how your door has been damaged. Typically, a door is broken in by a kick landing just above the knob, which causes a split in the jamb (the part of the frame across the stop from the hinges) running up to the casing (the top part of the frame). Remove the casing with the putty knife and use the pliers to remove any remaining nails.

Door Diagram

3) Carefully remove any parts of the wood that are chipped off using the putty knife. If the casing is damaged, it must be replaced.

4) Look at the strike plate, the long piece of metal nailed into the frame around the lock. If the crack runs behind it or the strike plate is damaged, remove it using the screwdriver.

Strike Plate.png

(Credit)

5) If the jamb has been displaced, push it back to its original position and clean out any debris using the putty knife. If the jamb cannot be pushed together tightly, it must be replaced. Put the glue on the putty knife and spread it on the inside of the crack, and then push the sides of the jamb together with clamps until they fit together tightly. Let the glue dry for an hour, and then remove the clamps.

6) Screw back on the striker plate, if necessary.

7) Nail the casing back onto the frame with the nail set and hammer. Putty any holes with a putty crayon of matching color, and use the stain marker to color over where the jamb was split, after removing excess glue.

Of course, if you’re short on time or the damage is too extensive, head over to TalkLocal – we’ll help you find the perfect contractor without the research-schedule-wait headache.

How to Install an Indoor Hammock

Wednesday, July 22nd, 2015

shutterstock_16202134

When we think of hammocks, I bet most of us imagine ourselves lying outside, ‘laxing on the beach without a care in the world. However, we live in a world dictated by the 9 to 5 grind, and most of us just don’t have the time to just relax…

UNLESS IT’S NATIONAL HAMMOCK DAY!

So, how do you celebrate this auspicious occasion? You celebrate by relaxing in a hammock of course, and if you don’t have the space for a nice outdoor hammock, we have a complete guide to help you get that beautiful, and often envied, indoor hammock!

To set up a hammock indoors, you will either need to buy or build wall hooks, or use a custom hammock stand.

To hang a hammock indoors using wall hooks, here are the steps to follow:


You’ll need…

2 Lag hooks
2 wood planks (2”x4”)Some drywall screws
A drill and, of course
A hammock.( If you don’t already have one that you’ve been using inside, you can buy a hammock from REI or Amazon).

1.  Cut the 2x4s to size (around 20” should work in most cases) and drill the plot holes into the 2x4s for the lag hooks. It’s best to measure them out before beginning. (You can also dress up the lumber with wood finish or just paint on it with whatever pattern speaks to you.)

2. Decide how high you want your hammock to hang and how far the ends will be from each other. Once you’ve decided all of this, screw your lag hooks into the 2×4 (which will be your hangers) and then screw the hangers into the wall horizontally.  Spread the screws apart when doing this so you don’t weaken the wood too much.

3. Last but not least, hang up the hammock and you’re done! Don’t just hop in it, though. Make sure you test out the hammock. You don’t want to sit in it and then suddenly you’re on the ground.

(For further information on how to do this, you can see this handy dandy DIY Wall hooks Guide.)

If you’re looking to have an indoor hammock but feel better having a professional do it, then contact TalkLocal and we’ll set you up with the handyman who will get that hammock up and swinging so you can celebrate Hammock Day the way you’re meant to.

Happy Hammock Day from TalkLocal!

DIY Faux Brick Wall Installation: Swanky Indoor Styles

Friday, July 3rd, 2015

shutterstock_322214192

Brick is everywhere these days – restaurants, swanky bars, modern homes – and for good reason: nothing adds a rustic touch like indoor brick walls. DIY faux brick wall installation isn’t that hard and it’s much cheaper; also, like laminate flooring, it looks convincing. Follow these easy steps to spice up your home.

1)      Measure your wall and decide how many bricks you need, as well as if you’re going to need to create special templates for windows and light fixtures, which can easily be done with cardboard and a box cutter or scissors. Faux brick wall tiles can be bought at almost any DIY store, or ordered from Home Depot online.

2)      Decide on a color scheme. You may be able to choose any, but in some cases, important furniture will require that you use certain colors. Though you can buy faux brick in almost any color, they can be painted to whichever you like.

3)     Saw the panels to conform to your templates.

4)      Get a hammer, nails, safety gloves, a nail gun, and caulking equipment. The panels can be easily affixed to the wall, no catch – just make sure you’re not obstructing objects on your walls by properly cutting down the panels.

5)      Make sure to caulk the panels down to fill in any cracks or spaces.

Small DIY home improvement projects like these can be fun and easy – but if you have a bigger project on your hands and lack the time or space to do it, get a professional. Head over to TalkLocal and we’ll fix you up with the perfect contractor for all your home improvement needs.

DIY Laminate Flooring Installation: Experience Q&A

Thursday, June 18th, 2015

shutterstock_250769293

TalkLocal marketing strategist Dallea Caldwell recently renovated her own floors, replacing the kaleidoscope of carpet and vinyl and wood with a single layer of smooth Beachwood laminate. For those interested in DIY laminate flooring installation, we’ve interviewed her about the experience.

Q: Dallea, why did you decide to do your own renovation rather than hiring a professional contractor?

A: The big thing was the cost. I did a bit of research and found out I could save around $2000. I knew going in that I wanted to use laminate flooring – I’d seen Beachwood in stores and liked how it looked – and, as it turns out, laminate is pretty easy to install.

Q: Walk me through the process – what’s the first step in a DIY project like this?

A: Getting the proper materials. I had a bit of DIY experience so I knew right away, I was going to need mallets and saws – a bunch of them. Specifically, I needed round saws, handheld saws, rubber mallets, and these rubber plants called tappers, which are used to tap together the interlocking layers of the laminate. But the biggest thing was help: renovating flooring requires manpower! So I called up some family members and told them to bring other necessities, like crowbars, hammers, saws, siding and such.

Q: After everyone had arrived and you had all your tools, how did you start?

A: Part one, the hard part, was getting up the flooring you already have. It was quite a task due to the smorgasbord of flooring types in my open-layout first floor; it was like a crash course in floor ripping. All in all, it was a really time and labor intensive process, from cutting strips of carpet to finding and scraping linoleum glue to prying up wood boards – and don’t get me started on the hours spent pulling up and nailing down staples and nails. The staples were like an endless game of pop goes the weasel.

Q: Sounds taxing. Was this a messy undertaking?

A: Very much so. I wanted the new flooring to be level; that meant every little thing, regardless of its material, had to be swept clear before the new flooring was to be installed. This soon turned out to be a very dusty affair; if you’re allergic to dust, be sure to take your medication before starting this project. The other problem with dust is that, like sand, it will find its way everywhere. In my case, it infiltrated the cat food – the poor kitties were vomiting all night long.

Q: What was the next step?

A: Then comes the actual installation. At first, it seemed like it was going to be awful because the laminate seller had unloaded this mountain of planks from an eighteen wheeler right in my garage; having to move the planks from place to place was honestly the hardest part. Installing was easier. You see, the trick is to just move in a linear fashion, like you’re mowing a lawn. The laminate we chose already had padding, and the laminate interlocks so that few pails were needed, so it was just a matter of lining everything up. As long as you keep moving in single directions, you’ll be able to cut the material to fit tight or peculiarly shaped areas. Which reminds me: this step requires some serious sawing. I had a great table saw, which only required an hour’s assembly, and was critical for precise cutting; you don’t want to waste wood, especially when a 1×2” plank bridges the space between the laminate and the wall.

Q: This all sounds like a ton of work. Was it worth it?

A: Sure, it was all hard, but remember: $2084 in savings. And the satisfaction of knowing that I made the floor myself, seeing the floor transform from an ugly patchwork to a beautiful, smooth surface – it was fantastic. Surprisingly, it proved not a bad family weekend.

And there you have it. However, some projects are too expansive to tackle even with your entire extended family. These are best handled by a professional. Head to TalkLocal and we’ll quickly set you up with the perfect contractor for free and without any hassle.

DIY Dads: The Rise and Fall of the Household Handyman

Monday, June 15th, 2015

shutterstock_264151898

Give a dad an inch and he’ll take a mile.

You know the story: he moves from paintbrushes to power washers to piles of random wrenches with a growing hardware store addiction. This is the evolution of the “Household Handyman,” the dad-turned-DIY specialist. For my dad, the transformation started when our boiler broke one fall.

A banker, he had little business intervening but he wasn’t going out without a fight. Within minutes, the hawk in a suit and tie had donned his worst t-shirt and shorts (“in case it got greasy”) and was intent on finding the Household Handyman’s Holy Grail: the boiler instruction manual.

One problem: the boiler was ten years old…finding yesterday’s instruction manual is hard enough. So, he went a-rummaging through parts of the house I didn’t know existed to emerge from the garage a half hour later, manual in hand, ambition in his eyes. It was exciting to see him march into the dark boiler room.

But Dad’s momentum soon turned to confusion, not that he couldn’t have figured the boiler out, but the chances didn’t look great; his head turned to the side at the oversized manual, a random piece of metal in his left hand. He had one trick left up his sleeve, though.

It was an old trick that he learned from Steve. Steve was a neighbor of ours and also happened to be my best friend’s dad. He was great – always there with us to play catch, drive us to the movie theater, coach our baseball team. He was a very involved father so he took all of his household maintenance tasks head-on.

At the end of the day, Steve was a tad more successful than my dad with this stuff (though he never tackled a mighty boiler). His first fix was a broken kitchen cabinet then he moved on to greater things and, before the end of the summer, he’d build his own white picket fence.

Steve’s house became a DIY playground and his next project was his roof shingling. What I didn’t tell you is that I grew up in South Carolina and Steve was so hot up there that, when he was hammering nails, a bead of sweat ran into his eye and that hammer went down right on his thumb! He didn’t surrender easily but some twenty minutes later he realized that he was moving very slowly, and had no choice but to reach into his pocket for Plan B.

What do my father’s and Steve’s Plan Bs have in common? They both involved a couch, a Heineken, the game, and a cell phone. There’s much a Household Handyman can do…but not even a 12-piece Allen key can provide a household with the convenience of a professional. Our boiler was fixed and Steve’s roof was shingled within a day.

In observance of Father’s Day, give your dedicated dad a break: see just how easy TalkLocal can make finding local service professionals.