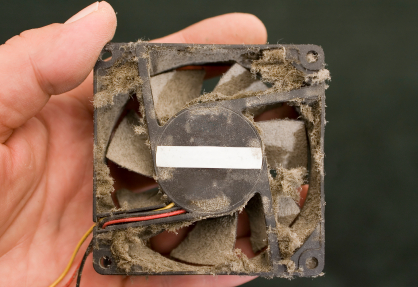
Have you been trying to figure out how to clean out a laptop fan? Perhaps you know that a dirty, dusty fan makes your laptop run inefficiently and heat up. As your computer heats up, it runs even slower. But what are you supposed to do? The following was written to provide you with information and tips when it comes to cleaning out a laptop fan.
Beware that if you take apart your computer to perform repairs and maintenance of your own, you may be voiding your warranty. Check your paperwork and warranty information online. Also, take your time and use caution as your operate on your computer. Before you begin, turn the computer off and unplug it from its power source.
Use a compressed air can as your primary tool in this repair. First, remove the screws from the back of your computer in order to access the fan. Once the cover is off, locate the fan. Use cotton tips and cotton balls to remove the dust and dirt from the fan blade.
After you have removed the main particles from the fan and surrounding area, get ready to use the compressed air can. The compressed air can is a great tool for clearing out very small particles that you may not see or that are in hard to reach places. Point the nozzle into the area you would like to clean and press to get the compressed air flowing. After you are finished, turn the computer upside down to release any loose particles. Return the computer cover to its original place and replace the screws.
A bit wary to try this on your own because you do not want to mess up your computer? Or think there is something else wrong with you computer? There is hope! Check out TalkLocal. You will be connected within minutes (for free!) to professionals right in your neighborhood that can help you with your problem!


