Archive for the ‘Furniture Upholstery’ Category


Get Your Couch Ready For Cuddle Up Day

Wednesday, January 6th, 2016

shutterstock_349063649

It’s finally getting cold outside, which means it’s optimal weather for Cuddle Up Day. Winter is the best time of year to snuggle up to your significant other, pet, pillow or, if all else fails, a bottle of wine. Cuddling is an excellent way to show someone or something just how much you care. Whether you’re all cuddled up on the couch or the recliner, make sure your furniture is in pristine cuddle condition. Nothing’s fun about uncomfortable cuddling! So if you find yourself in the unfortunate position of having to cuddle on a cracked leather couch, these DIY leather repairs will ensure that your favorite cuddle space is in tip top shape for Cuddle Up Day!

The Cat Scratch

So, your cat has decided that if you will not cuddle with them, then you will not cuddle at all. To treat the cat-scratch affected area, simply use hair trimmers or scissors and sandpaper to remove the peeling leather, leaving a smooth surface. Then, rub a leather cleaner on the surface to blend things in. Be sure to test on a small area first! It won’t look perfect, but it’ll look a lot better than it did originally. Check out this video for a step by step tutorial.

The Worn and Torn

This one’s been with you from the beginning, and you just can’t give it up. It was there for you before just about every major life event you’ve had since birth. IT SHOWS. If this leather couch has some serious rips and cracks, then it’s best to just order a leather repair kit, such as this one.

The Belly Up Bicast

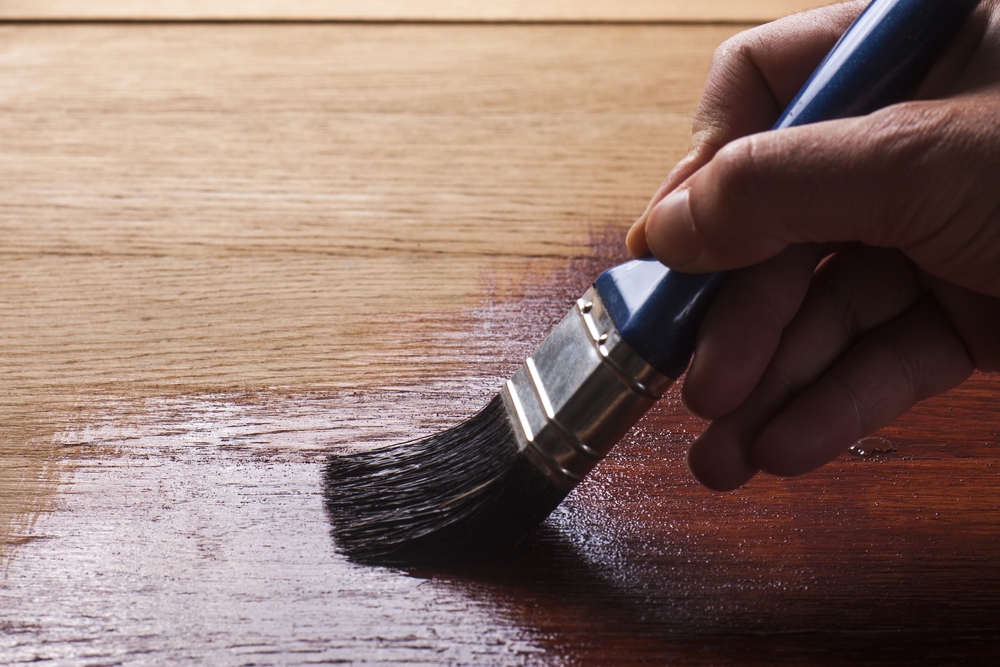
So, your leather couch is a little threadbare. It’s seen better days, but you’re still not ready to part with it just yet. In order to save your couch and keep it intact for a little longer, purchase some Leather Studio paint and get to work. Remove any excess leather sticking up. Next, apply as many coats as necessary, usually 3-5, to the worn area. Allow each coat to dry before applying another. That’s it! You’re finished! This quick fix works best on small areas.

But if you find that your couch is in need of more TLC, give TalkLocal a call and we’ll connect you with an upholstery specialist near you. Now, go cuddle up!

P.S. this also works great for the impromptu cuddle sessions in the car.

DIY Furniture Refinishing: Make Old Furniture Shine Like New

Wednesday, August 26th, 2015

Does your furniture look like it’s about to go past the point of no return? Only the most unsightly furniture needs complete refinishing (if you just have a few white rings, check out this article where we focus on furniture makeovers). However, if your table is severely chipped, extensively worn, or deeply blemished, then these DIY furniture refinishing tips will help you strip the old finish and lay down some new shine.

shutterstock_280851356

STEP 1: Stripping Old Finish

Most finishes can be stripped with sandpaper, but if they prove stubborn, you’ll have to use special products. Which product depends on the type of finish. Fortunately, applying the most effective tools to remove each finish is a simple first step in an equally simple (yet labor intensive) process.

Finish: paint, shellac, acrylic, lacquer, varnish

Required: High-grit sandpaper fixed to a sander or block

Many finishes can be scraped up with 150-grit sandpaper. Move to 220-grit to get the finer areas and then remove excess dirt with a damp rag. If sanding proves ineffectual, you might have to take a trip to the hardware store for specialized products.

Finish: Acrylic or paint

Required: Chemical stripper

Only use chemical stripper in a well-ventilated area with gloves and goggles as its ingredients are caustic and dangerous to the eyes. Apply with a rag and clean it up with steel wool by rubbing along the wood grain.

STEP 2: Applying Wood Stain

After stripping the old finish, wetting the surface of the wood will show what it’ll look like with finish applied. Incorrect or poor color can be corrected by applying wood stain with a rag. High-quality hardwood responds best to gel stain. Wipe in the direction of the grain, taking care to distribute it evenly, and remove excess with another wet rag.

Let the stain dry. If its appearance is not satisfactory, the stain can be liquefied by applying more on top, which will allow you to remove it or change its distribution.

STEP 3: Laying Down New Finish

Here’s our guide to picking the best finish for your furniture. In this walkthrough, we’ll cover two common ones – which to use depends on how much you’ll be using this furniture. If heavily, opt for oil-based polyurethane, which is more durable than water-based finishes; if not, use wiping varnish, which will look a bit sleeker.

 Applying polyurethane requires a few steps. First, apply the base layer with a foam or bristle brush in the direction of the grain. Let it dry overnight, even it out with 280-grit sandpaper and clean off any dust. When the surface is even, lay down a second coat as you would a layer of paint, brushing with the grain (pop bubbles by brushing them over).

Applying wiping varnish is essentially the same procedure – just take care not to lay down excess varnish, as it can result in unsightly buildup when dry.

Take a moment to admire your work! Refinishing furniture is not a simple task; if you’ve done it yourself, that’s something to be proud of. If this long and messy procedure isn’t for you, try a much simpler solution: TalkLocal. Our free and unique system will match you up with the perfect pro to get that furniture refinished on your  schedule – and it’s a lot more fun than watching finish dry.

Picking The Best Wood Finish: Find The Finest Shine

Monday, August 17th, 2015

A pristine piece of wooden furniture is a rare opportunity to pick a finish that both screams class and withstands the elements. It’s a bit of work to do right, but as we all know, well-treated wood is a beautiful thing, so your fresh (or freshly stripped) furniture only deserves the best wood finish. Educate yourself on the uses of all the different types of finish with this final installment in our finish guide (we’ve also covered finish maintenance and DIY refinishing).

Finish tends to be flexible so, for the most part, your only constraints are how intensely the furniture will be used and what kind of atmosphere you wish to create. Let’s run through the different types of finish and what they’re good for.

 –        Paint: The power of paint is in its versatility. It’s a great pick for creating color-themed rooms, as any wood can be painted any color. However, paint is best used on low or medium quality wood, simply because you can’t appreciate the natural attractiveness of, say, fine mahogany from under a layer of thick color. It’s also not quite as durable as some other finishes. For these reasons, many opt to paint cabinet doors and composite wood.

–        Lacquer: This protective finish is great for imparting smooth shine. It’s highly versatile in terms of sheen level, types of lacquer ranging from “flat” to “high gloss”. Lacquering furniture can take quite some time, requiring application of several thin layers, but can be used on any wood surface you need to shine.

–        Stain: As the name suggests, wood stain is used to stain wood surfaces different colors. These colors are often richer than natural wood, allowing them to both enhance preexisting colors and lay down new ones. Another plus: after drying, it can be covered with another finish, so it’s often applied before a protectant like lacquer or varnish, and can be used on any type of wood.

–        Resin: Upon application, this unique finish will penetrate the wood and harden its fibers, accentuating the natural appearance of the furniture and highlighting grains. Resin is best used on open-fiber woods such as rosewood, teak, oak, and walnut; closed fibers don’t absorb resin as well. It can also be applied over any stain except for varnish or vinyl types.

–        Varnish: Varnish combines several types of finish to both protect and beautify wood. Like lacquer, it comes in a wide range of sheen levels but, due to its greater thickness, provides more protection. This finish can be used on most types of wood.

–        Shellac: Derived from the secretions of the lac bug (yes, quite gross,) this natural protective finish nicely accents fine hardwood with a warm shade. Be sure to use a coaster, though; its sensitivity to heat makes it vulnerable to white rings. Like varnish, this finish is used on a wide variety of hardwoods.

–        Polyurethane: This synthetic finish is essentially a plastic that, when painted onto hardwood, hardens to protect the surface without drastically altering its color. It’s a popular pick for hardwood floors, but can be sensitive to extreme heat or caustic liquids.

Start your DIY furniture refinishing project off right with this simple guide but if you’re short on time or far from a hardware store, take a break with TalkLocal. Our unique and speedy system will hook you up with the perfect furniture upholsterer for your needs and schedule – for free! Save both time and money so you can soon plan for a party and show off your fabulous wooden furniture.

best wood finish

Reupholstering Chairs and Sofas: Make Your Old Furniture Like New

Wednesday, August 12th, 2015

shutterstock_4702978

Got ripped, stained, or otherwise blemished upholstery? A little bit of DIY initiative can save you the time and money you’d otherwise spend on a professional upholsterer. Reupholstering a chair or sofa isn’t as complicated as it seems; all you’ll need is a knife, thread, sewing machine, and a staple gun.

It may not be necessary to reupholster your old furniture just because the cover is stained so first, we’re going to teach you how to remove stains from your upholstery with this DIY cleaning solution.

DIY homemade upholstery cleaning solution

Upholstery stains can easily be taken care of but it’s best to know if your upholstery is synthetic, like nylon or polyester, or natural, like cotton or wool.

If your upholstery is synthetic, you can make a cleaning solution by mixing water and white vinegar well in a 2:1 ratio and applying it from a spray bottle. If the stain doesn’t lift after scrubbing the wet area with a rag and letting it dry, try again after mixing in a tablespoon of liquid soap for every 4 cups of water.

Natural upholstery is more safely cleaned with a 1:1 mixture of water to liquid dish soap. Apply lightly with a sponge and scrub lightly with a rag until the stain is lifted.

Reupholstering Chairs and Sofas

If you’re going to reupholster the entire thing, the first step is to remove the old upholstery. Whether you’re dealing with a sofa or a chair, you should always start at the bottom, as that’s where the most material is used. If you can find where the upholstery was fixed to the furniture, see if you can remove whatever was fastening it, like a line of staples. If you can’t, just take your knife and cut it free from the furniture.

After the bottom is removed, turn it upright. If it’s a sofa: remove the back, followed by the sides, the inside back, and then the inside arms. If it’s a chair: remove the upholstery on both sides of the back. Try not to damage the old upholstery too much; it’ll be a useful guide for the new cover.

Lay out your new upholstery over the old and cut the fabric. If the old upholstery was seamed, cut a ½ inch from the old seam, or if it was stapled, cut 2 inches from the staples. Next, sew the pieces of fabric together using heavy duty thread and a sewing machine, allowing for a ½ inch inlay.

Next, start attaching the fabric to the furniture using a staple gun. This process is relatively straightforward for a chair, but for a sofa, you’ll have to work inside-out: start with the sofa deck, followed by the inside arms, and then the inside back. Remove any excess fabric and you’re done!

If you don’t have the time to reupholster yourself, find a professional. Before you bloat your computer with search tabs, try TalkLocal – just enter the info of the job you need done and let our unique search system find you the perfect furniture upholsterer for your needs and schedule.

DIY Furniture Polish Recipe: Save Yourself the Trip

Monday, August 3rd, 2015

DIY

Ever find yourself relaxing on your favorite love seat when a furniture commercial rolls across your screen and tempts you to replace everything not nailed down? Your whole house seem so pale, crack, and decayed in comparison to all the shiny new furniture on the TV. Then, just before going online and making some huge purchase you’ll probably regret, you remember all of the great memories you’ve created with the stuff you’ve got, how it’s still sturdy and fits you still. Sure, your furniture is beginning to look a bit…eh. But nothing too serious that it can’t be helped with a little love and a simple retouch.

Luckily, you can gratify your desire for newer looking furniture without breaking the bank or even leaving the house. You probably have all the ingredients for this handy dandy DIY furniture polish recipe laying around. Even if you are fresh out of common grocery items, like olive oil and white vinegar, you probably planned on picking them up at the market today, didn’t you?

Here’s a recipe for a DIY furniture polish that delivers instant gratification without buyer’s remorse.

Supplies Needed:

– A funnel
– Measuring cups
– Spoons
– A bottle
– A rag

Three Ingredients:

– 2 tbsp of  olive oil
– ¼ cup of white vinegar
– ¼ cup of lemon oil or juice

Here are the four simple steps:

1. Use the funnel to pour all ingredients into bottle.

2. Shake well.

3. Pour polish onto rag and rub onto wood finish in the direction of the grain. Take care to evenly distribute the polish.

4. Remove excess polish with clean cloth.

Does your furniture need a more intense touch-up? Then check out our blog about DIY furniture makeovers. As for those furniture jobs that are too big to tackle yourself, get a professional. Head over to TalkLocal and we’ll fix you up with the perfect furniture upholstery cleaning professional  before the commercial break is over.

DIY Furniture Makeovers: Don’t Let your Furniture Decay!

Wednesday, July 15th, 2015

shutterstock_223684648

Is your furniture starting to look “antique”? The story behind those white rings on your coffee table – “I, uh, left some Chunki Chikin Soup® on it” – won’t draw conversation like the history that paints the family china, so it’d be best to keep it looking new. It would be an expensive hassle to regularly get professionals to retouch your furniture – so if you have some extra time on your hands, save yourself some trouble by trying out some of these tricks for DIY furniture makeovers.

Getting Started

Look over the furniture for blemishes like white rings, cracks, or degraded finish – applying mineral spirits will highlight them.

Cleaning Up

Dip a sponge in a mixture of soap and water and gently scrub the finish. Wring the sponge, rinse, and dry using a towel.

Removing White Rings

Remove minor white rings by applying petroleum jelly and letting it sit overnight. Worse white rings require special products and severe rings require the attention of a professional.

Removing Paint Stains

Remove any paint stains with a modified razor blade. Just wrap a bit of masking tape on both ends of the blade, and when you hold it, bend it slightly to get it close to the paint without actually touching the wood. Scrape the paint carefully.

Removing Blemishes

Apply gel stain to the surface to cover up small blemishes. Soak up the gel stain with a cloth and wipe it across the finish, and then remove the excess with another cloth. It takes time to dry, so if you change your mind, you can remove it with mineral spirits before it sets in.

Filling Cracks

Fill in any small cracks with wax from a wax stick. Break off small pieces, warm them in your hands, and work them into the length of the crack using a thin tool. Clean up any extra wax with a cloth.

Updating your Finish

After you’re finished, apply wipe-on finish with a rag in small swirls. Wipe off the excess in the direction of the grain, and let it dry overnight.

It’s surprising how much better your furniture can look after these simple procedures. They won’t work for glaring issues, however; if there are extreme blemishes in the finish, deep white rings, or it needs stripping, get a professional – head to TalkLocal and we’ll fix you up with one furniture upholestry professional before you know it.

Build a Home Theater: Furniture

Friday, November 8th, 2013

Build a Home Theater: Furniture - Furniture Upholstery

When you build a home theater, it’s important to consider the furniture that you are going to use. The furniture, like the lighting in your home theater, is very important. It’s where people are going to spend their time and will determine their comfort while they are watching movies or television.

Furniture will also determine how much time they spend in the home theater. If the furniture is uncomfortable, they won’t be spending too much time in the home theater, no matter how good the sound and TV system are. So, making the furniture comfortable, even if you have to reupholster it, is important.

Picking the Right Furniture

The right furniture for your home theater system shouldn’t be too hard or too soft. If it’s too hard, people will find it uncomfortable. Make it too soft and people will fall asleep instead of enjoying the home theater system. U-shaped couches are great for when you are having a lot of family or friends over. They offer a great view of the television and seat everyone comfortably.

Big chairs, on the other hand, make great additions when you build a home theater for solo movie viewing. They are extremely comfortable and will give you a great viewing experience that you’ll often want to repeat.

Arm rests with cup holders are handy when watching movies or games where you want to have a drink in hand. These arm rests will hold soda, beer, juice, or water and they are great for when friends visit.

So the bottom line is, when you build a home theater, think carefully about the comfort level of your furniture.

Need Help Building Your Home Theater?

Try reupholstering older furniture for a fresh look! Contact TalkLocal today and let us connect you with a furniture upholstery service in your area to help build a great home theater system for you and your family!

Chair Reupholstery Steps

Tuesday, April 30th, 2013

Chair Reupholstery Steps - Furniture Reupholstery

Everyone is on a budget these days. Few people have hundreds of dollars to blow on brand new home décor, but that doesn’t mean you can’t renovate and get the look you want. You have to start thinking about turning trash into treasure. When you take the chairs you have and follow a few simple chair reupholstery steps, you can end up with a gorgeous new look that makes your creative sense — and your checkbook — happy.

What you’ll need:

– Fabric you love. Use a measuring tape on your chair to figure out how much you’ll need, and make sure you get at least a yard extra – just in case.

– Flathead screwdriver

– Hammer

Chair Reupholstery Steps To Follow:

1. Remove the fabric that covers the bottom of the chair.

2. Remove the exterior frame. Use the hammer to tap the flathead screwdriver under the frame and remove it gently.

3. Remove all of the current fabric on the chair by starting at the bottom. Since chairs are originally made top-to-bottom, it’s much easier to undo that work bottom-to-top style. You’ll have to do this one panel at a time, and it can be time consuming. Use whatever method is easiest for you. Oftentimes, this fabric is stapled on with an industrial stapler. You could use your flathead screwdriver, pliers, or any other method you prefer to pull out the staples.

4. Label the fabric as you go so you know which part of the chair it was from.

5. When you get to the ply-grip, be careful: it’s sharp. Use a butter knife to open the ply-grip to help you remove the fabric here.

6. Lay the old fabric aside, making sure it’s flat and unfolded.

7. Cut the new pattern. Use the old fabric as a guide so you are sure you don’t have a huge size difference here.

8. Sew where necessary.

9. Attach the new pattern to the chair top-to-bottom — the opposite of the way you removed it.

10. Attach the wood frame. You can stain this if you’d like.

Too Much Hassle?

Now you have a new chair and a new look for your home. For more help in recycling items and renovating for less, TalkLocal can connect you with the local professionals you need, in just minutes.

Furniture Upholstery Cost

Saturday, April 27th, 2013

Furniture Upholstery Cost - Furniture Upholstery

A worn, torn, sad, saggy couch can be the embarrassment of any homeowner. If your couch or other furniture pieces have reached the point of embarrassment that even covers cannot hide, consider reupholstering your furniture. It is important to research the average furniture upholstery cost prior to making your finial decision about your furniture.

Do-It-Yourself Upholstery Cost

This cost can greatly vary depending on the supplies you already have at home. Sewing machines, thread, padding, replacement springs, etc. aside, the fabric price itself can vary as well.

You really want a fabric designed for upholstery or you risk tears and fast wearing. Cheap upholstery fabric tends to start around $5 per yard, while high end fabrics can be at least $180. Expect to pay $15-$30 per yard for a nice, durable upholstery fabric. Most couches use 18-20 yards of fabric, so multiply the price of your fabric per yard by 18-20 and you will have a rough estimate of your furniture upholstery cost.

Professional Upholstery Cost

For professional upholstery, the fabric prices remain the same, but now you must add in labor. You really must call local furniture upholstery shops to compare this price as it may vary by area. However, an average price is $1,500 to $2,000. The upholsterer will usually provide an estimate, but keep in mind that if additional repairs are needed that cannot be seen with the old fabric on, this may increase your cost. Also, if you do not have a method of transportation for your furniture, you will have the delivery charge to deal with.

Need More Help?

If you are concerned about ruining your furniture by trying to reupholster it yourself, call in the pros. TalkLocal can find furniture upholstery professionals in your area that are highly qualified. Our service is completely free, and the professionals you speak to can give you a more accurate price for your specific pieces.

How To Repair Torn Couch Fabric

Thursday, April 18th, 2013

How To Repair Torn Couch Fabric - Furnitrue Reupholstery

Just because your favorite couch has been ripped due to daily wear and tear does not mean you have to get rid of it. Learning how to repair torn couch fabric is easier than you may think. Depending on the size and location of your fabric tear, you may follow different steps to repair it.

Here are some ideas:

Upholstery tacks: These tacks are used to attach new upholstery to old furniture. If you have a tear in a corner or along the side of a piece of furniture, you may consider using these tacks to attach a complimentary piece of upholstery to the couch. This will not only hide the tear, but it will also give your old furniture a fresh, newer look for a pretty inexpensive price.

Stitching: With smaller tears, there is always the option of using a similarly-colored thread to stitch the tear back together. When done properly, this can be unnoticeable and prevent the tear from growing.

Excess material: When you need to patch the tear, try using the excess material on the back of the couch. You can cut an even patch that coordinates with the pattern where the tear is and attach it to the new spot. To do this, simply stitch up the edges with matching thread and use upholstery glue or tacks to attach it to the torn area.

Products: If the tear can be reconnected, there are some specific upholstery glues that can hold it together and keep the tear from growing. You can purchase such products at most local home repair shops, and usually you do not need any special training to use them.

Whenever using glue of any kind to repair furniture, you need to be sure to keep kids and pets away until the glue is completely dry. If your upholstery tear can’t be fixed using these tips on how to repair torn couch fabric, you may consider finding a professional to get the job done.

Skip The Search Process

We can help you find the professional you need. At TalkLocal, we take the work out of connecting you with professionals in your area so you can get back to movie night on your favorite and newly-repaired couch.