Archive for the ‘Painters’ Category


Designing a Suave Bachelor Pad

Monday, April 25th, 2016

modern neutral bedroom in bachelor pad

Designing a Suave Bachelor Pad
Have you recently moved into your very own pad? You can turn your new apartment into a masculine oasis that looks high-end without breaking the bank to do so. Take these design tips into consideration when you’re planning out your new bachelor pad and transform your home into the space of your dreams.

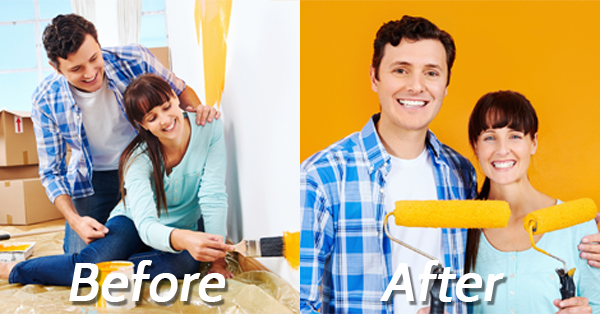
Use Paint to Your Advantage
If you purchased your home, there’s no reason you shouldn’t paint your walls. Few things can change the entire atmosphere of a space like a fresh coat of paint. If you’re renting your bachelor pad, check with the landlord first. If they give the go ahead, you’re in the clear. If they say no, consider whether it’s worth it to take a hit in your security deposit so that you can make your space exactly the way you want it to. In most cases, it’s completely worth it. Call TalkLocal and within minutes we’ll connect you with a local pro that’s able to paint your new pad.
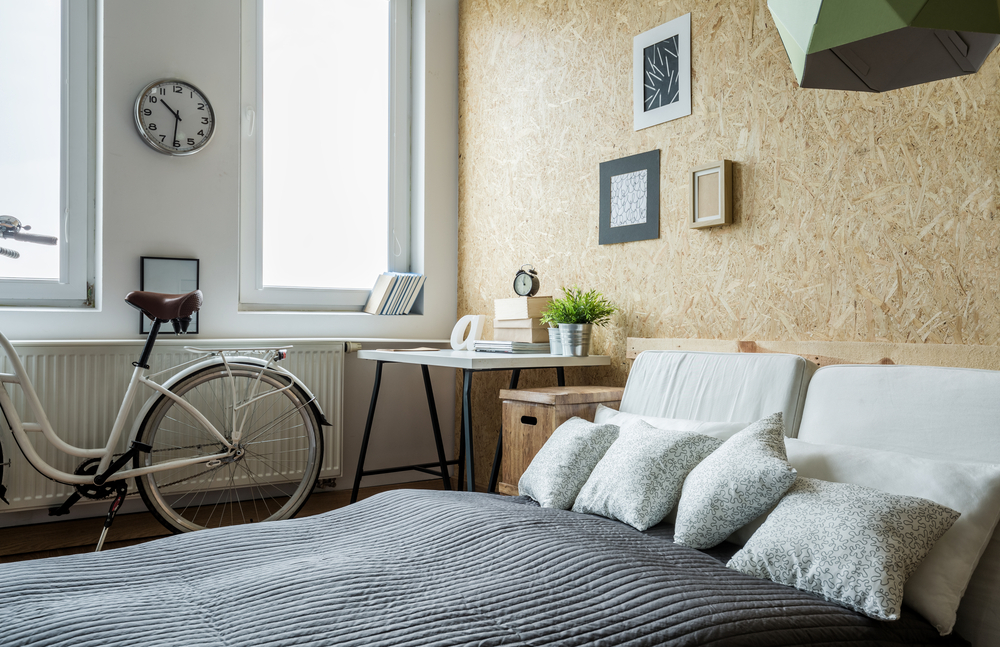
Think Modern
You may not have the bank account to throw a small fortune into your design, but that doesn’t mean you can’t make your place look expensive, without it actually being, well, expensive. An easy way to do this is stick to modern décor options. Clean lines and modern materials combine for a high-end look your visitors will definitely be impressed by. Modern looks lend themselves to minimalism, which is great for guys looking to carve a clean, clear space that encompasses the best of the 21st century. If you’re unsure what can be categorized as modern, use websites dedicated to modern objects, gadgets, and decorations like www.touchofmodern.com. One of the easiest ways to make an impression without going overboard? Statement art. Banksy-style pieces are sure to draw the eye, and minimalist paintings will give you an air of sophistication with ease. If you don’t want to drop hundreds of dollars on a canvas painting, consider purchasing a few large art prints from Society6. You can hang up multiple or rotate through to keep your décor feeling lively all year long. One final note: make sure you frame it; this isn’t college and unframed posters have no business being taped or nailed to the wall.

Maintain Your Space
Keep your space clean. Nothing is less impressive than a space that’s cluttered with décor and littered with trash. If you can’t find the fortitude to clean up after yourself, invest in a cleaning service to come each week. Keeping a clean space is good for both your physical and mental health. Clutter leads to higher rates of stress and depression, so do yourself a favor and make the commitment to keeping your new pad looking its best. Besides, with a clean place, you’ll never have to worry about quickly picking up for an unexpected guest.

A Source of Entertainment
If you want your bachelor pad to be the go-to spot for the big game or Friday night get-togethers, make sure your entertainment center is up to par. If you’ve got some money to work with, an in-home theater system is the way to go. Complete with a Blu-ray player and speakers that you can hide throughout your living room for the biggest effect, your movies and music will come through with the best audio in the apartment complex (don’t be surprised if you get a few noise complaints). While you probably want to include a television, game consoles, and speaker systems in your space, one thing that will kill the look of your space is the presence of tangled cords. Install a concealing channel and thread your wires through, or use a BlueLounge Cable Box to get rid of unsightly brambles of cord. If you need help hanging and installing your latest gadgets, call TalkLocal for a local handyman.

An At-Home Bar
What could be more debonair than your very own personal bar? If you plan on doing any type of entertaining, it’s worth it to invest in some quality barware. From cocktail shakers to tumblers for your whiskey, you likely have many of the bar accoutrements you need already. One thing you might not have? A bar cart. Check out this simple but refined option from Room & Board. A little out of your price range? This version from Target is under a hundred dollars, and you can always spray paint it to make it match your home’s color scheme.

Repainting The Interior of Your Home

Wednesday, November 4th, 2015

beforeandafter

Maybe it’s the lack of vibrant natural light, the predominance of reds, golds, and browns, or the stunning beauty of the pure white snow soon to come; but for some reason, there’s a huge misconception that painting is more of a task to do in the warmer months. Sure, the freshness of spring may put you in the mood for all things new- including a color change, but autumn is as good as any a time to paint the interior of your home. In fact, it may be the best time. Here are some advantages to repainting the interior of your home during the fall months:

Not as Humid — The heat and humidity in the summer months actually makes it harder for the paint to dry and cure properly. The excess moisture from the humidity prevents it from evaporating, and it doesn’t bond to the wall. This will cause issues with the texture of the paint and result in an uneven coat. It also makes the paint dry a lot faster.

Moderately Cooler Temperatures — Those temperate weather seasons like Fall and Spring are great for opening the windows to let the paint fumes out without worrying about letting the heat or A/C out with it. Once the winter hits, painting would put you between fumes and freezing; in the summer it’s that or the fiery heat.

Saves Time for Other Projects — By repainting the interior of your home during the fall or even winter months, you will have time for other projects like gardening, patio upgrades, and painting the exterior of the house — projects that are best done in the spring and summer.

If you’d rather skip all that hard work and relax, let TalkLocal find you a professional that can handle it for you. Best part is — painting contractors are likely to score you a good deal because the colder months are their slower months.

House Painting Contractors

Tuesday, March 25th, 2014

House Painting Contractors - Painters

Hiring a gifted, dependable house painting contractor is one of the best decisions that you can make, if you want to boost the appeal of your property in a time- and cost-effective manner.

However, not every painter has the skills, the tools, or the expertise required to provide more than satisfactory results. So, how could you possibly identify the truly competent house painting contractors who are actually suitable for this job? Here’s how.

Do Your Homework

Word-of-mouth advertising always works to your advantage. Be curious. Ask around. Perhaps one of your best friends or one of your neighbors has recently painted his house and is pleased with the end result.

Pay him a visit and get the contact information of the painting company that completed this assignment. The rest is easy: discuss your options with the house painting contractor and make sure you can afford to pay for these services.

Ask for Up-front, No-Obligation Estimates

To avoid unpleasant surprises, always compare estimates provided by at least three of four painting companies found in your area. Go in favor of first-class services matching your allocated budget.

With so many companies operating in this line of work, it doesn’t really make sense to break the bank to repaint your house. Don’t settle for less than high-quality, inexpensive services that come with a 100% client satisfaction guarantee.

Interview Your Favorite Candidates

Schedule a meeting with your favorite contractors, to analyze their behavior and their answers to some of the most important questions that you should never forget to ask:

1)    How long have you been in business?

2)    What type of products, tools, and techniques are you going to use to paint/repaint my house?

3)    Do you provide written guarantees for your work?

4)    Are you licensed, insured and fully trained?

5)    Can you offer any references?

Track Experts the Easy Way

If you don’t want to waste any time trying to spot reliable house painting contractors who live and work in your area, rely on TalkLocal to simplify your mission. TalkLocal is a free service created to put you in contact with real pros that operate in your local area.

Why Use Latex House Paint

Wednesday, March 19th, 2014

Why Use Latex House Paint  - Painters

More than 70% of the paint that is available on the market today is the latex type of paint, which is also known as water-based paint, since most of its liquid component is water. A majority of do-it-yourself enthusiasts use latex house paint for their home improvement projects for both interior and exterior paint applications and for good reason. Here’s why:

Qualities of Latex House Paint

Latex paints are preferred by many professional painters and do-it-yourselfers primarily because they are so easy to clean up, requiring only water and regular soap. More than this, latex paints also offer many advantages performance-wise.

For one, high-quality latex house paint is more durable than oil-based paint when it comes to retaining color and resisting chalking. This means a house painted with latex house paint would look good for longer than one painted with oil-based paint.

Also, latex paints do not have the tendency to become brittle, unlike oil paints, so these paints will not crack easily.

Latex paints of high quality that have binders of 100% acrylic are particularly long lasting and flexible. They are known to adhere incredibly well to various outdoor surfaces, so there is less likelihood of painting problems, like flaking, peeling, or blistering. Using latex house paint for your home project will save you time, since it dries much quicker than oil-based paint. With its fast drying time, it’s possible to apply the second coat on the same day.

Features of Latex House Paint:

– More elastic than oil-based paint so it adheres well to most surfaces and can be applied on concrete, wood, brick, stucco, galvanized metal, aluminum and vinyl siding, and others

– Excellent chalk- and fade-resistance, even with bright sun exposure

– Allows smooth and even application with minimal paintbrush drag

– Not susceptible to mildew growth

– Minimal odor

– Easy cleanup with water

– Quick-drying in as short as one hour, up to six hours

Do You Need Help with a Painting Job?

Whether you’ve got a small or big painting job or you need expert painter hands, turn to TalkLocal to find you the best painters in town. We offer a free service that will connect you with up to three, qualified local painters, so all you have to do is to choose the best person for the job. Save time searching for a reputable painter. Use TalkLocal now!

Cold Resistant Paint

Thursday, March 13th, 2014

Cold Resistant Paint - Painters

Years ago, paints could not be applied unless temperatures were at least 50 degrees Fahrenheit. Nowadays, things have changed, and the paints have considerably improved. Researchers have come up with a formula that allows you to apply paints even at 35 degrees F.

What’s the Magic Formula?

A cold resistant paint’s formula is based on acrylic, a plastic molecule. The acrylic is a polymer derived from the acrylic acid, of which millions of kilograms are produced each year. Therefore, you have a fast-drying paint, which contains an acrylic emulsion that helps the pigment dry faster, and resist longer.

What Rules Should You Follow?

This type of paint allows you to paint or have your house painted at low temperatures. Nonetheless, you should be very careful if you choose to use it. It is recommended to apply cold resistant paints according to the manufacturer’s specifications, but never under 35 degrees F.

When using this kind of paint you need to consider both the temperature of the air and that of the area, which is being painted. Here are some rules you should follow if you don’t want to get the expected results:

1. Check the label for the “35 degrees F” specification.

2. Check the wall’s temperature with a thermometer.

3. Prim your wall before painting.

4. Apply the painting somewhere around noon.

You should always look thoroughly on the label of the product you plan to buy. Then, when actually starting the work, you must be sure that both the temperature of the air and that of the surface you intend to paint aren’t below 35 degrees F.

For the wall’s temperature, use an infrared thermometer. After doing this, there is another very important step: prim your wall – this will ensure a good spreading and distribution of the product. Finally, paint your walls between 10:00 and 15:00 at the latest, so that there is enough time for them to dry up.

Need Professional Painters?

If you are not sure whether your walls should be painted using this type of product or if you need further explanations from an expert, you can give us a call. Seva Call can find the right professional for you.

Using Anti-Mold House Paint

Tuesday, March 11th, 2014

Using Anti-Mold House Paint - Painters

Mold is one of the most common problems shared by homeowners everywhere. If neglected, mold growth can damage your home and contribute to different health issues.

There are a number of ways to lessen the likelihood of developing a mold problem in your home, one of which is using anti-mold house paint. While several paint brands today offer products that effectively inhibit the growth of mold, it is important to take note that these products cannot exterminate mold.

How Does Anti-Mold Paint Work?

First of all, mold will grow in any environment where these elements are present: moisture, organic material, and warm temperatures (60-100 degrees Fahrenheit).

To prevent mold growth, anti-mold paint has antimicrobial agents and additives that resist stain and traps odor. It also stops moisture and water infiltration. Anti-mold paint products that have been approved by the Environmental Protection Agency follow regulations concerning Volatile Organic Compounds (VOC) and anti-microbial inhibitors.

How to Use Anti-Mold Paint Effectively

Before using anti-mold paint, the crucial first step is to eliminate the source of the mold. Simply painting over a moldy surface will not work. The underlying mold must be removed first, and the water source that is feeding the mold growth should be identified and addressed to ensure there will be no future contamination.

If the surface has no mold, however, prepare it for paint application by simply power washing it. Ensure the surface is clean and completely free from contaminants like dirt and grease. The surface should also be completely dry before paint application.

On the other hand, surfaces with mold have to be treated first with the proper fungicidal solution before being power-washed. Follow the product manufacturer’s instruction when applying the fungicide. If this doesn’t work to completely eliminate the mold, scrub the surface with a solution of water and bleach (3:1 ratio). Leave the solution on for 24 hours and then rinse thoroughly. Next, apply another coating of the fungicide.

If the surface appears to have deeply-rooted mold, it is best to hire professional mold cleanup and removal services. You can apply anti-mold paint on walls, ceilings and sub-floors of old and new buildings.

Find a Professional Painter

Ensure the proper application of anti-mold paint by hiring a professional painter. Seva Call can match you with up to three qualified painters in or near your area. Simply contact us through our website or over the phone and we’ll start the search for the right professionals for your job. Try Seva Call now!

Using Acrylic House Paint in Cold Weather

Thursday, March 6th, 2014

Using Acrylic House Paint in Cold Weather - Painters

Today, acrylic house paint is the preferred paint of many professional and DIY painters for exterior applications. Typically, they use regular, 100% acrylic house paint for various outdoor painting jobs. This type of paint is ideally used when temperatures are in the 50-70 degree range, but it can also be used even in colder temperatures if completely necessary. Before applying, it’s important that very shiny surfaces or those not faded by sun exposure be removed.

If the existing exterior paint is oil-based and you’re planning to switch to acrylic house paint, there are many essential considerations, which is why outdoor paint jobs are best handled by professional painters.

For instance, surfaces with mildew or chalking must be cleaned properly to remove the impurities. To do this, use a strong cleaner like TSP and mix some bleach with it. This solution will dislodge the chalk and kill the growth of mildew. Also, you must first coat any surface painted with oil-based paint with a high-quality bonding primer prior to painting it over with acrylic house paint.

Working in Cold Weather

When painting with low-temperature acrylic paints, one of the trickiest parts is watching out for drops in temperature. Acrylics must be cured (100% dried) before they are exposed to harsh conditions. Low-temperature acrylics can be applied in temperatures as low as 35-50 degrees. However, paint manufacturers indicate an acceptable temperature range for their product, and the temperature has to remain within this range for up to three hours after the paint has been applied.

Additional Tips:

– Note that other materials typically used during painting/home improvement jobs may not be suitable for cold temperatures like new acrylic house paint products. For instance, primers and fillers normally require warmer weather.

– Start the job as early as sunrise and work around your house to follow the course of sunlight. Stop working when temperatures start to go down.

– Paint dries slower in cooler temperature, so allow additional hours for drying before applying the next coat.

– When painting, make sure you’re not painting over dew so as not to trap moisture under paint, which will cause it to have blotches.

Get the Help of Professional Painters

If you require expert help with an exterior paint job this winter or at any time of the year, Seva Call can get you the help you need. Send us your service request and we’ll connect you with qualified painters in your local area in just a few minutes. Try us!

Home Painting Company

Wednesday, February 26th, 2014

Home Painting Company - Painters

Professional services brought to you by a respectable home painting company are a long-term investment. Apart from improving the aesthetics of your house and boosting its resale value, talented, dependable painters can also teach you how to preserve a smooth finish for the longest period of time, and how to prepare your home for the entire painting process.

How to Make Sure that the Exterior of Your Home Is Ready for Painting

So, you’ve finally decided to call a home painting company and now you’re waiting for the contractor to arrive. Simplify the whole process by doing some of the recommended prep work on your own, by following this useful checklist:

– Trim bushes that might restrict the painters’ access to the siding of your house.

– Inspect water spigots and make sure they are fully functional, as you will have to use them to power wash the exterior of your house.

– Check electrical outlets that will be used by painters to power some of their tools (like sanders, electric saws, and so on).

– Remember to turn off your water sprinklers before giving the green light to the painting process.

– Keep in mind that at the end of the painting process you will have to leave the door open for at least for a few hours. In this case, rely on other security measures to prevent burglary attempts.

How to Take Pride in Appealing Exterior Elements for the Longest Period of Time

A good painting job will always deliver long-lasting, aesthetically pleasing results. Nonetheless, you can preserve the appeal of your exterior elements for many years to come by following a few simple steps:

1)   Clean the siding of your home with a brush and wash it with a bleach additive-based solution, especially if the exterior of your house is prone to mildew or mold contamination.

2)   Remove bird nests that could stain the siding.

3)   Remove ivy to prevent extensive humidity damage that could compromise your painting efforts.

4)   Power wash and inspect brick surfaces that usually hide significant dust and debris accumulations.

Ask an Expert

Hire experts from the best local home painting company to beautify your property. Find the best specialists with Seva Call, a free service enabling you to track and meet dependable pros in your area.

How to Refinish Wooden Floors

Thursday, February 20th, 2014

How to Refinish Wooden Floors - Painters

If your old wooden floor needs refinishing, here’s what you can do.

First, examine it in order to establish if it needs repairs, too. If it is damaged, it’s best to fix it before any starting your refinishing project. It’s not difficult to refinish wooden floors, but you should pay attention to a number of details.

Preparation Works

1. Take your time when preparing the floor for refinishing. That means its surface must be cleaned and sanded. A good preparation starts with the removing of all the objects in the room — not only carpets, but also whatever may hinder the cleaning process.

2. Insulate all electrical openings and switches using tape. At the end, vacuum the wooden floor. Now, it is ready for sanding.

Sanding

3. The sanding operation is meant to smoothen and polish the floor. You will sand it down by rubbing its surface with sandpaper. Stains and different scratches need to be sanded away.

A mechanical sander can be of great help, but it won’t be able to touch certain small areas. You can use sandpaper for these spots to make sure you remove all stains.

4. Once you’re done sanding, clean the floor thoroughly.

Refinishing

5. At this stage, you can start refinishing your wooden floor. If you have vacuumed the floor and there isn’t any debris left, you can start applying the finish. Your floor should be dry and your windows opened, in order to ensure the circulation of fresh air around the room.

6. Apply the finish carefully, so that the whole surface of the floor is covered with the same amount of finishing agent. Stain your wooden floor using a pad, and then let it dry. If necessary, apply another layer of stain for a deeper color.

Need Help?

If you find this process difficult, Seva Call can put you in touch with professionals who can do it for you. Just give us a call and we’ll find the right painters in your area who can refinish your wooden floor.

How to Refinish Wooden Doors

Monday, February 3rd, 2014

How to Refinish Wooden Doors - Painters

Your door may look old and rusty over time, which will reflect on the overall appearance of your property. Rain, snow, exposure to sunlight, and aging will eventually deteriorate your door. You can buy a new one or, more conveniently, refinish your old wooden door.

How to Refinish Wooden Door 

If, instead of buying a modern fiberglass door, you have decided to recondition your seasoned one, let’s see what steps you should follow in order to do a good job. You can refinish wooden doors successfully if you pay attention to each of the following six stages:

1. First, remove the door from its frame. You may need a friend to help you.

2. Remove the paint from it using a paint remover.

3. Clean the paint remover using a scrapper.

4. Wipe the door down using towels.

5. Use sandpaper to clean the surface of the door, prior to any refinishing works.

6. Use a varnish based on oil to refinish it – it can do miracles.

When you choose to begin this home improvement project, you will need to remove the door. In order to keep it safe, it is recommended that you use a sheet to cover it. It can be difficult to support the door, but a friend should be enough to do the job.

Then, the old finish of your door is best removed with a paint remover, which you should apply repeatedly until you can see the surface of the wood.

Then again, this surface needs more cleaning, with the help of sandpaper. Only after this operation has been performed can you start refinishing, using an oil-based varnish.

Need Assistance?

If you’re not much of a DIY’er, and find this difficult and tiresome, a professional painter can do the job for you. Seva Call can put you in contact with several experienced professionals in your local area in no time.