Motorcycle chain replacement can get pricey, since good chains are not cheap. If you find yourself needing a motorcycle chain replaced, you want to make sure you know what you’re doing and how to do it. The following are step-by-step instructions for motorcycle chain replacement:
Motorcycle Chain Replacement
1. Use a stable jack stand to lift the rear tire off of the ground. Make sure the jack is firm and steady.
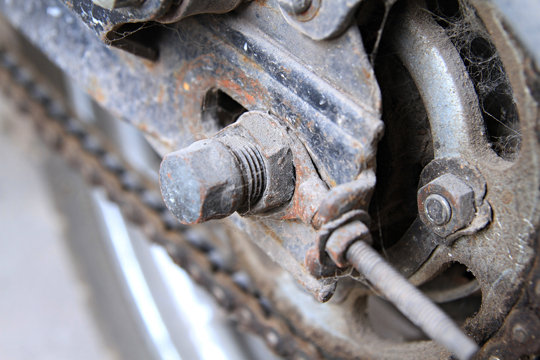
2. Use a crescent wrench to remove the lug nut on the rear tire. Also, pull off the square-shaped axel spacer.
3. Softly use a hammer to tap on the lug bolt so you can push it out slowly. When you can’t tap anymore, pull it out on the other side. You may use a glove or wash rag to get a better grip and avoid getting grease on your hands.
4. Repeat for the other square axel spacer.
5. There is a “master link” on the chain link. It is slightly thicker than the other links and it has a clip on its side. Find this link, remove the clip, and pull the link apart. Then, you can remove the entire chain.
6. Put your new chain on the sprocket of the tire and slowly guide it around the inner sprocket.
7. Connect the new chain and put the new clip on the master link.
8. Align the tire again.
9. Return the square axel spacer and lug bolt by placing the spacer on the side of the tire and pressing the lug bolt back through the axel area.
10. Put the second spacer around the axel bolt so you can replace the axel nut.
11. Use a crescent wrench to tighten.
Call A Professional For Help
You have now replaced your motorcycle chain. If you need help finding professionals in motorcycle chain replacement, try using TalkLocal. Our state-of-the-art system connects you automatically to the auto repair professionals you need to get you back to riding down a country road with the wind at your back.


