Archive for the ‘Plumbers’ Category


Leaking Bathroom Pipes

Thursday, October 25th, 2012

Leaking Bathroom Pipes Plumbers

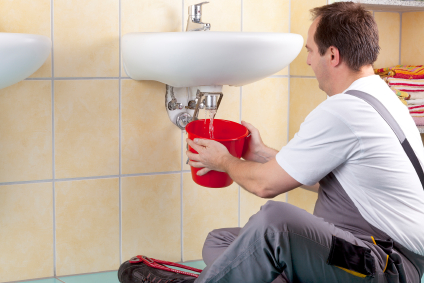
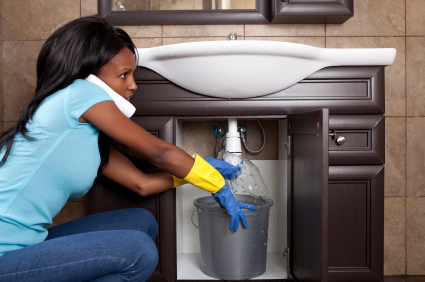
The dripping of water through leaking pipes is not a sound anyone wants to hear, but with a small investment of time and basic tools, you can save money otherwise spent on a plumber. Most bathroom sink leaks are going to be caused by a bad drain pipe, loose pipe connection, or bad drain flange. Each of these problems is easily fixable.

For all leaky pipes, run the water to determine where exactly the leak is located. Now, depending on your problem, see what steps would need to be taken to fix leaking bathroom pipes.

Bad Drain Flange

1. Shut down the water in the house.

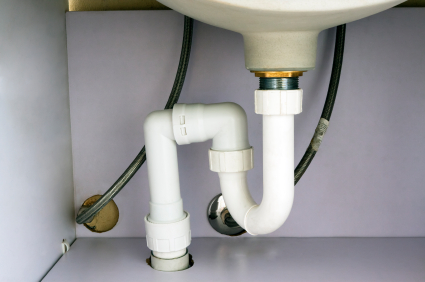
2. Loosen the slip nut that connects the sink trap to the main draine line, but not to the extent of disconnecting the sink trap.

3. Pull down on the sink trap to disconnect it and move it out of your way.

4. Unscrew the slip nut that connects the sink trap to the pipe coming out of it using channel lock pliers. If your sink drain has a stopper this will not need to be done. Instead, disconnect the stopper mechanism from the pull stem. There is a thumbscrew that connects the two. Unscrew the thumb screw to release the stopper mechanism.

5. Remove the nut connecting the sink to sink drain using a wrench.

6. Lift out the sink drain and remove any old plumber’s putty. If the flange is bent or damaged, replace it.

7. Replace the plumber’s putty by rolling up a small ball and forming a thin rope. Then set the

putty on the underside of the drain flange. Now fit back the sink drain and secure it back on

using the retaining nut.

8. Wrap plumber’s tape around any of the pipe threads.

9. Reconnect all pieces in reverse order that you disconnected it.

10. Tighten the slip nuts using channel locks.

Replacing Sink Drain Pipes

1. Shut down the water in the house.

2. Disconnect the sink trap from the wall drain pipe using channel lock pliers.

3. Remove the pipe coming from the sink drain and the drain assembly. You will be left with one disconnected piece consisting of a tail piece and a sink trap.

4. Get a new tail piece and a sink trap from a hardware store.

5. Wrap plumber’s tape around the exposed pipe threads.

6. Slide a slip nut on the unthreaded part of the tail piece.

7. Connect the tail piece the to the sink drain using a slip nut and channel lock pliers.

8. Connect the sink trap and the main drain with a slip nut.

9. Connect the sink trap to the tail piece using another slip nut.

Loose Connections

1. Tighten the sink drain flange with a wrench. Turn the retaining nut a quarter turn.

2. Tighten all of the connections between pipes under the sink using channel lock pliers.

3. Disconnect sections that will not stop leaking when tightened.

4. Clean old plumber’s tape off of threads and reapply new plumber’s tape.

5. Secure drain lines using channel lock pliers.

If none of these methods work calling a plumber may be necessary. TalkLocal can connect you to high quality plumbers in a matter of minutes.

How to Stop Leaky Pipes

Tuesday, October 23rd, 2012

How to Stop Leaky Pipes Plumbers

A leak in your pipe might range from being virtually harmless to flooding your home, so appropriate measures must be taken in order to patch the pipe up effectively; otherwise, you may discover some surprise leaks later. Knowing how to stop leaky pipes also depend on the position of the leak in the pipe. If the leak is at a joint, simply tighten the joint. However if a leak is in the middle of a pipe, you won’t be able to change the pipe by yourself, as unscrewing the pipe in one end will tighten the pipe in the other. These are temporary fixes for your pipe until a plumber can fix the pipe himself.

Pipe patch kits are sold at hardware stores and contain a piece of rubber and two metal plates that holds the rubber patch to the pipe. This can even be a permanent way to stop a leak if the leak is small. However, you can use a piece of heavy rubber and a pair of c-clamps/hose clamps to achieve the same effect.

You can also use waterproof tape as a temporary measure to stop small leaks by wrapping the tape starting two inches from the hole to two inches after the hole. Epoxy paste is also a good way to stop holes, in addition to compound sticks that can be rubbed on tiny leaks to stop them. If you’re using epoxy paste or waterproof tape, make sure the pipe is dry first.

Pipes that are wearing thin have more leaks, so if you see one leak, don’t be surprised when another appears soon after. The best solution is to find a plumber and replace that section in the pipe, which is a permanent fix. Use TalkLocal for free to find a plumber that can find your leaky woes!

Toilet Wax Ring Replacement

Monday, October 22nd, 2012

Toilet Wax Ring Replacement Plumbers

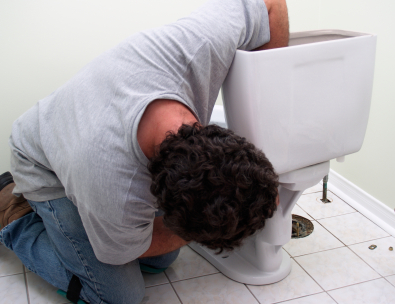
A toilet wax ring is what seals your toilet base to the floor/toilet flange below it. There may be a breakage of the wax seal if you start to notice any of the following:

– your toilet is loose or wobbles from side to side

– there is water or dampness around the base of your toilet

– your toilet leaks and leaves stains on the ceiling below

Toilet wax ring replacement is not extremely difficult, but be prepared because it can be a messy, heavy task. If you are replacing the seal yourself, you will need: a replacement wax seal and wax seal installation kit (available at most hardware stores), a trash bag, gloves, and a plastic putty knife.

How to Replace the Wax Seal

1. Turn off the water supply

2. Flush the toilet a couple of times to empty the water completely.

3. Use a sponge to dry up the remaining water in the bowl.

4. Unscrew the nuts on the base of the toilet that holds it to the floor.

5. Disconnect the supply line for the water (the silver coil connected at the back of the toilet).

6. You will have to rock the toilet side to side to loosen it from its current seal and to break the caulking that is keeping it in place.

7. When it is disconnected, be sure to grab the toilet from the bowl and not the tank. Move the toilet and flip it on its side so the base of the toilet is facing up.

8. remove the wax and old rubber seal from the floor and the remaining wax on the bottom of the toilet.

9. Take the new seal and put it in place.

10. Seal the toilet on the new ring. This can be easily done by sitting on it and rocking it side to side to make sure the seal had adhered to the wax base.

11. Replace the bolts and caps to the base and reconnect the water line.

12. Turn the water supply back on and let the bowl fill with water.

13. Flush the toilet and do a damage check for leaks or problems with the newly installed wax ring.

If you are having trouble with the project on your own and would feel more comfortable contacting a professional, try using TalkLocal to find one near you. TalkLocal is a FREE service that will connect you with top-quality, reliable plumbers in your neighborhood, within minutes. Just enter in your problem, location and availability and TalkLocal will contact multiple companies, who will then call YOU directly, ready to help. Save time and stress from searching for the right, most affordable plumber on your own, and let TalkLocal do it for you!

Toilet will not Stop Running Water

Friday, October 19th, 2012

Toilet Will Not Stop Running Water Plumbers

A constantly running toilet can waste a lot of water and cause you to spend more money. Follow these steps if your toilet will not stop running water:

Step 1: Open the lid to the toilet tank. The tank includes all the inner workings of the toilet. Look inside to see if anything is tangled or unattached.

Step 2: Adjust the lift chain. Jiggle the toilet handle to free up the lift chain. If the toilet stops running, adjust the chain inside the tank. The chain may become wrapped around the lift arm and you may need to adjust the position of the chain. Simply disconnect the hook from its slot and reconnect at the next slot on the float arm. If this doesn’t work, check to see if the float arm has become disconnected. The top of the float should be slightly above the water level.

Step 3: Check for leaks with a dye tablet. Dye tabs are available at most hardware and plumbing supply stores. After flushing, simply drop the dye tablet into the bowl as the water begins to fill back up. If you tank is leaking, the water will begin to turn the same color as the tablet. The flapper valve that does not seal properly may be the culprit. For an easy fix, turn off the shut-off valve located below the tank and flush the toilet to “empty it.” Remove the flapper and replace it with a new one. If the flapper valve seat is cracked, you will have to replace the entire unit. You can find one at any local hardware store.

Step 4: Check the ball-cock assembly. If you have followed the previous steps and everything seems to be in working order, you may need to replace the ball-cock assembly. First, empty the tank and then replace the ball-cock assembly using an assembly kit. Make sure the follow the instructions carefully.

If you are still experiencing toilet problems, try consulting a professional. TalkLocal will connect you to a reliable plumbing contractor in minutes!

Plumbing Water Leaks

Tuesday, October 16th, 2012

Plumbing Water Leaks Plumbers

Plumbing Problems: Water Leaks

One of the main plumbing problems you can face is plumbing leaks.  Some preventative maintenance in your home’s plumbing can go a long way. A few simple tips can help you keep things smooth:

– Routinely check your pipes for rust, leaks, buckling, or other issues which may ultimately turn into a headache.

– Check under the sink, in the basement ceiling, and any other visible areas with visible pipes.

– Use a wrench to tighten nuts and bolts that have come loose. Many times the culprit of a leak can be a defective washer. Replacing it with a new one can cheaply and easily fix the problem. This is a common issue with dripping shower spouts and leaking faucets.

– When leaving the house for a short vacation or longer trip in the winter, be sure to leave the faucets open a crack to allow water to flow. This will prevent the pipes from freezing and potentially bursting which can turn into a huge mess.

– If you find your water heater leaking, it’s a sure sign that it needs to be replaced. A leaking heater means the lining at the bottom has been worn away and needs attention ASAP.

By following these few simple steps, you are well on your way to keep your home from turning into a plumbing nightmare and having plumbing water leaks. If you cannot fix the problem on your own, don’t worry! TalkLocal can connect you to a heroic plumber in your area in minutes. To use this speedy service, submit a service request on TalkLocal’s website including your problem, location, and availability. Soon after submitting, you wil receive phone calls from up to three high quality service providers in your area that can help you with what you need, when you need it.

Drain making Gurgling Noise

Monday, October 15th, 2012

Drain Making Gurgling Noises Plumbers

If you hear your drain making gurgling noises several moments after using the sink, shower, and in more extreme cases the toilet, then it may be a result of a blocked drain or vent pipe. Often times, the mixture of dirt and grease can build up in the drains and the plumbing. This buildup can cause the water to drain slowly. As a result, the air bubbles can not go through the pipes and get expelled at the nearest hole, resulting in a gurgling noise that is audible to the user. In a clean drain and line, water and air bubbles can easily flow together down a drain, with the air and water getting expelled in their appropriate spots. If there is a gurgling noise that is present for every drain in the house however, then it is evident that there is a larger blockage in the main pipe rather than a smaller pipe attached to the fitting drain.

One of the best ways to prevent this is to abstain from pouring anything down the drain that may cause a build up such as food, hair, grease, etc. In the event that there is already a buildup, there are many chemical solutions that can be poured into the drains to clean the drains. When using the solutions, make sure to follow directions closely. The solutions are toxic and may cause personal injury. Additionally, if you do not let the solution sit long enough it may not work correctly. If the problem persists, you should use a “snake” to physically unclog the areas. A snake is a long, flexible, coiled metal wire that can reach far and deep into the plumbing of your house and break up the debris. Use the snake with enough force to break off the build up, yet not so aggressively that you will damage the pipes and cause a leak.

Another reason you may be hearing the gurgling noises is a blocked vent pipe. The vent pipe is connected to all the main plumbing pipes in the house and is vented out through the roof of the house. This vent may be blocked because of leaves, a bird’s nest, accumulated dirt, etc. Due to the blockage, the air can not be ejected through the vent. Thus the air is forced to escape through the nearest opening, which is usually the last sink used, and results in a gurgling noise.

The vent is usually on the roof, so only a trained professional with experience should attempt to unblock the vent because it is a dangerous task. The professional needs to check the cap that blocks leaves and animals from falling into the vent. Use TalkLocal to find a high quality plumber in your area.

Fix a Leaking Pipe Under Bathroom Sink

Thursday, October 11th, 2012

Fix a Leaking Pipe Under Bathroom Sink Plumbers

Fixing the pipes under your bathroom sink can seem intimidating but it is definitely doable. To correctly fix a leaking pipe under bathroom sink, you should identify exactly where the problem is.

1)   The pipes have loose connections.

Sometimes your pipes will leak because a connector has come loose. This is a very simple issue and can be fixed in a snap. To tighten up any loose connections, you will need a pipe wrench, a pair of channel lock pliers, and plumber’s tape.  You should first tighten up the drain flange with the pipe wrench by turning the retaining nut about a quarter of a turn. Now you can tighten the rest of the connections between the pipes using the channel lock pliers. If some sections continue to leak even after being tightened, you should disconnect them and apply new plumber’s tape. Then, reconnect them and see if this stops the leaking.

2)   The pipes themselves are failing.

Another problem that may cause leaking is that the pipes are actually failing and need to be replaced. First and foremost, turn the water off. Use channel lock pliers to remove the pipes from the drain pipe and wall. Take the whole thing to the hardware store so you can find an exact match. Make sure you also get new slip nuts as well. Install the pipes and see if the leaking stops.

3)   The sink’s drain flange has gone bad.

You may have a more serious issue if you sink’s drain flange is broken. You should disconnect the sink trap using the channel lock pliers and swing it out of the way. Use the pliers to remove the slip nut connecting the drain flange to the sink and take out the retaining nut with a pipe wrench. You should inspect the flange and see what needs to be replaced. It could be an easy fix with replacing the plumber’s putty, or something more serious if anything is bent or cracked.

Continuing Problems

If you continue to have problems with your pipes leaking, you should seek professional help. Use TalkLocal to be put in contact with reliable local plumbing businesses. You don’t have to do any work! Simply input your problem and availability and TalkLocal will do the rest. Within minutes your should be connected to someone who can help you out.

Low Water Pressure in Parts of House

Tuesday, October 9th, 2012

Low Water Pressure in Parts of House Plumbers

What happens when you start to get low water pressure in parts of your house?  Everyday tasks like washing the dishes or taking a shower gets harder and it can be extremely frustrating.  When you have low water pressure in parts of the house, it could be a serious problem so you should try and resolve it as soon as possible.

The first thing you need to do is determine how widespread the problem is.  See if it is affecting just one area or the entire house. In order to test the water pressure, you should buy a hose bib water pressure gauge. These devices are simple to use. You should first make sure there is no water running in the home.  Turn all faucets off, stop using any machines, and stop using hoses. You will need to thread the pressure gauge into any hose bib and turn it on.  Record the resulting pressure reading as your static water pressure.

Potential Causes:

The problem could lay with the supply valve, the aerator, or faucet itself.

Supply valve — The supply valve my not be completely open. These types of valves are open when they are turned left and closed when turned right.  You should turn the valve completely left until it won’t turn any further.  If the valve is kinked or crushed, you should replace it.

Aerator — The aerator or filter screen may be clogged which causes low water pressure. The aerator is threaded onto the end of the faucet.  When you remove it, you should use a cloth to protect the part from tool marks. Turn the aerator to the right to remove and inspect the debris found on it. Remove anything that could impede water flow.

Faucet — The faucet itself is not working properly. You should try to replace the entire device so that you prevent further problems or damage.

Continuing Problems

If you continue to have problems with your water pressure you should seek professional help.  Use TalkLocal to be put in contact with reliable local plumbing businesses within minutes.  You don’t have to do any work! Simply input your problem and availability and TalkLocal will do the rest.  Almost immediately you will be connected on the phone with someone who can help you out.

Different Types of Bathroom Vanities

Monday, October 8th, 2012

Different Types of Bathroom Vanities Plumbers

If you’re giving your bathroom a makeover, there are several different types of bathroom vanities to choose from.  Vanities can be very simple, modern, elegant, or even have an antique appearance.  You can choose multiple sinks, multiple mirrors, a vanity with drawers, etc.  It can be beside the bathroom wall, attached onto the wall, or in one of the corners of your bathroom.  The options are endless, and you can even design your own custom display.  The eventual choices are all up to you, depending on your interests, needs and budget.

The simplest type of vanity is one where you have a separate sink that stands alone from your bathroom wall.  This is called a pedestal sink.  This set-up will also include a mounted mirror, a cabinet within the mirror or maybe a shelf attached to the wall to place toiletries.

A second type of vanity is one attached to your bathroom wall.  This can be a cabinet vanity, (where the sink is mounted on top of a cabinet,) or a simple stand-alone sink mounted to the wall.

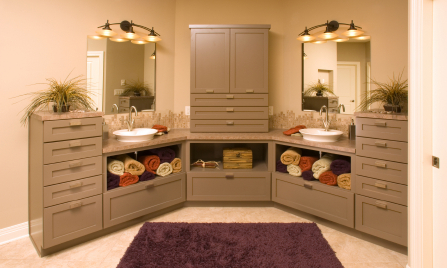
A third option is to have a vanity setup in a corner of your bathroom.  In this case, you may choose a cabinet or mounted stink with a countertop.  A benefit to situating your new vanity in a corner is the privilege of having two mirrors on each wall above the sink.

If you have a larger bathroom, you can choose to set up two sinks, (his and hers.)  Overall, you also have the options of choosing different materials for your new vanity including wood, glass, porcelain, etc.  You may want a more modern, simple look, or an elaborate, antique-style vanity.

Are you considering installing a new vanity?  Need a bathroom contractor for the job?  Try using TalkLocal, a free service that will connect you with top-quality, reputable plumbing/contracting companies in your neighborhood within minutes.  All you need to do is enter in your specific problem, location and availability, and TalkLocal will do the rest.  Save time searching through phone books to find the “right” plumber, and let TalkLocal do it for you!

Garbage Disposal Stopped Working Suddenly

Friday, October 5th, 2012

Garbage Disposal Stopped Working Suddenly Plumbers

If your garbage disposal stopped working suddenly, there few things you can do to try and fix the problem yourself. If nothing happens when you flip the disposal switch, get down and take a look under the garbage disposal.  There is usually a small red button under the garbage disposal that resets the system. Push the little red button and see if anything happens. If your disposal was just overworked or if there was a power surge, this could fix the problem.

If that doesn’t work, you will need to use a wrench-like tool (it usually comes with the garbage disposal) that is shaped like a squared “S” and is hexagonal in shape. On the end, there should be a flat piece of metal with 6 sides. With the tool, look at the bottom of the garbage disposal. There should be a hole in which this tool will fit. Stick it in there and turn the tool a few times. This will manually force the garbage disposal to turn, breaking up any hard pieces that may have caused the disposal to stop. A few turns should unclog the disposal. Try to flip the garbage disposal switch again and see if it is working properly. If you lost this tool or need a replacement, you can find it at your local hardware store for around $3.

Did both solutions not work for you? You can either buy and install a new garbage disposal yourself, which costs no more than $100, or you can hire a professional to look at it and fix it, which will likely cost a few hundred dollars. To find a high quality plumbing service that offers a reasonable price, use TalkLocal to get in contact with local businesses. TalkLocal will comparison shop for you to find a business that can accomodate your needs.