How to Compost Fall Leaves

Friday, November 16th, 2012

How to Compost Fall Leaves Landscapers

Fall provides an abundance of leaves that can be turned into rich compost and added back into the garden to make the soil more productive. Home composting is a great way to use a natural process to add valuable nutrients and conditioners to the soil. If you have never made compost before, you might wonder how to go about it. Here’s how to compost fall leaves in a relatively simple way, with minimal cost and effort.

1. Purchase or build large compost bins five to six feet across. The large size allows for rapid heating which creates compost faster. Bins can be purchased from home stores, garden centers, or farm supply stores. Inexpensive bins can be built from chicken wire.
2. Add raked leaves to the bins alternating with layers of nitrogen material. Do not shred leaves which can lead to compacting. Nitrogen comes from green matter and can be in the form of grass clippings, green plant material, or nitrogen fertilizer. One to two cups of nitrogen fertilizer per bin or one part leaves to two parts green clippings is ideal.
3. Water layers as you build the pile. Water is necessary for decomposition. If you wait until you finish building the pile, it becomes more difficult to saturate.
4. Do not turn leaves. Fall composting does not require turning because it allows heat to escape which is needed for the composting process. Only turn in the spring.

Following these steps will produce usable compost by spring. If left untouched, leaves take two to three years to compost.

Keep in mind a few tips when composting fall leaves. First, do not compost weeds. Some seeds may not be destroyed during the heating process and may be spread around the landscape when using compost. Second, do not add protein to the compost pile. This includes meats, bones, and fat. They attract animals such as rats. Finally, to prevent the spread of disease in your yard, do not add diseased plant material to your compost pile.

If you have questions or need additional professional assistance, let TalkLocal help you. It is easy, quick, and takes just minutes.


5 Fun Family Games for Thanksgiving

Friday, November 16th, 2012

5 Fun Family Games for Thanksgiving Party Planners

Thanksgiving is a time for family, friends, and feasting. It is easy to focus on food and forget that the most important part is being together. Preparing an activity or game will engage guests in creating a party atmosphere. Here are 5 fun family games for Thanksgiving.

Family Trivia: Teams with all ages, males against females, or one family against another compete to answer questions in history, sports, and miscellaneous categories. Questions like “what is Grandpa’s middle name?” or “who got a ticket for going too slow on the interstate?” help families learn history and invite family stories.

Photo Scavenger Hunt: Divide guests into teams with a camera for each. Provide a list of 8 to 10 pictures needed, like a picture with the oldest family member, the team gathered in a small bathroom, or the team engaging in an activity. The winning team is the one which completes the tasks the fastest.

Impromptu Talent Show: In a basket place a number of slips of paper on which are written who is to perform and what the act will be. For example, everyone with a birthday in June, July, and August will sing the national anthem or everyone wearing something orange, green or brown will perform a bowl game cheer.

Turkey Feather Relay: This is a relay race that allows everyone to participate, including grandma with her walker and a waddling toddler. Divide guests into teams and provide each team with a feather. Designate a starting line and a turnaround point. The challenge is to go from the starting point to the turnaround point and back again with a feather on the top of the head. No hands allowed. The winning team is the first to have all members complete the challenge.

Thankful Turkey: Create a simple turkey using a paper plate for a body and construction paper for other parts. Cut enough bright colored feathers for every guest to have one. Ask each to write one or two reasons to be thankful on the feathers. One by one each guest shares and attaches the feather to the turkey.

Long after the meal is forgotten, guests will remember all the fun of celebrating Thanksgiving at your house. These games are more than time fillers, they are memory makers. For more help planning the perfect Thanksgiving gathering consult with a party planner found at TalkLocal.

Best Dog Treatment for Ticks and Fleas

Friday, November 16th, 2012

Best Dog Treatment for Ticks and Fleas Veterinarians

Are you looking for the best dog treatment for ticks and fleas? To answer that, Frontline Plus is the best treatment you can use on your dog. It is a waterproof topical liquid that you place behind your dog’s neck and along its back.  Frontline Plus is guaranteed to kill ticks and fleas within 24 to 48 hours of application.  It keeps ticks and fleas away, and they will die if they come in contact with your dog.

K9 Advantix is another dog treatment for ticks and fleas; however, it is not as good as Frontline Plus.  After 28 days, K9 Advantix loses about 50% of its effectiveness, whereas Frontline Plus only loses 5%.  K9 Advantix has also been known to have harmful chemicals that can hurt your dog and other pets you may have in your home.

Home Remedies

Tick and flea medication for dogs can be expensive.  You can treat dogs for ticks and fleas with items found in your own home—and within your budget.

Apple cider vinegar is a good way to keep ticks and fleas away from dogs.  Mix a tablespoon of apple cider vinegar in your dog’s food.  Another great way to treat dogs for ticks and fleas is to spray your dog with apple cider vinegar immediately after thoroughly bathing your dog.  Washing your dog with blue dawn soap is also a well-known home remedy for treating dogs.  Let the apple cider vinegar air dry, and then comb out the dead ticks and fleas.

You can also try bathing your dog with diluted Head and Shoulders shampoo.  It will irritate the ticks and fleas and they will leave your dog.  If you are worried your dog brought fleas and ticks inside your home, spray your home with Citrus Spic and Span.  It will kill fleas and ticks instantly, as well as freshen up your home.

If you would like to find a quality veterinarian in your area that knows more about different types of dog treatments for ticks and fleas, TalkLocal can help connect you.  TalkLocal can also put you in touch with the top pest control professionals in your area to help get rid of ticks and fleas in your home.

Water Leaking from Under Glove Box

Friday, November 16th, 2012

Water Leaking from Under Glove Box Auto Repair

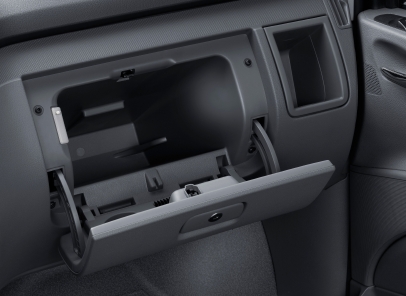
There are many reasons why there is water leaking from under your glove box.  It is a surprisingly common problem with many possible fixes.  The following is a list to help you sort out the problem.

One of the most common problems is water leaking from a blocked AC hose.  In order to resolve this clog, try the following steps:

1.  Lift the hood and go towards the passenger side of the vehicle.  There you will find the AC drain, an “L” shaped boot directing towards the ground.

2.  Remove the tube from the place where it connects to the rest of the vehicle.

3.  Inspect the tube to see if it is clogged.

4.  Remove any debris or dirt from the tube.

5.  Replace it back into its original position.

If the problem still persists, there are still many places to check.  Give the drain vents located near the fender a look.  There may be dirt or leaves built up creating a block.  In addition, there may be a clog underneath the battery.  This will require some expertise on your part to deal with the problem effectively and safely.  Finally, check out the sunroof and doors to make sure there is no debris making it difficult for these objects to properly seal as they close.

If you are still having difficulty locating the problem, or simply want to make sure everything is done with expertise, hire a professional.  Use TalkLocal to be connected to a highly rated auto repair technician today.  Simply enter a brief description of your service needs along with your location and availability, and TalkLocal will do the rest.

Garage Auto Lift

Thursday, November 15th, 2012

Garage Auto Lift Garage Door Repair

A garage auto lift is a device that elevates a vehicle inside a garage. They can open up a lot of space to be used for storage. There are various types of garage car lifts to choose from. Depending on your situation, different auto lifts will be better than others for you.

Why would you use a garage auto lift?

Auto lifts are typically used for cars that are not driven very frequently. For example, if you have a car that is being worked on, it may be time to store the car until you can resume work. In addition, many sports cars or luxury cars are only driven during certain seasons, so the rest of the year it is more efficient to store the car out of the way and avoid paying someone else for garage space. In addition, boats, ATVs, motorcycles, and snowmobiles can also be stored with the proper equipment.

Freestanding garage auto lifts come in different shapes and sizes. Typically, they are sold as either a 7000-pound limit or as a 9000-pound limit. The 7000-pound limit lifts are typically used for sports cars and ATVs, whereas the 9000-pound lifts are used for larger vehicles such as trucks. In addition to four-post lifts, there are also two-post lifts.

Along with creating storage space, lifts can be used when you want to elevate your vehicle to do repair work, such as changing the oil. These lifts are much less expensive than the storage lifts. They are very handy tools to have around your home. While it may be an upfront cost toward your car, doing repairs on your own can save you a lot of money compared to taking your car to the shop.

Whether you need auto advice or want some manual help, check out TalkLocal. You will be connected for free to a professional right in your neighborhood! Your car troubles will be solved!

Can you Change the Processor in a Macbook Pro

Thursday, November 15th, 2012

Can you Change the Processor in a Macbook Pro Computer Repair

Everyone loves speed — fast cars, fast food, fast computers, etc. Computers can be made quicker by upgrading the processor or increasing the RAM on the computer. At this point you may be thinking, can you change the processor in a MacBook Pro? The quick answer is yes, but it is extremely unadvisable because doing so voids your warranty and risks the condition of your laptop. Not all computers can have upgraded processors and the MacBook Pro is a part of that list.

Upgrading your MacBook Pro’s processor is a very complex process that the typical person (and even more seasoned techies) will not be able to follow. Apple chooses to solder their CPUs in their laptops rather than including a socket that would allow you to upgrade your processor (like most laptops have). This means that to upgrade your MacBook Pro’s CPU, you will have to open up your laptop. If you’re wondering why Apple does this, you won’t need to wonder much longer. Apple does this because not only does it force users to purchase a new machine rather than upgrading, but it also allows Apple to make their laptops slightly thinner.

In any case, the MacBook Pro’s processor is soldered onto the logic board and cannot be replaced, so unless you are in a destructive mood, we would not advise you to change the processor. Doing so will void your warranty instantly, meaning you will be held responsible for anything that may go wrong.

Of course, that’s not to say that changing the processor in a MacBook Pro is impossible, only very difficult. If you really wanted your MacBook Pro to have an upgraded processor, you could ask a computer repairman to take a look at it. If you’re searching for a capable and reputable computer repairman, consider using TalkLocal to find a capable and reputable computer repairman for you. TalkLocal is a free service that will connect you with top-quality, computer repair companies in your neighborhood within minutes. Just enter in your specific problem, location, and availability, and up to three companies will call YOU directly.

How to Find Main Drain Cleanout

Thursday, November 15th, 2012

How to Find Main Drain Cleanout Plumbers

Are your toilets, sinks and showers all stopped up?  You might have a clog in the main drain that connects to the city’s plumbing system.  In this case, you need to find the main drain cleanout in order to clear the clog.  Read on for more info on how to find the main drain cleanout.

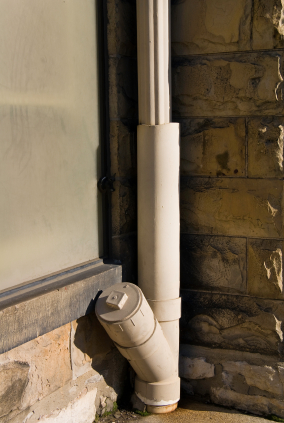
A main drain cleanout will look like a 3- or 4-inch wide pipe with a cap that has a square knob on the top.  It will most likely be popping up from the ground.  The first place you should look is outside your home.  Try looking in the front yard, close to the walls and behind/under bushes near your home.

If you can’t find it there, try looking on the sides of your house.  Again, stay close to the walls, and focus on the areas near the bathrooms.

If you fail to find it outside, you may need to look inside your house; try the basement and near/behind your toilets.  In some cases, the main drain cleanout may be behind or covered up by drywall.  You could choose to tear down parts of the drywall to look for it, but beware that this may get a little messy.

Once you find the cleanout, you will need a pipe wrench to loosen the cap.  Twist and remove the cap slowly, as you will likely see water flowing out as you loosen it.  After removing the cap, clear out the contents at the surface.  Wear gloves and keep a trash-bag nearby.  You might need a plumber’s snake to reach further down into the pipe to clear out the rest of the clog.

If you can’t locate the main drain cleanout, it is also possible that your house does not have one.  In this situation, you will need to contact a plumbing company for other solutions.  Use TalkLocal to connect you to multiple highly rated plumbers in your area.

What is Roof Decking Material

Thursday, November 15th, 2012

What is Roof Decking Material Roofers

What is Roof Decking Material?

If you’re dealing with your home’s roof, you may be asking yourself “What is roof decking material?” When people refer to roof deck, they are referring to a special layer of roofing material.  This is the layer put down between the primary structure of the home, such as the trusses and joists, and the insulation/weatherproofing layer. This is a very important part of roofing because is ties all the structural parts of the roof together.

There are many different types of roof decks.  You can get roof pavers, OSB sheathing, plywood sheathing, wood groove, corrugated metal, reinforced concrete, or grancrete encapsulated polystyrene.  Some of these materials are specially engineered to be stronger so that they can hold more weight.  This is helpful because then you can then put in roof patios or gardens.

Roof decking creates the base for the roof covering and increases its rigidness.  Installing roof decking is similar to the process of installing wall sheathing.  The only difference is that the material is much thicker.  There are certain requirements for roof decking, so you should always first check the building code for your area.

Roof decking protects from rain, cold weather, shingle damage, etc.  It provides more protection and lays flatter so that it stands stronger against any severe weather.  The roof deck of your roof can be compared to the foundation of your home because it is the most important part.  It ties all the structural components together.  The point of the roof deck is also to shape the roof so that the shingles will form properly.

Other inquiries

If you have more questions about roof decking materials, try talking to a professional so that you can get the best help possible.  The easiest fastest way to get in contact with reliable local roofing companies is to use TalkLocal. Just put in your problem and availability and let them do all the work.  Within minutes you will be connected to someone who should be able to help you out.

How to Fix Cracks in Exhaust Pipes

Thursday, November 15th, 2012

How to Fix Cracks in Exhaust Pipes Auto Repair

Your exhaust system is made up of many different parts: the piping, the manifold, the catalytic converter, and the muffler. When one or more of these parts breaks down, it can pose as a serious problem. Sometimes the exhaust pipe on your car will crack or malfunction because substances such as salt wear down the metal of the pipe and cause breakage, which could cause dangerous gas leaks and a lot of noise.  If your exhaust pipe does indeed crack, you can patch it up as a temporary solution. However, you should replace it as soon as you can. Read on to learn how to fix cracks in exhaust pipes.

The first step you need to take when repairing the cracks in an exhaust pipe is to clean the area around the crack.  This ensures that you will get a good solid seal around the affected area.  You should turn your car on until the temperature is around 70 degrees Fahrenheit.  At this point, the metal should be warm to the touch.

You will need some special tape to patch up the crack.  Remove the paper or plastic backing from both sides of the tape.  Wrap up the broken area until it is completely covered.  You should try to overlap it until the coverage is about an inch thick. You and secure the tape even further by wrapping a wire around it.

If you do not want to use tape and would prefer putty you should dampen the area around where you want to apply it.  Administer the putty with a knife and press hard.  You can put your car in idle for about 10 minutes to allow the putty to dry.  This should hold you over until you can replace the pipe.

If you are looking for professional help to help with your cracked exhaust pipe, use TalkLocal to be put in contact with reliable local auto repair businesses.  You don’t have to do any work! Simply input your problem and availability and within minutes you should be connected to someone who can help you out.

How to get rid of Broadleaf Weeds

Thursday, November 15th, 2012

How to get rid of Broadleaf Weeds Landscapers

Figuring out how to get rid of broadleaf weeds can be a tricky task, especially if you value getting rid of broadleaf weeds using the organic route. Any type of weeds can be annoying but broadleaf leaves can be especially troublesome because they usually grow in pairs. Check out the rest of this article for tips on how to get rid of these pesky weeds.

First, what are broadleaf weeds?

Broadleaf weeds blossom in pairs and and have wide, flat leaves, hence their name. Broadleaf weeds are all over the place. One of the most common types of broadleaf weeds is the dandelion. In order to keep broadleaf weeds from forming, one of the best practices is to keep your lawn and garden well kept. Trim, prune, and cut at the appropriate times.

How do I get rid of dandelions?

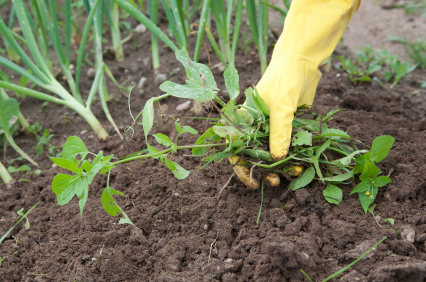
Dandelions are tricky because you cannot just remove part of the dandelion and expect it to wither away and never arise again. Dandelions must have their entire bodies removed in order to stay away. Either remove the dandelions by hand or use a dandelion weeder. After you have removed the dandelions, fill the empty space with new lawn seeds to prevent the dandelions from forming again. Pesticides are another option for killing the weeds.

What can I do besides using a ton of chemicals and pesticides?

One option that doesn’t use pesticides throughout your lawn is adding corn gluten to your fertilizer as you spread the fertilizer throughout the lawn. In addition, you can walk through your lawn and use a shovel to dig up the weeds.

Still need help with getting rid of the weeds? Check out TalkLocal, where you will be connected directly to local, high quality professionals that can help you with your landscaping needs at the time that is most convenient for your schedule. Check it out!