
How to Get Rid of Wasps

Tuesday, November 20th, 2012

How to get rid of wasps Pest Control

If you’ve ever been stung by a wasp, you know that having a wasp’s nest in your yard is a big problem. Wasp removal can be tricky, but knowing the correct strategy for the right type of wasp will help you successfully remove these pests. Learn how to get rid of wasps with the tips we’ve provided for you below.

It is important to distinguish the two types of wasps: solitary and social. The solitary wasp is usually very docile with a very long, thin body and waist. These wasps are not territorial and rarely sting. They are actually considered beneficial in the gardening sense because they prey on garden pests such as aphids and beetles. To remove solitary wasps, simply fill a spray bottle with citrus oil extract. A quick spray will kill these pesky solitary wasps on contact.

Social Wasps

The United States has three common types of social wasps: paper wasps, bald-faced hornets and yellow jackets. Social wasps have nests and are usually the kind of wasp that people want controlled.

– Paper Wasps: These are the most docile of the social wasps and are usually only considered pests in high traffic areas. They build intricate nests, much like the honeycomb, without an outer shell like most bee and wasp nests. To remove paper wasps, purchase a can of pressurized wasp killer and spray the nest in a sweeping motion during the night.

– Bald-Faced Hornets: Hornets are fearsome looking, but are usually not looking for trouble. They live in aerial nests and tend to be less aggressive than yellow jackets. To get rid of hornets, you should also use a can of pressurized wasp killer to spray the nest from a distance during the evening. Bring a flashlight, too, if you’re not certain where the entrance to the nest is.

– Yellow Jackets: Yellow Jacket wasps are extremely territorial and aggressive. Their thick waists and bright yellow patterns easily identify them. The best way to get rid of yellow jackets is to identify the nest and then pump enough poison into the nest to kill all of the wasps in one shot. Obviously, this is easier said than done. To find the nest, you should wait until dusk when all the yellow jackets will be returning to the nest. You can pick out the high amount of flying insect traffic in the evening sun. Once the nest is identified, use a can of non-projectile wasp killer to spray the nest later at night. Spraying the nest at night means there is less of a chance that the wasps will come out to fight.

Before spraying any nests it is a good idea to wear gloves and multiple layers of clothing to avoid stings. Move slowly around the nest because sudden movements can attract attention.

Nest Removal

Once you are sure all the wasps have been killed, you can safely remove the nest. For underground nests, it is probably safe to fill the nest with dirt and gravel. You can knock down the nest if it is aerial. This should end your wasp problem until the next migration cycle.

If you’re consistently experiencing problems with wasps, you should consider hiring a trained professional to eliminate the problem. TalkLocal can connect you to several highly rated pest control professionals in your area within minutes. Simply give us a brief description of your service needs along with your contact information and times available, and TalkLocal will do the rest.

How to Floss

Tuesday, November 20th, 2012

How To Floss Dentist

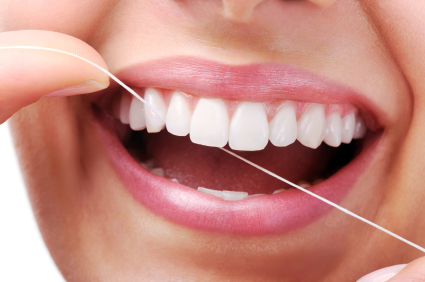
Did your recent trip to the dentist not go as well as expected? We’ve all gotten lectured about flossing since before we can remember, but if you’ve finally decided to listen to your dentist, make sure you’re doing it right. Proper flossing will remove plaque and food particles in areas that your toothbrush cannot reach. Learning how to floss will help prevent tooth decay and gum disease, which is why flossing is so strongly recommended by your dentist

How to floss:

1. Start with a long strand of floss, around 18 in. long.

2. Wind most of the floss around your middle finger, so you’ll have an inch or two to work with.

3. Slide it between each tooth. You’re motion should go up and down, ensuring you cover the entire area.

4. Curve the floss around the base of each tooth.  Go all the way down to your gumline, but don’t force the floss.

5. Every time you move to a different tooth, make sure to use clean sections of floss. Otherwise you’re just spreading plaque and food from tooth to tooth.

If  you’re noticing problems with your teeth that flossing is not helping, you should schedule an appointment with you dentist. If you need a new dentist, try using TalkLocal to find one. Our free online service will provide numerous local options for you within minutes.

What Does a Roof Replacement Cost

Monday, November 19th, 2012

What Does a Roof Replacement Cost Roofers

What does a roof replacement cost? Replacing a roof yourself generally costs less because you don’t need to pay yourself for the labor for the project. However, you should remember the risks involved in doing jobs like this yourself. If you are inexperienced or working with a difficult roof, you may accidentally injure yourself. If you are preparing for inclement weather or need the roof replaced quickly, it is best to hire a professional team to assist you.

As far as materials go, here are the corresponding prices–assuming that the roof replacement is done for an average-sized house.

Roofing Prices by Type

Asphalt: $700 – $3,700 per roof

Slate: $17,000 – $84,000 dollars per roof

Wood Shingles or Shakes: $7,000 – $20,000 per roof

Concrete Tile: $8,000 – $21,000 per roof

Ceramic Clay Tile: $12,000 – $21,000 per roof

Steel: &5,000 – $22,000 per roof

Aluminum: $12,000 – $24,000 per roof

Copper: $25,000 to $40,000 per roof

You will also need to purchase the correct tools for the job. Purchase at your own discretion. Some of the materials are not necessary, but will make the job a lot easier. For example, the chalk line will be easier than trying to hold the tape measure in place to create a straight edge.

Suggested tools

Hammer

Crowbar

Ladder

Tape Measure

Chalk line

Caulking gun

Roofing Nail Gun

Shovel

Box cutters

Hammer Stamp

Other Factors in Pricing and Hiring a Professional

Provided that you hire a professional to do your job for you, there are various factors that can affect the pricing. One of them is the accessibility of the roof. If your roof is higher up from the ground and requires more effort to reach, the workers will charge you more.

Another aspect of accessibility is the slope (angle) of the roof. Steep roofs require more labor, driving up the price. Additional costs may be added to the job depending on where you live. Hurricane-prone areas have special requirements for the roofs, further increasing labor.

TalkLocal can help with finding the best local roofers to fix your roof quickly, saving you time and energy in a stressful situation.

How to Replace a Toilet Seal

Monday, November 19th, 2012

How to Replace a Toilet Seal Plumbers

How to Replace a Toilet Seal

Potty, john, loo, lavatory, the toilet. It goes by many names but it’s here for the same thing. A toilet is an integral part of our everyday lives. Furthermore, the toilet seal on your commode is very important because it prevents damage to your floor. Read more to learn how to replace a toilet seal.

The seal is located at the bottom of the toilet. It rests on the floor and is a gasket made out of a ring of wax. If you want to replace it you should be able to get another one from any hardware store. It is an inexpensive part, yet it prevents major damages to the floor and sub floor. Replacing your flooring is a lot more expensive than just the seal.

Before doing anything with the toilet or the seal, you should shut off the water supply in your home.  Flush a few times to empty out both the tank and the bowl.  You should also use a sponge to soak up and remove any water left behind.  When replacing the toilet seal, you need to wear gloves and make sure that the temperature is set at at least 70 degrees Fahrenheit so the wax that makes up the seal is very pliable.

The first thing you should do when replacing the toilet seal is remove the caps and nuts that hold the base of the toilet bowl to the floor. You should now disconnect the water supply line. Gently move the toilet bowl around to break the current seal completely. Remove all the old wax remnants.

Now unwrap the new seal and place it all around the toilet opening round side up. Make sure that all the bolts are in place. Lift the toilet and place it over the flange/seal. Now you can do the actual sealing. Make sure the toilet bowl is level before replacing the nuts and caps and tightening them. Then, reconnect the water line and turn the water supply on. Flush and make sure that the water levels are correct. Make sure to wash your hands with anti-bacterial soap.

Continuing Problems

If you continue to have problems with your toilet bowl seal you should seek professional help. Use TalkLocal to be put in contact with reliable local plumbing businesses within minutes.  You don’t have to do any work! Simply input your problem and availability and TalkLocal will do the rest.  Almost immediately you will be connected on the phone with someone who can help you out.
 

How to Restart Windows 8

Monday, November 19th, 2012

How to Restart Windows 8 Computer Repair

Windows 8 is the newest operating system from Microsoft and is designed primarily for use with tablet computers. Unfortunately, even experienced users of previous Windows versions will feel as though they’ve been violently and unexpectedly thrust into alien terrain.

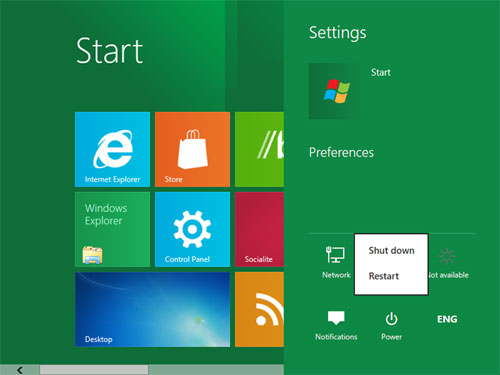
Many users have reported finding this operating system’s Shut Down, Restart, Sleep and Log Off features to be an exercise in frustration. Unlike Windows XP, Vista and 7, which conveniently and sensibly placed these options in the Start Menu, Windows 8 seems determined to get you to jump through hoops just to do something as basic as rebooting your computer. Fortunately, this guide will teach you how to restart Windows 8 with relative ease.

If you’re looking for the shut down and restart options in your Metro Start Menu, you’ll be sorely disappointed. All that you’ll find there are the options for logging off of your Windows account or locking the machine to prevent unwanted access. There are two ways that you can go about restarting or shutting down your computer in Windows 8.

1. The first way is to open up your Charms box by pressing the Windows+C keyboard shortcut combo. This will bring up a dialog box that contains additional PC options. Once you’ve opened the box, click on the Power button to display a list of more options. Pick the action you wish to perform.

2. The second and simplest way is to use the classic keyboard shortcut combo, Alt+F4, from the desktop. This will bring up another dialog box, but it will look much more similar to a Windows XP-style box. It will contain a drop down menu with options for switching users, logging off, shutting down or rebooting. Before rebooting using this method, it’s strongly recommended that you save any open work and close all of your open or active applications.

If you’re still having trouble rebooting your computer, you may need to call in a professional who is familiar with this operating system. Fortunately, TalkLocal makes it easy to find one in your area.

How to Enjoy the Onslaught of Thanksgiving Foods and Still Stay Fit

Monday, November 19th, 2012

How to Enjoy the Onslaught of Thanksgiving Foods and Still Stay Fit Personal Trainer

During the holiday season, Americans pack on an average of  8 whopping pounds per person. Then, come New Year’s, many of those people make the resolution to drop that excess weight and attempt to eat healthier. However, knowing how to enjoy the onslaught of Thanksgiving foods and still stay fit  ispossible by following a few simple guidelines.

Watch Your Intake

People have a tendency to let their taste buds take over during the holidays—especially Thanksgiving. One way to enjoy the onslaught of Thanksgiving eats and still stay fit is to watch how much you’re eating and exercise some portion control. You can do this by counting calories or simply by sticking with small portions of the high-calorie treats that everyone else is enjoying in large doses. You can also decrease your caloric consumption by avoiding alcohol and excess desserts, both items chock full of sugar and empty calories.

Stick with Your Exercise Program or Start One

If you already work out, stick with your existing program. If you aren’t exercising, begin doing some light to moderate exercise, such as walking, bicycling or easy weightlifting. For those who already have a workout routine, it can help keep the extra pounds away if you can manage to sneak in an extra workout or two. Burning those extra calories can help to make up for any Thanksgiving overindulgences.

Work with a Trainer

People who work with personal trainers often make greater health and fitness gains than those who don’t. A trainer will hold you accountable for your eating habits as well as your exercise habits. Rather than being accountable only to yourself, you’ll have to explain to your trainer why you overate at a holiday feast or why you haven’t been showing up for exercise sessions. In most cases, a trainer will also push you harder than you will push yourself, challenging you to do one more rep or one more mile. Over time, those extra reps and miles add up to fitness gains. A personal trainer can also help you define realistic fitness and weight loss goals, and he or she will have the knowledge and expertise to help you meet those goals.

If you would like to find a quality personal trainer or exercise specialist, search TalkLocal to find a fitness professional you can trust.

How to Move Cats Long Distance

Monday, November 19th, 2012

How to Move Cats Long Distance Veterinarians

Moving over a long distance can be stressful not only for you, but also your feline friends. Long distance moving with your cat can be a challenge, but the following advice will help you to know how to move cats long distance.

Test Drive Before the Big Move

If you have ever driven your cat to the vet, you probably know how they react to a car ride. Make sure you familiarize yourself with your cat’s car ride behavior before the long trip. They will probably react the same to a long car ride as they do to a short one.

Use a Pet Carrier or Crate

It may be tempting to let your cat roam free during the trip, but its best to use a pet carrier or collapsible crate. Just like humans needs seatbelts to keep them safe and secure in a car, your pet needs to be secured inside a carrier. (There are no laws regarding this, but it is just a safer choice). Larger crates can accommodate more than one cat. Throw in a comfy blanket to encourage them to take a nap. It’s also more comforting if your cat can see you, so keep the crate close by.

Prevent Kitty Carsickness

Nobody wants to deal with a carsick cat, especially during a long ride. To prevent a sick kitty, it’s best to let your cat travel on an empty stomach. Feed your cat less than normal if food is necessary. Otherwise, carsickness may be imminent.

To Sedate or Not to Sedate?

You may want to sedate your cat before the long car ride. This decision depends on how your cat reacts to car rides. If your cat is easily stressed by travel, you may want to use sedation. If your cat tends to curl up and fall asleep during car rides, sedation may not be necessary. Consult your veterinarian for suggestions.

To get in touch with a local vet, use TalkLocal to talk to one in minutes! Just file a quick service request online and up to three reliable vets will call you almost immediately.

Speedometer Not Working

Monday, November 19th, 2012

Speedometer Not Working Auto Repair

A working speedometer provides the driver with valuable information about the car’s speed.  Modern speedometers use a magnet on the rotating shaft and a magnetic sensor to calculate the car’s speed.  Older cars use an electric current on the rotating shaft and, by measuring the magnetic force produced, one can get a speed reading.  However problems with a cable replacement in older speedometers and speed sensors in newer ones can cause this tool to not function properly.  Is your speedometer not working?  Read on for information on how to fix this problem.

Finding a cable replacement

1.  Remove the engine cover and doghouse from the car in order to remove the cable.

2.  Remove the bolt from the dashboard and access the old cable.

3.  Remove the nut on rotating shaft and pull the cable through the passage.

4.  Remove the clamp from the transmission and engine compartment.

5.  Tighten the nut on the rotating shaft and fix the square end of the new cable in the adapter.

6.  Using the passage we used to remove the old cable, pass the new one through and tighten the bolt at the rear end of the cable.

7.  Put the clamps and engine cover back on you removed in the first step of the process.

Speed sensor replacement: front wheel drive vehicles

You will find the speed sensor behind the engine and above the trans-axle.

1.  Remove the connecting hose, air cleaner and electrical connector.

2.  With 10 mm socket, take out bolts keeping the speed sensor init’s place.

3.  Unscrew the sensor to take it out.

4.  Replace the sensor in place and tighten the bolts we previously removed around it.

5.  Reattach the hose, air cleaner and the electrical connector to the sensor.

Speed sensor replacement: rear wheel drive vehicles

You will find the speed sensor on the driver’s side behind the transmission.

1.  Raise the vehicle up on the drivers side and keep it there using a car jack.

2.  Disconnect electrical connectors present on the sensor and take out bolts keeping the sensor in place, using a socket.

3.  Take out the sensor carefully and fix a new one in its place.

4.  Attach the electrical connector to it and tighten it.

It is necessary however to consult expert opinion and allow the expert to figure out what is wrong.  Many times a replacement of a part may not even be needed and a mechanic can guide you as to what  needs to be done.  TalkLocal can quickly connect you to an auto repair professional in your area in a matter of minutes.

What to do When Turkey is Stuck in the Garbage Disposal

Friday, November 16th, 2012

What to do When Turkey is Stuck in the Garbage Disposal Appliances Repair

Cleaning up after Thanksgiving dinner is a big job. Invariably, some tough parts of the turkey carcass get shoved into the garbage disposal along with bits of yams and other leftovers scraped from dinner plates. When the switch is thrown to grind it up, there is nothing but a humming sound of the disposal motor trying to work. So here’s what to do when turkey is stuck in the garbage disposal…

Wooden Spoon Trick

1. Shut off the power to the disposal at the breaker box. Helpers may accidentally hit the switch thinking it is for something else. An old wooden spoon is the perfect tool to get a garbage disposal unstuck. Invert the spoon and insert it handle side down into the disposal. The spoon needs to be long enough to reach the bottom of the disposal.
2. Work the spoon around the inside perimeter of the bottom of the disposal. The loose objects should move about freely. Feel for something stuck against the outer edge right at the bottom. It should be easy to tell the metal parts of the impeller blade from bones and other food items. When the stuck object is found, work it back and forth with the spoon to dislodge it.
3. Use the spoon to apply pressure to the impeller at the bottom too. It is just a disk that spins. When the impeller moves back and forth easily, the disposal is unstuck. It may be good to remove the food object that caused the problem in the first place.

The Pop Up Thermometer

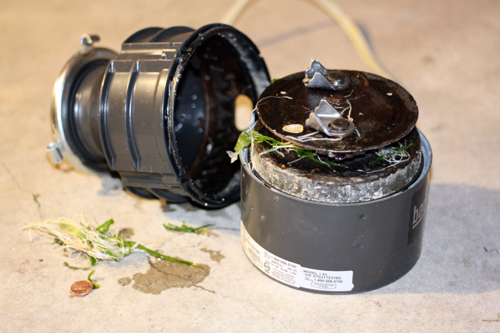
The plastic thermometer placed in turkeys that let the cook know when the proper internal cooking temperature has been reached are notorious for getting stuck in disposals. They are made of plastic and have a metal spring. They are sized just right to get stuck between the impeller and outer edge of the disposal.

1. To remove a stuck thermometer, empty the disposal using your hands for solids and a ladle for liquids. Carefully explore the bottom of the disposal with your hands. The impeller can be sharp in spots. Move slowly. Use a pair of regular or needle-nose pliers to grasp the thermometer. Carefully and slowly work it free and remove it.
2. These two things fix most of the problems of a stuck garbage disposal during the holidays. If the impeller is freely moving, the small drain of the disposal may be clogged. That requires disassembly of the drain pipe to clear it.

If these methods fail you, call TalkLocal to find a service professional to help you now!

How to transfer contacts between Android and Blackberry

Friday, November 16th, 2012

How to Transfer Between Android and Blackberry Computer Repair

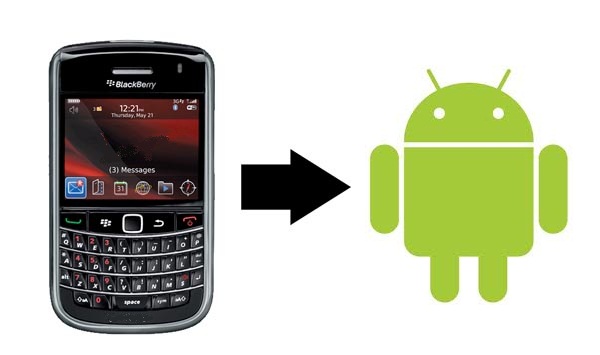
Congratulations on your new phone. Whether you simply needed a newer phone or wanted more control over your device, you’re sure to be happy. Of course, you don’t want to leave everything behind with your old device. Fortunately, both Android and BlackBerry work with Google Sync, which allows you to transfer contacts between an old and new phone regardless of which operating system you’re moving to. You don’t need to worry about losing essential phone numbers or email addresses if you follow these step-by-step directions that will teach you how to transfer contacts between Android and Blackberry.

Contacts to BlackBerry

1. Open your contacts app on your Google smartphone.
2. Touch the “Menu” button. Tap “Manage Contact.” Choose “Copy Contacts.”
3. Pick “Phone” as the cop source. Choose “Google” as the destination. Your contacts will copy to your Google sync account.
4. Launch Google Sync from your Downloads app on your BlackBerry. If you do not already have to app, go to “m.google.com/sync” to download Google Sync. Touch “Install Now” to install.
5. Type in your Google account username and password.
6. Choose which information to sync and when to sync it on the screen that appears. For instance, you can choose to manually or automatically sync contacts. You will also be able to sync reminders to your phone. If you choose to sync your calendar as well, it will ask how far in advance you wish you to sync your calendar.
7. Choose “Save” to begin syncing. This process may take some time if you have many contacts.

Contact Syncing From BlackBerry 

Moving from BlackBerry to Android is an easy process, too.
1. Open Google Sync on your BlackBerry.
2. Choose “Sync Now” to make sure the most current contact information is added to your Google account.
3. Open the “Accounts & Sync” app on your Android phone from the gear icon.
4. Touch “Google.” Touch to add a checkmark to “Sync Contacts.”
5. Touch “Sync Now” to sync.
6. Open your contacts app. Touch the arrow next to “Phonebook” to open the drop down menu. Make sure “Google” is checked. You will now see all your synced contacts.

A similar process lets you sync contacts between your iPhone 5 and a smartphone with a different operating system. If you find it difficult to transfer contacts or run into errors during the process, TalkLocal is here to help. Schedule an appointment to move your contacts today!