Computer takes Long to Load Videos

Wednesday, September 12th, 2012

Computer takes Long to Load Videos Computer Repair

Nothing is more annoying than waiting for something to finish loading. If your computer takes long to load videos, you don’t have to put up with twiddling your thumbs. Thankfully, there are a few steps that you can follow to ensure that you are optimizing the time that it takes for videos to load on your computer.

Download Video

This may seem like an obvious solution but it is oftentimes an option that we forget. If you want to show a video from the Internet for a presentation, it may be safer to download the specific video and then simply replay it from your computer. This takes away the risk of faulty Internet connection when you need the video for an important matter.

Upgrade your Internet Connection

If you are consistently have problems with loading videos, it may be time to upgrade your system. Check with your neighbors and see which provider they are using. Perhaps you will have to split off from the rest of the building and go with a higher-grade Internet provider.

Consider Storm Damage

If you just had a bad storm in the neighborhood, the bad weather may be lending a hand to your temporary problems. If this is the case, there is not much you can do, but rest assured that relief will come. If the service providers know about the problem, more than likely they are working hard to reconnect your Internet so there is better quality of service.

Still having issues loading videos on your computer or with another problem you can’t seem to fix? Check out TalkLocal. You will be directed to a professional right in your neighborhood within minutes! It is quick, free, and easy to use!

Recover Data from Water Damaged Hard Drive

Tuesday, September 11th, 2012

Recover Data from Water Damaged Hard Drive Computer Repair

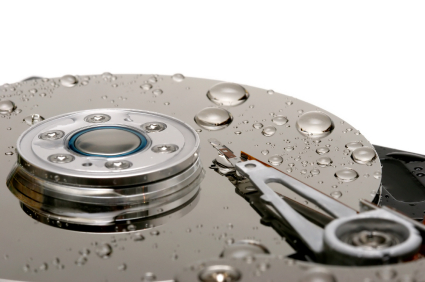
Did your computer have a bad encounter with water recently? Well, the chances that the circuitry on your computer may have been fried, especially when the computer was in operation when this happened. The next logical step is to save your files from the dead computer. Read this guide on what to do to recover data from water damaged hard drive.

Recovering the Data

The first thing to realize is that this more than a normal job you can do alone. Although recovering data from a drowned hard drive is possible, it is advised to use a specialist’s expertise because wrong moves could jeopardize your data.

As always, cut all sources of power to the hard drive by unplugging it. Operating under dangerous conditions could further damage the data as well.

And although this seems counterintuitive, do not make any artificial attempts to dry out your wet hard drive. Doing so could solidify the residue in the water and further the damage the data. If it was pure water, then it is fine; if not, then resist the urge to dry it.

Package the hard drive to send to a specialist. Secure your hard drive inside the package by stuffing the rest of your box with cotton, or some other soft material that will not damage the hard drive. Make sure it does not shake around inside the package, as this could cause more damage. Seal the package tightly so that no other liquid/gas can get into the package. Once you have done these steps, your package should be ready for a specialist.

Take note that specialists around your area may all be busy if your area has suffered a flood/etc. The demand for the specialists’ service would outnumber the available supply, making a long line if you needed their services.

Additional Help

If you need to find professional help to recover data from water damaged hard drive, TalkLocal can help with finding the correct local experts in this case, saving you time and energy in what may be a stressful situation.

Types of Plants for Japanese Garden

Tuesday, September 11th, 2012

Types of Plants for Japanese Garden Landscapers

Japanese gardens are famed for their unique look.  They are traditional gardens that aim to create miniature idealized landscapes.  These zen grounds are favored for their fancifully perfect atmosphere.  Many people go to Japanese gardens specifically to meditate and relax.  Japanese gardens originated on the small island country but have spread to all parts of the world.  These popular alternatives to traditional backyards have become more and more common throughout the western world. Check out this article to learn about the different types of plants for Japanese gardens including common Japanese scenery types, garden types, and plants.

There are three types of scenery for Japanese gardens:

1)   Reduced scale method – all natural elements reproduced on smaller scale

2)   Symbolization method-  abstract, uses elements to symbolize bigger pictures

3)   Borrowed views method – uses elements to imply scenes different than reality

There are also two types of gardens:

1)   Tsukiyami –  consists of hills and ponds

2)   Hiraniwa – flat ground with elements on top

The common types of plants found in Japanese gardens are:

1)   Bonsai – everyday shrubs trained to look like old large trees in miniature form

2)   Evergreens – Japanese Black Pines, Himalayan white pines

3)   Deciduous trees – scarlet maple, willow, water oak

4)   Hedges – Japanese barberry, pittosporum, yew, weigela

5)   Flowers – irises, tree peonies, azalea

6)   Other – Moss, sweet flag, ardisia, spurge

Professional Help

If you have problems with choosing plants for your Japanese garden you should seek professional help.  For example, in Japanese gardening, trees are planted scarcely, so professional could tell you how far away you need to plant a tree and how big you should expect it to grow. Landscapers have extensive knowledge about what plants work best with your climate and backyard. Use TalkLocal to be put in contact with reliable local landscaping businesses.  You don’t have to do any work! Simply input your problem and availability and within minutes your should be connected to someone who can help you out.

How to get Rid of Water Stains on Windows

Tuesday, September 11th, 2012

How to get Rid of Water Stains on Windows Maid Services

You can view a million things in your backyard through your windows.  A couple of deer looking to graze, a beautiful sunset, or your children playing in the grass are among the few.  But when there are water stains on your windows these picture perfect moments can be ruined.  Water stains are the result of hard water and can be truly annoying.  You should try to get rid of water stains as soon as you can because otherwise they will only get worse and become a bigger hassle to clean.

How to get Rid of Water Stains on Windows

Before you do anything you should clean the window with plain water to get rid of all the easy to remove dirt and stains.

Vinegar and Water

When you want to remove water stains, you can concoct a homemade solution that will clean your dirty window.  You should prepare a solution of one part water and one part white vinegar.  Try to use water that is soft, which contains less minerals.  Minerals such as calcium, magnesium, and other metal cations are what cause hard water in the first place, causing the stains you see on the window.

Now you can soak a clean towel into the vinegar and water solution and then dab it onto the stain.  Hold the wet towel to the window for a few minutes keeping constant contact with the window.  The vinegar’s acid softens the mineral deposits, which should make it easier to remove. Using a new towel, wipe and rub the window to remove the spots.  You may need to repeat this process a few times in order to get rid of the harder stains.

Lime-A-Way and Lemon Juice

You can also try to use Lime-A-Way to remove stains. After this process is completed, you should try to use lemon juice to buff it up.  Lemon juice also has the softening abilities of the vinegar.  Spray a mixture of lemon juice and water onto your window and let it set for a little while.  Once this is done wipe it off with a clean towel and your windows should look as good as new.

Got maids?

If you prefer someone else deal with hard water stains on your windows, you can find reliable maid services using TalkLocal. Simply input your problem, availability, and location onto the website and within minutes, you should be connected on the phone to someone who can help you out.

My Sony TV will not Turn On

Tuesday, September 11th, 2012

My Sony TV will not Turn On TV Repair

My Sony TV will not Turn On

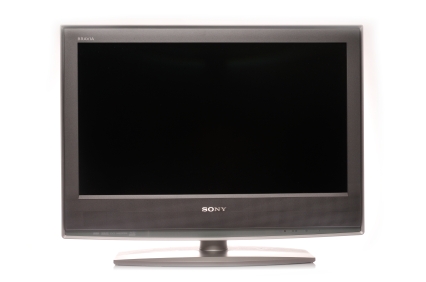
You come home and all you want to do sit, relax and watch some TV.  You pick up the remote and you press the “On” button but nothing is happening.  You might be wondering, why my Sony TV will not turn on.  Discovering that your TV will not turn on is a big disappointment when you go to sit down and relax. For starters, is that little light flashing on and off, telling you the TV is in stand by mode? If so, go over to the power supply and unplug it, then re-plug it. Hopefully, this does the trick. However, if your problem still persist with your Sony TV, do not despair because this is actually a common problem for Sony TVs.

Causes

There may be a number of reasons why your Sony TV is not turning on. A very common reason is that there is a buildup of moisture near the power supply. Sounds weird, right? But it is true. When there is too much moisture near the power supply, a little sensor goes off and does not allow the TV to work anymore.

How do I fix it?

First, unplug your TV from the wall or other power source. Then, in order to get rid of the excess moisture from your TV, you will need a hair dryer. Take a hair dryer and blow hot air near the power supply. The power supply for Sony TVs is usually located near the bottom right side if you are facing the front of the television. Run the heat of the hair dryer along the vents of the TV. Do this for a minute or two. Plug your Sony back into the power supply and test it out. Remember this is a long shot when trying to quick fix your television without professional help.

Since this is only a temporary fix, you may need more help. If this is the case and your TV is still not working, check out TalkLocal, a free concierge service. You will be directed within minutes to up to three local, high quality TV technicians who can help you with your problem at the time that is most convenient for your schedule.


How to Upgrade Your Computer (and Not Break the Bank)

Tuesday, September 11th, 2012

How to Upgrade Your Computer (and Not Break the Bank) Computer Repair

Computer repair and computer upgrades often go hand in hand, mainly because when something inside a computer breaks, it presents a good opportunity to get stuck in a replace a few components at once. But that process isn’t always the most cost-effective; in fact, many people decide that upgrading simply isn’t worth the expense. Whilst it’s true that there are a several parts of a computer which are pricey to replace – the main processor, for example – there are plenty more that can be replaced relatively cheaply if you find a good deal but have a big effect on performance. So let’s take some time to find out how to upgrade your computer including which parts of your computer you can upgrade cheaply, but which will also result in a noticeable performance boost.

Install new memory sticks (RAM)

Memory is one component that’s both low cost and easy to install. Even if you’re not a computer wizard, you should still be able to install sticks of RAM without too much trouble. If you have a 32-bit Windows operating system, you’ll be limited to 4GB of RAM, whereas if you have a 64-bit flavour of Windows, you’ll be free to install much more memory, depending on your OS. For example, if you have 64-bit Windows 7 Ultimate, you can install up to 192GB of RAM. You can find 2GB sticks of RAM for as little as $10, so it’s very cost-effective to upgrade. And the benefits you’ll see on your computer will be more stability, faster loading times, and the ability to run multiple apps at once.

Upgrade your power supply (PSU)

Many PC gamers have come across the problem of poor performance in certain games, and usually resort to upgrading their graphics card to make a markable difference. However, it’s not always this component that’s the source of the problem. Many modern graphics cards, including the latest GeForce 600 series, require at least 500-watt power supplies in order to run at their best. With most ‘package’ PCs coming with just 300-watt PSUs, you can see why people would run into trouble. A new PSU of at least 500-watt can be found from only $16 on the web, and they’re a piece of cake to install.

Invest in a middleweight graphics card

Speaking of graphics cards, these are also a key component that can be upgraded cheaply and make a real difference to performance – specifically to gaming and video playback. In a world of HD, having a good graphics card is almost essential. And now there are plenty of cards in the mid-range which are ideal for playing the latest titles as well as playback of HD video at 1080p. On top of that, a good mid-range card can also help with graphics editing software like Adobe Photoshop. At the present time, the best graphics cards for under $150 would be either the Radeon HD7770 or the GeForce GTX560 SE. Either of these will allow you to play the latest games and watch the latest movies in glorious HD.

Update your soundcard and system

Another cheap and easy way to boost your rig is to upgrade your soundcard and sound system. There are now lots of affordable 5.1 sound systems that offer top quality cinema-like sound for a budget price. All you’ll need is a low-cost 5.1 sound card, which are available for just a few dollars, and a good sound system from a manufacturer like Creative (available from as little as $57). This combination will bring a new dimension to your music, movies, and video games. Lots of people forget to upgrade their sound when they upgrade their computer, but it’s one of the best ways to maximise your experience without having to shell out too much cash. And you’ll be able to enjoy movies in awesome 5.1 digital sound – the way they’re meant to be heard.

So there you have it: four cheap ways to turn your rig into a budget monster. But don’t forget: if you’re not confident in upgrading the parts yourself, or if you have any computer issues that require a professional to repair, you can use TalkLocal to locate computer repair services in your area. Just use TalkLocal to find a local computer repair service you can trust, then focus on the more important thing: enjoying your newly upgraded computer!


Transfer Turbotax to New Computer

Monday, September 10th, 2012

Transfer Turbotax to New Computer Computer Repair

When you get a new computer, the first thing you need to do is move all your important files to the new machine, such as your TurboTax files. You need a flash drive, CD-ROM, or other portable storage device to hold the tax return file. Make sure to backup the file somewhere safe before copying!

Transfer Turbotax to New Computer:

If you use Windows:

1. Click the Start menu button.

2. Type .tax2011 in the Start Search field at the bottom of the menu. As you type, matching files will appear in the Search pane. Replace 2011 with the relevant tax year.

a) Make a note of the file’s location or path. By default, TurboTax saves tax files in the My Documents > TurboTax folder.

c) From the TurboTax File menu, choose Open.

d) Browse for the file’s location on your computer to open it.

If you use a Mac:

1. In the upper-right corner of your desktop, click the Spotlight (looking glass) icon, and then type tax in search field. Search results appear as you type.

a) Tax return files will appear in the Documents section. The default name for tax files is the primary taxpayer’s name followed by the 2-digit tax year.

b) If you don’t see your tax return, click Show All at the top of the list and go to List view. In the Kind column, look for TurboTax…Tax Return.

Now connect the portable device to your new computer, and drag the file into whichever folder you want to hold your TurboTax files in. Don’t click on the file and open TurboTax instead, but first make sure it’s already installed on the new computer. Then from TurboTax, just find your tax return file and open it.

If you’re still having issues finding, transferring, or opening the file, you could always find a local professional immediately on TalkLocal to help you.

Top Safety Tips for Taxis

Monday, September 10th, 2012

Top Safety Tips for Taxis Taxicabs

When traveling in a city, taking a taxi is the most direct way to get from point A to point B.  They can be more expensive, but a lot more efficient and time saving.  Taxis can also be dangerous, so make sure to be safe when traveling.  Follow our top safety tips for taxis to avoid getting into a dangerous or harmful situation.

20 ways to stay safe when taking a taxi:

1)     Look for taxi stands

2)     Make sure the taxis are similar looking

3)     Check the taxi’s phone numbers

4)     Look for a taxi meter/radio

5)     Know generally where you are going

6)     Keep your luggage close

7)     Be cautious of sharing a cab

8)     Know who to call in case of emergencies

9)     Travel in pairs or groups

10)     Look for someone who kind of speaks your language

11)     Learn a bit of the local language

12)     Split up where you keep your money so you don’t show them everything you have

13)     Watch how you dress (don’t dress like a target)

14)     Look for a driver/car in good condition

15)     Don’t hail off street, call a taxi in advance

16)     Keep the windows up

17)     Sit in back not the passenger’s seat

18)     If you are threatened do not resist

19)     Don’t accept food/water form your driver

20)    Try to not travel late at night/when its dark

Taking a taxi in a foreign place may be daunting, but as long as you are careful and cautious you should be fine.  If you are looking for a taxi service, use TalkLocal.  Simply enter a brief description of your service needs along with your location and availability, and TalkLocal will connect you to multiple high quality companies in your area.

How to Make Toilet More Water Efficient

Monday, September 10th, 2012

How to Make Toilet More Water Efficient Plumbers

Saving water is good for both your wallet and the environment.  Instead of buying and installing a toilet that uses less water, review the tips provided below to learn how to make your toilet more water water efficient.

How to Make Toilet More Water Efficient: 

Do you have an empty plastic bottle or a brick/rock?  Fill the bottle with a bit of sand/pebbles and fill it the rest of the way with water.  Put the cap back on, and seal it.  The idea is to make the container heavy enough so that it will submerge, and stay submerged in water with little to no movement.

Next, locate the tank of your toilet – this is the topmost box that your back touches when using the toilet.  Open the top cover and put it aside gently.  You will see that the tank is somewhat full of water – submerge the bottle/rock you found in that water in a way that the thing you put in isn’t interfering with the mechanism inside.

Put the cover back on and flush the toilet two times.  You should notice that your toilet is using less water to flush itself on the second flush and thereon.  The normal amount of water used to flush the toilet has been reduced by the volume of the object you placed inside the tank.

The object you placed inside the tank is now displacing the actual amount of water used to flush the toilet.  The tank fills itself only up to a certain height with water, and with an object taking up space inside, the tank will fill up to that certain height with less water, thus flushing with less amount of water.

If you use too big of an object, you may even find that there isn’t enough water to flush the toilet at times – you will want to find a small object to replace the current one if this is the case.  It is important to find the right balance.

Additional Help

If you feel like you need professional help adjusting your toilet or purchasing a new one, use TalkLocal.  This completely free service will connect you to up to three plumbers in your area who are willing to help.  Within minutes, you should be on the phone with a highly rated professional.  Save time searching for the right professional and have them call you.

Are Braces Worth it for Adults

Monday, September 10th, 2012

Are Braces Worth it for Adults Dentists

Are braces worth it for adults?  There are both pros and cons to getting braces at an older age.  Ultimately, you will have to make the decision about whether or not it is worth it depending on your specific situation.

Talk to your dentist

The first step is talking to your dentist.  If do not have a dentist you can use to TalkLocal to be connected to multiple highly rated dentists in your area today.  If your dentist believes that braces may be an option for you, they can put you in touch with an orthodontist.

Consult with an orthodontist

Consultations with an orthodontist are typically free, so you can get opinion from multiple orthodontists before making your decision.  Make sure that you go to a qualified professional, you want to make sure that you have quality advice before making a major decision like getting braces.  Additionally, “cheap” alternatives to braces, such as the “Six Month Smile” can often have negative effects that a dental practitioner may not know about or tell you.

Decision-making factors

The main things to consider when deciding whether or not you should get adult braces are health, aesthetics, comfort, and cost.  Crooked teeth can cause serious health problems, and they will be harder to brush as you get older and your dexterity wanes.  If you are considering braces for health reasons it may be worth it, especially if your orthodontist says your are at risk for health problems.  If you are only considering braces for aesthetics it may not be, (unless your teeth are very bad.)

Braces are expensive, a nuisance, and sometimes painful.  Although braces will eventually lead you to have a more beautiful smile, having metal in your mouth for 1-2 years is not exactly attractive.  There is an option called invisalign, which are clear braces, but they are much more expensive.  The decision depends on you, your financial situation, and your lifestyle.  Do you think the potential long term benefits are worth the short term financial cost and annoyance?  If so, then get braces.  If not, then don’t.