What are the Different Types of Window Glass

Thursday, September 6th, 2012

What are the Different Types of Window Glass Window Replacement

Windows can really complement the appearance of a home or building. When choosing a type of window glass, you need to consider the look you want, as well as the practical aspects of the glass.  You might be wondering, what are the different types of window glass you can put on your home. This article sorts types of window glass by where it is typically used: in the home or in a commercial building. Read on to learn more about the different types.

For Houses

Sheet glass, also known as float glass, is the typical glass found in older homes. Now, Low-e glass is recommended because it is efficient in keeping heat out. It allows certain sources through it, but keeps out the excess heat trying to penetrate through your windows.

Tinted glass has a tint to it that keeps out the light. By keeping out the light, the goal is to keep out unnecessary heat. However at the same time, when there is an overcast day, this type of glass blocks out the light almost too much.

Pattered glass is used to insure privacy. This type of glass has a pattern on one side to prevent other people from seeing through the glass. This is the most common type of bathroom glass used for privacy purposes.

For Commercial Buildings

Horticulture glass is less expensive than the typical sheet glass and is typically used when constructing greenhouses.

Tempered glass not only has safety features for homes, but for vehicles as well. If tempered glass breaks, it crumbles into pieces to prevent shards of glass from hurting anyone.

Wired glass is used for security purposes. This specific type of glass has steel wire mesh imbedded into the glass. This type of glass not only provides reinforcement, but also keeps fire from spreading.

Now that you have a better understanding of the different types of window glass, you can better plan what windows you’d like to install. Check out TalkLocal to be connected directly to high quality window replacement service in your neighborhood that can help you out!


How to Copy Entire iPhoto Library to External Hard Drive

Wednesday, September 5th, 2012

How to Copy Entire iPhoto Library to External Hard Drive Computer Repair

It’s always a good idea to secure a backup of your files.  However, make sure that the device to which you back up your files (a flash drive, etc) is secure.  Losing the physical copy would make the entire process pointless.  You can also make use of server-sided storage such as google drive and dropbox.

How to copy entire iPhoto library to external hard drive

1.  Secure the hard drive to which you will download the data.

2.  Connect it to your computer – you can just plug in a flash drive.  If you have an actual hard drive, you will need a usb-to-usb cable.

3.  Close iPhoto before attempting to move any files.  This is necessary because files in operation cannot be changed.  After closing iPhoto, locate your pictures folder.

4.  Find the hard drive you want to transfer the files to through your computer menu.

5.  Open up the hard drive.

6.  Choose the iPhoto library from the pictures folder by clicking on the icon once.

7.  Drag the icon to the hard drive screen.

There should be a bar that pops up, showing you the progress of transferring the files and an estimation of how long the entire process should take.  Feel free to go do something else while the process completes.

After the process completes, you should receive a notification screen.  Click OK.  You may now disconnect the hard drive from your computer since no files are being transferred between your computer and the drive.  Make sure that you store the drive in a safe place – losing the hard drive, as mentioned before, defeats the whole purpose of downloading your photo library.

If you feel like you need professional help, TalkLocal can help you find the right local computer repair company, saving you time and energy in what may be a stressful situation.

Teeth Sensitive when Breathing In

Wednesday, September 5th, 2012

Teeth sensitive when breathing in Dentists

Feeling pain or discomfort when breathing in or drinking/eating something cold can prove that you have sensitive teeth.  It can also mean that you have a cavity, or have a nerve that is exposed near your gum line that exacerbates the pain felt by cool air/food.  If your teeth are sensitive when you’re breathing in, check out this article.

Tooth sensitivity is very common, and in many cases, it can be helped by simply using toothpaste specifically formulated for sensitive teeth.  In other cases, it may mean something more serious, like a cavity/exposed nerve as mentioned above, gum recession, or even gum disease.

Sensitivity can also be induced as the enamel and protective layering on your teeth becomes worn down and your roots become exposed.  Overzealous or vigorous brushing can scrape away this enamel, and often leads to sensitivity.  Eating and drinking foods and drinks with high amounts of acidity can also damage your enamel and cause tooth erosion.

If you are experiencing tooth sensitivity and find that using special toothpaste is not helping, it may be a good idea to see a dentist.  Try using TalkLocal to find one.  TalkLocal is a free service that will connect you with top-quality, reputable dentists in your neighborhood, within minutes.  All you need to do is enter in your specific problems/symptoms, location and availability, and TalkLocal will contact multiple dentists who will then call you directly, ready to help.  Save time, stress and pain from searching for the right, most affordable dentist, and let TalkLocal do it for you!

Cloud Storage Backup Solutions for Home

Wednesday, September 5th, 2012

Cloud Storage Backup Solutions for Home Computer Repair

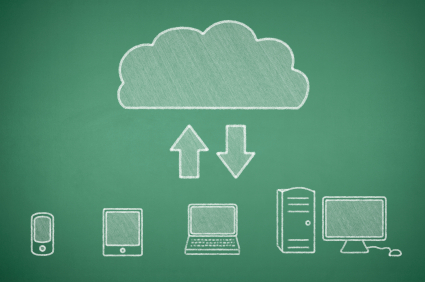
Cloud storage, previously used mostly by large businesses, is becoming more and more popular as a form of data storage and backup for ordinary users.  Previously, users had to manually upload files individually by hand, making backups a hassle.  Now, most backup programs will automatically sync any files in your designated folders to the cloud, making cloud storage much more accessible to the average user.  There are a variety of options for backing up your files in cloud storage for your home, each with its own advantages and disadvantages.  However, most of these either offer a free trial or a storage size limit before you have to switch to the paid plan or buy more space.  Most of these also have monthly fees that you must pay to continue to store your data.

Cloud storage backup solutions for home:

Mozy

Mozy offers 2GB of free storage, $5.99/month to upgrade to a 50GB limit.  Plans cap at 125GB for home users, with a price of $9.99/month.  The 50GB plan limits you to only one PC, and the 125GB plan lets you backup up to three PCs.  You’re able to schedule regular backups and choose specific files outside of the sync folder for backup.

Dropbox

Dropbox offers 2GB of free storage and $9.99/month to upgrade to a 50GB limit.  The more expensive plan is $19.99/month for 100GB of storage space.  The plans may be more expensive, but you will be able to sync to an unlimited number of computers from the same account.  Files in the Dropbox folder will automatically sync, but you can’t sync individual files outside of the folder.

SugarSync

SugarSync is Dropbox’s direct competitor, and prices start at $4.99/month for 30GB of space.  However, you can go up to 500GBs+ for $399.99 a month if you need it.  SugarSync also offer features that DropBox does not have, such as sending files of any size and syncing a file through email.  SugarSync also allows you to sync files from any location on your company.  However, Dropbox also works on Linux systems, and tends to be a bit faster.

IDrive

IDrive offers 5GB of free storage and starts at $4.95/month for 150GB of space.  However, IDrive does not allow syncing to unlimited computers, and is purely a backup service.  They do offer a family service that allows syncing for up to 5 computers for 500GB, and IDrive also keeps up to 30 backed up versions of the same file at no extra charge.

These are only a few cloud storage solutions for your home.  If you want to find out more about cloud storage in general, use TalkLocal to find a computer technician that will be able to tell you more about the different types of cloud storage and the one that is most suited for you.

How Much Paint do I Need for a 12 x 12 room

Wednesday, September 5th, 2012

How Much Paint do I Need for a 12 x 12 room Painters

When it’s time for a change in your house what’s the best way to achieve it?  Repainting your rooms can give your home a completely different feel.  You can go from plain white walls to ones that pop with pomegranate red or sea foam green.  A little bit of color change can truly brighten up your home.

How do I figure out how much paint I need?

The amount of paint you will need depends on a variety of different things.  Whether you are doing multiple coats, the quality of your paints, the amount of space you need to paint, if you are also painting the ceiling, etc.  In order to calculate the amount of wall space you need to cover, you should multiple the length of the wall by the height by the number of walls.  You should then have a total square foot area for the walls.  You can also factor in the ceiling by multiplying the length of the room by the width.

Finding the right type of paint

Each gallon of paint will list the amount of square footage on the side of its label.  It all depends on the quality and number of coats you plan on applying.  Higher quality paint will have more coverage with less coats, and it will give off an overall better look.  Buying lower quality may save a few bucks initially, but you’ll be paying for it in the long run by having to repaint.

How much paint do I need for a 12 x 12 room?

A typical gallon of paint has the ability to cover 400 square feet of wall space.  Most of the time, you will apply two coats.  A 12 x 12 x 8 room is about 350 square ft., not counting the ceiling.  This means that you will need two gallons, maybe a little more if you are planning on painting the ceiling as well.

If you do not want paint your house on your own, hire a professional.  Use TalkLocal today to be connected to multiple reliable local painting businesses within minutes.  Simply input your problem, location and availability, and almost immediately, you will be connected to someone who can help you out.

Car Shakes when I Brake at High Speeds

Wednesday, September 5th, 2012

Car Shakes when I Brake at High Speeds Auto Repair

Car shakes when I brake at high speeds

So you’re going for a joy ride and suddenly your car shakes when you hit the brakes.  You are wondering, why the car shakes when I brake at high speeds?  If your car shakes when you brake at a high speed, or just when you drive at a high speed in general, it usually means that your car alignment is off.  Although car services offer to check the entire car alignment for you, the process is made much faster and cheaper if you actually know the specific component that is causing the problem.

Specific aspects to car alignment

Your tires are the four points at which your car touches the ground.  Needless to say, a problem with a tire will upset the balance of the car, possibly causing the car to shake at high speeds.  Check your tires for the correct balance, weight, wear and tear, and broken belts before you start look at the other places of your car.

If there is a problem with your tire and the problem is fixed by simply replacing the tire, you’re in luck – there is probably nothing else wrong with your car.  However, if the problem persists even after replacing the tire, there may be a chance that a wrong alignment is the source of the problem and it is the reason your tires may be damaged.

Problems with brake pads

Shaking of the car exclusive to braking at high speeds would probably mean that your break pads have worn out, or that your rotors are in a bad shape (warped).  An unevenness in the rotor will shake your car when the brake pad tries to slam down on it.

Worn brake pads, obviously, have the same effect – the problem is that the rotor itself may become damaged from a prolonged use of worn break pads.  The faster you identify this problem, the less damage will happen to your car.  Do not let it go unnoticed for too long.

More advice

Because a small problem (worn out break pads, unbalanced tires) can turn into a bigger problem (warped rotors, shifted alignment) with time, cars need scheduled checkups.  If you have been experiencing this problem for a long time, bring your car to a professional for a full checkup to avoid problems in the future.

TalkLocal can help you find the correct local professionals for your problem, saving you time and energy in what may be a stressful situation.

Uninstall Program on Macbook

Tuesday, September 4th, 2012

Uninstall Program on Macbook Computer Repair

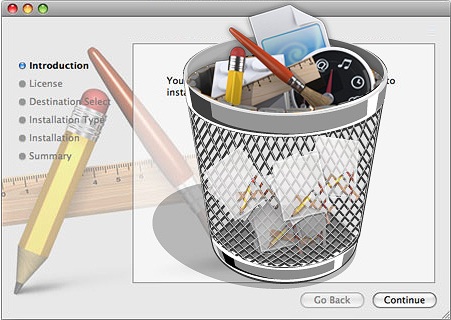
Apple products are notoriously easy to use and simple to figure out when installing programs.  Macbook computers have one of the most user friendly systems.  When it comes to uninstalling programs, the same applies.  Compared to PC laptops, deleting files from a Mac is easy and hassle-free.  This article will explain how to a uninstall a program on a Macbook.

Possible Solutions

You have two options when trying to uninstall programs from your Macbook.  You can download another application to remove the files or you can do it manually.  You should be careful when using a third party device to delete programs though.  There are some disreputable programs that portray themselves as a trustworthy source, but in actuality may damage your Macbook.

Uninstall using a third party application

Some good third party applications that will remove all traces of installed programs are AppZapper or CleanApp.  These types of packages work when you drag the program you want to uninstall into their folder.  The application will recognize all the other files associated with this program and delete them.  This way all parts of the program you wish to uninstall will be taken care of at once.  One program you should stay away from is CleanMyMac.  This is a dangerous program that implants cookies and monitoring software into your computer.

Uninstall manually

If you would prefer to do this process manually it will take a little longer, but is still much easier than if you were to do so on a PC.  You can go into your computer finder and search for the program you wish to uninstall.  The first thing you should do is drag it into the trash and empty it.  You should also run a spotlight search for that same program and see if there are any remaining folders in which it was installed.  You can also hit “Control+” on the icon to see what files the program has.  The beauty of Mac applications is that it packs all of the files the program needs into one icon/place.

Many applications will leave behind preference files, which save your settings for that program.  These files can be safely deleted. While they may run in the background and take up negligible disk space, but you should still get rid of them if you do not plan to reinstall the program.

Continuing Problems

If you cannot figure out how to delete the program, try consulting with a professional so that you can get the best help possible.  The easiest way to get in contact with reliable IT supports services in your area is TalkLocal. Just submit a service request on the website, stating your problem and availability and let them do all the work.  Within minutes you will be connected to someone who should be able to help you.

How Do I Balance My Checkbook?

Tuesday, September 4th, 2012

How Do I Balance My Checkbook Accountants

You might be asking yourself, how do I balance my checkbook?  This article outlines . Hopefully it will make balancing your checkbook appear as a much less daunting task than you originally perceived it to be. Balancing a checkbook may seem like an outdated chore but it still can be an effective way to save money and know where you are spending your precious dollars.

Essentials to balancing a checkbook

– Your checkbook register and a pen

– Copy of your bank statement

– A calculator or phone/computer with calculator functions

– Check withdrawal or deposit slips

– ATM withdrawal or deposit slips

– Credit card purchase history

– Interest rates for your bank accounts

– Information about bank charge fees

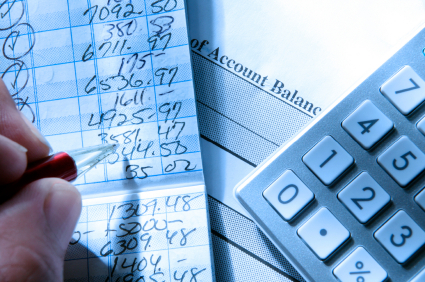
In your checkbook register, write how much your current balance is by using your bank statement. Write it in the specified box in the booklet or on the first line. Then, make a habit of recording all your expenses, including ones not involving checks. Add your deposits and subtract your payments and purchases. Remember to include automatic payments that you do not have to submit yourself. When you receive your statement, check that it matches with your check register. Mark off the ones you have recorded and add anything you have missed. Double check your math and make sure your balance from the check register equals your balance from the statement. Once your check register matches your statement, mark a double line under the last transaction in your check register. Now you will know where to start when checking your next statement.

If you need help balancing your checkbook or or have other financial questions, check out TalkLocal, a free service that can help you get connected directly to top rated professionals right in your area! You will be connected to high quality accountants within minutes of submitting a service request.

Can I Sync my iPod to my iPad

Tuesday, September 4th, 2012

Can I Sync my iPod to my iPad Computer Repair

Can I Sync my iPod to my iPad?  The answer is yes. The people at Apple know that you want to be able to transfer your music from one device to the next, so the steps to do so are straightforward and can be done quickly. You can sync your iPod to your iPad through iTunes on your computer by following the steps below. Syncing your iPod to your iPad is just a few clicks away!

1. Connect your iPod to your computer.

2. Sync the device.

3. Click on “Devices” on the left hand panel of your iTunes; you will see different tabs such as “Music,” “Apps” and other choices.

4. Go through the tabs and click what you want synced to your computer from your iPod. All the data on your iPod will be synced onto your computer.

5. After your iPod has fully synced, disconnect it from your computer.

6. Now plug your iPad into your computer.

7. Sync the device.

8. Once again, if you click “Devices” on the left hand panel, you will see the same tabs.

9. Go to the desired tab and choose what you want synced onto your iPad.

10. Click “Apply” > “Sync.”

11. After properly syncing your iPad, disconnect it.

 iCloud

You may also save data to iCloud, which will allow you to access your information from any device. It is Apple’s online storage device, where you can make certain files available online from other computers or mobile devices. For example, you can save your music from your iPod into iCloud and access it from your iPad.

Your content can also be transferred between your iPod and iPad through iTunes or by syncing data to iCloud. If you are having further difficulties with your Apple devices, TalkLocal can help connect you to highly trained IT professionals in your area. Just go to the TalkLocal website and fill out a short service request.

How to Increase Toilet Water Flow

Tuesday, September 4th, 2012

How to Increase Toilet Water Flow Plumbers

If you have an older toilet and you are experiencing an unusually slow refill time, it might be a result of an old toilet water supply house. Over time, these hoses can become clogged or kinked, restricting the water flow into the toilet tank.  Read this article to learn more on how to increase toilet water flow.

In order to fix this problem and increase the flow of toilet water, you must replace the toilet water supply hose.  To do so, pick up a new hose, an adjustable wrench, and a pair of slip joint pliers at your local hardware store. Twist the knob where the hose connects to shut off the water supply and unscrew the valve from that end. Finish detaching the hose from the other end by unscrewing it where it attaches to the bottom of the toilet tank. You might need to use pliers for this part if it’s tightly screwed in.

Next, use Teflon tape to wrap around each end where the hose is inserted. This helps to seal the connection after the new hose is installed. When you’re ready to reconnect, take the large end of the new hose and connect it to the end of the flush valve. Then, take the other end and attach it to the shut off valve. Use your wrench to make sure the fitting is tightened all the way.

When you’ve finished, you can turn the water supply back on by turning the valve all the way counterclockwise. This will ensure that the hose allows the highest volume of water to flow back into the tank.

If these directions seem a little too complicated or this didn’t fix your problem, you should call a local plumber to check it out for you. Try using www.TalkLocal.com to help you book a highly rated plumber in your area within minutes.