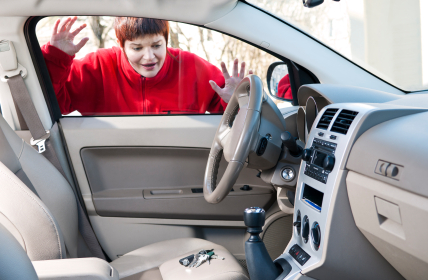
How to Get Keys Out of Locked Car

Friday, July 13th, 2012

How to Get Keys Out of Locked Car Locksmiths

There is nothing more frustrating than getting locked out of your car and staring at your keys through the window. What makes it even worse is if you left your engine running. Luckily, there are ways to get inside most locked cars, so you can retrieve your keys without having to deal with a car dealership or a locksmith.  Below are some tips on how to get keys out of locked car.

Using a coat hanger

You are extremely lucky if you have an older car with the lock that presses up and down. Straighten out a wire coat hanger, curl the end into a little hook and slide it between the side or vent window and rubber molding. Use the hook to grab the button and pop it up.

Using  a jimmy

Go to a gas station if you are fortunate enough to be parked near one. Many of them have a jimmy you can use to open your door. It slips between the door and window and works on the locking system in the door, opening it easily.

Using roadside assistance

Call your roadside assistance provider. Your plan will probably have a service policy for opening locked cars.

Breaking a vent

Try breaking the small vent window if you absolutely must get into your car. It is relatively cheap to replace.

Using a code

If you have a newer car, check to see if your keys have been coded. Some codes are engraved on the key; others are hidden inside a plastic piece on the key. Have a key made at no charge by calling the code in to a locksmith. The cost of the locksmith’s visit will still be cheaper than having locksmith make a wax model and then craft a new key.

If none of these options work, use TalkLocal to immediately get in contact with local locksmiths who can help you.

Basic Computer Maintenance

Thursday, July 12th, 2012

basic computer maintenance computer repair

Basic computer maintenance is essential for the funtioning of your computer.  There is no guarantee of a perfectly functioning computer, but basic maintenance techniques can help preserve the life and efficiency of your machine.

If you regularly clean your hard disk, you will increase the productivity of your computer.  This includes getting rid of temporary files, temporary Internet files, and emptying your recycle bin. This unneeded information is only slowing your hard drive down.

Furthermore, you can restore your computer to its original speed by reinstalling all the programs on your system on a long-term basis.  However, make sure to save your files in a separate location before performing this action. You can also increase the speed of your machine’s activity by performing a disk defragmentation task.  Defragmentation regroups files neatly together, so the computer can read the files with more fluidity. A fragmented file must be reassembled every time it is accessed, which decreases computer speed.

Scanning for viruses is an essential maintenance practice.  Extensive corruption files and data can unknowingly occur if left alone too long.  A simple scan once a week can help to protect your computer against this.
Backing up your files is an easy way to avoid trouble.  If there is any content on your computer that you would be concerned to lose, save them in cloud storage, an external device, or use a provided backup program on your computer.

Keep your computer up-to-date by installing software updates at regular intervals.  Security updates are constantly occurring, so stay current to protect your computer from viruses. When restarting and shutting down your computer, take the proper steps–even if it takes a little longer. Wait for the computer to power down instead of simply eliminating its power source.

As with all technology, physically cleaning your machine and the area around it is an important task.  To promote the flow of heat away from your computer, it is best to keep machines off the floor and out of closets. Along with keeping your machine cool, take precautions to keep it dry. Be careful when handling drinks or food near your computer; the safest practice is to eat elsewhere.

If you experience difficulty or have questions on any of this, TalkLocal can conveniently connect you to a computer repair service for further advice and assistance.

Accent Colors for Gray Walls

Thursday, July 12th, 2012

Accent Colors for Gray Walls Painters

Think about painting a room but not sure which direction you’d like to go? Gray walls give any space a modern touch. The right accent colors for gray walls will give this neutral color some edge.

Red or cranberry tones give a wonderful pop and breathe life into your room. A rusty red accent wall or red decorations will give your room look a sophisticated and elegant look.

Blue or turquoise accent décor will bring a serene appearance to your room. A blue vase or blue plates are peaceful, calming colors.

Yellow, although not as common, matches perfectly with gray walls. A yellow sofa or yellow glass decorations bring sunshine into your neutral-walled space.

A regal violet accent makes any room more fun and adds a royal tough to your space. Try a gray room with violet bed sheets! Lavender accents also create a cool and contemporary ambience that will help you relax.

Pastel accent colors complement the neutral gray because they are softer on the eyes. If a cheerful yellow accent is not your style, try a soft pastel.

Mixing accent colors is captivating in gray-walled rooms. Blue and green mixed accent colors will freshen up your room by bring the sky and grass into your space. Black and white accents will add a clean, classic look to your room. What is your favorite color? What mood are you trying to set in your space?

The possibilities are endless with gray walls. Once you’ve decided on your accent color, use TalkLocal to connect you with the best-rated painters in your area. Learn how to use TalkLocal today!

How Often Should a Housekeeper Come

Thursday, July 12th, 2012

How Often Should a Housekeeper Come Maid Services

How often should a housekeeper come?  Below are some factors to consider when answering this question:

How many pets live in your house — If you have more than one pet, it is a good idea to have a housekeeper come at least every two weeks.

How many people live in your house — If there are multiple people living in your home, having a housekeepers come every week or every other week will take a lot of the cleaning load off of your hands.

How clean you like your home — Are you okay with having the house look a bit messy for a while? This will give you a different cleaning schedule from someone who is a perfectionist and values being in a pristine home.

How much you like cleaning — For some people, cleaning is a way to relax and unwind. If this is you, once a month would be a great choose to leave the tasks that you dislike to someone else.

How much extra time you have in your schedule — For example, if you are a single mom in an apartment with no dishwasher or washing machine, it may be more beneficial to have someone else do these chores so you can spend more time doing other activities. If you are this busy, a maid once a week for specific tasks is a great choice.

Generally, once a month or every other week are preferred time frames for how often a housekeeper should come. Go ahead and give it a try. If you don’t like it, you can always discontinue the service or adjust the scheduling. Try TalkLocal, a free service that will connect you with a high quality maid in your neighborhood. You will only talk with maid services who can accommodate your needs, and the housekeeper will come any time that works best for you.

How to Fix Rust in Wheel Well

Thursday, July 12th, 2012

How to Fix Rust in Wheel Well Auto Repair

Are the wheel wells of your car covered in rust spots?  Rust can form in many different places on your car, but wheel wells are especially prone to rust because of the water, mud, and rocks that are constantly kicked up into them by the tires while driving.  Damp conditions are ideal for rust formation and–if you do not treat it–the rust can spread and eventually eat holes through the metal of your car.  Here are some suggestions that explain how to fix rust in wheel well and prevent rust buildup in your wheel wells where your car is most vulnerable.

The first step is to get a scrubbing brush with a long handle and physically scrub as much of the rust off of the wheel well as possible.  You may need to lift your car up with a jack and remove the tire to get at the rust depending on its location.  You can purchase brushes designed specifically for this purpose from most home improvement stores in the auto section.

Next you need to get a bottle of WD-40, which is also available in any home improvement or hardware store.  Spray any remaining rusted areas with the WD-40 and let it sit and soak in for 15 – 25 minutes.  This step helps to soften the remaining rust so you can do another round of scrubbing.

If there is still remaining rust that you are unable to scrub off, you may want to purchase an acid-based rust remover from the hardware store.  You can apply this remover with a paper towel to all of the remaining rusted areas, but be sure to put on gloves beforehand.  Let the remover sit for 15 minutes and use your scrub brush to scrape away the last of the rust.

Once all of the rust has been removed, you might want to apply an undercoating to help prevent new rust from forming.  You can purchase rust proofing undercoating spray at the hardware store.  While wearing gloves and safety glasses, simply spray the undercoating on the surface of your wheel well, using short spurts to avoid over spraying.  Allow about 15 minutes for the coat to dry and apply a second coat for additional protection.

If you need more help, TalkLocal can connect you with local auto repair services.

USB Ports Not Working

Thursday, July 12th, 2012

USB Ports Not Working Computer Repair

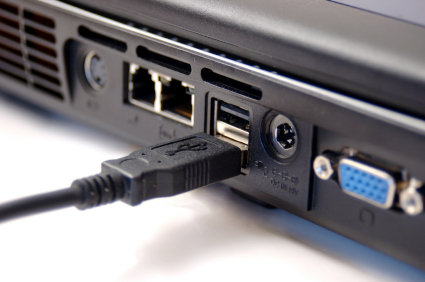
We use Universal Serial Bus (USB) ports for everything: sharing documents, installing devices, and transferring data. So, when “unknown device” or “USB device not recognized” pops up, a mini panic attack is sure to follow. Luckily, there are a few ways to solve the issue of USB ports not working.

Causes of a malfunctioning USB port

A malfunctioning USB port could be attributed to outdated driver software. A USB port may stop working when you insert or improperly remove a device. Make sure you eject the volume appropriately so that you do not corrupt the files on the USB device or damage your USB port. Please note that a USB device that you formatted for use on a Mac may not work fully on a PC.

USB Port or Device Solutions

–Verify the source of the problem. Check the device manager to scan hardware changes and make sure the device is enabled and recognized. If it is not, plug the USB device into another port or another computer see if the problem is the device or the port.

–Try shutting down your computer for a few minutes and then restarting it to refresh the USB ports. Shut down your laptop and remove the battery for 5 minutes. Restart your laptop and test the device.

–Updating the USB driver can give your computer the boost it needs. Check your hardware manufacturer for the latest driver.

–Removing or uninstalling the USB drivers, followed by restarting your computer. Once your laptop is running, reinstall the USB driver(s) that you uninstalled and connect your device.

Still having problems with your USB port?

TalkLocal is your solution. If the USB port is still not working after these troubleshooting operations, then there may be a problem with the motherboard, which will need to be replaced. TalkLocal can help connect you instantly to the best local technicians and IT service companies to repair or replace your USB port or motherboard. Simply go to TalkLocal and put in a service request. You can get connected to help within minutes–and stop hassling with your USB port.

Apple Computer Is Not Charging

Wednesday, July 11th, 2012

Apple Computer Is Not Charging Computer Repair

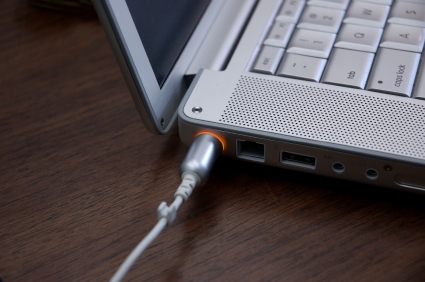
Believe it or not, even the foolproof Mac has issues. Has your computer failed to charge when the MagSafe power adapter is plugged into your computer and a power source?  What do you do when your apple computer is not charging?  Before heading to the frustrating confusion and long lines at the Genius Bar, try the following tricks.

Diagnose the problem area

1.  Go to System Profiler.

2.  Click on “Power” on the left side window pane.

3.  Scroll down to the bottom where it says “AC Charger Information” and it will tell you if your Mac is connected and charging. If it says “No” to both while your Mac charger is plugged in, then the issue is your power adapter. If so, read the next section titled Adjust the connector. If it says “Connected: Yes” and “Charging: No”  while your power adapter is plugged in, then the issue is your battery. Skip to the section titled Remove the battery.

Adjust the connector

–Flip the connector of the MagSafe Power adapter that attaches to your computer. Sometimes one side has better contact with your Mac than the other side.

–Check that the connector and port is free of debris.

–Make sure the pins in the connector are not stuck. Gently push on the pins with a small tool. If these tips don’t work, read on for more solutions.

Remove the battery

1.  Starting with your Mac charger plugged into the computer and connected to a power source, shut down your Mac.

2.  Remove the battery.

3.  Unplug the MagSafe power adapter.

4.  Hold down the power button for 5 seconds and then release.

5.  Plug the MagSafe back into the Mac.

6.  Don’t put the battery back in yet. Plug the MagSafe in and wait for the green light indicator to turn on.

7.  Put the battery back in.

8.  Turn on your Mac. If your computer still won’t charge, read on for more tips.

Reset the SMC

1.  Shut down your Mac.

2.  Plug in your MagSafe Power adapter into your Mac and into a power source.

3.  Reset the System Management Controller (SMC) by pressing “shift + control + option + command + power button (hold for 5 seconds)” and then release all the keys at the same time while your Mac is shut down. This will get the battery to charge.

4.  Press the power button to turn on your computer.

If you Mac still will not charge…

What if you cannot fix it yourself–no matter how many times you bang your computer out of frustration? Instead of wasting time searching for IT forums on the internet or facing long lines at the Genius Bar, contact TalkLocal to  find the best IT service provider to solve your problem.  Simply fill out a short service request on TalkLocal’s website to talk to a high quality local computer repair shop in minutes!

Brakes Squeal in Reverse

Wednesday, July 11th, 2012

Brakes Squeal in Reverse Auto Repair

Are your brakes making an annoying squeal every time your car is going in reverse?  Squeaky brakes can be a huge nuisance for any driver and they are a problem that many people struggle to deal with.  If you don’t have much in-depth car knowledge and your brakes squeal in reverse, then you may want to read these tips for fixing this embarrassing problem.

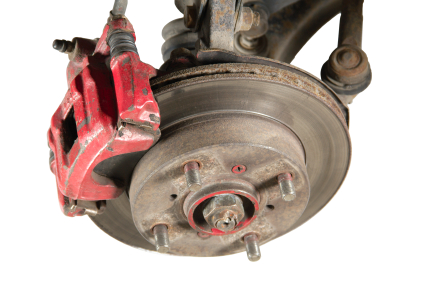
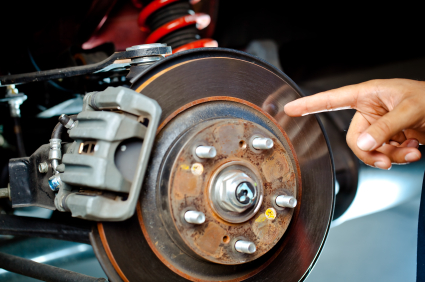
The first thing to realize is that some amount of noise when braking is normal and unavoidable because your brake pads wear over time, though the severity depends on the make and model of the car.  Certain driving conditions, such as stop and go traffic and dusty, sandy, or humid areas can make your break pads worsen faster. Abusive braking practices can also contribute to hardening on the surface of your brake pads, which causes them to squeak when applied.  Depending on how far this hardening process has gone, you may be able to sand the surface smooth with sand paper. Otherwise, you will need to get your brake pads replaced.  It is also possible that there is a faulty part in the brake system other than the pads that needs to be tuned.

There are many spray chemicals sold as brake lubricants that can address the squeaking problem, but unless you are an auto expert, you should use caution putting anything on your brake pads. There is a good chance of messing up and doing even more damage.  There are a couple things that you can try yourself, including performing a series of backing up and braking maneuvers.  To do this, you just need to find an empty lot or stretch of road and drive in reverse while repeatedly hitting the brakes hard.  This can sometimes remove the hardened surface glazing that is causing your brakes to squeak.  Even if this method works, it is important to remember that this is not a long term solution.  The driving conditions that caused the surface hardening will eventually cause the squeaking to return unless they are changed.  You can try to use a gentler and more even braking motion in order to preserve your pad’s condition.

If you need to find an auto mechanic to replace your brake pads or inspect your braking system, you should check out TalkLocal.  You can use TalkLocal to get in contact with a reliable local auto technician within minutes.  Just enter a description of your problem, availability, and location on the website and TalkLocal will connect you directly to someone who can help.

How to Brighten Up a Dark Room

Wednesday, July 11th, 2012

How to Brighten Up a Dark Room Painters

Some rooms are unfortunately stick with bad lighting. However, this doesn’t mean you should settle for poor ambience. A well-lit room can boost your mood and increase productivity, so consider these tips if you are wondering how to brighten up a dark room:

·      Replace light bulbs with compact fluorescent light bulbs that have a higher light out put. “Soft white” bulbs produce a warm light whereas “daylight” bulbs produce a cool and vivid light. As an added bonus, CFLs use less energy than incandescent light bulbs.

·      Fill the room with light-colored furnishings like a white chair or pillow.

·      Add a lamp or two.  Browse sites like Etsy for unique lamps that can double as artwork. Lamps that can be displayed closer to the center of the room will be able to light a room better than ones that are shoved into a corner.

·      Add wall lights to areas where light is more often needed such as inside a closet or near cabinets.

·      Open curtains whenever possible. Sunlight is a easy and free way to brighten up any room. If you want more privacy, invest in some sheer curtains that still allow sunlight to shine through.

·      Add mirrors to reflect the light in the room. Mirrors also make a room appear bigger.

·      Change the detailing in the room using brighter colors. Even small adjustments can transform the look of a room. Try replacing light switch plates or fan blades to give the room touches of fresh color.

·      Repaint the walls. A variety of color choices can brighten and expand a room. Check out color suggestions here (hyperlink to “colors paint to use for rooms with no windows). TalkLocal can match you with a high quality painter in minutes. Just fill out a request form online to talk with painters who can help transform your room.

How to Remove a Very Large Fallen Tree

Wednesday, July 11th, 2012

How to Remove a Very Large Fallen Tree Tree Removal

Removing a large fallen tree by yourself tends can be very difficult and dangerous, especially if you don’t have much experience with tree removal. Using a chainsaw is also extremely dangerous, and if you’re a novice, you should never try to remove a large tree by yourself. Professional help is highly recommended, as fallen trees can occur in many different dangerous scenarios that can’t all be covered in one article. Partially fallen trees are the most dangerous, as they are usually supported by a few branches under great tension and can resume falling at any time. Some tips on how to remove a very large fallen tree are provided below.

–  Always have at least another person work with you. This is in case you get trapped or injured, there’s someone to call for help.

– Partially fallen trees are extremely unpredictable, so always have an exit strategy and a path cleared in case the tree falls or starts rolling.

– You must wear appropriate safety gear, do not even consider using a chainsaw on a fallen tree unless you are well protected.

– Make sure your chainsaw is sharpened before you start the job. Dull chainsaws get caught more easily and makes the job much slower.

– Always stand on the opposite side of the limb you’re cutting.

– Cut smaller branches off first, gradually leaving only the trunk behind.

– Start at the base of the tree if possible, and work your way up.

– Before cutting a branch, check if it’s under pressure first. If it is, cut as close to the pressure point as possible, as branches can whip extremely quickly.

– If large branches are propping the tree trunk up, always leave them on the trunk to prevent the trunk from rolling.

– Every couple of branches, clear the debris from where you are working, as tripping or stepping on a branch could result in horrific injuries.

– If your chainsaw blade ever gets stuck, turn it off immediately. Do not turn it back on until you have removed the blade from the tree. Use a wedge to remove the chainsaw, as pulling with brute force can be dangerous.

– If the trunk is flat on the ground, cut the trunk into multiple pieces first. Make sure your chainsaw is large enough to cut through the trunk of the tree, as one that is big enough to cut off the branches may not be big enough to cut through the trunk.

Removing large fallen trees should always be done by an experienced professional, so use TalkLocal for free to find a highly rated tree removal company in your area today.