
Okay so you spent countless hours raking out leaves from your front and back yard…you’re tempted to just throw them in the trash bin — but don’t! There are tons of ways you can reuse your fall foliage with DIY projects.
What you’ll need:
Leaves
Wax Paper
Hot wax or Mod Podge
Hot Wax or Mod Podge
Mod podge or wax can be used to preserve the leaves, but we recommend painting them with mod podge. Using mod podge can be just as messy as hot wax, but at least you don’t risk burn related injury or pain. Plus, mod podge helps the leaves retain their bright colors, and makes them much sturdier as well.
Note: If you do opt for hot wax, use a tweezer or some other small, gentle vice-like tool to grip each leaf as you dip into hot wax and lay them on wax paper to dry.
Place the leaves out on sheets of wax paper, and gently paint one side and leave on the wax paper to dry. To speed up this process, you can use a hair dryer. Let them dry for at least an hour after you use the dryer. When the first side of the leaves are dry, flip them over and repeat the first step. Easy as that!
Leaf Pro Tip: If you do decide to use a hair dryer, make sure you keep it moving so you don’t dry one spot for too long.
Now what? We picked some of our favorite DIY projects that use your mod-podged leaves.
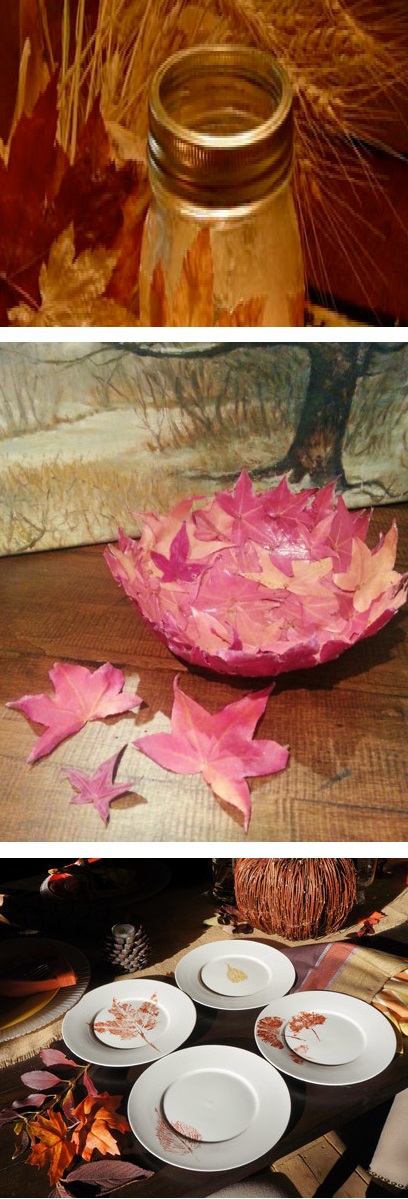
We love this one because it reuses the mod podge, so the only other material you need is a dollar store candle holder. So it’s SUPER cheap. All you need to do is brush the leaves onto the candle holder (in whatever design you like) and let it dry. Sound familiar?
Again, this project won’t clean out your wallet because it also reuses the mod podge. However, it is a little more of tedious process. All you need is a bowl and plastic wrap, which are everyday kitchen items. Once you choose the bowl you want to use, line the inside of it with one layer of plastic wrap (P.S. Make sure the plastic wrap is covering the entire area of the bowl).
Then, cut the stem of the leaves off. After that, apply a layer of your mod podge to the inside of the bowl. Start to lay the leaves out to cover the bottom and sides of the bowl; cover the inside until you have as much coverage as you want. Add one more layer of mod podge to seal everything. Let it dry for at least a day. To remove the leaves from the bowl, pull up on the sides of plastic wrap and flip the (leaf) bowl over. Now, peel the layer of plastic wrap off of the back. Finally, put your bowl off to the side to finish drying. Voila! That wasn’t so bad, was it?
This one doesn’t require mod podge, so if you don’t have time to get any, then this might be the project for you. The only materials are white plates, food-safe metallic paint, and a paint brush. If you don’t already have basic white plates at home, you can always pick some up at your local dollar store. In addition to making your wallet happy, it’s incredibly simple. All you need to do is brush the metallic paint onto the textured sides of your leaves, so it will help the leaf design transfer better onto the plate. Then, let it dry of course.
If you’re stumped as to what to do with the rest of your mod podge, have no fear! You can check out our DIY Pinterest board for more DIY projects; or you can just call us at TalkLocal for a handyman if you’d rather skip over the whole DIY part.


