Archive for the ‘Appliances Repair’ Category


How to Clean an Iron Soleplate

Sunday, January 20th, 2013

How to Clean an Iron Soleplate - Appliances Repair

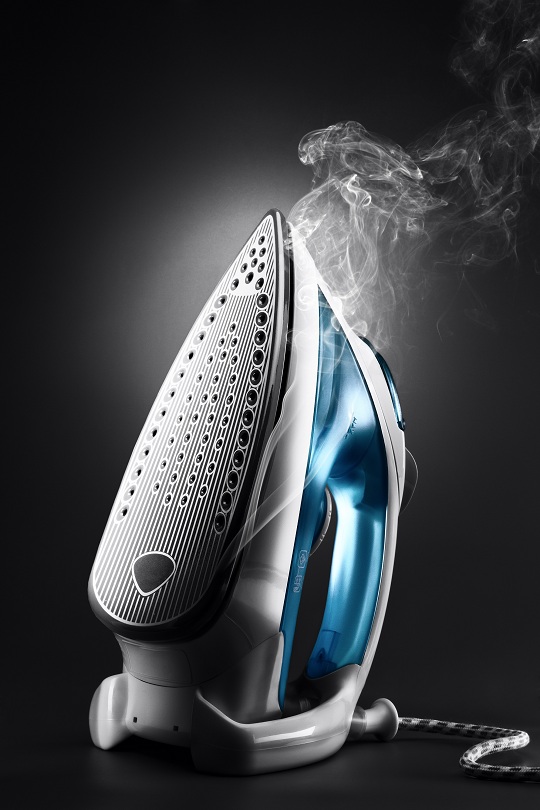
Ironing our garments makes our clothes look crisp and new. Although we usually iron clean clothes, the soleplate of the iron gets dirty over time. When the iron starts sticking to your clothes, you run the risk of damaging or burning your clothing. Below are some easy ways to help you learn how to clean an iron soleplate to keep your iron looking as new as your clothes.

Vinegar

Vinegar is an inexpensive household cleaner. This multipurpose liquid is great for removing any residue, such as starch, which may be found on the bottom of the soleplate. To clean your iron with vinegar, unplug your iron and let it cool off completely. Pour some vinegar onto a cloth or towel and wipe the soleplate of the cool iron. If there is dirt in the soleplate holes, use a cotton swab to get into those hard-to-reach spots. If the dirt is difficult to remove, combine vinegar and baking soda on a cloth and rub the soleplate. You may also try warming up a solution of vinegar, salt, and water to remove tough residue buildup. Pour it on a soft cloth and wipe away dirt.

Newspaper

To remove waxy residue, heat the iron to its hottest temperature to help melt the wax. Lay several sheets of newspaper flat on a heat-resistant surface. Then “iron” the newspaper, using a clean sheet each time until the wax has been removed. When the wax has been removed, let the iron cool down and wipe the iron soleplate with a damp cloth to remove any newsprint left behind by the newspaper.

Detergent

A mild detergent with water will get the job done. Detergent breaks down oils and dirt. Use a damp cloth with some mild detergent and wipe the soleplate. Go over the soleplate again with a damp cloth to remove any soapy residue.

You can also read the instruction manual of your iron to find useful tips for preventing residue buildup on the soleplate. Never use an abrasive material, such as steel wool, to clean an iron soleplate of an electric iron because it could damage the iron.

Additional Help

If your iron needs repairing, use TalkLocal to help connect you with a local appliance repair professional. Try TalkLocal today!

Maintenance Tips for Refrigerators

Thursday, January 10th, 2013

Maintenance Tips for Refrigerators Appliances Repair

There are few household appliances as important and frequently used as refrigerators.  No matter your living situation, the amount of time you spend at home, or your place in the family, you probably visit this type of machine several times each day. Every machine will eventually put itself out of use, but being conscious of a few things can help prolong the life of your refrigerator.  Here are some maintenance tips for refrigerators to ensure their longevity

Again, every appliance will acquire some problems over time, but don’t get yourself into a refrigerator predicament before absolutely necessary!  By stationing the machine appropriately and performing these routine maintenance tasks, you can more effectively avoid expensive repairs and enjoy the proper functioning of your refrigerator.

However, problems may still prevail after performing routine maintenance tasks. Use TalkLocal to find reputable local handyman in your area that can fix your essential household machine.

Bad Smell in Microwave

Friday, December 21st, 2012

Bad Smell in Microwave Appliances Repair

No one wants a smelly microwave. It is unappealing and can rub off on the food you eat (and smell is nearly 75% taste, after all). So how exactly do you get rid of a bad smell in a microwave? Well, fortunately for us all, there are a few different ways to get rid of these bad smells.

All the methods start the same and include the use of boiling water and vinegar. This first step is imperative to getting rid of any remaining food particles that may leave a smell. Fill a microwave-safe bowl about halfway with water. Add about a tablespoon and a half of white vinegar (dishwashing liquid works, too). Microwave this concoction for about five minutes (or less if your microwave is very powerful). This process will create steam that cleanses the walls of the microwave and allows any food particles to be cleaned more easily. When you take out the container, use a paper towel to clean the interior of the microwave. Now that the interior is clean, we can work to remove the smells that still remain.

The process for getting rid of the smell involves placing a small to medium amount of vinegar, baking soda, or lemon juice inside a microwave safe bowl (we prefer using lemon for the best smell). Place the bowl in the microwave and heat it for roughly six minutes or until the liquid boils. Leave the door closed for 15 minutes to let the new smell sink in. Once the bowl is cool enough to handle, take it out and clean the interior of the microwave again. When this is done and the interior clean, leave the microwave door open overnight. By the next morning, your microwave should smell significantly fresher. Repeat as necessary until you are satisfied with the smell.

Following these steps, you should be able to freshen your microwave yourself, but if you feel more comfortable having a professional take a look, consider using TalkLocal. TalkLocal is a free service that will connect you with top-quality, reputable appliance repair companies in your neighborhood within minutes. Just enter in your specific problem, location and availability, and up to three companies will call YOU directly, saving you the time and stress of finding one yourself.

What to do When Turkey is Stuck in the Garbage Disposal

Friday, November 16th, 2012

What to do When Turkey is Stuck in the Garbage Disposal Appliances Repair

Cleaning up after Thanksgiving dinner is a big job. Invariably, some tough parts of the turkey carcass get shoved into the garbage disposal along with bits of yams and other leftovers scraped from dinner plates. When the switch is thrown to grind it up, there is nothing but a humming sound of the disposal motor trying to work. So here’s what to do when turkey is stuck in the garbage disposal…

Wooden Spoon Trick

1. Shut off the power to the disposal at the breaker box. Helpers may accidentally hit the switch thinking it is for something else. An old wooden spoon is the perfect tool to get a garbage disposal unstuck. Invert the spoon and insert it handle side down into the disposal. The spoon needs to be long enough to reach the bottom of the disposal.
2. Work the spoon around the inside perimeter of the bottom of the disposal. The loose objects should move about freely. Feel for something stuck against the outer edge right at the bottom. It should be easy to tell the metal parts of the impeller blade from bones and other food items. When the stuck object is found, work it back and forth with the spoon to dislodge it.
3. Use the spoon to apply pressure to the impeller at the bottom too. It is just a disk that spins. When the impeller moves back and forth easily, the disposal is unstuck. It may be good to remove the food object that caused the problem in the first place.

The Pop Up Thermometer

The plastic thermometer placed in turkeys that let the cook know when the proper internal cooking temperature has been reached are notorious for getting stuck in disposals. They are made of plastic and have a metal spring. They are sized just right to get stuck between the impeller and outer edge of the disposal.

1. To remove a stuck thermometer, empty the disposal using your hands for solids and a ladle for liquids. Carefully explore the bottom of the disposal with your hands. The impeller can be sharp in spots. Move slowly. Use a pair of regular or needle-nose pliers to grasp the thermometer. Carefully and slowly work it free and remove it.
2. These two things fix most of the problems of a stuck garbage disposal during the holidays. If the impeller is freely moving, the small drain of the disposal may be clogged. That requires disassembly of the drain pipe to clear it.

If these methods fail you, call TalkLocal to find a service professional to help you now!

Refrigerator making Humming Noise

Tuesday, November 6th, 2012

Refrigerator making Humming Noise Appliances Repair

The annoying humming noise that’s coming from your fridge could be caused by a number of problems, some of which are easy to solve, some of which you’ll need a quality mechanic for, and some that will force you to replace the machine. Read on if you have a refrigerator making humming noises and you want to fix it.

Sound coming from the back

If the humming sound is coming from the back of the fridge, it’s either due to your compressor or the motor fan. A broken compressor is a big deal, as your fridge won’t cool properly. If your compressor is broken, you won’t be able to fix this yourself and should get a professional trained in sealed systems to replace it. A dirty motor fan could also be causing the problem, so check the fan or make sure it’s not dirty, frozen, or stuck on another object.

This loud humming could also occur when the fridge door is open for an extended amount of time, as ice will build up on the evaporation coil. Turn off the fridge for 24 hours and then start it up again to see if that fixes the problem.

Sound coming from the bottom

If the sound is coming from the bottom of the fridge, this it could be because your fridge is off balance. Make sure your fridge is level and all the feet are bearing pressure equally. If one foot is only lightly touching the ground, it could create a humming sound as the fridge vibrates against the floor. Also, clean out the coils with a vacuum cleaner with a brush wand.

Sound coming from inside the fridge

The evaporation motor inside the fridge is supposed to get rid of excess moisture that could form ice inside your refrigerator. If the sound becomes louder when you open the fridge, then your evaporation motor is probably broken. This is another part that you can’t fix yourself, and you must replace it.

Because refrigerators have many different motors and parts running at once, they’re very difficult to repair. Oftentimes, you’ll have to be certified anyway in order to replace a certain part. Your safest solution is to use TalkLocal for free to find an appliance repair professional in your area.

Smoke Coming from Vacuum Cleaner

Friday, November 2nd, 2012

Smoke Coming from Vacuum Cleaner Appliances Repair

Seeing smoke coming from your vacuum cleaner may be disturbing, but it looks worse than it actually is. This article will teach what do if it happens and how to prevent it in the future. Read on to first learn the cause of the smoke.

Why Your Vacuum Cleaner is Smoking

If you are seeing smoke coming from your vacuum cleaner, it is most likely coming from the vacuum’s belt. Objects, such are cables or cords, may be caught in the brush roller, causing it not to spin. The brush will keep trying to spin, but fail, thus producing smoke and a burning smell.

How to Stop Your Vacuum Cleaner from Smoking

To fix the problem of smoke coming from you vacuum cleaner, you should move any large objects away from the brush roller. You should also take the vacuum belt off of you vacuum and inspect it for damage or general wear and tear. If it is okay, put it back on. If it looks damaged or worn out, you should replace it. You can consult your vacuum’s instructions manual for how to replace your vacuum belt.

Preventative Measures

To prevent smoke from coming from your vacuum cleaner in the future, you should make sure you keep it well-maintained. Check the brush roller regularly and remove any hair, lint, etc. Make sure to empty the bag or tank regularly, before it gets completely full. Also, make sure to replace the filters at least once a year.

If this article did not help you stop smoke from coming from your vacuum cleaner, you may need to contact an appliance repair professional. With the help of TalkLocal, you can receive phone calls in minutes from up to three high quality appliance repair professionals in your area that are available when you are.

Dryer Taking Longer to Dry Clothes

Wednesday, October 31st, 2012

Dryer Taking Longer To Dry Clothes Appliances Repair

Your dryer that used to dry a full load in 30 minutes is now taking three hours to dry a towel. It’s frustrating you to no end that your dryer is taking longer to dry clothes than normal. However, don’t throw out your once trusty dryer yet, for the problem is usually fixable by simply cleaning or replacing a part. Here are some common causes of a slow dryer:

Lint trap is clogged

You should clean your lint trap every time you use your dryer, as lint buildup will slow down your drying time significantly. This is the most common reason as to why your dryer is taking longer to dry clothes. If you don’t regularly clean your lint trap, it could even start a fire in your dryer ventilation. Another place to check is in the lint trap slot. Sometimes there may be no lint on the filter, but plenty stuck in the slot that’s causing dryer slowdowns. Broken lint filters should be replaced as soon as possible.

Venting hose is clogged

The venting hose is the second part to check, as lint that wasn’t trapped in your lint filter could have ended up in your venting hose. A clogged venting hose is far more dangerous than a clogged lint trap, as this is where a fire could start. If you don’t regularly use your lint trap, then expect a buildup of lint in your venting hose. Even if you regularly do use your lint trap, something could be stuck in your ventilation that’s causing your dryer problems. Clean out your venting hose every once in a while with a vacuum cleaner as part of the regular maintenance of your dryer.

Heating element is broken

The heating element is a coiled wire inside your dryer’s cabinet that is responsible for drying your clothes. Before testing out your heating element, unplug your dryer first. Choose your dryer model from this site to find out how to open its cabinet to access the heating element. Make sure you have a multimeter ready to test out the heating element. Touch one probe to each end of the heating element and set your multimeter to the R x 1 resistance scale. If the multimeter reads a resistance of infinity, then your heating element is broken and should be replaced.

If you don’t want to mess with potentially dangerous appliances, then maybe you should use TalkLocal to find a quality appliance repair professional in your area. Soon your dryer will be running like it’s new!

Pilot Light Went out on Gas Stove

Tuesday, October 30th, 2012

Pilot Light Went out on Gas Stove Appliances Repair

The pilot light is the light on the surface of the stove on each of your burners that “guide” the gas into burning when they are released from the pipeline. Without the pilot light, the released gas will not burn and flood into the room, causing “invisible” danger. Read more to learn what to do if your pilot light went out on the gas stove.

Technical Problems

There are really only two ways a pilot light could be turned off:

– You spill water/liquid on the light and the liquid floods over the pilot light.

– The flow of gas that keeps the pilot light going is switched off.

In either case, you will need to turn it back on. To do so, follow these directions:

1. For safety measures, shut the gas behind the stove before doing anything. Moving the stove out to turn off the gas can also be dangerous due to the weight and the sheer volume of the stove — have someone to do it with you. Carry it out and place it gently so that it would not scratch up the surface.

2. Shut down the gas valve — there should be a knob that indicates the flow of gas. After shutting the flow of gas, wait for a while, and open the windows to aerate the area of any residual gas.

3. Get a candle — one of those birthday candles will be fine. Light it up using a match. Position the candle so that the flame replaces the area where the pilot light used to be. Make sure that the position of the candle stable before turning the gas back on.

Warning: Do not use a match directly, instead of a candle. Turning the gas on and then striking the match near it could create an uncontrollable flame, burning you.

4. Once the pilot light is on, move the stove back into the original position, carefully.

Additional Help

If you feel like you need professional help on fixing the pilot light on your gas stove, TalkLocal can help with finding the correct local experts in this case, saving you time and energy in what may be a stressful situation.

Microwave will not Stop Running

Monday, October 29th, 2012

Microwave Will Not Stop Running Appliances Repair

Having a microwave is such a convenience.  You can pop in a dinner or warm up some soup within a matter of minutes maybe even seconds!  The various array of things you can do with a microwave make this product extremely versatile.  You can defrost, warm up, bake, etc.  Sometimes devices like microwaves start to malfunction.  For instance, if your microwave will not stop running, then it can pose a problem for your food.

The most important thing to remember when your microwave is spazzing out is that you need to care for your personal safety first.  You should unplug the device from the power source.  Opening the door when the microwave is still on is extremely dangerous.  You should never do this.  Your face and hands could get burned very badly.  Shield your eyes and unplug the microwave as soon as you can.

The issue may be with the smart board.  This is the part of the microwave that signals the device to stop when the timer runs out or the door is opened.  If the smart board breaks or goes bad, the microwave will be unable to stop because it is short circuiting.  Once you unplug the microwave, you need to go get a new smart board and replace it. In most cases it may be completely ruined and you should just throw the entire thing away and get a replacement microwave.

If you continue to use the microwave even though it is malfunctioning you could cause serious damage. The device could blow up or start a fire, which could cause serious injury and destroy your kitchen.  You should be extremely cautious when approaching a microwave that will not stop running.

Continuing Problems

If you continue to have problems with your microwave you should seek professional help.  Use TalkLocal to be put in contact with reliable local appliance companies within minutes.  You don’t have to do any work! Simply input your problem and availability and TalkLocal will do the rest.  Almost immediately you will be connected to someone who can help you out.

Vacuum Cleaner not Picking up Dirt

Friday, October 26th, 2012

Vacuum Cleaner not Picking up Dirt Appliances Repair

If you feel like you are vacuuming the same area over and over to no avail, there are few things that could be wrong with your vacuum. This article will help you figure out why your vacuum cleaner is not picking up dirt and how to fix it.

– Check if the bag is full. If the bag is full, you vacuum will not be able to suck up any more dirt. If the bag is not full, check if the filters are dirty. They may need to be cleaned or replaced.

– Check the hose of the vacuum. The hose should be detachable from the vacuum; take it off to check if there is a clog inside of it. If you cannot peer through it and see out the other end, squeeze it to try and get anything out that could be clogging it. If squeezing the hose does not work, try poking it with a long object such as a wire hanger to get whatever is stuck out of the hose.

– Check the attachment connection of the hose and the base of the vacuum. There could be something clogging this piece of the vacuum as well. You can also use a wire hanger to remove the object if you cannot get it out with your fingers.

– Check the vacuum belt to see if it’s slipping off. If the vacuum belt is slipping off, the vacuum will make high pitched sounds and the vacuum brush will not be moving. If the belt comes off easily, you will need to replace it.

– Check the actual brush of the vacuum. If it appears to be spinning, but it is not picking anything up, there may be some objects caught inside the brush itself. Check for anything tangled up inside the brush and remove anything you find.

If none of the above suggestions help fix your vacuum, you may want to contact an appliance repair professional. With the help of TalkLocal, you can receive phone calls in minutes from up to three high quality appliance repair professionals in your area that are available when you are.