Archive for the ‘Appliances Repair’ Category


Moldy Smell in Washer

Thursday, October 25th, 2012

Moldy Smell in Washer Appliances Repair

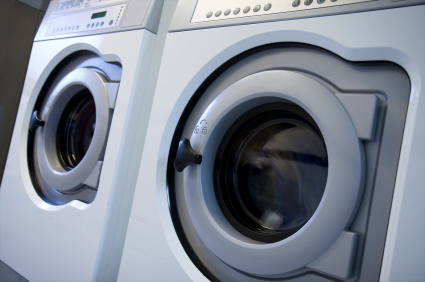
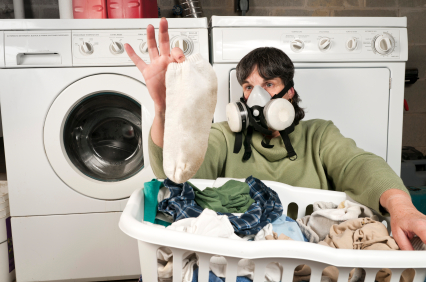
Moldy washers are pretty gross, especially when you consider that this machine is supposed to make your clothes cleaner! Use bleach or another mold cleaner to wipe the inside of your washing machine, taking care to especially clean the rubber seal that’s located between the door and the inside of the machine. There are ways to get rid of the moldy smell in your washer. Use a quarter cup of powdered dish detergent on the hottest water setting to completely get rid of the mold in your washing machine. Try opening the small door at the bottom of your washing machine and letting the water drain out. There might be a lot of water trapped inside, so get a bucket and be prepared to clean up the water. However, the best method to stay mold free is to prevent mold from forming in the first place. Here are the most common reasons mold forms inside a washing machine:

 Using too much detergent — A lot of people follow the instructions on the detergent bottle and pour in too much detergent. Detergent that creates a large amount of suds is more likely to cause mold to develop. Use 1/3 of what the bottle recommends, unless the clothes are heavily soiled.

–  Using fabric softener — Fabric softener is a source of food for mold and bacteria, and encourages mold growth on the inside of the tub. Use dryer sheets or dryer balls instead.

–  Using only cold water to wash your clothes — Hot water kills most bacteria and mold, while cold water provides a moist environment for fungi to grow. Try making your hot water load the last load of the day.

–  Not using the machine for a long time — This gives time for mold to develop without interruption by running water. If you’re going to be on vacation or won’t be using the washer for a while, make sure to fully dry the inside first. Leave the door of your washing machine to let the water dry faster.

–  Drain pump is blocked — If the filter of the drain pump is clogged, then water may drain more slowly or not at all. The excess water causes mold to develop inside the washer.

Mold is a relatively easy problem to deal with, but washers have a habit of breaking down often and the problem may not be as easy to fix. Use TalkLocal to find a qualified appliance repair professional to remove your washer woes for no additional charge!

Sour Smell in Dishwasher

Monday, October 22nd, 2012

Sour Smell in Dishwasher Appliances Repair

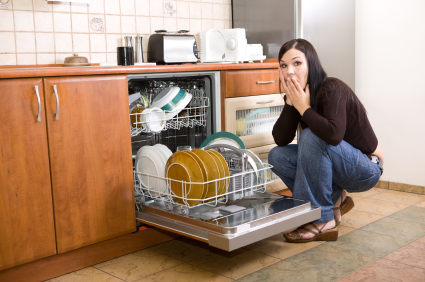
There are some pretty bad smells in the world. A sour smell in your dishwasher ranks pretty high on that list. A bad smell can originate in a number of ways, but once you find the source, it is fairly easy to get rid of the smell. So how exactly do you get rid of a sour smell in a dishwasher? Keep reading to find out.

One source is food residue. Although the food typically goes down the dishwasher’s drain as it is supposed to, small food particles and residue can remain. These can cause a sour odor if left alone too long. To get rid of this, clean the bottom of the unit with vinegar (preferably white vinegar) and rinse it thoroughly with hot water.

Another source of a sour smell can be the dishwasher hose. If the hose is not installed properly or if it is set in a position that does not allow it to drain efficiently, stagnant water can create a bad, sour smell. This hose is probably inside the kitchen cabinet below the sink and brings water to and from the dishwasher. If stagnant water is inside the hose, this foul water may be used to wash your dishes, resulting in bad odors all around.

Dead remains can also be a source of terrible smells coming from your dishwasher. Small pests like mice make their nests in warm places such as insulation and can die inside. Their dead remains create a staunch, rotten smell and the only way to remedy this is to locate the pests and replace the insulation. If possible, pull the dishwasher out and inspect the insulation for any sign of pests or pest remains.

And finally, if none of these solutions seem to work, run an empty cycle after pouring a few cups of vinegar or lemon juice into the bottom of the unit. This should freshen the smell of the dishwasher and get rid of some of the odors.

Following these steps, you should be able to get rid of the sour stench yourself, but if you feel more comfortable having a professional take a look at it, consider using TalkLocal. TalkLocal is a free service that will connect you with top-quality, reputable appliance repair companies in your neighborhood within minutes. Just enter in your specific problem, location and availability, and up to three companies will call YOU directly, saving you the time and stress of finding one yourself.

Oven Timer Not Working

Friday, October 19th, 2012

Oven Timer Not Working Appliances Repair

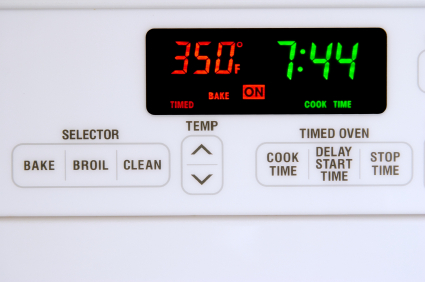
If your oven timer is not working, you should first check check your oven’s manual and make sure that everything is set correctly. If you cannot find anything wrong in the manual, you can try the following things.

Test for Power

1. Make sure that everything is turned off or you could electrocute yourself. To be sure that the power is off, check that the clock, timer, and oven light are all off.

2. Find the housebreaker or fuse.

3. Disconnect the fuse or turn the breaker off of the 220-volt wall plug.

4. Pull the plug on the oven.

5. Turn the breaker back on.

6. Test the wall outlet by plugging something else in and seeing if it works. If you plug something else into the outlet and it does not work, than the problem is with your power outlet.

Test the Terminal Block

1. Make sure you have disconnected all power.

2. Locate the terminal block in the back of your oven, where the power cord is connected to the oven’s circuity.

3. Find the terminal block wires (there will be three or four) and check for any damage. CAUTION: Do NOT touch any bare wires or terminals.

4. Turn the breaker or fuse on for a short period to see if the terminal has power. If your terminal block does not have power, it is likely an issue with the wiring in your house.

Test the Oven Timer Itself

1. Make sure you have disconnected all power.

2. Move the oven away from the wall.

3. Take off the back cover of the oven by unscrewing the screws. You will be able to see the back of the timer clock. If there is a glass panel, take it off.

4. To test if the timer/clock is working, set the VOM to the ohmmeter function and set the range to R x 1.

5. Touch a test lead to each terminal of the fuse.

6. Look for the clock motor leads and take them off of the circuit.

7. Put a test lead on each clock motor wire. If there is not continuity, there is a problem with your clock and you will need to replace it

If you have figured out the problem and prefer a professional make the repair, you can use TalkLocal to connect with up to three high quality appliance repair professionals in your area that is available when you are.

Kitchen Appliance Breakdown Insurance

Friday, October 12th, 2012

Kitchen Appliance Breakdown Insurance Appliances Repair

After buying a new kitchen appliance, you may be wondering whether kitchen appliance breakdown insurance is worth it. After spending anywhere from a couple hundred to a couple thousand dollars for your appliance, it may not seem like a good idea to spend anymore. The question becomes, is it worth it to spend money on insurance after spending so much money on appliances?

The quick answer to that question is yes, it is definitely worth it. Having the manufacturers warranty is one thing. This warranty generally protects the consumer from appliance breakdown that is the fault of the manufacturer (for example, if a part just randomly stopped working). This warranty is certainly helpful, but what happens if your electricity goes out, then comes back and ends up shorting your appliances circuit? It would be considered your fault and unfortunately, the manufacturers warranty wouldn’t cover this type of incident. That’s why having kitchen appliance breakdown insurance is a crucial. Depending on the type of coverage you buy, these types of insurances can protect you from anything—from surges in electricity to dropping your appliance.

As a homeowner, you never want things breaking, but sometimes it happens. Even if you have homeowners insurance, your major home appliances aren’t typically covered under this. Instead, this covers burglary or natural disasters, such fire. Also, the manufacturers warranty that comes with most appliances usually lasts a year, meaning when your appliance breaks in a year and a half, the repair costs are left completely up to you.

If you want to avoid situations like this, the solution is to purchase kitchen appliance breakdown insurance. This type of insurance (again, depending on the plan you purchase) usually covers any type of breakdown and allows you to find help with just one phone call. This insurance is also a great idea if your appliances are fairly old, as kitchen appliances typically begin breaking down after a few years. You can protect yourself from costs and long waiting times by purchasing kitchen appliance breakdown insurance. Don’t make the mistake of not protecting yourself with insurance.

If you need help deciding what the best type of kitchen appliance breakdown insurance is, or if you need help fixing an appliance, consider using TalkLocal to find a capable appliance repairman for you. TalkLocal is a free service that will connect you with top-quality, appliance repair companies in your neighborhood within minutes. Just enter in your specific problem, location and availability, and up to three companies will call YOU directly, saving you the time and stress of finding one yourself.

Smeg Oven Timer not Working

Tuesday, October 9th, 2012

Smeg Oven Timer not Working Appliances Repair

Smeg ovens are typically high-quality ovens that come in many different shapes and sizes. They offer different models that use both electrical and gas, and they offer different styles and colors to suite every consumer. Unfortunately, Smeg ovens are just as susceptible to breakdown as any other ovens, whether the issue is electrical or structural. One such breakdown can be with the oven timer. Quite a few people have complained about their Smeg oven timer not working. There’s no easy answer to solving this issue, but there are a few steps that can be taken to remedy this.

The first troubleshooting step you want to take is to try resetting the oven. To do this, move the oven away from the wall and remove the power cable from the outlet. Wait about 20 minutes to allow it to reset, then plug it back in to start the oven back up. If you don’t feel like moving your oven, an alternative option would be to reset your circuit breaker. Once you reset the breaker, the oven timer should reset as well.

You can also try holding down all the timer buttons at the same time. Some people have reported that this tactic works at times to reset the timer. Another tip is to consult your user manual. Typically, the manual offers troubleshooting steps that can quickly and easily solve any of your problems.

However, if none of these methods worked to get your Smeg oven timer working again, then it is likely your oven timer has structural damage and will need to be investigated by an appliance repairman or an electrician before more damage occurs. If you are looking for someone to help, consider using TalkLocal to find a capable appliance repairman for you. TalkLocal is a free service that will connect you with top-quality, appliance repair companies in your neighborhood within minutes. Just enter in your specific problem, location and availability, and up to three companies will call YOU directly, saving you the time and stress of finding one yourself.

Installing Electrical Wiring in a Wall Oven

Friday, October 5th, 2012

Installing Electrical Wiring in a Wall Oven Appliances Repair

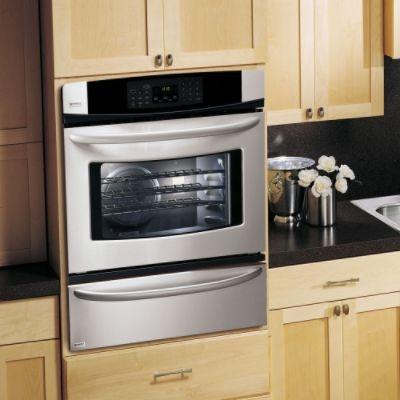
If you recently purchased a new oven and would like to install it on your own, the most difficult step will probably be getting it connected to your home’s electrical system.  For most of us, wiring a major appliance like an oven is a daunting task.  It can be very confusing figuring out which wire goes where and how exactly to connect everything safely.  Here are a few steps to keep in mind to help you cut down on the stress and strain of installing electrical wiring in a wall oven.

The first thing to do before getting started is read up on your local electrical wiring codes.  Many localities now require a separate neutral and grounding wire, which means that you will need to have four different wires connecting your oven to your house. These wires are: a black power wire, a red power wire, a white neutral wire, and a bare or green ground wire.  If your local code does not require a separate grounding wire, you will only need the red, black, and white wires.  You will be connecting the wires from your oven to the junction box in your kitchen.  Before installing, consult your oven’s user manual and check that the amp requirements are met by the circuit breaker the junction box is connected to, and then disconnect the power supply by tripping the breaker for the circuit.  Be absolutely sure that you flip the correct fuse or you could seriously injure yourself.

Now you should be ready to connect your oven.  Simply connect the black wire from your oven to the black wire in your junction box, and the red oven wire to the red junction box wire.  If you need to use separate neutral and grounding wires, connect the white oven wire to the white junction box wire and the green/bare oven wire to the junction box itself.  Otherwise, connect both of these two wires to the casing of the junction box.  Once all of this wiring is installed safely and securely you can turn the circuit breaker back on and your oven should be ready to use.  If something went wrong or the oven will not turn on, you might need to bring in a professional electrician.  Luckily, you can find one in your area in just minutes by using TalkLocal to automatically connect you for free.  All you have to do is enter your name, contact info, and a short description of your problem.  Try it out today for all your home service needs!

Washing Machine Moves Across Floor

Thursday, October 4th, 2012

Washing Machine Moves Across Floor Appliances Repair

It’s important to keep your washing machine on a level ground if you want it to do its job. A washing machine that isn’t positioned evenly will not work efficiently and will move around. Balancing it isn’t too difficult, so if your washing machine moves across the floor, continue reading.

First you will want to check and see if your washing machine is level. Check underneath the machine and ensure you can see all four feet are firmly planted on the floor. If you’re reading this, chances are they aren’t all firmly on the floor.

Identify which side of the washing machine isn’t level by placing a carpenters level on the top of the front edge of the washing machine and checking for the air bubble to see which side of the washing machine is low. The bubble will be on the side of the washer that needs to be lower.

On the feet of the washing machine will be locknuts that need to be adjusted. Using a wrench or pliers, loosen the locknuts and turn the front feet until the bubble on the carpenters level is in the center. Now that the front feet have been evenly leveled, the back feet are next. Tilt the washing machine forward so that the back of the washer lifts off the floor. Since back legs of a washing machine are almost always self-adjusting, this step allows the back legs to easily adjust.

After placing the machine back down and in place, place the carpenters level on the left or right edge of the machine so as to check whether the washing machine is level from the back to front. If they aren’t, turn the front feet until the bubble is in the center of the carpenters level. When you finally manage to level the washing machine, tighten the locknuts to ensure it stays in place.

This process isn’t too complicated, but if you followed these steps and still need help or if you have a different issue with your washing machine, consider using TalkLocal. TalkLocal is a free service that will connect you with top-quality, reputable appliance repair companies in your neighborhood within minutes. Just enter in your specific problem, location and availability, and up to three companies will call YOU directly, saving you the time and stress of finding one yourself.


Microwave is not Heating Up

Thursday, September 20th, 2012

Microwave is not Heating Up Appliances Repair

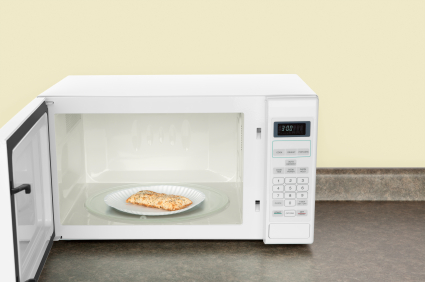
Your microwave is a helpful device that makes cooking a lot easier.  It speeds up the process of defrosting, heating up, etc.  When your microwave begins to malfunction it can really make life difficult.  When your microwave stops heating, the entire device becomes useless. However, you should still try to fix it by first determining the problem. Below are a few possibilities for why your microwave is not heating up.

Magnetron Failed

A magnetron is the part of the microwave that actually produces the heat to warm your food.  This component is a major part of the microwave and actually makes up 95% of the cost of the entire oven. For this reason many people opt to simply replace the entire microwave rather than pay for a replacement part. The problem may also be that the circuit providing power for the magnetron is faulty and you will need to take it apart to find the problem. You will need a voltmeter to find exactly where the issue is.

High Voltage Capacitor Defective

The high voltage capacitor in your microwave oven could be defective, causing your microwave to stop heating properly. This part of the microwave store electricity. If this component is defective then not only will your microwave not heat but you will also hear a buzzing noise. You should replace this part if you want to fix the problem. Before you test to see if it is indeed the capacitor causing problems, you should discharge to avoid injury.

Diode Malfunctioning

A third possibility is that the power diode that passes current in one direction is malfunctioning.  You should test the diode to see if it is defective and replace it if it is.

Continuing Problems

If you continue to have problems with your microwave not heating you should seek professional help.  Use TalkLocal to be put in contact with reliable local businesses within minutes.  You don’t have to do any work! Simply input your problem and availability and TalkLocal will do the rest. Almost immediately you will be connected with someone who can help you out on the phone.

Toaster Oven Timer Broken

Tuesday, September 18th, 2012

Toaster Oven Timer Broken Appliances Repair

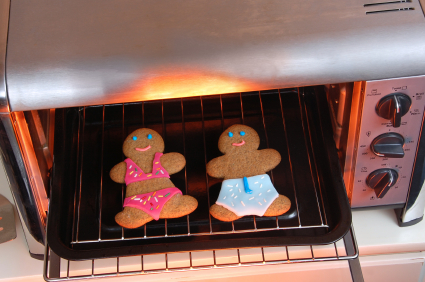
Toaster ovens are a compact and easy way to cook for one or two without having to waste the energy needed to power a conventional oven. The timer knob on the toaster oven allows you to set some food in the oven and not worry about it burning.  The oven gives off a loud ding alerting you to when your food is ready. So if your toaster oven timer is broken, you should try to fix it as soon as you can and there are a couple things that you can do.

You can try to replace the knob or simply get a separate timer.  To replace the knob, open up the side panel on the oven; you will see the wiring for your toaster oven. Check that the two wires that connect the switch to the oven are intact.  If not, use electrical tape to fix them. If the wire is beyond repair, you should get replacement wires from the hardware store. You can also buy a replacement knob from the manufacturer for around $5. Pull the knob off from the front after you remove the housing screws and replace the wires and knob. Replace the side panel and see if the knob works again.

Another option you have is to get a side timer. You can set the timer and walk away, but be sure to return as soon as the timer goes off so that you can turn the oven off.  This option is not directly attached to the oven so the heat will not turn off with this timer.  You should be vigilant when you use this kind of timing option.

Continuing Problems

If neither of these options work you should either replace the entire toaster oven or seek professional help.  Use TalkLocal to be put in contact with reliable local businesses within minutes.  You don’t have to do any work! Simply input your problem and availability and TalkLocal will do the rest.  Almost immediately you will be connected with someone who can help you out on the phone.

Refrigerator is not Cooling

Thursday, September 13th, 2012

Refrigerator is not Cooling Appliances Repair

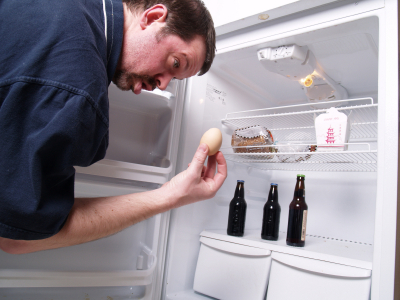
So, your refrigerator is not cooling? Is there green smoke and a funky smell coming from your fridge? Let’s get rid of that nastiness so you can get back to having fresh, safe food! Check out these common problems and their solutions.

Defrost that build up

A common problem with refrigerators stems from the freezer component of the unit. Sometimes a buildup of ice occurs and blocks the evaporator cover of the unit. If this is the case, unplug the unit and allow the frost to melt.

Check the fan

If the fans under the refrigerator are not working, it will affect your whole unit. Get close to the refrigerator and listen for the fan. If you do not hear the fan running, you may have an issue.

Deice the drain

Occasionally your drain may back up with water. When this happens, the water freezes. If the water freezes, water will be leaking inside the fresh food section. Look on the back or bottom of the freezer to locate the evaporator cover and remove the ice. Once the ice is removed and melted, unclog the drain. To take preventative measures, mix baking soda and water together and pour the mixture down the drain.

Listen closely

If you hear a clicking noise every three minutes or so, your condenser may be the culprit. This is happening because the condenser is overheating and is clicking to take time to cool off again. In order to fix this problem, remove the back of the refrigerator and locate the condenser coils. If they are dirty, take time to clean them. Allow the refrigerator to sit unplugged for about 30 minutes to give it time to cool off before you plug it back in.

If you are still having issues, check out TalkLocal, a free service that can connect you directly to professionals right in your neighborhood.