Wishing you Happy New Year!

Tuesday, January 1st, 2013

Wishing you Happy New Year! Seva Call

At Seva Call, we’re wishing you a happy New Year by giving you a sneak peak at a few of the things that we’re working on in the office. Look out for these exciting new additions to Seva Call!

1.     In the office, we are eager to launch of our free iPhone and Android apps! We’re just adding the finishing touches on these apps, so they’re flawless for you, your friends, and your family. These apps will allow you to easily find the local professionals you need from your home, office, or even your car! Don’t waste an extra minute searching the yellow pages when your smart phone can find you a solution in just a few minutes.
2.     We’re working hard to expand our services to help everyone we can! Seva Call is growing fast! Look out for launches in New York, New Jersey, North Carolina, Georgia, Alabama, Florida, and many other states across the nation.
3.     Our writers are thinking of interesting, important, and useful new articles to post to our website. These articles will help you accomplish tasks from winterizing your house to staying fit for the New Year. We promise you’ll find our tips useful and relevant.

Don’t worry, that’s not all! In the office, we’re always thinking of new ideas. Keep an eye out for our new advancements to Seva Call in 2013.

All of us at Seva Call hope you had a relaxing and fun filled holidays spending time with loved ones. We sincerely wish you a happy and healthy 2013.

Safe Ways to Kill Cockroaches

Monday, December 31st, 2012

Safe Ways to Kill Cockroaches Pest Control

Cockroaches are incredibly resilient creatures, being able to survive for months without water or food. Fortunately, there are many safe ways to kill cockroaches that are nontoxic for your home, which is perfect for households with kids or pets. However, if you see roaches on a regular basis, then you’ll still want to hire a professional, as this may be the only way to actually rid your home of roaches.

Live Traps

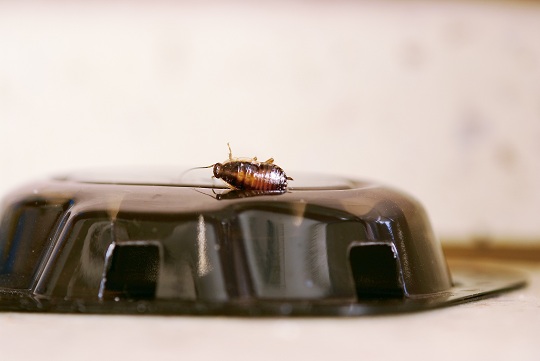
There are many live traps that can either be purchased or made using a steep bowl or container. All you’ll need to do is put petroleum jelly on the sides of the bowl so the cockroach cannot get out afterward. Place some cockroach bait on the bottom of the bowl and create a paper ramp so that the cockroaches can get into the bowl but not out. You can then flush the cockroaches down the toilet to safely get rid of them.

Boric Acid

Boric acid is an insecticide that’s much less toxic than a lot of other insecticides. Simply mix together one part boric acid, one part flour, and one part granulated sugar. The sugar attracts the roaches while the flour sticks the mixture to them and the boric acid damages the cockroach’s shell so that they die of dehydration. Be very careful where you put this, as kids and pets may choose to eat it so place it only where bugs can get it.

Cockroach Bait Station

Many stores will also sell cockroach bait that’s placed within a child and pet-proof container. The roaches should eat the poison and bring back the food to the nest, where it should kill the infestation. Other traps may contain an adhesive to trap the cockroaches.

These three methods are usually the best child and pet-proof solutions for getting rid of cockroaches. Once again, if you’re consistently seeing cockroaches, you’ll definitely want to call a pest expert to clear the infestation. You can always use TalkLocal to find a high quality pest control expert in your area to take care of your cockroach problem in just minutes!

Replacing Garage Door Panels

Monday, December 31st, 2012

Replacing Garage Door Panels Garage Door Repair

Your garage door may endure quite a bit of wear and tear throughout its lifetime. Fortunately with some DIY spirit, you can replace the damaged garage door panels yourself and extend your garage door’s lifespan. This is most likely a project you’ll want some help with, as the panels may be rather large and unwieldy. Otherwise, replacing garage door panels is fairly straightforward.

Find replacement panels

Each garage door will have different sized panels so make sure you first contact your garage door manufacturer to order the correct style of panels. At this point, you may also want to consider replacing the entire garage door, especially if there’s actual functional damage to the rails or extreme cosmetic blemishes.

Remove the old panels

You will want to raise the garage door and disconnect the power to the automatic garage door opener. You will be able to loosen the turnbuckles and tension springs that hold the panels in place; be careful here as the tension springs have quite a bit of stress on them.  Unscrew the hinge from each side of the panel that you need to remove until all the damaged panels are removed. 

New Panel Installation

You should now be able to slide in each new garage door panel.  You will need to insert them into the top of the garage door track and then attach them once they are positioned correctly. Then, you need to reconnect the hinges and the turnbuckles/springs you removed earlier.

Your garage door now should be looking like new!  Depending on the color of your garage door, you may want to prime and paint it to match the other panels.  If you’re looking for more help or just want to talk to an expert, TalkLocal can connect you to a garage door repair expert in just minutes!

Can All Carpet Stains Be Removed

Monday, December 31st, 2012

Can All Carpet Stains Be Removed Carpet Cleaners

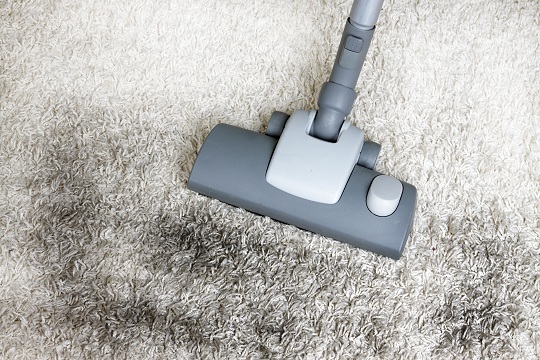
Unfortunately, not all carpet stains can be removed. Some oil-based stains, such as tar or gasoline, will be considerably harder to remove when it is already dried into the fibers of the carpet. These stains will also require some heavy-duty cleaning, which may even destroy the carpet if the fibers are too worn out. Therefore, it is best to act before the stain completely dries up, as most stains can be removed without heavy cleaning.

Most Common Types of Stains

Flavored drink stains (from juice, kool-aid, etc.) can be removed through the following steps:

1. Dab the stain with a dry towel without rubbing it in or spreading it around. Absorb as much of the liquid as you can.

2. Mix together 1/4 cup of white vinegar, one tablespoon of liquid dish soap, and one cup of water in a sprayer and spray on the stain. Let it sit for about 10 minutes.

3. Wipe the stain with a new dry towel.

* Warning: if the carpet is old and valuable, consult a professional as to not damage the carpet.

Coffee stains can be dangerous, meaning they can leave a permanent mark on your carpet unless they are treated before the coffee dries into the fibers. Follow these steps:

1. Dab the stain with a dry towel without rubbing it in or spreading it around. Absorb as much of the liquid as you can.

2. Mix together 1/4 cup of white vinegar, one tablespoon of liquid dish soap, and two cups of water in a sprayer and spray on the stain. Let it sit for about 25 minutes. Diluting the coffee stain works well in most cases, which is why you should add more water to the solution and wait a bit longer.

3. Wipe the stain with a new dry towel.

* Instead of trying the entire solution, try a little to see if there is any effect on the carpet. If you find that it does not help, run to the nearest store and buy a commercial mix for your type of carpet.

Additional Help

Can all carpet stains be removed? No, but most can be. If you feel like you need professional help, TalkLocal can help with finding the correct local experts in this case, saving you time and energy in what may be a stressful situation.

Do I Need a License to Cut Down Trees

Monday, December 31st, 2012

Do I Need a License to Cut Down Trees Tree Removal

When asking the question – do I need a license to cut down trees, you first need to figure out what specific trees you talking about. If you mean a couple trees in your backyard, then you free entirely free to do so, as these trees are your property. But be careful not to damage anything when the tree falls down — this includes you and your property as well as your neighbors and their properties. Make sure that you are taking the right precautions.

How to Cut Down a Tree

Dress for the occasion: A simple t-shirt and jeans won’t cut it. Wear a durable jacket, some protective headgear, jeans, and closed toe shoes to account for the tree debris. Then choose the direction which you want the tree to fall and clear that area of all objects. Make sure people in the area steer clear of the area and are aware of your tree removal project.

Next, assess the tree. Look at the slope of the ground and the slope of the tree itself. Needless to say, the slope in which you cut the tree and the slope of the ground is a more favorable direction for the tree to fall due to sheer gravity. Also, watch out for the branch distribution of the tree — the more branches it has on a side, the more weight that side carries.

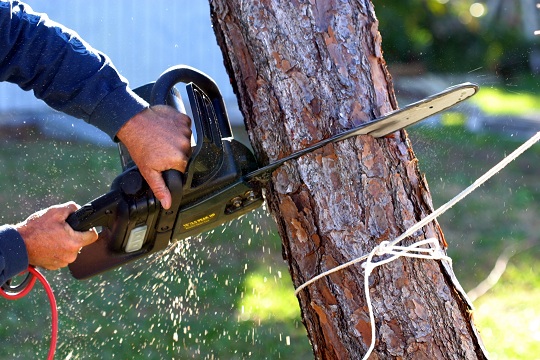
Start by using a chainsaw to make a wedge cut from the direction which you want the tree to fall. Take the chainsaw at an angle that is slanted upward, at a 30 degree angle. Run the chainsaw through the tree at that slope, but do not cut the entire width of the tree. Only cut about 70% of it. You should now have a hanging cut in the tree.

Now make another wedge cut, slanted downwards at about the same angle and the same direction from which you want the tree to fall into. The two cuts should converge and leave a block of wood hanging loose in the tree. Take the block of wood out and you should have a “chipped” tree.

Push or kick the tree in the direction you want it to fall. This shouldn’t be too hard, as you have a chipped incline in the tree that guides the fall. Stand in the opposite direction of the incline and kick the tree away from you. Take into account the evenness of your footwear and the wind current if there is any.

Additional Help

If you feel like you need professional consultation on how to cut tree, TalkLocal can help with finding the correct local experts in this case, saving you time and energy in what may be a stressful situation.

Can I Upgrade from Tiger to Snow Leopard

Monday, December 31st, 2012

Can I Upgrade from Tiger to Snow Leopard Computer Repair

You might be thinking, can I upgrade from Tiger to Snow Leopard for your Mac?  Upgrading Mac OS 10.4 Tiger to Mac OS 10.6 Snow Leopard should be very easy as long as you have an Intel processor and at least one GB of RAM. If you have a PowerPC processor of any kind, then I’m afraid you’re out of luck, since the highest OS version PowerPC supports is Leopard. However, if you’re sure that you have an Intel processor, then the installation should be no problem. Your upgrade will work with a $29 Snow Leopard update CD, so there’s no  need to get the full $169 Snow Leopard package.

When installing the new OS, you don’t have to do a clean install, but you should back up your files on an external hard drive. If you want to be extra careful, you can create a bootable hard drive image that can be used to your entire computer. Use Super Duper to create a bootable backup of your hard drive, just in case anything goes wrong during the installation. If you run into any major problems, such as the installer hanging or any error coming up, you may want to try doing a clean install of Snow Leopard. For this, make sure you have your files backed up! Either create a bootable image with Super Duper or backup your files manually, but you must backup your files in some manner. Below are the steps:

1. Boot from the Snow Leopard CD.

2. Click Install Mac OS X.

3. Click on Utilities and follow the instructions to restart your computer.

4. Click the Utilities again, and then click Disk Utility.

5. Click Erase a Volume to completely wipe the hard drive.

6. Quit out of Disk Utilities and proceed with the installation as usual.

Snow Leopard is ideally installed on top of an existing Leopard OS, so unforeseen problems might come up if you currently have Tiger. Use TalkLocal for free to find a professional computer technician to fix your OS problems!

Installing an SSD into a Desktop

Friday, December 28th, 2012

Installing an SSD into a Desktop Computer Repair

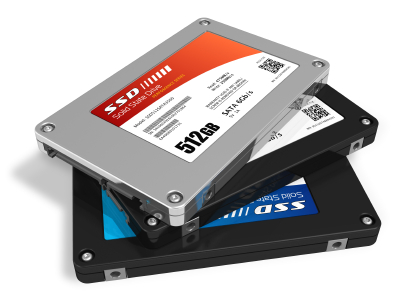
There are many reasons to switch to a solid-state drive (SSD). Generally, an SSD reads data faster than a hard disk drive (HDD). Though it falls short when storing media, it works well with storing applications and operating systems. An SSD also shortens the boot up time of your desktop and consumes less battery than a HDD. If you are installing an SSD into a desktop, follow the steps below.

Things to keep in mind before installation

– When you are selecting an SSD, a 60GB capacity is typically sufficient for a desktop.

– If you have large files, be sure to move them to the HDD at the time of their installation.

– Before taking your desktop apart, check your warranty. Some manufacturers do not cover damages from consumer installations, so work carefully.

Installation

1.   Make sure the computer is turned off.

2.   Refer to your computer’s manual for how to safely remove the case.

3.   If you have a 2.5″ SSD — which is most common today — you will need an adaptor bracket to make the SSD fit. If you have a 3.5″ SSD, you do not need the bracket.

4.   Attach one end of a SATA cable to the SSD and the other end to the motherboard.

5.   Install the SSD into an available disk bay.

6.   Replace the case.

7.   Turn on the computer. A message should say the SSD is recognized

After Installation – Operating System Transfer

You can transfer your operating system to your SSD by using a program such as Paragon Migrate OS to SSD 2.0 (available for $20) or transferring it manually.

If you want to play it on the safe side, use TalkLocal to find professionals in your area who can help with your specific computer needs. Just fill out a service request online, through the phone, or on the mobile application, and talk to a local service provider in minutes.

How to Remove Tree Roots

Friday, December 28th, 2012

tree_with_roots___edit_by_ahintofpurple-d4ajx43

Trees play a critical role on our planet. They are responsible for providing us with food and oxygen, they filter our air and make Earth livable for humans, and they preserve soil and support wildlife. In short, trees are an essential part of our lives and deserve our respect. However, sometimes, trees become cumbersome and difficult to manage when they become too big and get in the way of other things you may want to grow. Alternatively, a tree can break due to a storm, leaving just the stump and roots remaining. With either of these situations, removing roots may be necessary. Unfortunately, removing a tree’s roots, especially older, larger trees, can be a tough, long process. Luckily, this is the perfect article to read if you want to know how to remove tree roots.

Since the first step to removing roots is to remove the stump, you will want to make sure this has been removed before proceeding. If you haven’t yet completed this step, go here to learn how. Removing tree roots requires the proper equipment, meaning a shovel/hoe and a chainsaw/ax/loppers.

Once you have gathered all your materials, the next step is to expose all the outlying roots. Dig around the base until the roots are exposed. Then, use your root-cutting equipment (chainsaw, ax, or loppers) to cut the tree roots. The key to root removal is to dig all around the roots, including underneath them, to make it easier to cut the roots. The best way of cutting thicker roots is to make a clean cut in a circular shape around the different sides of the root to join the incisions into one large incision. Also, cut smaller roots before moving on to larger roots. This will allow you to remove older and thicker tree roots that have had time to grow.

Once you have finished digging and cutting, you will have a large hole in your ground where roots used to be. To make the land fertile again, clean away any old fragments of root or stump. Then, place soil and/or sod to ensure the area returns to its previous glamour.

If you need help removing your tree stump or roots, consider using TalkLocal to find a tree removal specialist for you. TalkLocal is a free service that will connect you with top-quality, tree removal companies in your neighborhood within minutes. Just enter in your specific problem, location, and availability, and up to three companies will call YOU directly, saving you the time and stress of finding one yourself.

Highest Rated Carpet Cleaning Machines

Friday, December 28th, 2012

Highest Rated Carpet Cleaning Machines Carpet Cleaners

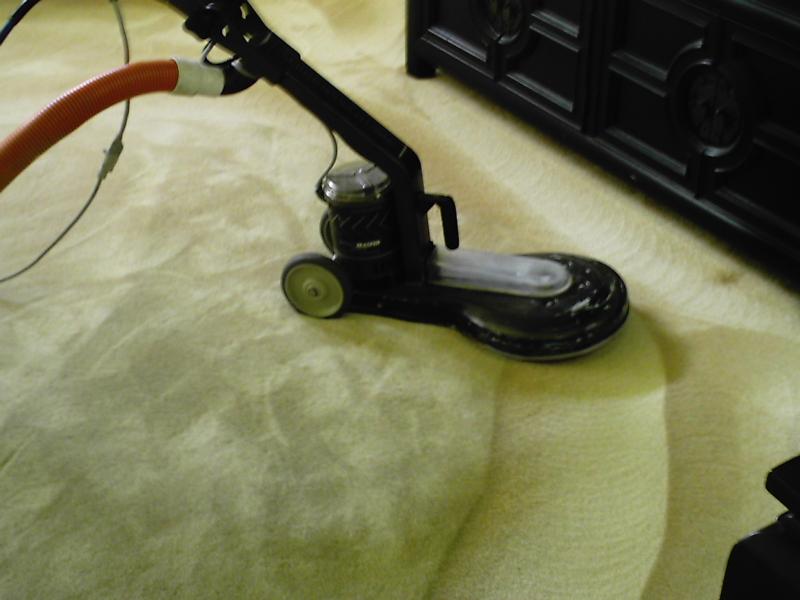
If you want to truly clean your carpet, it will require a carpet cleaning machine or a steam cleaner. A steam cleaner uses a mixture of water and detergent along with rotating brushes to scrub each fiber of your carpet, making it completely clean. Below is a description of the highest rated carpet cleaning machines.

Hoover SteamVac with Clean Surge

The Hoover SteamVac with Clean Surge is the highest rated carpet cleaning machine by consumers, according to a consumer review site called Consumer Search. The price of the Hoover SteamVac with Clean Surge is abut $150, which is average for a steam cleaner. Tests by third parties indicate that carpets cleaned with the Hoover SteamVac with Clean Surge are cleaner and less wet once the cleaning is complete. It has five cleaning brushes and two tanks full of cleaning solution. Additionally, it has the “clean surge” which gives extra cleaning solution to carpet stains. The only negative aspect about it is its breakable plastic pieces.

Bissell QuickSteamer PowerBrush

A cheaper, but still quality carpet cleaning machine according to Consumer Search, is the Bissell QuickSteam PowerBrush. It costs less than the Hoover SteamVac with Clean Surge at about $100, a low price for steam cleaners. It is very effective for cleaning small rooms or carpets, but it not designed for cleaning large rooms, let alone an entire house. The negatives to the Bisell QuickSteamer PowerBrush are that it tends to leave carpet particularly wet and the steam cleaner sometimes leaks. It also has a smaller water tank.

Bissell 9400 Proheat 2X Select Upright Deep Carpet Cleaner

Another product review company, GALT Home, rates the Bissell 9400 Proheat 2X Select Upright Deep Carpet Cleaner as one of the best carpet cleaning machines for consumers. It is very powerful and has excellent suction. It has 10 cleaning brushes and a 12-inch cleaning path. Additionally, it can heat up water to get rid of tough stains on the carpet. It is the highest rated, but also one of the most expensive carpet cleaning machines at $199.

If you do not wish to purchase a carpet cleaning machine or steam clean your carpets yourself, you can contact a carpet cleaning professional to do it for you. With the help of TalkLocal, you can be on the phone in minutes with up to three high quality carpet cleaning professionals in your area that are available when you are.

Repair Bathroom Exhaust Fan

Friday, December 28th, 2012

Repair Bathroom Exhaust Fan Electricians

To walk into a bathroom with a broken exhaust fan right after someone has either performed a “number 2” or taken a shower is no pleasant experience. Bathroom fans can be extremely handy in either sucking up and clearing away those more pungent smells, or removing the moisture and humidity that comes with taking a warm shower. If your bathroom exhaust fan is broken, here’s what you can do to troubleshoot the problem:

If the switch for your bathroom light works but the switch for the exhaust fan doesn’t, then it is most likely the fan motor that is broken. Replacing the motor is a fairly simple process if you have the right tools and take the appropriate safety precautions.

How to replace the fan motor

Before doing any type of repair work, it is critical to turn the switch for the fan OFF, and also to turn off the electricity for it through your house’s circuit breaker panel. If the power for the fan is connected to the power for the bathroom light, you will have to turn this off and continue with a flashlight or other source of light.

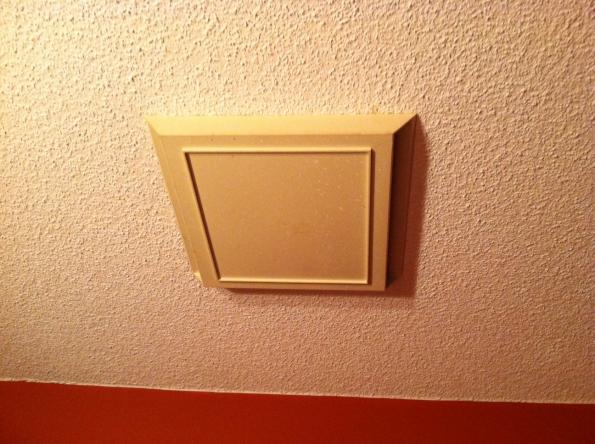
Next, unscrew and remove the cover panel for the exhaust fan, being sure to save any disconnected screws. Then inspect the fan for any visible damage. In most cases, you will see that there is a fair amount of dust built up from the fan’s use, so it may be helpful to clear this away before continuing.

If after cleaning the dust and inspecting the fan, you may see that there is a disconnected wire. If so, simply reconnect it. If you see no disconnected wires, the next step is to check out the fan motor.

Unplug the exhaust fan and pull it out along with the fan motor. You may need to apply some pressure and pull steadily to remove it, or there may be a couple screws holding it in place. Then, either take note of the specific model number of the fan, or bring it along with you to the nearest hardware store to buy a replacement. Installing the new one should be simple; just follow the removal steps in reverse.

If you are having trouble removing or replacing your exhaust fan, it may be a good idea to contact a professional. Try using TalkLocal to contact an electric contractor near you. TalkLocal is a free service that will connect you with top-quality, reputable electricians in your neighborhood, within minutes. Just enter in your specific problem, location, and availability and TalkLocal will contact multiple companies who will then call YOU directly, ready to help.