Laptop Mouse Button Stuck

Wednesday, December 26th, 2012

Laptop Mouse Button Stuck Computer Repair

Your laptop travels everywhere with you — to the office, lunch, and everywhere in between. From heavy usage, dirt and debris can build up on your mouse buttons and make them stick. If you find your laptop mouse button stuck, here’s how you can fix it:

Lodged debris

1)   Turn off the laptop and make sure it is not plugged into an electrical outlet.

2)   Spray a can of compressed air along the cracks of the stuck mouse button. Tilt the can at an angle to reach deep into the button crevices.

3)   Run a toothpick lightly along the cracks to dislodge any debris.

4)   Use the compressed air again.

Sticky substance

If you think soda or some sticky substance has caused the button to stick, moisten the bristles of a toothbrush or some thin tool to clean the edges. Do not moisten the toothbrush too much for obvious reasons. Also, be careful not to probe too deeply or else you may damage internal components.

Broken spring mechanism

If the button is still stuck, the problem may not be due to dirt. Instead, the spring mechanism underneath the button may have come out of place. You can take apart your laptop and reset the spring into its holder.

Professional assistance

If you are wary of taking your laptop apart, you can check your warranty for coverage. If it has not expired, contact your manufacturer for repair help. If it has expired, you can use TalkLocal to connect you to a computer repair service to restore your mouse button to its original state. TalkLocal will browse multiple companies and send the most appropriate service providers your way. Within minutes of filing a service request online, you will receive a phone call from a computer repair company that can solve your problem on your schedule. Now that’s customer service!

Cleaning Window Shutters

Monday, December 24th, 2012

Cleaning Window Shutters Maid Services

Shutters provide both form and function to your house while being instantly noticeable, so it’s important to clean them often to maintain a good impression. Depending on the material of your shutters, you’ll need different cleaning supplies. Use this guide if you are wondering how to go about cleaning window shutters.

Interior shutters

For painted and vinyl shutters, a mixture of dish detergent and water is fine, but for wooden shutters you’ll need special wood polish. However, a vacuum cleaner with a brush attachment is required for the weekly maintenance of all shutter types. Then, depending on the shutter material, use either the wood polish or the water and detergent solution for a monthly cleaning. Follow up this process with a toothbrush to get into the crevices of the shutters. If you used the detergent solution on painted/vinyl shutters, make sure to rinse off the soap with clean water and dry thoroughly.

Exterior shutters

Mix a cleaning solution of one part dish detergent and four parts water. Pick a cleaning tool with a long handle, like a brush or a mop, if your shutters are high up and out of reach. If you have a pressure washer, use that to spray away any debris and dirt on your shutters. Otherwise, your gardening hose on high pressure will be fine. Use your chosen cleaning tool to scrub your shutters, starting from the top down, so the dirty water won’t get on the clean sections of the shutter. Use the hose to rinse the shutters while the shutters are still wet from the cleaning solution.

If you don’t have the time or effort to do this every week, why not find a maid to do it for you? For absolutely no charge, TalkLocal will find you the most reliable maid service that fits your schedule.

How to get rid of Hornet Nests

Monday, December 24th, 2012

How to get rid of hornet nests Pest Control

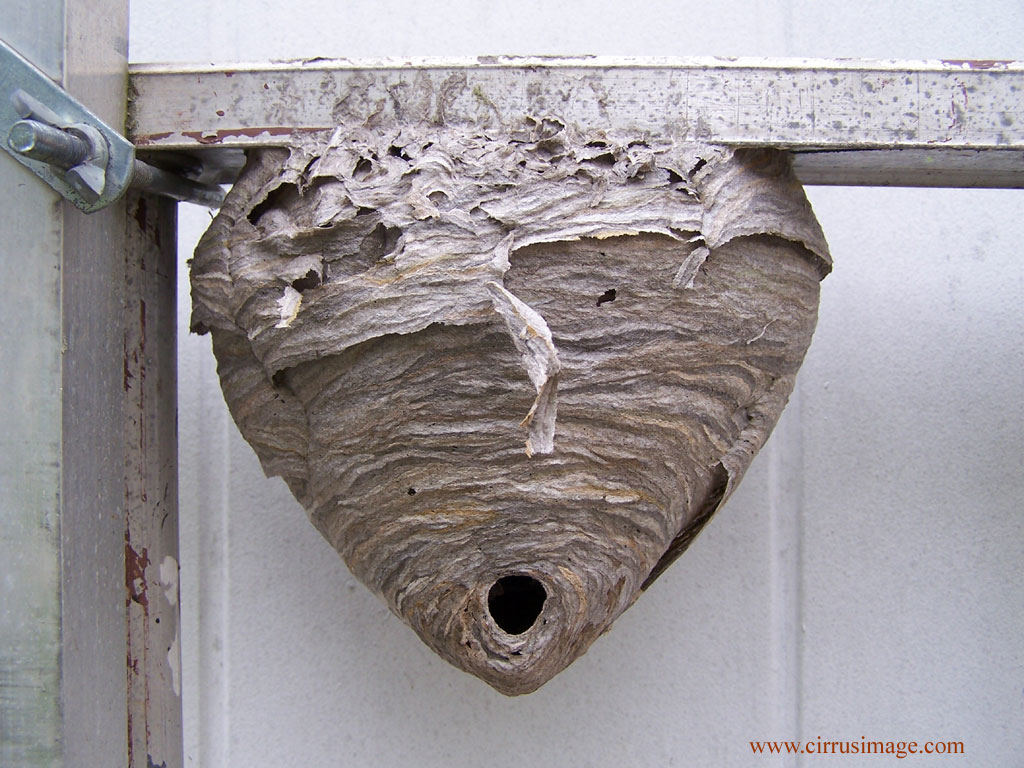
Hornets are one of the scariest pests to get rid of by yourself, but it is definitely possible to eliminate your hornet infestation if you’re careful about it. Protective clothing and a clear backup plan are two of the most important factors in a successful wasp removal strategy. After getting rid of the nest, you’ll need to take preventive measures against future hornet and wasp infestations. Below is a detailed guide for how to get rid of hornet nests.

Removing the nest

1. Locate the nest; it is usually in a dry place protected from the elements, such as under your porch, in the eaves of your roof, in the attic, or along a doorway.

2. Get a special wasp insecticide from your home improvement store. All the wasp insecticides are essentially the same, so get at least two of the cheapest aerosol cans.

3. Don protective gear that covers every inch of your body. Tuck pants into socks and long sleeves into gloves. Wear a large brim hat covered by a nylon stocking that tucks into your collar. If you have a respirator, wear that too. Insecticide might not kill humans, but it’s definitely not good for you. If you do not have a respirator, wear something that covers your mouth and nose and make sure the area is well ventilated.

4. Plan out an escape route for after you spray the wasp nest. Make sure to retreat quickly after furiously spraying the nest, as any wasps that you might have missed will go after you. Breathing in the wasp insecticide is pretty harmful for your body as well, so you should exit the area fast.

5. Attack the wasp nest at night to catch all the wasps in the nest asleep, but you may have difficulties escaping the area if you can’t see your surroundings properly. If this is the case, attacking at dusk or dawn is also a viable option, but more hornets tend to be awake.

6. Attack the nest from far away, as most of these wasp and hornet killers have a spraying range up to 15 feet. After a while, start moving closer to the nest to spray.

7. Leave the nest alone for a while, as any wasps that return to the nest will also die on contact. Do not go near the area for a few days.

8. Remove the nest entirely by sticking it in a plastic bag and throwing it away.

People who are allergic to hornet and wasp venom should not attempt to do this by themselves, and should instead hire a professional pest control service to take care of their problem. The best solution is to use TalkLocal for free to find a pest control service that tackles wasps.

Smoke Coming Out Of Computer

Monday, December 24th, 2012

Smoke Coming Out Of Computer Computer Repair

Smoke Coming Out Of Computer

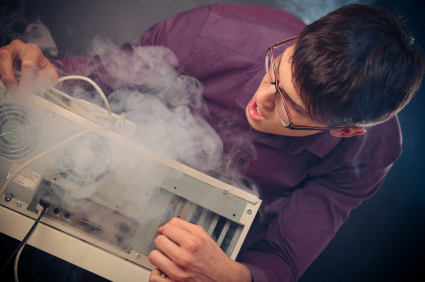
Smoke is never a good sign, especially when it is coming from your computer. This critical problem is more severe than any issue tech support can handle. Due to its dangerous nature, you should address this problem immediately. Stop what you are doing instantly and unplug the computer. Do not breathe in the smoke. Give your computer some time to cool off, about 5-10 minutes, before trying to turn it on again. Read on to learn more if there is smoke coming out of your computer.

Potential cause of the problem

Overheating is the cause of smoke coming out of your computer. It is detrimental to the lifespan of your computer, so make sure to regularly clean your computer, fansand the CPU tower, and keep your computer in a cool place.

Check to make sure your fans are all working and effectively cooling your computer. They must be spinning quickly and they must be clean of dust. A failed fan or a clogged fan contributes to overheating.

It could also be caused by a bad capacitor in the motherboard. Examine the motherboard for any signs of damage.

Another possible cause of smoke coming out of your computer is improper voltage. Too little voltage will cause your computer to not work. A higher voltage that necessary can short circuit your computer. The wrong power supply can fry your computer, so make sure it matches.

If Smoke is Coming Out of Your Computer…

You will probably need to replace the device that was smoking, so contact TalkLocal to help connect you with the right professional at your convenience. A local computer repair company will be able to diagnose your problem as well as help you find the necessary parts to repair your computer. Just go to the TalkLocal website and provide your location, problem, and location. You will be on the phone with help in minutes.

How to Install New Headlights

Monday, December 24th, 2012

How to Install New Headlights Auto Repair

Installing or repairing a new headlight for your car on your own can be a significantly cheaper alternative than taking your car to the nearest auto body shop. All you need to do is go to the nearest auto parts store and to find the right headlight for your vehicle’s specific make and model. From there, with the right tools and this guide, you will know how to install new headlights in no time.

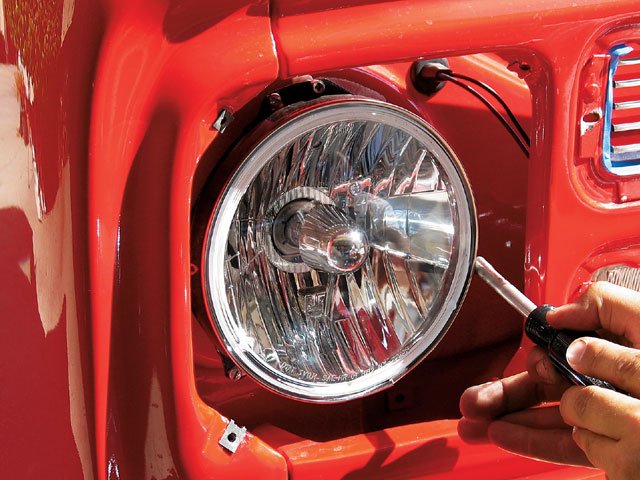
First, to remove the light, you will need to open up the hood of your car. On the side of the broken headlight, you will need to find the plastic connector for the headlight. Remove the electrical connector that gives the headlight its power. Then, find the cover that houses the headlight.

After unscrewing this cover, remove the headlight bulb from the headlight compartment holder. You might need to remove any mounting screws or retainers holding the bulb in place.

After removing the old headlight, take the new headlight and compare to make sure you have the right bulb. Hold it by the plastic casing instead of grabbing the bulb itself. You should be able to set it in place pretty easily. Then take the mounting screws or holdings and re-tighten them. Plug in the headlight to the electrical connector that you removed the old headlight from.

After everything is in place and screwed back in, close the hood and turn on your car for a test run.

If you think you have done something wrong, you have the wrong headlight type, or you would simply prefer the help of a professional, try using TalkLocal to find an auto repair shop near you. TalkLocal is a free service that will connect you with top-quality, reputable auto repair professionals in your neighborhood, within minutes. Just enter in your specific problem, location, and availability and TalkLocal will contact multiple companies, who will then call YOU directly, ready to help.

10 Must Do Tips to Cleaning Up after a Storm

Monday, December 24th, 2012

10 Must Do Tips to Cleaning Up after a Storm Landscapers

Even though life may seem incredibly hectic after a destructive storm rolls through, there are many important things that you’ll want to do, especially if you’re looking to file an insurance claim.  Here are 10 tips for cleaning up after a storm:

1. Make temporary repairs to prevent further damage.  You’ll want to cover up holes in the walls, roof, or the windows with boards or plastic so that inclement weather cannot further damage your home.  Make sure that you stay safe and don’t risk your own safety while making these repairs, especially if the repairs are on the roof.

2. Contact your insurance company immediately so that they know damage has occurred, the severity of the damage, and the time it happened.  Make sure you supply them with good contact information and you have a record of all correspondence with the insurance company.

3. Save all your receipts from all the repair expenses, since you most likely can be reimbursed for those materials.

4. Take photographic or video evidence of the damage for insurance reasons.  This will be important later on when you are talking with your insurance company and trying to file a claim.

5. Don’t throw out damaged personal property items before your insurance company has seen it.   You should be especially certain to keep damaged furniture or other significantly expensive items so that the insurance will be able to verify their damage and eventually replace it.

6. You should try to provide heat to your home if you have the means to do so (like with a generator) if the temperatures outside are below freezing.  If you are unable to do so, consider turning off the water and draining pipes to prevent freezing pipes from bursting.

7. If your home has suffered significant enough damage that you cannot occupy your home safely, talk to you insurance company.  They often times will cover your living expenses while repairs to your home are being made.

8. Avoid using electrical appliances, such as televisions or speakers if they’ve been exposed to water, unless you’ve had a technician tell you they are safe to use.

9. Keep away from dangerous situations such as downed power lines or fallen trees.  These situations are best handled by professionals and may pose a significant threat to your well being.

10. Make sure the food that you eat is safe.  Since you’ve most likely been without power, food will only stay good in a refrigerator for about 24 hours.  Beyond that, discard any milk or egg-based goods (like mayonnaise) that have been sitting at room temperature for more than two hours.

If you are in need of a cleanup crew, try using TalkLocal to find local landscapers.

Car Windshield Crack Repair Kit

Monday, December 24th, 2012

Car Windshield Crack Repair Kit Auto Glass Repair

Windshield crack repair kits are great tools to fix small cracks in your auto glass. They are available almost anywhere, from hardware stores to auto shops, and can help avoid more severe glass damage. After purchasing your car windshield crack repair kit, follow these steps to remove any small rock chips and bulls-eye cracks.

Do NOT perform this repair in direct sunlight. Your work will not result in an attractive repair because the heat will cause the resin to harden too quickly. Also, windshield crack repair kits will not repair larger windshield runs.

1. Clean the area around the crack. Use the razor blade included in your kit to scrape away any loose pieces of glass. You also need a clean area around the crack to attach the suction cup tool, so feel free to clean the area with Windex. Make sure the area fully dries before continuing on to the next step.

2. Place the suction cup tool. Make sure to place the tool so that the threaded center section is directly over the chipped area. Firmly place the suction cups into place, securing the four arms of the tool.

3. Insert the threaded repair tool. Once the suction cup tool is centered directly over the crack, insert the threaded repair tool. Screw it in tightly by hand.

4. Check the tool alignment. Make sure that the rubber end of the threaded tool is directly above the chip in your windshield. If it is not aligned, then reposition the tool.

5. Add the windshield repair resin. Open up the tube of repair resin and add it to the repair tube. It’s okay to add a few more drops than stated in the directions to be safe. You can’t use too much, but using too little will add a lot of time to the repair process.

6. Insert the plunger. You should quickly insert the center plunger right after you add the repair resin. Then, tighten the plunger almost all the way down. You’ll be able to tell you are adding enough pressure because the plunger will become more difficult to screw in. After reaching the limit, loosen the plunger a little to let air bubbles to escape. Then re-tighten it.

7. Remove the tool and apply the finishing film. Give the resin a few minutes to fully penetrate the chipped glass before completely removing the suction tool. Quickly place a section of the clear finishing film over the still-moist repair area. Carefully press the resin toward the edges of the film using the razor blade, making the film as thin and even as possible. You can add tape to the edges of the film to make sure it won’t slide around while the resin is settling.

8. Finishing touches. Wait about 10 to 20 minutes until the resin completely dries before removing the film. Clean up your repair by scraping the excess resin from the windshield with the razor blade. Then, sit back and admire your beautiful repair work.

If you feel more comfortable letting a professional handle the work, use TalkLocal to find a high quality auto glass repairman.

How to Plan for a Power Outage

Monday, December 24th, 2012

How to Plan for a Power Outage Electricians

Power outages are some of the hardest things to prepare for. You could be enjoying air conditioning and television one minute, then scrambling in the dark to find the flashlight the next. Being prepared is the best defense against a loss of power. Read on for tips for how to plan for a power outage.

First things first: if power goes out, you are going to want to have all your necessary supplies in one location. Keeping a backpack full of emergency supplies is the best way to go. This backpack should include a few days worth of nonperishable food and water, a first-aid kit, medication, a fully-charged prepaid phone, a radio, and flashlights. Keep this backpack in an accessible and memorable area. The last thing you would want to happen is to store all your necessities in one place and forget that location.

Knowing where your flashlights are is a must. If you’re without power during nighttime, maneuvering around safely becomes an encumbrance, let alone trying to survive. Having different types of flashlights (battery-powered, solar-powered, wind-up, etc.) is strongly recommended.

Keeping your food safe and cool without power may be difficult, but it can be done. Open your fridge only when absolutely necessary to preserve the cold temperature. To keep your freezer cold, place plastic containers nearly filled with water (with enough space to account for water expansion) and place these wherever there is space in your freezer. This helps keep food cold while minimizing the air in your freezer at the same time.

No one likes losing their power, but by following these steps, you can ensure your time without power is far more manageable.

If you would rather talk to a certified electrician, try using TalkLocal. Simply enter in your problem, availability and location, and within minutes, top-quality electricians will call you directly, ready and willing to help.

Uninstalling Antivirus Software

Friday, December 21st, 2012

Uninstalling Antivirus Software Computer Repair

You installed antivirus software to combat those pesky viruses, but for whatever reason, you no longer want it on your computer. What steps should you take uninstalling antivirus software?

Rest assured, there is a middleman for these types of complicated instillations and his name is Revo Uninstaller Freeware. Revo Uninstaller Freeware works with Windows to remove files left behind by a program’s uninstaller — at no cost to you! Go to their website and download this useful tool.

Manually installation

If you are skeptical about downloading software, you can also uninstall the software on your own. It is a lengthy process, but not a difficult one.

If you are removing Symantec’s Norton Antivirus from a PC:

1. Click Start >> Control Panel >> Add/Remove Programs.

2. Go to the Norton program.

3. Restart your computer when instructed.

4. Click Change >> Remove All.

5. Click Start >> My Computer >> Program Files.

6. Right click on all the Symantec folders and click delete.

7. Under Program Files, click the Common Files folder.

8. Delete all Symantec folders.

9. Restart your computer again.

10. Click Start >> Search >> All Files and Folders >> More Advanced Options.

11. Select every option except “case sensitive.”

12. Search “Norton.”

13. Delete all Norton folders from the results.

14. Restart your computer again.

15. Repeat everything on from step 10, using “Symantec” instead of “Norton.”

Some precautionary steps are necessary because uninstalled security software may interfere with newly installed security software, which would cause the system to freeze. To prevent this:

1. Go to the Registry.

2. Click Start >> Run.

3. Type “regedit.”

4. On the top of the Regedit window, click + next to HKEY_CURRENT_USER.

5. Click Software.

5. Right click Symantec >> Delete.

6. Go to HKEY_CURRENT_USER.

7. Repeat step 4 through 6.

8. Restart your computer.

9. Repeat steps 2 through 5.

10. Click + next to Microsoft >> + next to Windows >> + next to CurrentVersion.

11. Click the Run folder.

12. Right click Symantec folders >> Delete.

13. Right click Norton Antivirus if present.

14. Repeat step 13 in HKEY_LOCAL_MACHINE.

15. Restart your computer.

If you need additional help with uninstalling stubborn software, TalkLocal can connect you with technical support services in your area.

Quick Fix for Cracked Window

Friday, December 21st, 2012

Quick Fix for Cracked Window Auto Glass Repair

Storms, a crazy party, or a bb gun can crack a car window, which can make the car owner go crazy. Window repair and window replacement can both be expensive. But before you rip your hair out over your misfortune, here are some simple quick fixes for cracked windows.

Shattered Window Pane

If the window has become completely shattered, a temporary patch can be used to stop the chill and hold the care over until a new window can be installed. To put the temporary patch on the window pane:

1. Remove the broken glass from the window with heavy-duty gloves.

2. Staple a few layers of thick clear plastic onto the frame. If you don’t have clear plastic, you can also use trash bags. Use more caution when driving now that some of your field of vision is blocked off.

Crack

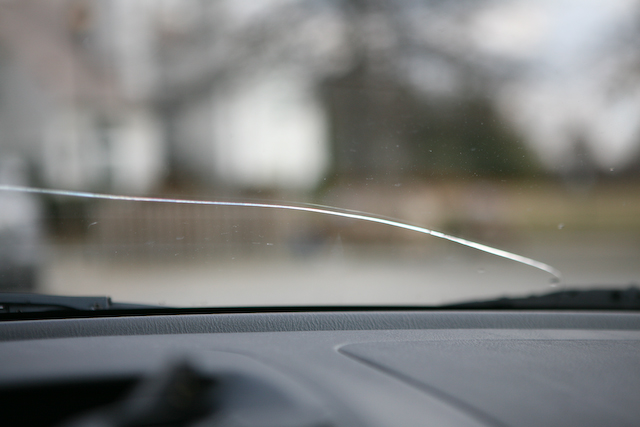
If there is a little crack in your car window, you can use the taping method to cover up the crack. All you need is the window taped on both sides with masking tape on the crack to temporarily cover the crack. Resin can also be applied to the crack. Resin repair kits can be purchased at all local auto repair stores. Resin repair kits come with resin, an installation tool, curing strips, razor blades and an instruction sheet. For small cracks, a mixture of cerium oxide powder and water can be applied to the small crack.

Hole

A hole in your car window can be easily fixed without the need of window replacement. If the method is done right, the hole becomes invisible. To fix a small hole in the window:

1. Apply clear nail polish in the hole.

2. Let it dry and repeat until there is a nail polish flush in the hole.

For temporary repair, reinstall a new window or call window repair. TalkLocal can connect you to the best window repair companies in your area.