Dog will not Eat

Monday, November 5th, 2012

Dog will not Eat Veterinarians

Have you noticed your dog has not eaten for 24 hours or more? There are many causes for a dog’s loss of appetite. Luckily, the problems are usually not too serious. Here are some common causes and solutions if you dog will not eat.

Vaccinations

There are many vaccinations for dogs to protect them from serious illnesses. However, this does not mean they don’t have adverse effect. Some vaccinations have side effects of a temporary loss of appetite in a dog. If the dog had recent vaccinations, ask the vet about the side effects of the vaccine that was given to your dog.

Surroundings

New surroundings affect a dog’s behavior and appetite. If your dog is new, then it may have not have adjusted to life in a new home. It may be depressed after leaving its previous home and refuse to eat. To help the dog be comfortable with its new surroundings, play and walk the dog frequently. For older dogs, trips and moving can affect their appetite. They may become nervous or uncomfortable in their new surroundings. To help a dog feel comfortable with their surroundings, take them for a walk before mealtime.

Pickiness or behavior

Sometimes it as simple as the dog just does not like the food given to it. If the dog has stopped eating after a change of food, then this could be the problem. Just go back to the dog food they were eating before or something similar to solve the problem. The dog may also be uncomfortable with the height of food bowl or an aggressive dog that is nearby when it eats. To resolve these problems change the bowl and let the dog eat alone without any other pets around it.

Illness

The worst cause is an illness. If there are symptoms along with a loss of appetite (including but not limited to having trouble urinating, coughing excessively, or coughing up blood/is vomiting), call a vet immediately. Use TalkLocal to find the best vet in your area to attend to your ill dog.

Home Remedies for Getting Rid of Fleas in the House

Monday, November 5th, 2012

Home Remedies for Getting Rid of Fleas in the House Pest Control

Nobody likes to see their pets suffer from irritating fleas. Even more concerning is that fleas don’t only live on your pets, but also on the carpet, furniture, and pet bedding in your home. If you would like to avoid chemical-filled pesticides on your pets and around your home, consider trying these home remedies for getting rid of fleas in the house.

Pieces of Flea Collar

To repel fleas from furniture and pet bedding, cut a flea collar into four pieces and place them under the bedding or furniture cushions. To kill fleas inside your vacuum cleaner bag, simply cut up the pieces and vacuum them up into the bag.

Floor Washing

Wash your floor with a lemon solution to keep the fleas away. Combine the juice of four lemons (including the rinds) with two liters of water.

Apple Cider Vinegar

Combine two parts apple cider vinegar with one part water into a spray bottle. Step outside with your pet and spray its coat with the solution. This will not kill the fleas, but cause them to jump off of your pet. This a good solution for temporary flea relief for your pet. You should invest in a permanent solution for your bet though.

Stash Earl Grey Tea

Some pet owners praise the flea repelling powers of Stash Earl Grey tea. Tear open a few tea bags and spread the contents on the carpet. Vacuum up the contents after a couple of days and you should see a reduction in flea activity.

Dawn Dishwashing Liquid

Add a few drops of the blue-colored Dawn dishwashing liquid to your dog’s bath. Shampoo your dog well and rinse thoroughly to prevent skin irritation.

If these methods don’t work, contact a local pest control service using Seva Call. Just submit a request online with your service need, location, and availability to talk to a professional in minutes!

Preventing Mold in Shower

Monday, November 5th, 2012

Preventing Mold in Shower Maid Services

Mold in the shower is a pain to discover with because it is so easily preventable. The key is to keep your shower free from water when it is not in use. Follow the tips below for preventing mold in your shower.

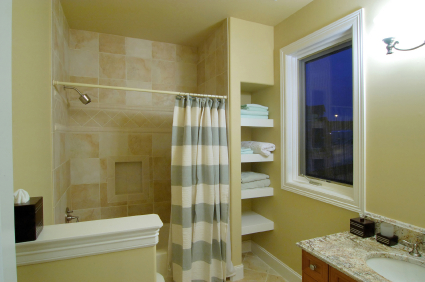
Keep the shower dry whenever possible — When you are done showering, wipe the water off of the floor. Allow the inside of the shower to dry by leaving the door open or pull back shower curtains for maximum air circulation. The shower door is a prime spot for mildew and mold to grow.

Ventilate the bathroom — If the weather is nice and your bathroom has a window, open it to let the steam escape. Also, leave the bathroom door open until the bathroom is completely dry. You should turn on your ventilation fan before you turn the water on for your shower; let the fan run well after you finish showering, until the bathroom is completely dry and the mirror no longer foggy.

Use shower sprays — There is a wide variety of shower sprays at your local store that can fight mold. You can choose from mild solutions to ones that use stronger chemicals. Just spray the solution all over your shower, especially on corners and the shower door. You can use a homemade solution if you don’t want to use harsh chemicals found in store-bought shower sprays. Use a spray bottle of undiluted white vinegar all over your shower. Leave it on for a few hours before rinsing it off. You can also use a mixture of two teaspoons of tea tree oil and two cups of water to clean tiles. Leave it on for a few hours as well before cleaning off.

If you’ve neglected your bathroom for a while and need an intense cleaning, you can hire a maid service through TalkLocal. State your specific service need in the online request form and receive a call from a high quality professional in your area within minutes!

Different Types of Window Locks

Monday, November 5th, 2012

Different Types of Window Locks Locksmiths

There are many different types of window locks, and knowing which one is appropriate can make a huge difference in the security of your home.  Windows are far more difficult to secure than doors, so knowing the function of the window and how to secure those openings are critical.

Keyed Locks

These locks can only be opened if you have the right key.  These locks are usually mounted on the side of double-hung windows.  It’s most likely the easiest if you have all the locks in your home keyed to the same key, so that you don’t have to keep track of many different keys.

Sliding Window Locks

These locks fit on the window to keep it from sliding or mount on the side of the track that can prevent any sliding motion.  They can even be used to keep the sliding window securely locked in the open position.  The benefit of using sliding window locks are that they require no assembly and can be installed very easily (no tools required).  These can even be keyed so that they require a key before opening or moving the window.

Swivel Action Locks

No key is required for these swiveling locks.  They use a self locking nib to prevent the window from fully opening.  These are good for most double hung windows.

Folding Latches

These are installed on the top of double hung windows and only allows the window to be slightly open.  It provides security while allowing a certain degree of air circulation in the room.  These windows can only be fully opened when the lock is folded all the way in.

Lag Screws

These screws offer a simple and cheap way to ensure your double hung windows are safe.  You’ll simply pre-drill a couple of holes on the left and right and insert lag screws with recessed washers.  You’ll then use a special key to tighten or loosen the screws.  You can even lock the windows halfway open if you would like.

Window Latch

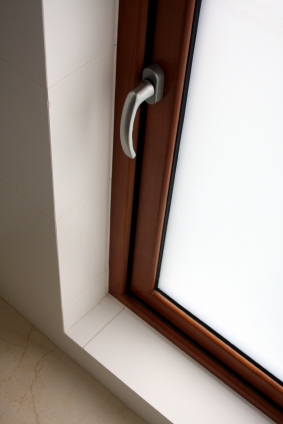
These latches are the most common and standard locks in the industry.  It is secured to one window and then attaches to another window when it is closed.  The latch locks or unlocks both windows at the same time when turned.

Knowing the correct window lock for your window is integral for your protection.  If you’re unsure about the lock, or would really like to get a professional opinion, the best way to contact one is using TalkLocal.  TalkLocal will instantly connect you with a local highly-rated professional window installation expert and the best part is that it’s completely free

10 Portable Generator Safety Tips

Monday, November 5th, 2012

10 Portable Generator Safety Tips Electricians

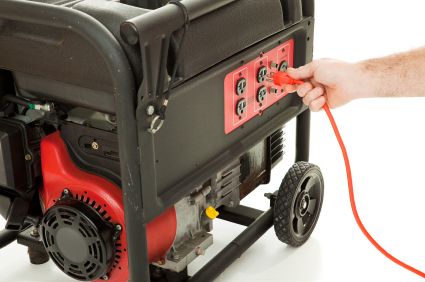
With Hurricane Sandy causing power outages, fallen trees, and damaged properties, some homeowners are considering buying their own portable generators to keep their electricity running. Here are 10 portable generator safety tips:

1. Before purchasing a generator, make sure you have an idea of how much electricity you will need the generator to sustain. Go through your house, and looking at all your fixtures, lights, etc. and add up all the wattage requirements.

2. Carbon monoxide is a critical threat when operating a machine like a generator. It is extremely important to be aware of the risks involved, and know that a generator should never be run inside the house, not even in your garage. Carbon monoxide, also known as the “silent killer”, can become trapped inside your home easily and cause death in minutes. It is recommended to keep the generator at least 10-15 feet from your house, with the exhaust pointing away from your house.

3. If you want to operate your generator directly with your house’s wiring system (i.e. your central A/C), do NOT connect the generator directly to the home’s electrical grid. For this, you will need a transfer switch. These switches are connected to the house’s main circuit breaker. It is recommended to have an electrician install a transfer switch in your home, as it can pose potentially dangerous risks if installed incorrectly.

4. You need to also prevent electrocution when operating a generator. Never plug it directly into one of your home’s wall outlets.

5. Generators run on gas. Therefore, it is important to ensure you have enough oil in the generator and on supply in case it runs out. In most cases, when electricity goes out in your neighborhood, this also means local gas stations are out of power. If gas stations have no power, you can’t fill up.

6. You will need to regularly keep up maintenance. Clean the machine regularly. Don’t use water to clean it, as it can damage the operation of the generator.

7. Test the generator every so often to make sure it operates. Turn it on and let it run for about 10 minutes every month or to ensure proper operation.

8. Keep your excess gas/oil supply in approved containers and make sure they are stored away from your house and the generator itself.

9. If you plan to use the generator at least once a year and keep gas in the engine, you should add engine fuel stabilizer to the engine as well to keep the gasoline from gumming up and causing clogs. Stabilizer can extend the “shelf life” of gasoline for up to a year. After adding some stabilizer, be sure to let the engine run for a couple minutes to fully circulate it.

10. Alert your neighbors that you plan to use a generator, as they usually operate pretty loudly.

If you’d rather contact a certified electrician, try using TalkLocal. Simply a service request and, within minutes, top-quality electricians in your area will call YOU directly, ready to help.

How to Turn Off Sticky Keys in Windows XP

Monday, November 5th, 2012

How to Turn Off Sticky Keys in Windows XP Computer Repair

Computer shortcuts (such as CTRL + P to print or CTRL + S to save) are a quick and easy way to get tasks done on Windows XP. However, if you are unable to hold down multiple keys at a time, these shortcuts do you no good. Luckily, StickyKeys exists to enable shortcuts, even when you only have one free hand. The way StickyKeys works is one key is considered “stuck,” or pressed, when the user is not actually holding it down. This allows the user to push another key—possibly too far away to reach with just one hand—and form combinations in this way. Although it is a helpful tool, StickyKeys can also be a nuisance to those who are used to the traditional short cuts. Luckily, learning how to turn off StickyKeys in Windows XP is simple. Read the instructions below to find out how.

1. Click Start on the bottom of your screen.

2. Click Control Panel > Accessibility Options.

3. Under the StickyKeys heading, there should be a tab labeled Keyboard. Within that tab, uncheck the Use StickyKeys box if you want to turn StickyKeys off. Conversely, check the box to turn StickyKeys on.

If the Use Shortcut checkbox in the Settings for StickyKeys is selected, it means StickyKeys is enabled. Once enabled, you can toggle StickyKeys off and on by pressing the Shift key five times.

Need professional computer help? TalkLocal can quickly connect you to a computer repair professional in your area! Just go to the website and submit your service need, location, and availability to talk to help in minutes. With TalkLocal, there is no need to wait in line at a computer store for help. Instead, the professionals come to you, ready to tackle your specific problem.

Best Snow Blower for your Money

Friday, November 2nd, 2012

Best Snow Blower for your Money Snow Removal

With winter coming around soon, it’s good to be prepared in case there is a lot of snow in your area. Buying a snow blower can really help you out during the winter months.  Using a snowblower over traditional shoveling methods can save you time, energy and pain.  To find the best snow blower for your money, take these things into consideration when shopping:

1)     How much snow you get

2)     Need versus want

3)     Gas or electric?

4)     Power: one stage or two stage?

5)     Quality

Deciding to get a snow blower is a good decision if you get frequent snowfalls with heavy amounts.  If you live in an area that only gets slight dustings of snow, investing in such a large piece of machinery may not be the best decision.  While it may seem cool to own one, it’s an expensive investment for those who will rarely put them to use.

Another thing to consider is whether you want a gas snow blower or an electric one.  Gas is very easy to use, and you don’t have to worry about tripping over wires or keeping the machine plugged in. While the price of gas is rising, this is not too big of an issue because a gas powered snow blower does not require a large amount.  If you decide to go with the electric blower, be prepared for your electric bill to slightly increase.

Another decision to make is whether you want a single stage or two stage blower.  This depends on how much snow you plan on removing.  A one stage snow blower has one high speed propeller that moves and forces the snow out of the discharge chute.  This size is considered the light duty machine, as it can be picked up manually to throw more snow.  The dual stage machine is self propelled with large wheels and chains.  This is for people with more serious snow removal issues.

When looking to purchase a snow blower, you should first research online and check out reviews for various types.  It is recommended that you buy from reputable companies like Honda, Toro or Ariens because they offer guaranteed high quality products.   The slightly elevated price will pay off in the long run.

If you are looking for snow removal or need help choosing which type of snow blower you want you should seek professional help.  Use TalkLocal to be put in contact with reliable local snow removal businesses within minutes.  Simply input your problem and TalkLocal will do the rest.

How to Increase Water Pressure in your Home

Friday, November 2nd, 2012

How to Increase Water Pressure in your Home Plumbers

Low water pressure can make washing the dishes or taking a proper shower a lot harder to accomplish. Learning how to increase water pressure in your home can be easy if you follow these simple directions.

The first step is to find what is causing the low water pressure in your home. The low pressure can be attributed to a couple of different things, so isolating the problem is key. Low water pressure may be caused by valves that aren’t in their proper position. There are usually two valves that control water pressure – the home valves and the customer valves. The home valve is often in front of the house where the water line enters the home and looks almost like a wagon wheel. To check and see if this valve is in its proper position, turn the valve clockwise to temporarily shut off the water and then turn it counterclockwise as far as possible to open the valve completely, while also getting rid of anything that may have been deposited within the valve. The other valve, the customer valve, is located in your meter box. You will also want to check and see if this valve is on, while utilizing this same method if it is not.

If both of these valves are on and fully functional, the problem lies elsewhere. The pressure regulator is another area where water pressure can be controlled. The pressure regulator is a valve that works to automatically maintain a certain level of pressure. These valves are often located near the water main outside the house. Once you have found the valve, you must adjust the screw to alter the water pressure. Tightening the screw (by rotating it to the right) will increase the water pressure in your home. A couple, controlled rotations should be all you need to increase your water pressure. Make sure not to increase the pressure by too much or you risk damaging your pipelines. One quick way to test the pressure is by keeping a sprinkler on nearby, allowing you to see how your adjustments impact the water pressure.

Utilizing these methods should allow you to easily increase the water pressure in your home. If none of these methods work, find a plumber because it is possible that other issues might be at play, such as a leaky pipeline or deposits within pipes that have mineralized over time. If you do need help, consider using TalkLocal to find a plumber. TalkLocal is a free service that will connect you with top-quality, reputable plumbing companies in your neighborhood within minutes. Just enter in your specific problem, location and availability, and up to three companies will call YOU directly, saving you the time and stress of finding one yourself.

Tips for Watering Plants

Friday, November 2nd, 2012

Tips for Watering Plants Landscapers

There are a few things to keep in mind when watering your yard: water loss, water penetration, soil/water/air relationship, and time required for plant watering. These can all be confusing to keep in mind, so here are a few tips for watering plants that should take care of the afore-mentioned details:

– Water your plants in the early morning or late evening when is cooler and when the wind is calmer, as this will prevent water loss through evaporation.

– Lawn grasses and most plants require an inch of water per week to keep the top soil moist. Drying out completely would be harmful to the plants.

– Do not over water your plants as plants sitting in water logged beds can rot or develop fungus. Additionally, plants need plenty of oxygen to grow properly, and waterlogging the plants will result in an inefficient water/soil/air ratio.

– Younger plants with smaller roots will only intake water from the top layers of soil, whereas trees and older plants will have established larger and more expansive root systems. This means that you should try to ensure top layer moisture for your younger plants, while the older plants can possibly go longer without watering as they may be able to tap into lower soil levels that retain water for longer.

– Figure out the type of soil that your plants are growing on as this affects the water retention. For example, one inch of water will go down 12 inches in sandy soil whereas it will only penetrate four to five inches in clay soil. Once you know the type of soil, and know how deep water penetration is in it, you will be better able to judge how much and how frequently to water your plants.

– Use a rain gauge to measure the amount of water that the plants get from rain, natural moisture in the air, and your watering so you know how much water the plants are receiving.

These are only a few tips for watering your garden. However, there is a lot more to taking care of your plants! Let TalkLocal help you find professional landscaping services.

How Often to Replace Brake Pads and Rotors

Friday, November 2nd, 2012

How Often to Replace Brake Pads and Rotors Auto Repair

Brake pads and rotors are essential to the functioning of your car, as well as your safety.  Therefore, knowing  how often you should replace these parts of your car is a very important thing to remember.  Take into consideration the following if you’re wondering how often to replace brake pads and rotors.

Brake pads

Brake pads are found inside the brake caliper with their friction sides surfaces facing the rotors.  Their purpose is to convert the kinetic energy of the car’s movement into thermal energy by friction.  When a driver taps the brakes, the two pads are squeezed together, slowing the motion of the vehicle.  Without brake pads, you would not be able to stop your vehicle.

When to change brake pads

Brake pads should be changed depending on the warranted life of the particular pads on your car.  Normally, this would be around every 10,000 miles.  However, if you hear a scraping or grinding noise coming for your wheels, you should get them checked and/or changed, regardless of the mileage.

Rotors

Rotors are the round, flat pieces of steel attached to rods inside the wheels of a car.  When the driver presses the brakes, the brake pads compress around the rotor, ultimately slowing or stopping the vehicle.

When to change rotors

The only time rotors need to be replaced is when the driver ruins them by driving for too long with bad brake pads.  When your brake pads are bad, the screws in the bases will drive into your rotors.  This is where the grinding noise comes from.  New rotors are much more expensive than brake pads, so be sure to stay on top of the functioning of your brake pads to avoid a much pricier repair.

If you are unsure of when to change your brake pads or if you have a problem with your brakes, you should get the help of a trained professional.  Visit www.TalkLocal.com to be connected to a highly rated, local automobile technician in less than 90 seconds.