Temporary Roof Leak Fix

Wednesday, November 7th, 2012

Temporary Roof Leak Fix Roofers

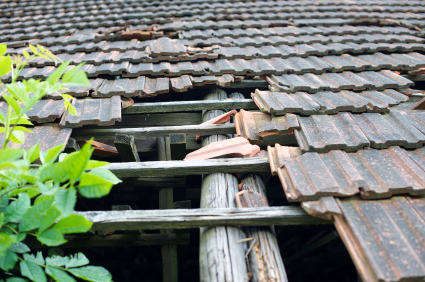
After any big storm, there is a frenzy to find roofers to repair the damages to your home. Due to the high demand, you aren’t always able to receive help right away. The following is a guide on how to make temporary roof leak fix  after a storm. There are certain precautions and steps you should take to evaluate and repair your roof.

Precautions

– Make sure everyone is in a safe place.

– Use caution as you near the room or area you are looking to evaluate.

– If the lights are out in the damaged room, do not enter the room because there may be power or electrical lines free.

– Never climb on a roof that has been damaged because the roof may not be sturdy enough to have additional weight on it.

Keeping the damage contained

– If there is a water leak coming from the roof, place a towel on the floor and place a bucket on the towel to catch the water drips. Follow the water tracks to evaluate the damage and see if mold is involved.

– Use a tarp and weather tolerant tape to cover the hole until further help and repair can come.

– If just a few shingles have come up during the storm, you can use roofing cement to hold them down until you can replace them with new shingles.

These tips should keep the damage to a minimum until professional help can restore your home to its original state. Check out TalkLocal to find a professional near your neighborhood. TalkLocal is free to use and will connect you to a professional that can come at the time that is most convenient for you and your schedule.


Different Types of Hamster Cages

Wednesday, November 7th, 2012

Different Types of Hamster Cages Veterinarians

Your pet hamster will spend most of its life in its cage, so it is important to pick out the right one. Cages come in all shapes and sizes, from plain and simple to flashy and colorful. When choosing a hamster cage, make sure to choose one that is large enough to accommodate your hamster and all accessories. This includes water bowls, food bowls, a hamster wheel, and a hamster house. If you have more than one hamster, make sure there is enough room for all pets to live comfortably. Read on for the different types of hamster cages.

Wire Frame Cages

This cage style is popular because it is virtually chew-proof. Your hamster will try to chew on anything it can, including his cage. Pet supply stores have many kinds of wire cages in stock and they can come in single and multi-levels.

Glass Aquarium Cage

Glass enclosures give you the ability to see your hamster’s burrows, reduce drafts, and reduce the chances of escape. However, they are harder to clean, heavier than wire cages, more expensive, and sometimes have problems with condensation.

Plastic Cages

Plastic cages have many of the same advantages and disadvantages as a glass cage because it is completely enclosed. However, plastic cages are lighter, easier to clean, and usually cheaper.

Plastic Tube Cages

This type of cage is very popular among young hamster owners. Although fun to look at, plastic tube cages are difficult to clean. Cleaning involves removing the tubes completely to clean the inside. Condensation may also occur, which is why many owners prefer wire frames. Plastic tube cages have the advantage of having pre-made burrows in which your hamster can run and play. They also provide entertainment to observers.

Additional Help

No matter what cage you choose, it is crucial to keep the cage clean for your hamster’s safety. If your hamster does happen to get sick, you can consult with a veterinarian for recommendations on how to maintain the cage. Use TalkLocal to get in touch with a high quality veterinarian in minutes!

How to Repair a Split Tree Trunk

Tuesday, November 6th, 2012

How to Repair a Split Tree Trunk Tree Removal

Severe storms can leave behind a mess in your yard. They destroy your landscaping, lawn ornaments, and even your roofing. There is a lot of cleanup involved with post-storm damages. If you have damages to the trees on your property, this article will help you learn more about how to repair a split tree trunk.

Materials

– gloves

– hard hat

– safety glasses

– a block and tackle

– rope

– drill with 1/2-inch diameter bits

– 1/2 inch steel bolts

– washers

– nuts

Instructions

Before beginning any repair, make sure you are safe. Wear gloves, a hard hat, and safety glasses.

1. Look above the strongest side of the tree and find a horizontal limb.

2. Hook the top pulley of your block and tackle over it.

3. Divide the split into thirds and mark each third.

4. Drill through the split on both sides at your first two marks. Make sure to use a 1/2 diameter drill bit.

5. Put the bolts through the holes you drilled. Make sure to screw the bolts in tightly.

6. Put washers and nuts on both ends to secure it.

7. Now you can remove the block and tack. However, you should leave the lash on top of the split for six months for safety purposes. During this time, watch the tree to see if it is healing. If it wilts considerably, you will have to cut it down. If the tree does not grow new leaves the following year, you will have to cut it down.

If the trunk is split on one side, with a large amount of wood on one side and just a little on the other side, you should not try to save it as this could be dangerous. If the tree trunk’s diameter is greater than 15 inches, it will also be too dangerous to save by yourself. Additionally, if the tree is very old, you should hire a professional to remove it.

If you do not think you can repair the tree, find a tree removal service through TalkLocal. You can be on the phone with up to three high quality local tree removal professionals in minutes!

How to get Rid of Camel Crickets in your House

Tuesday, November 6th, 2012

How to get Rid of Camel Crickets in your House Pest Control

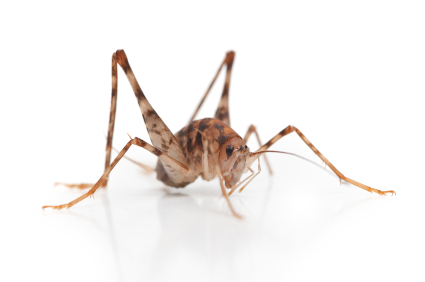
Camel crickets, or cave crickets, are often found inside homes, garages, and sheds. They are about 1/2 – 1 ½ inches in size and unlike field crickets, they do not chirp. Since they do not make noise, you may not realize the crickets are in your home until you find them or their fecal droppings. Camel crickets are not dangerous, but their droppings are unpleasant and they may chew on clothing if trapped inside a building with a limited food supply. If want to know how to get rid of camel crickets in your house, try the following tips:

– Camel crickets will enter your home, shed, or garage through holes and cracks. Walk around the exterior of the structure and fill any of these openings with caulking material. Silicone caulking will also keep out moisture, a cricket-attracting element.

– Install weather stripping material around the bottom of the baseboards of your home and your garage door. Weather stripping will prevent the camel crickets from slipping under the cracks of your baseboards and underneath your garage door.

– Use a dehumidifier in any rooms where you have previously found camel crickets. Crickets actively seek out moisture, so this will dry out the area.

– Set sticky traps in areas where you have previously found the crickets. Set that traps in the corner of room and behind furniture. Check them daily and dispose of used traps.

– Keep any mulch at least 12 inches away from the base of your home. Camel crickets are attracted to the moisture within the mulch, and they are more likely to enter your home if the mulch is close by.

– Spray the outside of your home, shed, or garage with insecticide. Make sure to spray the entire perimeter of the structure.

Need professional help? TalkLocal will connect you to reliable pest control professionals in no time!

How to Fix Garage Door Cable

Tuesday, November 6th, 2012

How to Fix Garage Door Cable Garage Door Repair

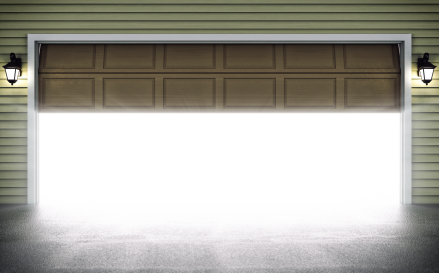
Even in our calmest days, we can alway count on the garage door to act up. Suppose the garage door goes off the pulley and hangs at an angle. This means the garage door cable is broken and need to be fixed. If you are up to the challenging task, there are many steps to learn for knowing how to fix a garage door cable. First, you must identity the cable that needs be replaced. There are 3 types of cable on a garage door: torsion, extension spring and safety cable. Read on to learn how to replace a garage door cable.

Materials for Replacing Cable

– Stepladder

– Cable Set

– Winding Bars

– 3/8- inch wrench

– Vise Grips

Instructions

1. Close the garage door.

2. Use stepladder to unplug the power cord.

3. Put the stepladder under the torsion spring.

4. Insert a winding bar into the hole in the winding cone.

5. Loosen set screws on the winding cone with 3/8 inch wrench.

6. Carefully let the spring rotate until the bar is steadfast against the door and inside the winding cone. Have a firm grip on the bar until it against on the top of the door. If there is more than spring, repeat the same process.

7. Loosen set screws on the drum on each end of the shaft where the cable wraps around the wrench.

8. Rotate drums around the shaft until both cables can be removed safely.

9. On the bottom bracket, remove the cable.

10. Pull off loop on the cable from the bottom bracket pin.

11. Place loop end over the bottom bracket pin.

12. Feed the end of the cables with the metal stop button behind each of door roller stem, letting them hang over the roller.

13. Use the stepladder to get to the right-side drum.

14. Slide the drum against the inside door track.

15. Thread cable behind the shaft and over top of the drum.

16. Put metal stop portion into the notch on the drum.

17. Rotate drum clockwise to wrap cable to the highest groove on the drum.

18. Grab the top of drum with one hand and rotate clockwise to tighten cable.

19. Tighten drum set screws.

20.Clamp a pair of vice grips over shaft.

21. Attach cable to left drum.

22. Tighten set screws with wrench.

23. Under the winding cone of the torsion spring, use winding bar to rotate winding cone until bar is horizontal.

24. Tighten set screws on the winding cone wrench.

25. Release the winding bar and remove from the winding cone.

26. Repeat if there is more than one spring.

Remember to have another person with you when replacing cables. For these kinds of jobs, a professional is highly recommended due its high risk of serious injury. TalkLocal can connect you to the best garage door professionals in your area.

My Light Bulb is Too Bright

Tuesday, November 6th, 2012

My Light Bulb is Too Bright Electricians

Have you noticed your light has been as bright as the sun? Do you notice yourself constantly saying “my light bulb is too bright”? If you notice a light has been burning bright, this is a major problem with your house electrical system. There are two problems that cause the light bulb to burn too brightly. Either there is a high voltage or neutral connection problem.

Before checking for these problems just recognize the type of light you have. If there are incandescent light bulbs and LED bulbs, they will be brighter than average bulbs. If these are the types of light bulbs that you feel are too bright in your home, switch to an average or lower watt bulb.

High Voltage

If supply of voltage is too great in the home, light bulbs will burn brightly and burn out faster.  If you notice the light bulbs in your home burning out unusually quickly, then this could be a high voltage problem. To check for a high voltage problem use a volt meter. Volt meters can be bought at your local hardware store for under $20. Use the voltmeter at an outlet or at a service panel. If you see a voltage over 125 volts, contact an electrician immediately.

Neutral Connection

If there is a main neutral connection problem, the light bulb will burn bright while other light bulbs dim. Other electrical appliances may also break in the process. If you notice these symptoms in your home, contact an electrician immediately as this problem will cause damages to other electrical appliances in your home.

To hire an electrician for these destructive problems, use TalkLocal. TalkLocal can connect you to the best electricians in your area for free.  Just type your problem, location, and availability into the online service form and TalkLocal will begin finding local businesses immediately. Within minutes, you will receive up to three phone calls from electricians who can help you.

Computer Screen is Hurting my Eyes

Tuesday, November 6th, 2012

Computer Screen is Hurting my Eyes Computer Repair

Many of us spend our time at work in front of screens and computers, only to return home to watch television and movies on screens as well.  As a result, we complain to others that a “computer screen is hurting my eyes”, we’re constantly straining our eyes and it’s quite common to develop blurry vision and sore eyes.  Fortunately, there are many things you can do to minimize the strain on your eyes, protecting your eyesight and preventing damage to your eyes.

Frequent Breaks

This is the simplest and most effective way to decrease eye strain while using electronics.  All you have to do is follow the “20-20-20″ rule. Every 20 minutes, focus on something 20 feet away for 20 seconds.  This should immediately refresh your eyes and allow the muscles to relax.  Frequent breaks will keep you feeling a lot better at the end of the day, so just remember “20-20-20!”

Eye Drops

When people use the computer, they actually end up blinking about 60% less than normal, leading to dry and strained eyes.  You may want to invest some eye drops to help refresh your eyes whenever they feel strained, or simply remember to blink more.

Computer Settings

Your computer monitor settings may also have a significant effect on your eye strain.  On the older CRT monitors, you need to make sure that your screen refresh rate is higher than 60Hz, or else you risk severe eye strain.  You may also want to decrease the screen resolution so that everything appears bigger; you won’t need to squint or strain to find the small icons.  Lastly, you can always use filters that help decrease eye strain such as F.lux (http://stereopsis.com/flux/). F.lux changes the color your computer display based on the time of day, so if you’re up late working, it tones it down to a more natural tone to decrease eye strain.

Remember that it’s easy to prevent eye strain; make sure to take breaks, blink often, and change your computer settings to protect your eyes.

Child Lock Stuck on Car Door

Tuesday, November 6th, 2012

Child Lock Stuck on Car Door Auto Repair

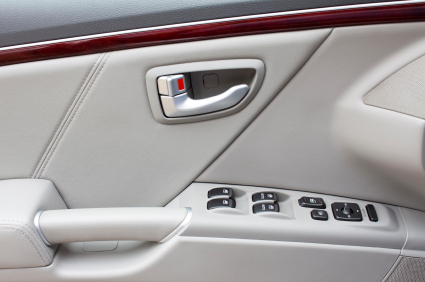
Child safety locks are put in cars in order to keep small children from opening car doors while you are driving.  This is a good safety precaution; however, if you accidentally get the child safety locks stuck, you will not be able to open the door from the inside or outside, which is a little bit of a problem. This article will help you figure out how to fix a child lock stuck on a car door.

One thing you can do is first look at the other door and figure out where the trigger for the child safety lock is. Once you know where it is on the other door, you should be able to figure out where it is on the door that is stuck. Then, take thin piece of stiff plastic (i.e. a ruler) and put it through the space between the body and the door from inside; try to slide it until you trigger the child lock off. This is a little difficult to do and it may take a few tries to succeed.

If you cannot trigger the child safety lock off with a piece of plastic, you may have to try a “slim jim.” Take a flathead screw driver and shimmy it into either side of the slits where the door handle goes into the door. Try to shimmy it up enough so that you can trigger the child safety lock off.

If neither of these methods work, you can try removing your car door, so that you can operate the latch directly. Or, you can contact an auto repair professional to help you out. With the help of TalkLocal, you can receive up to three phone calls in minutes form high quality local auto repair professionals that are available when you are.

Refrigerator making Humming Noise

Tuesday, November 6th, 2012

Refrigerator making Humming Noise Appliances Repair

The annoying humming noise that’s coming from your fridge could be caused by a number of problems, some of which are easy to solve, some of which you’ll need a quality mechanic for, and some that will force you to replace the machine. Read on if you have a refrigerator making humming noises and you want to fix it.

Sound coming from the back

If the humming sound is coming from the back of the fridge, it’s either due to your compressor or the motor fan. A broken compressor is a big deal, as your fridge won’t cool properly. If your compressor is broken, you won’t be able to fix this yourself and should get a professional trained in sealed systems to replace it. A dirty motor fan could also be causing the problem, so check the fan or make sure it’s not dirty, frozen, or stuck on another object.

This loud humming could also occur when the fridge door is open for an extended amount of time, as ice will build up on the evaporation coil. Turn off the fridge for 24 hours and then start it up again to see if that fixes the problem.

Sound coming from the bottom

If the sound is coming from the bottom of the fridge, this it could be because your fridge is off balance. Make sure your fridge is level and all the feet are bearing pressure equally. If one foot is only lightly touching the ground, it could create a humming sound as the fridge vibrates against the floor. Also, clean out the coils with a vacuum cleaner with a brush wand.

Sound coming from inside the fridge

The evaporation motor inside the fridge is supposed to get rid of excess moisture that could form ice inside your refrigerator. If the sound becomes louder when you open the fridge, then your evaporation motor is probably broken. This is another part that you can’t fix yourself, and you must replace it.

Because refrigerators have many different motors and parts running at once, they’re very difficult to repair. Oftentimes, you’ll have to be certified anyway in order to replace a certain part. Your safest solution is to use TalkLocal for free to find an appliance repair professional in your area.

How to Remove a Tree Stump

Monday, November 5th, 2012

How to Remove a Tree Stump Tree Removal

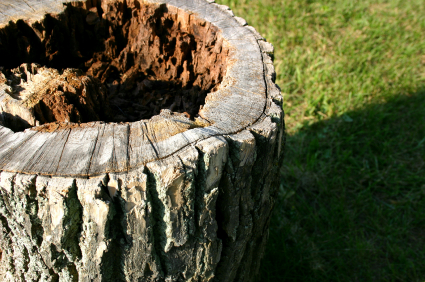
Trees are an indispensable part of life on Earth. They are responsible for providing us with food and oxygen, they filter our air and make Earth livable for humans, and they preserve soil and support wildlife. In short, trees are an essential part of our lives and deserve our respect. But despite their ability to live for up to hundreds of years, trees die and leave a legacy – their stumps.

Tree stumps can be incredibly difficult to remove. There is no easy simple way to do it. There are a few methods of doing this, ranging from using chemicals to hand digging to using automatic grinders. The best removal method all depends on the type of tree and the tree’s root system. Read on to learn how to remove a tree stump.

If your stump is relatively small, digging it out may be a good way of removing it. The tools you will need are a shovel as well as an axe, loppers, or a root saw. You will have to use the shovel to dig up roots and then use the loppers, saw, or axe to cut the roots. Continue doing this until the majority of roots are removed. When enough of the roots have been cut to allow movement, remove the stump.

However, if the stump in question is too large to dig out, you will have to utilize other tactics to remove the tree stump. One option is to use a stump grinder. This is a machine that is used to grind up the stumps down into sawdust. You can rent one of these for roughly $100 or you can hire a professional to take care of it for you.

An alternative option for large stumps is to use either chemicals or fire. The first option, chemicals, involves drilling a series of holes in the stump and then dropping chemicals into them. These chemicals speed up decomposition time, but can take weeks to complete. Don’t use this method if your stump needs to be removed quickly. The other method, fire, is actually a method that has been used for hundreds of years. To do this, you once again drill a series of holes in the stump, and then pour kerosene into the holes. Place some scrap wood on top of the stump and get a fire going to try and light the stump. Try and isolate the stump with wire and remove any nearby leaves or twigs to ensure the fire doesn’t spread. Be sure to check up on the stump regularly.

If you followed these instructions and still need help, you may want to find professional help to remove the tree stump. If you need help finding a professional tree removal company, consider using TalkLocal to find a tree removal specialist for you. TalkLocal is a free service that will connect you with top-quality, tree removal companies in your neighborhood within minutes. Just enter in your specific problem, location and availability, and up to three companies will call YOU directly, saving you the time and stress of finding one yourself.