Seva Call Wants to Save You

Friday, November 2nd, 2012

Seva Call Wants to Save You Seva Call

Hurricane Sandy is described as “The Perfect Storm”, which caused many devastations for the East Coast earlier this week. The Seva Call team would first like to send out our condolences to those affected by Hurricane Sandy, our thoughts and prayers are with you all.

The Seva Call team has been working hard to help East Coast residents with services after Sandy made her debut. With Hurricane Sandy hitting the New York/New Jersey area hard, we have been able to connect those in need of help to professionals, such as plumbers, to help with homes that have been flooded. As requests are still coming in, Seva Call wants to save you and continue helping homeowners, automobile owners, and the millions of residents who need services done to get back to their normal life. We are ready to connect you to plumbers, heating and cooling professionals, auto repair professionals, electricians, and other professionals that are waiting to help you recover and move forward.

To help you recover in the wake of Hurricane Sandy, we are offering you $20 when you use Seva Call to schedule an appointment with a professional who can help rebuild your home. Visit Seva Call to fill in out request or call 301-876-4913 and tell us what you need help with, your location, and availability. Tree removal services, electricians and other service professionals will call you back as needed. Once you’ve successfully scheduled an appointment, used the service and had a great experience, you can redeem your $20 by posting about that experience through Seva Call’s Facebook or Twitter pages, or by calling 1-877-987-SEVA (7382).


Best Energy Efficient Windows

Friday, November 2nd, 2012

Best Energy Efficient Windows Window Replacement

Purchasing the best energy efficient windows is a great way for homeowners to reduce the cost of heating and cooling their homes. Choosing the right windows can be tricky, but the key is finding the upgrades that save money without delivering a blow to your bottom line. When choosing energy efficient windows, homeowners should focus on four key aspects: frame, glass, design, and installation.

The Frame

There are a variety of window frame materials available, each with its own pros and cons. It is up to you to choose the material that works best for your budget.

Vinyl

Pros: less expensive without being “cheap,” can offer excellent energy efficient options through insulated glass and tight construction that reduces air leakage

Cons: limited color choices

Wood

Pros: best value for insulation, can stand the test of time if well-built

Cons: prone to rot (especially in humid or rainy climates), require more upkeep

Aluminum

Pros: practical in rainy and humid climates, meets coastal building codes (strong against hurricanes)

Cons: not the best choice to prevent heat transfer and loss

Wood-clad

Pros: offers the low-maintenance of vinyl or aluminum with the temperature-transfer resistance of wood

Cons: prone to rotting in wetter climates

The Glass

Experts suggest going with a double-paned window with Low-E glass, with a vacuum-sealed argon fill. The feature will cost about $40 extra per window, but it’s worth the price in energy savings. Low-E argon filled windows offer much more insulation than single-pane windows. This will make a big difference in your monthly energy bill. You should also check the window glass for its energy-efficient features.

The Design

The best energy efficient window designs include:

Double-hung windows These are found in many homes across the United States, particularly in pre-war buildings. The windows are double-hung and the bottom slides up to open the unit. This can be an efficient option, but is not the best choice for extreme climates because of the potential for air intrusion between sliders.

Casement windows These units are popular in climates where wind is an issue. These windows have a crank that swings the window outward to open and they seal tighter when wind blows in towards the house.

Picture windows  These are typically large units that do not open. They come in many shapes and sizes and can be energy efficient with the right glass choice and gas-filled interiors.

The Installation

A proper installation is important to keeping your windows energy efficient. Even the best windows will not perform effectively if installed incorrectly. Be wary of any contractor who relies too heavily on expanding foams or sealants to get windows to fit well. These materials aren’t waterproof and can cause problems later down the road. Pre-installation water proofing done well before installation is the best option to seal your windows from the elements.

If you need professional help to install new windows, use TalkLocal to find a local service provider in minutes!

How to Change Mac OS X Theme

Friday, November 2nd, 2012

How to Change Mac OS X Theme Computer Repair

Apple has a dedicated team of designers to conduct extensive research in order to maximize the user experience of Mac computers. For that reason, they have made customizing the design of OS X very difficult. Read more to learn about how to change the Mac OS X theme. 

There are minimal built-in options for customizing your Mac. You have the option of choosing whether you want the overall look of buttons, menus, and windows to be Blue or Graphite. You can also change the highlight color between a number of colors. Change your color options by going to System Preferences > General. The most common customization is changing the desktop background. You can go a step further and customize your screensaver by going to Desktop > Screensaver. You can change the size and position of your dock, as well as add and remove programs. The programs magnify when you scroll over them–you can control the amount of magnification and toggle the feature on and off; all these options can be controlled by going to Dock. If you want to choose what items appear in your sidebar and create colored labels for you folders, go to Finder > Preferences.

If you are interested in further customizing your Mac, you can search online for user-created workarounds, but be warned that you risk doing damage to your system if the customizations are not from reliable sources. Make sure you back up everything before attempting anything you find on the Internet. If you find that attempts at customization workarounds have caused problems with your system, you may want to contact at a computer repair professional to fix your computer. With the help of TalkLocal, you can receive phones calls within minutes from up to three high quality computer repair professionals in your area. Just go to the website and tell them your problem, location, and availability.

Smoke Coming from Vacuum Cleaner

Friday, November 2nd, 2012

Smoke Coming from Vacuum Cleaner Appliances Repair

Seeing smoke coming from your vacuum cleaner may be disturbing, but it looks worse than it actually is. This article will teach what do if it happens and how to prevent it in the future. Read on to first learn the cause of the smoke.

Why Your Vacuum Cleaner is Smoking

If you are seeing smoke coming from your vacuum cleaner, it is most likely coming from the vacuum’s belt. Objects, such are cables or cords, may be caught in the brush roller, causing it not to spin. The brush will keep trying to spin, but fail, thus producing smoke and a burning smell.

How to Stop Your Vacuum Cleaner from Smoking

To fix the problem of smoke coming from you vacuum cleaner, you should move any large objects away from the brush roller. You should also take the vacuum belt off of you vacuum and inspect it for damage or general wear and tear. If it is okay, put it back on. If it looks damaged or worn out, you should replace it. You can consult your vacuum’s instructions manual for how to replace your vacuum belt.

Preventative Measures

To prevent smoke from coming from your vacuum cleaner in the future, you should make sure you keep it well-maintained. Check the brush roller regularly and remove any hair, lint, etc. Make sure to empty the bag or tank regularly, before it gets completely full. Also, make sure to replace the filters at least once a year.

If this article did not help you stop smoke from coming from your vacuum cleaner, you may need to contact an appliance repair professional. With the help of TalkLocal, you can receive phone calls in minutes from up to three high quality appliance repair professionals in your area that are available when you are.

What Can You Do With Autumn Leaves?

Thursday, November 1st, 2012

What Can you do with Autumn leaves Landscapers

Nature puts on a dazzling display of colors and shapes for us to enjoy in the form of changing leaf colors each year. Once the leaves drop to the ground, the challenge is to figure out what to do with them. This is especially important as leaves covering paths and walkways create a slipping hazard, while a thick blanket of leaves on a lawn will eventually kill the grass by depriving it of light and air. So what can you do with autumn leaves? Here are a few ways to take care of fallen leaves, and use them for gardening purposes.

Rake, Sweep and Blow

Use a leaf rake on the lawn. Choose a rake that is broad enough to collect a large number of leaves with each swipe but light enough so that it does not tire you out too quickly. Longer handles allow you to stand straighter, which reduces back strain during your raking sessions. Use a broom to sweep leaves off hard surfaces, such as patios, walks and driveways. A motorized leaf blower will help you to move leaves from under shrubs and other tight spaces; but you will have to supply gas, electricity or battery power.

Make a Soil Conditioner

Make a soil conditioner with leaf mold. Rake up the leaves and pack them into a plastic trash can liner. Sprinkle the leaves with water as you go. Tie the bag closed. Punch holes into the sides to allow air and water inside. After a year or two, the leaves decompose into leaf mold that you can use as a nutritious soil conditioner or mulch to help improve your landscape.

Compost

Combine the leaves with other organic elements such as grass clippings, shredded cardboard, eggshells, rotted fruit or vegetables, and coffee grounds. Place in a container, such as a barrel, composting bin or plastic trash can. Alternatively, stack the items in a small area that sectioned off by wire fencing. Stir or turn the stack several times each week to circulate air and water. The rate of decomposition will vary according to the specific conditions of your stack, but most people should expect to have compost to spread within six to nine months.

You might also try the professionals

If you do not have the space to store leaves, then rake and bag them up for your municipality or a private service to collect. Also, ask your neighbors if they can use your leaves. If you are one of the many homeowners who cannot devote the time, space and effort towards removing your leaves, it makes sense for you to contact a professional landscaper through TalkLocal.

5 Simple Vegan Thanksgiving Stuffing Recipes

Thursday, November 1st, 2012

5 Simple Vegan Thanksgiving Stuffing Recipes Party Planners

While many people eat turkey on Thanksgiving, several people have dietary restrictions or eating preferences. Which unfortunately  means that they might get left out of the festivities. So here are 5 simple vegan thanksgiving stuffing recipes, that are just as tasty as the original and which ensures that everyone can enjoy Thanksgiving to the fullest! You can create these vegan thanksgiving meal or vegan thanksgiving side dish quickly and easily: –

Recipe #1 – A substitute for the traditional stuffing

  • 10 cups bread crumbs
  • 1 or 2 tbsp olive oil
  • 1 tbsp garlic
  • 1 cup diced onion
  • 1 and ½ cups chopped celery
  • 1 tsp sage
  • 1 tsp thyme
  • 1 tsp salt
  • 1 tsp pepper
  • 2 or 3 cups of vegetable stock or hot water with vegetable bouillon cubes

Combine all ingredients except for the liquid. Once all the dry ingredients are mixed together, add the veggie stock/veggie bouillon until your stuffing reaches your desired thickness. Don’t stir too much or the mixture will become mushy.

Recipe #2 – Mushroom delight

  • 1 tbsp vegetable oil
  • 1 diced onion
  • 3 to 4 celery stalks, chopped
  • 1 chopped bell pepper
  • 1 can sliced mushrooms (4.5 oz)
  • 1 garlic clove
  • ½ tsp salt
  • ½ tsp pepper
  • 1 ½ cups crushed corn flakes
  • 10 oz vegan or non-dairy cream of mushroom soup or soy milk

Mix all ingredients together and bake in an oven for 30-45 minutes in a greased casserole dish at 350 degrees.

Recipe #3 – Add some rice

  • 1 loaf of day-old bread, cut or broken into 1-inch cubes
  • 2 ½ cups of vegetable broth
  • ½ tsp sage
  • ½ tsp thyme
  • ½ tsp salt
  • ½ tsp pepper
  • ½ cup of cooked rice
  • ¼ cup of dried cranberries

Mix all ingredients together and bake in an oven for 30-45 minutes in a greased casserole dish at 350 degrees.

Recipe #4 –  Fruity melee

  • 4 cups bread crumbs
  • ½ cup of chopped celery
  • ½ cup of chopped apple, no peel
  • ½ tsp sage
  • ¼ tsp salt
  • ½ cup of dried cranberries
  • ¼ cup chopped walnuts or pecans
  • ¾ cup vegetable broth

Mix all ingredients together and bake in an oven for 20 minutes in a greased casserole dish covered with foil at 350 degrees. Take off the foil and bake for an additional 20 minutes.

Recipe #5 – Back to the basics

  • 5 cups bread crumbs
  • ½ onion, chopped
  • ¾ cup celery, chopped
  • 1 tbsp olive or vegetable oil
  • ½ tsp sage
  • ½ tsp rosemary
  • ¼ tsp salt

Mix all ingredients together and bake in an oven for 30 minutes in a greased casserole dish covered with foil at 375 degrees. Take off the foil and bake for an additional 15 minutes.

Use these simple thanksgiving recipes to include all family members in the feast! For more ideas or for help planning your Thanksgiving party or Thanksgiving feast this year, search TalkLocal for assistance from a trusted professional.

DIY Thanksgiving Centerpieces Using Fall Finds

Thursday, November 1st, 2012

DIY Thanksgiving Centerpieces Using Fall Finds Party Planners

If you’re hosting a Thanksgiving dinner this year, a beautiful fall centerpiece is a must have. Centerpieces take your meal above and beyond, giving the entire room an ambiance and scenery that puts everyone in a celebratory mood. Contrary to what you may think, a gorgeous and creative centerpiece does not have to cost an arm and a leg. In fact, the best way to obtain an artistic centerpiece is by making one yourself! Autumn is such a beautiful time of year and nature leaves objects to use all around us. Hunting for objects to incorporate in your centerpiece is half of the fun and it’s also an excellent activity to get the kids involved in. Read on for some simple DIY Thanksgiving centerpieces using Fall finds.

Baskets, gourds and other base
First, you’ll need a base of some sort. Baskets and cornucopias made of wicker or wood are very inexpensive, and it’s a safe bet that you can even find them at your local thrift store. You could also hunt for a colored vase in a fall color such as amber, plum, mustard yellow, or moss green. A hollowed out pumpkin or gourd with the top cut off makes a beautifully festive flower and twig vase that you can simply toss out at the end of the evening and these give a rustic fall feel to any room. A large metal mixing bowl or colander is another option and this works in a pinch since most of us have these lying around anyway. You can fill bowls with larger objects such as gourds, small pumpkins, and dried corn.

Acorn, baby pumpkins and other fillers
You’ll need some filler items for your centerpiece, and these will be a breeze to find outside, or if you’re looking for a less temporary centerpiece you can purchase plastic objects. Acorns, especially when attached to branches, make an earthy statement. Baby pumpkins and squash come in a variety of colors and textures. Don’t forget vibrant fall leaves and flowers: these will add a delicate, earthy touch to any centerpiece. Dried corn is almost an homage to the history of the holiday. If you have candles lying around, they will make an excellent addition, as would a string of white Christmas lights.

Thanksgiving can be a very busy time, so if you need assistance in decorating for your party, simply call TalkLocal. They can connect you with a professional party planner. This will make your load lighter, and that’s something we can all celebrate.

How to Remove Cranberry Stains from the Carpet

Thursday, November 1st, 2012

How to Remove Cranberry Stains from the Carpet Carpet Cleaners

Cranberries are a delicious fruit that can be used in a huge assortment of decadent desserts, or enjoyed on their own for an extra special treat. Unfortunately, many individuals who love cranberries will find themselves wondering about how to remove cranberry stains from the carpet at one point or another. The deep crimson color of cranberries and their juice makes for noticeable stain when pressed into a light carpet, making it imperative to remove the offending liquid as quickly as possible. Using the following techniques, homeowners should manage to lift even the most stubborn cranberry stains from their home’s floor.

Blotting the Carpet
If cranberry juice is spilled on the carpet, the excess liquid needs to be removed from the fabric. This should be done very carefully, as rubbing the carpet could cause the stain to set. Instead, a towel should be pressed very lightly onto the spot where the cranberry liquid is located. If any fruit remains, it should be carefully picked up and disposed of properly.

Applying a Cleaning Agent or a Bleach
Detergent is one of the most popular solutions for lifting a cranberry or other fruit stain. A small amount of detergent mixed with warm water can be sponged onto the stain. In turn, all of the liquid should be soaked up again. This can be repeated several times until the desired results are achieved.

If detergent does not successfully remove the offending stain, a hydrogen peroxide solution may work more effectively. This should only be used on stains that have been treated with other products and have not responded to the removal attempt. Soaking the area with a 3% hydrogen peroxide solution, the carpet should be left to sit for approximately one hour. The liquid can then be blotted away. This can be repeated several times if needed.

Particularly stubborn stains often require the assistance of a carpet cleaning professional. To find a qualified company in your area, use TalkLocal. TalkLocal makes it easy to find professionals in no time, as the system takes care of the tough work for you.

How to Fix a Leaky Faucet

Wednesday, October 31st, 2012

How to Fix a Leaky Faucet Plumbers

Does your faucet continue to leak even after tightening it completely? You’re not alone. A leaking faucet is both a common annoyance and a waste of water. Fortunately, there are ways to save money by fixing it on your own.

If your faucet is leaking, it could be for one of these two reasons: loose nuts or a worn out or improperly installed washer. The majority of all leaking faucets are caused by washer problems, but loose nuts are usually the problem when the leak is coming from the base of the handle.

Learn how to fix a leaky faucet by following these six simple steps:

1. Turn off the main water supply. The shut-off valve is usually located underneath the sink you are working on.

2. Loosen the packing nut with an adjustable wrench by turning it counter-clockwise. Then use the faucet handle to pull out the entire valve.

3. Locate the old washer, which will probably be at the bottom of the valve unit.

4. Replace the old washer with the new one matching its size.

5. Replace the valve unit.

6. Tighten the packing nut and turn the water back on.

If after completing these steps your faucet still leaks, you should call a plumber to fix the problem. Visit TalkLocal to be connected to a local service professional in your area to help you with your problem.

How do you Remove Rust Stains from Sink?

Wednesday, October 31st, 2012

How do you Remove Rust Stains from Sink? Maid Services

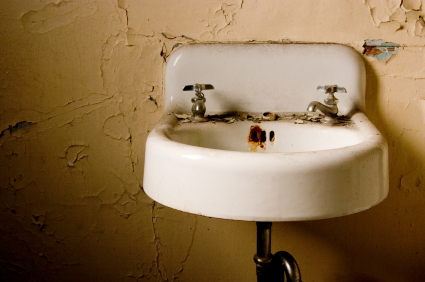
A common question asked is “how do you remove rust stains from a sink?” To answer that, unfortunately, regular cleaning products will not get rid of rust stains in sinks. Similarly, regular cleaning will do nothing to keep rust stains from forming in the first place. If you are worrying about rust stains, then a little more work is required. Below are a few effective ways to get your sink looking new again. Regardless of whether you have porcelain or a stainless steel sink, try out a few of the following special cleaning methods and figure out which works best for you.

Vinegar method

– Use vinegar and a scouring pad to get rid of those evil rust stains. Pour white vinegar onto the pad and scrub in a circular fashion centered on the stained area. Do not be afraid to put a little muscle behind your work. Use a good amount of force when scrubbing out the stains. It will require hard work so do not grow weary if the stains do not come out with a few gentle strokes.

Lemon juice method

–       Apply lemon juice to the affected area. Allow the liquid to sit on the area for awhile until the spots start to fade away. Then rinse the sink with fresh water. If there are still stain spots, repeat the steps.

Bar Keepers Friend

–       Try out Bar Keeper’s Friend, a multi-purpose cleaner that works on porcelain, copper, stainless steel, fiberglass, and tile. You can order the product online or check your local store. Then just follow the instructions on the bottle.

If rust is a persistent problem or you just simply do not feel like dealing with, it may be time to hire a professional cleaning service to come to your home. Check out TalkLocal and you will be connected directly to a high quality professional right in your neighborhood! Have a maid service come to your home and take care of not only your sink stains, but also have them do a touch up on the rest of your home.