How to get your Keys out of your Trunk

Wednesday, October 31st, 2012

How to get your Keys out of your Trunk Locksmiths

Have you ever been in such a rush that you locked your car keys in your trunk?  This is something that has probably happened to all of us at some point in time, and it can be pretty annoying, especially if you have somewhere you need to be.  If this has happened to you, continue reading for our tips and tricks on how to get your keys out of your trunk.

How to get your keys out of your trunk

If your lock is inside the interior door handle, you will need to call a professional.  If you have an old fashioned lock with little buttons, you are in luck; all you need is a wire coat hanger.  Take the coat hanger and make most of the hanger straight with a small hook at the end.  Insert the hanger between the rubber and the side of the window.  Carefully hook the hanger around door lock and pull it up.  Once you have the door unlocked, check the area near the driver’s left knee for the latch to open the trunk.  If there is no latch, going through the cushion of the back seat is another option.

If you have a newer car

Many new cars use electrical security systems.  If this is the case with your car, you can save a lot of money by opening the door yourself, or with assistance, and then get into the trunk.  In order to get into the trunk, look for the fuse panel that is along the driver’s door, near to the dashboard.  The door usually closes on this panel.  Locate the 4 fuses (the 7.5 and 5 amps) on the left and wait a minute.  Replace them into their original places and then test to see if the door unlocks.  If the door does unlock, the system is deactivated and you are good to go!  If your car does not unlock, pull 4 fuses at a time until you get the correct combination.

If you’ve tried these methods and have had no success, hire a professional to help.  Use TalkLocal today to get in contact with multiple highly rated locksmiths in your area for free.  Simply enter a brief description of your service needs along with your location and availability, and TalkLocal will do the rest.  Stop searching for the right service professional and use TalkLocal.
How to Connect Electrical Outlets in a Series

Wednesday, October 31st, 2012

How to Connect Electrical Outlets in Series Electricians

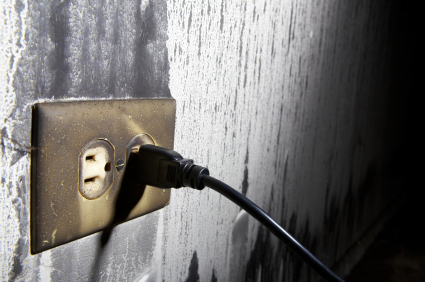
Electrical outlets in a series, as opposed to electrical outlets in a parallel circuit, allow you to access electricity from multiple sources without the individual wiring for each source to the main.  Well-placed outlet series can minimize the strain that your outlets may face by being overloaded with multiple plugs.  Continue reading for more information on how to connect electrical outlets in a series.

Step-by-step

Materials needed: Drill and drill bit(s) corresponding do your outlet settings, screwdriver, wire cutters, electrical cable, electrical outlet kits (depending on how many you want installed), sharpie marker, measuring tape, and rubber gloves.

1.  Go into your place’s circuitry box and power off the specific outlet that you are using.  Make sure that it is the correct one before you start working.  Put your gloves on at this stage.

2.  Using the screwdriver, loosen the two screws on the outlet you want to connect from and pull out the outlet without disconnecting any wires from it.

3.  Measure how far up from the ground the outlet you want to connect from is.

4.  Line up the electrical outlet you want to install with the position and the correct distance from the ground that you measured.

5.  Mark the studs between the desired outlet position from the original outlet, taking into account the correct distance form the ground.

6.  Drill holes at the marked spots.

7.  Weave the cable between the outlets through the holes.

8.  Connect the wiring to the original outlet.  The black wire goes to the brass screw.  The white wire goes to the silver screw.  The green wire goes to the green screw.

9.  Reattach the original outlet back to its original position.

10.  Connect the desired (new) outlet and install it as well.

11.  Test the new outlet.

It’s generally a good idea to consult an electrician regarding how to connect electrical outlets in a series in order to make sure you know what you are doing.  TalkLocal can help you find the correct local experts in this case, saving you time and energy in what may be a stressful situation.

How to Repair DC Jack on Toshiba Satellite

Wednesday, October 31st, 2012

How to Repair DC Jack on Toshiba Satellite Computer Repair

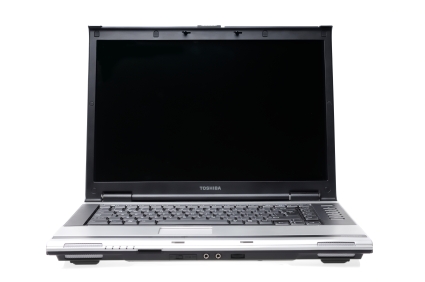
One of the most common complaints about the Toshiba Satellite laptop is a broken power jack, or power connector. This usually occurs when the power jack gets pushed into the laptop and feels loose, preventing the laptop from charging properly. Read more to learn how to repair dc jack on a Toshiba Satellite laptop.

To repair the damage:

1. Replace the original plastic jack with a metal one. You can find these at most technology stores for under $5.

2. Disassemble the laptop by removing the top cover assembly. You will need a screwdriver to do this.

3. Once you open the top cover, find out why the power jack feels loose. It’s probable that the power jack and the mounting brackets on the base assembly are damaged.

4. Using a pocketknife, remove the plastic supports from the internal side of the base.

5. Again, using the pocketknife, remove the plastic wall surrounding the mounting hole. Make the hole larger so the new jack fits in.

6. The new jack may be too long for the laptop cover to properly fit back onto the base. You can fix this by cutting off part of the negative lead or by bending it.

7. Coat both leads with plenty of solder.

8. Remove the damaged power jack from the laptop.

9. Cut off wires somewhere close to the jack base.

10. Take off the insulation, wind the wires together, and cover with solder.

11. Connect the red (+) wire to the lead of the new jack. Connect the black (-) wire to the lead on the one you shortened. Make sure to check the polarity before turning on the power!

11. Mount the new power jack on the base.

12. Solder wires to the new jack (red wire to the center, black to the side, as done before).

13. Solder wires at a 90-degree angle to the jack so the top cover (and the right speaker) fits in.

14. Cover both leads with electrical tape.

15. Now the new modified power harness is installed into the laptop base. You can tighten the nut on the power jack and secure it to the base.

16. You will have to slightly modify the top cover assembly to make it fit on the laptop. Get rid of the plastic reinforcement walls. If they remain touching the power jack after the cover is installed, there will be a space between the cover and base.

15. Reassemble the laptop.

Although this takes some time, it is a cost-efficient way to fix your Toshiba Satellite laptop. If you would prefer some professional help, use TalkLocal to connect you to the best computer repair professionals in your area!

New Car Battery Still Won’t Start

Wednesday, October 31st, 2012

New Car Battery Still Won't Start Auto Repair

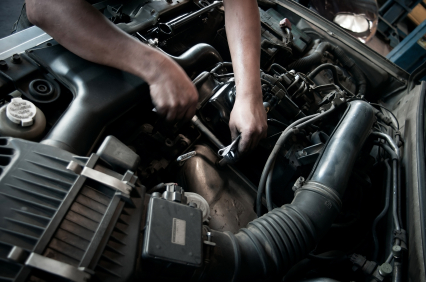
You have a new car battery and your car still won’t start.  Use these helpful tips to save money and get back driving on the road in no time.  You can find the top rated replacement battery for your specific car model and year on Amazon and have it shipped overnight. If your new car battery still won’t start, read the following for a breakdown of the most common reasons this might be happening.

Potential problems:

–  A fuse is blown.

–  The cells are not filled with the proper amount of water.

–  You have a bad starter. Check out common car parts when seeking car part replacements.

–  Dirt or residue may be on the inside of the connectors.

–  The new battery may need to be fully charged before installing it into your car.

–  Make sure there is a solid connection between the cables and the battery.  In addition, check out your connections to make sure they are all connected to their assigned places.

Solutions:

Usually the starter is the problem if you hear just one click when turning the key in the ignition.  However, if you hear no sounds as you turn the key, check to make sure you are well grounded.  If a fuse is blown, this can be an easy $5-8 dollar fix.

If you do not hear any clicks:

–  Check the 120A main fuse in the back left hand corner of the fuse box in the engine compartment.  If the fuse is blown, it is about a $5.00 purchase from your dealer.

–  In addition, check out the ACC 30A fuse.  If the cigarette lighter works, it is not the ACC 30A fuse.

If you can’t seem to diagnose the problem, hire a professional.  Use TalkLocal to get in touch with multiple highly rated auto repair technicians in your area today.

The owner of this website is a participant in the Amazon Services LLC Associates Program, an affiliate advertising program designed to provide a means for sites to earn advertising fees by advertising and linking to Amazon properties including, but not limited to, amazon.com, endless.com, myhabit.com, smallparts.com, or amazonwireless.com.

Dryer Taking Longer to Dry Clothes

Wednesday, October 31st, 2012

Dryer Taking Longer To Dry Clothes Appliances Repair

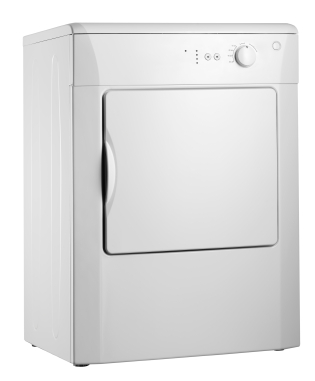
Your dryer that used to dry a full load in 30 minutes is now taking three hours to dry a towel. It’s frustrating you to no end that your dryer is taking longer to dry clothes than normal. However, don’t throw out your once trusty dryer yet, for the problem is usually fixable by simply cleaning or replacing a part. Here are some common causes of a slow dryer:

Lint trap is clogged

You should clean your lint trap every time you use your dryer, as lint buildup will slow down your drying time significantly. This is the most common reason as to why your dryer is taking longer to dry clothes. If you don’t regularly clean your lint trap, it could even start a fire in your dryer ventilation. Another place to check is in the lint trap slot. Sometimes there may be no lint on the filter, but plenty stuck in the slot that’s causing dryer slowdowns. Broken lint filters should be replaced as soon as possible.

Venting hose is clogged

The venting hose is the second part to check, as lint that wasn’t trapped in your lint filter could have ended up in your venting hose. A clogged venting hose is far more dangerous than a clogged lint trap, as this is where a fire could start. If you don’t regularly use your lint trap, then expect a buildup of lint in your venting hose. Even if you regularly do use your lint trap, something could be stuck in your ventilation that’s causing your dryer problems. Clean out your venting hose every once in a while with a vacuum cleaner as part of the regular maintenance of your dryer.

Heating element is broken

The heating element is a coiled wire inside your dryer’s cabinet that is responsible for drying your clothes. Before testing out your heating element, unplug your dryer first. Choose your dryer model from this site to find out how to open its cabinet to access the heating element. Make sure you have a multimeter ready to test out the heating element. Touch one probe to each end of the heating element and set your multimeter to the R x 1 resistance scale. If the multimeter reads a resistance of infinity, then your heating element is broken and should be replaced.

If you don’t want to mess with potentially dangerous appliances, then maybe you should use TalkLocal to find a quality appliance repair professional in your area. Soon your dryer will be running like it’s new!

How to Groom Matted Dog Hair

Tuesday, October 30th, 2012

How to Groom Matted Dog Hair Veterinarians

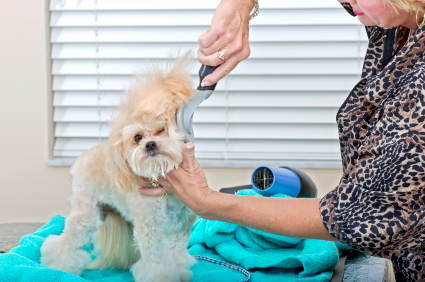
The size of the work is going to be dependent on the size of the dog you are grooming. But learning how to groom matted dog hair is nothing like mowing a lawn or raking leaves – you are tidying up something that is alive and sensitive to your moves. You must be careful as to not to upset the dog when grooming it.

Grooming the Dog

Get into a comfortable position for you and your dog first. A big dog should lie down at your feet, and a small dog should lie down on your lap or on a table. It is generally recommended that you start with the most sensitive area to get it over with. The most sensitive area for the dog is the under and around the ears – but be careful as to not rush the process. Do a small area at a time.

Use a metal comb to smooth out the knots – when you see a cluster (or a knot), approach it from the boundaries (the ends of the knotted area) and slowly work your way into the center of the knot.

But be careful as to hold the roots of the knotted hair firmly when undoing the knots – holding it at the middle and running the comb through will only unsettle the top hair, which will become knotted with time as the roots are still knotted.

Do not attempt to undo too many knots at the same time as it may cause too much friction for the dog to stay still. If you feel as if the dog is agitated, give him something to calm him down in the process – like a dog treat.

If you feel as if appearance of your dog in some areas really won’t make a difference, you can even cut out some fur. The fur will grow over time. Be careful, as always, that you are not hurting the dog by an accident or cutting unnecessary hair.

Give the dog a treat after all this is finished.

Additional Help

If you feel like you need professional help on grooming your dog, TalkLocal can help with finding the correct local experts in this case, saving you time and energy in what may be a stressful situation.

What is the Purpose of an Attic Fan

Tuesday, October 30th, 2012

What is the Purpose of an Attic Fan Heating and Cooling

A common question asked is “what is the purpose of an attic fan?”  Attic fans are used to increase airflow and save you money on your electrical bill.  The following should provide you with more information on attic fans and why they are useful in homes.

What function does an attic fan serve?

An attic fan works as a ventilation unit.  Attic fans reduce costs and keep your home fresh and filled with clean air.

How does an attic fan work?

An attic fan circulates the air in the attic.  Not only does it circulate air, it also replenishes fresh air into the home system.

Why is this important?

An attic fan reduces the amount of stagnant air in the attic.  Doing so keeps hot air from building up and creating unnecessary heat in your home.

What are more of the benefits?

Additional benefits of an attic fan include fresh air being dispersed throughout the home.  This not only keeps the oxygen levels ideal, but it also brings in fresh outdoor smells.  Attic fans also get rid of smelly or stale air from within the home.  For a complete breakdown on attic fans, check out attic fan purposes.

In addition to having an attic fan, seeking other options such as roof ridge vents and installing more attic insulation can reduce costs as well.  To reap these benefits, install an attic fan today.  Use TalkLocal to be directly connected to a heating and cooling professional in your area today.

How to Connect an Electrical Outlet to a Light Switch

Tuesday, October 30th, 2012

How to Connect an Electrical Outlet to a Light Switch Electricians

If you have an outlet in a room that does not operate from the room’s light switch, it is possible to re-wire the outlet receptacle so that it is connected to the light switch.  This can be a confusing task, but with careful preparation, it can be done.  Read on for more information on how to connect an electrical outlet to a light switch.

Before starting, it is critical to turn off the power to the circuits you will be working with for safety precaution.  You will need to unscrew the plates from both the outlet and light switch and take a careful look at the wires that are housed inside the boxes.  Be sure to keep all the screws nearby, as you will need them later.

For step-by-step directions, try reading this article with specific directions and helpful pictures.  This video also explains the process with clear directions.

If a task like this is completely new to you, it might be better to contact a professional electrician for help.  Try using TalkLocal, a free service that will connect you with top-quality, reputable electricians within minutes.  All you need to do is enter in your specific problem, location and availability, and TalkLocal will contact multiple companies in your area who will then call you directly, ready to help.  Save time and stress from searching through phone books and directories for the right, most affordable electrician, and let TalkLocal find one for you.

Ways to Make your Carpet Smell Better

Tuesday, October 30th, 2012

Ways to Make your Carpet Smell Better Carpet Cleaners

Vacuuming the carpet won’t get rid of all the odors in your home. Some odor-causing particles are smeared into the fibers of your carpet, requiring more than just pure force of a vacuum to eliminate the smell. You can try spraying the carpet with a scent in order to overcome the smell, but that’s not really getting rid of the smell, is it? Read more to learn ways to make your carpet smell better.

Getting Rid of the Smell

Using baking soda is one way you can absorb the smell-causing particles in your carpet. Follow these directions:

1. Mix together a 3/4 cup of baking soda, 1/4 cup of talcum power, and 2 tablespoons of cornstarch.

2. Pour the mixture into a container that can sprinkle the content over the carpet, such as a spice shaker.

3. Sprinkle the contents of the shaker on the carpet areas you want to clean.

4. Rub it into the fibers of the carpet using a brush or a broom. Wait a while (overnight) for the mixture to settle in; you will want to make sure that no wind is present to disturb the powders on the carpet.

5. Clean up the powder using a vacuum.

You can try buying a carpet fragrance powder at a local supermarket, but they are essentially the same thing as your homemade mixture. Use the same ratio as described above if you are interested in making different amounts of mixture.

You may also be interesting in steam cleaning your carpet for definite results. Hands down, this is the most effective way to not only get rid of the smelly odor on your carpet, but also clean your carpet. However, the cost of steam cleaning your carpet is not cheap. You can try renting a steam cleaner to just do the job yourself. The cost of renting a steam cleaner will probably be under $50. Having someone to do it for you, on the other hand, will cost a bit more.

If you are expecting guests soon, try something that will cover up the smell, such as scented candles. Make sure that there aren’t flammable objects nearby whenever you light a candle.

Additional Help

If you are looking for ways to make your carpet smell better and feel like you need professional, TalkLocal can help with finding carpet cleaning experts, saving you time and energy in what may be a stressful situation.

Car Door Open Light Stays On

Tuesday, October 30th, 2012

Car Door Open Light Stays On Auto Repair

The door-open light staying on is a common problem that happens when the door switch plunger sticks (most likely due to an accumulation of dirt or rust).  Fortunately, this is a simple problem to fix and doesn’t take a lot of automotive expertise to repair. Read more to learn what to do if your car door open light stays on.

You’ll first want to thoroughly clean the door switches on all the doors with a cleaning spray.  This should at the very least loosen up any of the accumulated grime that’s built up within the door switch.  You should then use compressed air to clear all the dirt and grime from those switches, and then apply a spray lubricant to the switches. You then want to lubricate the surface of the switches, which can done with either a dry lubricant or the more commonly found WD-40.  Try to avoid having too much excess lubricant on the switches, as the lubricant may leak into your car or damage other parts in the general area.

If this doesn’t work, you can also take the door panel and do the same treatment from the other side of the door switch to ensure the door switch is completely cleaned and lubricated all around. However, if the door switch light is still on after the entire treatment, there may be some faulty wiring or the switch may need to come out for repair.  It’s highly suggested that you leave this job to an auto-repair professional, since they will have the necessary tools and expertise to properly repair your car. Likewise, if you ever feel uncomfortable or unsure during the process of cleaning your door switches, you may just want to have your car looked at a mechanics.

TalkLocal can help you find a local high-quality repair center who can take care of your car light problem right away.  You’ll be talking to quality mechanics in the area in just minutes!