Get Rid of Pantry Moths

Wednesday, October 24th, 2012

Get Rid of Pantry Moths Pest Control

Pantry moths are one of the most bothersome pests to have to deal with; they ruin your food and lay eggs everywhere. Pantry moths can be identified by their whitish-grey color and are generally no larger than an inch or two. The moment you see a pantry moth, immediately address the problem unless you want to see your pantry crawling with moths. Once you find one, there are sure to be many others nearby, either hidden or visible. In a nutshell, you must first kill the existing infestation of moths and then take steps to prevent them from ever returning. Read on to learn exactly how to get rid of pantry moths.

Pantry moths live for one reason – to create more moths. Though these moths only have a two-week life span after reaching adulthood, the females are capable of laying up to 400 eggs at a time. Pantry moths leave behind cocoon webbing and worm-like larvae, typically within dry food products. Although they prefer dried food, they also tend to infest flours, grains, candy, and similar foods. Look for any open containers or cereal boxes and clean these out. Even if you don’t see anything that may indicate pantry moths have been there, it’s a good idea to clean out containers and throw out old open boxes. If you are throwing anything out, make sure you keep this trash separate from your other trash, and leave it outside when you finish.

If the degree of infestation is worse or if you just want to be thorough, it may be a good idea to clean every crevice and every corner with soapy water. Even door hinges and the sides of a door can harbor moth larvae, so overlook any area if you want to be complete. Dry the cleaned areas thoroughly, and then vacuum these areas. These are breeding grounds for pantry moths that love to snack on dry foods and grains. Next, wipe shelves, food containers, and other surfaces with white vinegar. For added protection, you can also repel pantry moths using other herbs such as peppermint, coriander, bay leaves, and black pepper.

By following these steps, you will have a moth-free pantry in no time. Furthermore, to prevent future infestation, you will want to store all your foods in airtight containers. You can also try freezing your food to kill off moths and larvae.

If you followed all these instructions and still find yourself with a moth infestation, you may want to find professional help. If you need help finding a specialist, consider using TalkLocal to find a quality pest control specialist for you. TalkLocal is a free service that will connect you with pest control companies in your neighborhood within minutes. Just enter in your specific problem, location and availability into the online form and up to three companies will call YOU directly, saving you the time and stress of finding one yourself.
Best Eco-Friendly Carpet Cleaners

Wednesday, October 24th, 2012

Best Eco-Friendly Carpet Cleaners Carpet Cleaners

Many carpet cleaners contain harmful chemicals such as chlorine that are detrimental to our health and the environment. “Green” carpet cleaners can remove spots and stains just as well as the industrial chemical cleaners. Continue reading for more information the best eco-friendly carpet cleaners.

Vinegar

One of the best eco-friendly carpet cleaners is vinegar. Most homeowners have vinegar in their pantry, but if not, it is inexpensive and can be found at your local supermarket. Many common carpet and rug stains can be cleaned with a vinegar and water solution, or with undiluted vinegar. Many common chemical carpet-cleaning products offer a foaming action. You can achieve this with vinegar, too, but putting the vinegar solution into a foaming soap bottle.

Vinegar works on a variety of tough stains. Diluted vinegar removes many different types of stains, including the following:

Crayons and Glue

Kids can be very messy, but it is easy to clean up after their mess. Crayons and glue stains should be treated with undiluted vinegar and an old toothbrush to scrub the soiled area. If the stain is stubborn, such as dried glue, warm up the vinegar and let it sit on the stain for about 15 minutes before scrubbing it away.

Red Wine

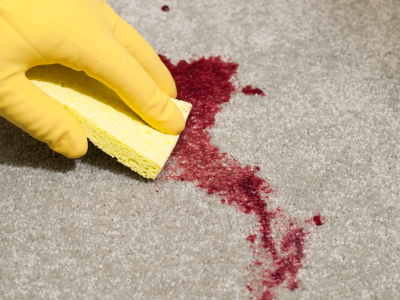
If red wine spills on your carpet, you can remove it by immediately throwing salt on the soiled area, which will absorb the spill. Next, remove the salt with a vacuum and clean with 1/ 3 cup of vinegar and 2/ 3 cup of water.

Grease

Grease stains can easily be removed, too, by sprinkling cornmeal to absorb the oils. Then, sponge the greasy stain with diluted vinegar.

Ketchup, coffee, soda, chocolate

Prepare a diluted vinegar solution with a 2 to 1 ratio of water to vinegar, respectively. Remove ketchup stains by liberally sponging the vinegar solution into the soiled area. Coffee, tea, and soda spills can be treated with just water. If the stain is set, then sponge in the diluted vinegar mixture. For chocolate, blot the stain with a clean cloth and the vinegar mixture.

Mildew

Vinegar is powerful at eliminating bacteria. Kill mildew with a mixture composed of half vinegar half water. Make sure the carpet dries since we want to get rid of any dampness to prevent future mildew.

For best results, remove stains as soon as they happen. If your carpet is beyond repair, use TalkLocal to connect you to a local carpet cleaning company today.

How to Make your House Look Clean Fast

Wednesday, October 24th, 2012

How to Make your House Look Clean Fast Maid Services

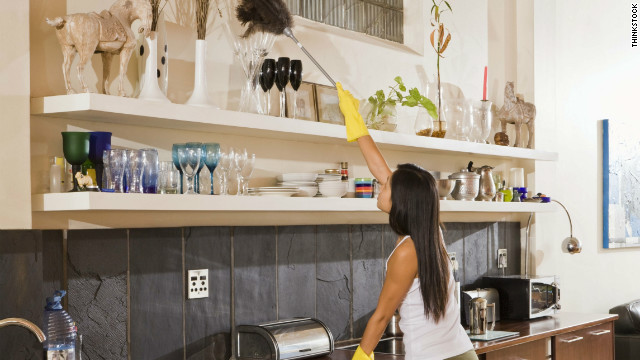
You’re having an unexpected visitor coming by within the next hour. Your house is a mess, and you need to figure out how to make it look presentable before they arrive. Here are some tips of how to make your house look clean fast:

– Are there random objects lying on your floor and coffee tables? Take a quick sweep through all your rooms with an empty basket. Place all the unwanted items and clothing in this basket, and throw the basket out of sight (in your bedroom closet, for example,) until your guest leaves. You can put them away later.

– Complete a quick dusting of all surfaces in the living and TV rooms, dining room, or any other rooms you use regularly.

– Go into the bathroom: throw all your sprawled out appliances, lotions, bottles and any other objects under the sink. Take a dampened paper towel and clean the mirror to get rid of dust and toothpaste spots. Take out the trash, make sure you have toilet paper on the roll, and make sure the toilet is flushed. Spray some air freshener.

– Do the same in the kitchen. Put your clean dishes away and throw the dirty ones in the dishwasher. Take out the trash and put all food away in the cupboards. Take a Clorox wipe and clean off all your counters.

– Go through your house and spray some air freshener, or open a couple windows to get a nice, clean breeze blowing through.

– If you have time, grab your vacuum and do a quick run over all your visibly dirty floors. Go into your doorway and put away all shoes, umbrellas, coats, etc.

– Lastly, make sure you look presentable. Wash your face, brush your hair, and make sure you’re wearing clothes that aren’t covered in cleaning supply stains or food stains. Put on some deodorant and perfume, and you’re good to go!

If you have some time, and you’d rather leave the cleaning to a professional who can make your house spotless, try using TalkLocal to find some local maid services. TalkLocal is a completely free service that will connect you with top-quality, reputable cleaning specialists in your neighborhood within minutes. All you need to do is enter your specific problem, location, and availability, and TalkLocal will contact multiple cleaning companies, who will then call you ready to help.

Locks for Sliding Glass Doors

Wednesday, October 24th, 2012

Locks for Sliding Glass Door Locksmiths

Sliding doors can be the most vulnerable places in a house for a burglar to break in.  Because of this, it is important to ensure that the locking system for your sliding glass doors is efficient.  There are several different types of locks for sliding glass doors.  Read on for more information on each type and how it works.

Clasp Lock

A clasp lock hooks itself on the frame’s opening.  Clasp locks can be easily broken with enough force because they are generally flimsy when installed.  You should always have an additional locking mechanism on your sliding glass door in addition to a clasp lock.

Security Bar

A security bar locks by blocking the path of the door to slide open.  Most sliding glass doors come with a security bar installed already.  It is usually a metal rod with rubber stoppers on the ends that is the same length as the part of the glass door that does not open.  These can usually withstand up to 1,000 pounds of pressure.  If your sliding glass door does not have a security bar built in, you can use a strong wooden rod or piece or piping to block the path of the door.

Cylinder Locks

Cylinder locks are regular door locks that can be locked and unlocked by a key.  When locked, a lever is hooked into a stationary bar in the door frame.  These have higher security than other locks, but can be opened by hammering, wrenching or prying.  Install cylinder guards around the lock cylinder to prevent this.

Foot Bolt

Foot bolts are small devices that can be put into the upper or lower corner of the door.  When locked, the spring in inside of the lock uncoils and extends a bolt into the door frame.   A foot bolt can be used to compensate for the other locks above.

For lock installation or advice on how to better secure your home, use TalkLocal to find a locksmith in your area.  Within minutes, you will be on the phone with up to three highly rated professionals willing to help.

Monitor Color Looks Weird

Wednesday, October 24th, 2012

Monitor Color Looks Weird Computer Repair

Computer color problems can affect the way you view graphics, watch videos, and even browse the Web. Most monitors are able to display thousands of colors, however, colors can sometimes be displayed inaccurately. This may lead you to wonder why your monitor color looks weird. Learn how to troubleshoot monitor color problems to make the best of your computer’s multimedia and graphic capabilities.

Instructions:

1. Check that the cables connecting the computer monitor to the case are efficiently secured. Sometimes loose cables can cause monitor colors to look weird or distorted.

2. Try adjusting the brightness and contrast levels on your monitor. These buttons are usually located on your monitor or on the upper portion of the keyboard. Consult your computer manual if you are unsure of how to adjust your computer color settings.

3. Try changing the color quality settings on your computer’s built-in video card. Click the “Start” menu button in the lower left-hand corner of your screen and choose”Settings,” then open the control panel. Double-click the “Display” icon. Click the “Settings” tab. In the drop-down menu listed under “Color Quality,” choose the highest color option available. The higher the color setting, the better. The highest possible setting for most monitors is the 32-bit color option. Click “OK” to implement the change.

4. Consider installing a new computer monitor. Some computers lose their ability to properly display colors over time. If your computer is old and  the previous steps did not work, try testing out a new monitor. This will confirm whether or not the monitor is causing the color issues.

Tip: Unshielded speakers and other magnetic interference can sometimes cause discoloration on your computer monitor. Remove all potential interferences away from the area around your computer.

Need a computer repair professional to help you fix your computer? TalkLocal will connect you to a reliable and local professional in minutes!

Roof Deicing Systems

Wednesday, October 24th, 2012

Roof Deicing System Roofers

When winter rolls around, the snow can be a gift and a curse. A light flurry may give your yard a seasonal touch, but a terrible snowstorm can collapse your roof. When too much ice and snow collects on your roof, ice dams form and prevent water from draining properly. The ice dams can cause water to collect and freeze in the gutters, which then forces the water to flood into poorly insulated areas. This water can damage your walls, ceilings, and roof structure–resulting in costly repair bills. The worst case scenario is your roof collapsing from the weight of the snow.

Homeowners can avoid this fate by regularly sweeping their roof. Some people who experience frequent snowfall install deicing systems to prevent snow and ice buildup on their rooftops. Roof deicing systems are usually comprised of heated cables or panels installed under roofing material to melt snow and ice. They are installed near the roof overhang where ice dams tend to form.

There are many reasons people opt for this useful technology. For one, it is a long-term and reliable investment; many deicing systems have a warranty that covers up to 10 years, which is good for homeowners who plan to stay in a cold area. A deicing system is convenient way to combat winter weather; without it, homeowners have to manually remove the ice which requires time and effort. A deicing system is also a safer alternative because it doesn’t require people to climb onto the roof.

However, if you still wish to manually remove snowfall from your roof, invest in a roof rake. This is a rake equipped with an extra long flexible handle, a long blade to pull snow off a roof, and wires opposite the blade to break up the snow. It is a great tool for anyone who lives in a snowy area. If you are dealing with occasional snowfall and don’t want to purchase a special rake, you can use a regular one. Be careful not to hit your shingles with the blade. The roof does not need to be scrapped clean, but rather, relieved from a good majority of the snow’s weight.

If you need to find a roofer to repair damages, TalkLocal can connect you to top quality professionals in minutes.

What Causes Tooth Decay

Tuesday, October 23rd, 2012

What Causes Tooth Decay Dentists

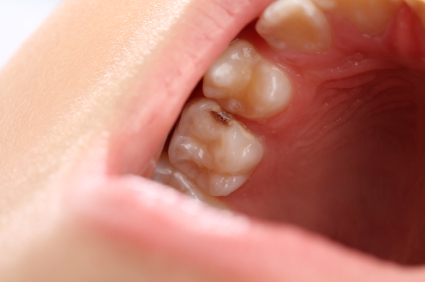
Tooth decay, simply put, is the process that results in a cavity.  Almost all of us have gone through the process of getting that toothache and then going to the dentists to get the cavity filled.  Many people like to attribute the development of cavities to “too much candy,” but while excessive sugars are definitely a major factor in tooth decay, cavities are a result of much more than just what we eat. Read on to learn more about what causes tooth decay and the preventative measures you can take.

What causes tooth decay?

Tooth decay can be attributed to a combination of bacteria and food.  The bacteria on your teeth form a sticky and clear substance called plaque around your teeth.  The bacteria in the plaque then take the sugars from the foods you eat and produce acid as a waste product.  The acids eventually burn through your enamel in a process called demineralization, exposing the sensitive pulp of your teeth and creating a cavity.

How can I prevent tooth decay?

Preventing tooth decay is fairly simple and really a matter of eating the right foods and maintaining good dental hygiene. It is essential to brush your teeth twice a day: once when you wake up and once before you sleep.  This removes as much plaque and bacteria from your mouth as possible.  Without plaque and bacteria, your tooth’s enamel cannot be worn down by the acids even if you do eat sugary foods often. Likewise, you should also floss daily because it also removes the bacteria wedged between your teeth that regular brushing cannot reach.

Diet changes can help as well.  Try avoiding sticky foods with high sugar contents such as raisins and caramel, as these not only have the sugars for bacteria but also are extremely sticky and difficult to remove from your teeth.  The longer the sugary food stays in your mouth, the more damage the bacteria can do.

I already have tooth decay. How can I treat it?

It all depends on the severity of the tooth decay.  If you’re only experiencing very slight tooth decay, you may be able to reverse it using fluoride rinses.  In all other cases, you’ll need to see a dentist.  A dentist will be able to recommend the correct course of action to repair your tooth.  In most cases of mild tooth decay, you may need to have the cavity filled, but in more severe cases, you may need a root canal or even tooth removal.

If you’re looking for a dentist to treat your tooth decay, make your search easier by using TalkLocal.  TalkLocal will connect you with the highest quality local dentist in just minutes, so you don’t have to waste time searching for one yourself!

Garden Pest Control Tips

Tuesday, October 23rd, 2012

Garden Pest Control Tips Pest Control

There are thousands of species of insects and pests that can invade your home garden and harm your plants. Some are more beneficial than you may think, but there are certainly some you want to keep out of the garden. Here are some home garden pest control tips you might want to use.

– Put up barriers or nets above and around your garden to keep out many types of pests and insects. You will need to set up the barriers so it is tight enough to keep the bugs out, but also loose enough so that water and sunlight can still enter.

– Hang up a bird nest around your garden to improve aesthetic and acoustic appearances, as well as act as a sort of “scarecrow” for insects. Feel good that you are providing a home for the birds while combatting annoying pests.

– Use a pest control spray. If you want to remain as eco-friendly as possible, be sure to look for those sprays that are naturally formulated. They are easy to find at your local home and garden retailers.

– Grow “practical” plants. There are certain types of plants that actually act as pest control agents themselves. Some examples are spearmint, hemp, and marigold plants.

If your pest problem seems too large or invasive to control on your own, it may be helpful to contact a local pest control professional. Try using TalkLocal to find one near you. TalkLocal is a FREE service that will connect you with top-quality, reliable experts in your neighborhood, within minutes. Just enter in your specific problem, location, and availability and TalkLocal will contact multiple pest control companies who will then call YOU directly, ready to help. Save time and stress from trying to find the right professional on your own and let TalkLocal do it for you!

How to Clean your Headlights on a Car

Tuesday, October 23rd, 2012

How to Clean your Headlights on a Car Auto Repair

Due to the dirt and the grime accumulated over time, your car headlights may be looking and worn.  Fortunately, there are many cost efficient and easy options for cleaning headlights.  Read on to learn how to clean your headlights on a car.

Toothpaste Method

Using regular white toothpaste works wonders for your headlights.  It’s actually preferable to use regular toothpaste, as whitening toothpastes contain other compounds that may damage your headlights.  All you have to do is apply the toothpaste with a soft rag and then rub in small circles until the grime comes off.  You’re essentially just using toothpaste as an abrasive and rubbing all the dirt and grime off with the rag.  Afterwards, just rinse with water and your headlights should look much cleaner.

Sandpaper Method

You’ll need three different grit sandpapers for this task, probably around 400, 1200, and 1500, respectively.  You’ll first want to clean the lenses with rubbing alcohol and then begin wet sanding with the 400 grit sandpaper.  You may see the factory coating coming off and it would be best to sand the coating off completely.  Then continue to sand out the scratches using the 1200 and the 1500 grit sandpaper, which will make it smooth.  Afterward, you’ll want to take it to a local auto body shop to spray plastic adhesion promoter and automotive clear coat.  This protective coating should last years, rather than the normal months after buffing the headlights.

Polishing Method

If the cause of fogginess is actually oxidization, it will mean that your headlights will need to be polished again.  You’ll first want to wash the headlights to remove as much grime as possible and allow them to dry thoroughly.  Then you’ll want to apply aluminum polishing compound with cloth moving in small circles.  Repeat as much as necessary until the headlights become clear.

The above methods work for most cases, but in the case that your headlights still are extremely foggy or scratched, you may need to take it into a local mechanic or repair shop to have professional work done.  If that’s the case, it’s highly recommended that you use TalkLocal to get into contact with a highly rated local auto repair professional.  It’s fast, easy and free!

How to Stop Leaky Pipes

Tuesday, October 23rd, 2012

How to Stop Leaky Pipes Plumbers

A leak in your pipe might range from being virtually harmless to flooding your home, so appropriate measures must be taken in order to patch the pipe up effectively; otherwise, you may discover some surprise leaks later. Knowing how to stop leaky pipes also depend on the position of the leak in the pipe. If the leak is at a joint, simply tighten the joint. However if a leak is in the middle of a pipe, you won’t be able to change the pipe by yourself, as unscrewing the pipe in one end will tighten the pipe in the other. These are temporary fixes for your pipe until a plumber can fix the pipe himself.

Pipe patch kits are sold at hardware stores and contain a piece of rubber and two metal plates that holds the rubber patch to the pipe. This can even be a permanent way to stop a leak if the leak is small. However, you can use a piece of heavy rubber and a pair of c-clamps/hose clamps to achieve the same effect.

You can also use waterproof tape as a temporary measure to stop small leaks by wrapping the tape starting two inches from the hole to two inches after the hole. Epoxy paste is also a good way to stop holes, in addition to compound sticks that can be rubbed on tiny leaks to stop them. If you’re using epoxy paste or waterproof tape, make sure the pipe is dry first.

Pipes that are wearing thin have more leaks, so if you see one leak, don’t be surprised when another appears soon after. The best solution is to find a plumber and replace that section in the pipe, which is a permanent fix. Use TalkLocal for free to find a plumber that can find your leaky woes!