Vacuum Cleaner not Picking up Dirt

Friday, October 26th, 2012

Vacuum Cleaner not Picking up Dirt Appliances Repair

If you feel like you are vacuuming the same area over and over to no avail, there are few things that could be wrong with your vacuum. This article will help you figure out why your vacuum cleaner is not picking up dirt and how to fix it.

– Check if the bag is full. If the bag is full, you vacuum will not be able to suck up any more dirt. If the bag is not full, check if the filters are dirty. They may need to be cleaned or replaced.

– Check the hose of the vacuum. The hose should be detachable from the vacuum; take it off to check if there is a clog inside of it. If you cannot peer through it and see out the other end, squeeze it to try and get anything out that could be clogging it. If squeezing the hose does not work, try poking it with a long object such as a wire hanger to get whatever is stuck out of the hose.

– Check the attachment connection of the hose and the base of the vacuum. There could be something clogging this piece of the vacuum as well. You can also use a wire hanger to remove the object if you cannot get it out with your fingers.

– Check the vacuum belt to see if it’s slipping off. If the vacuum belt is slipping off, the vacuum will make high pitched sounds and the vacuum brush will not be moving. If the belt comes off easily, you will need to replace it.

– Check the actual brush of the vacuum. If it appears to be spinning, but it is not picking anything up, there may be some objects caught inside the brush itself. Check for anything tangled up inside the brush and remove anything you find.

If none of the above suggestions help fix your vacuum, you may want to contact an appliance repair professional. With the help of TalkLocal, you can receive phone calls in minutes from up to three high quality appliance repair professionals in your area that are available when you are.

Fixing Leaking Pipes under Sink

Friday, October 26th, 2012

Fixing Leaking Pipes Under Sink Plumbers

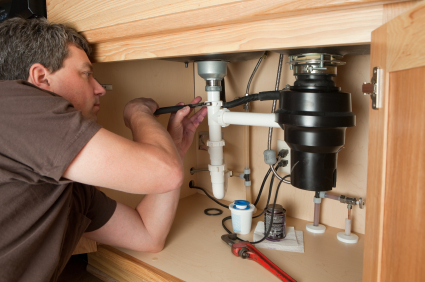
Tired of waiting for your spouse to fix the leaking pipes? Here are a few helpful tips to assist you with fixing leaking pipes under the sink without wrecking the place. Identifying the leak source and replacing old parts are key steps to a having fully functioning sink.

How to stop a leaking pipe under your sink: 

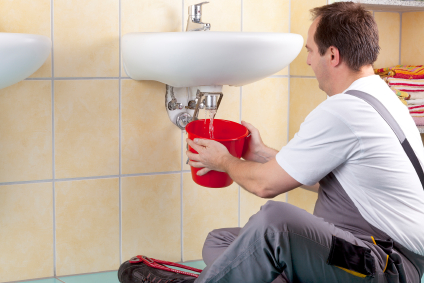
Whether you have brass pipes or PVC (plastic) pipes, these tips are for you. To begin, place a bucket under where the leak is taking place to catch the dripping water. Next, dry the pipes with a towel. Identify if the leak is coming from the incoming pipe or outgoing pipe. Plug the sink and run the faucet. If you see a leak at this time under the sink, the incoming water pipes are the issue. If you do not see a leak, unplug the sink and allow the water to drain. If a leak occurs, the problem is with the outgoing pipes.

The highest damp point usually indicates the start of the leak. Depending on the location, there may be various things to look for. For example, a pipe may have a crack, the shutoff may be bad, or the nuts could be loose. If the shutoff is the problem, check out this article. If a nut is loose, a basin wrench will do the trick to tighten them up. Sometimes the washers or nuts are worn out and need a replacement. If that is the case, you can find these parts for replacement at your local department store. Replacing the worn parts is a cheap and efficient fix if the leak is not too large.

If you don’t have the correct tools or would like someone else to fix the problem, use TalkLocal to find a plumber that will come at your convenience. The service is free and will quickly connect you to a high quality plumber near you.

How to Find a Trustworthy Auto Mechanic

Friday, October 26th, 2012

How to Find a Trustworthy Auto Mechanic Auto Repair

Whether you’ve just moved to a new area or have just purchased a new car, knowing how to find a trustworthy auto mechanic is important for keeping both your vehicle and your wallet in good shape.  Auto mechanics have a notorious reputation for shady dealings, especially when it comes to overcharging you for sub-standard repair work.  Since most people don’t have a clue what their repairs should really cost, having a mechanic you can trust is the only way to be sure that you are not being taken advantage of.  It can be hard to know who to trust, but here are some things to keep in mind and watch out for on your search.

There are basically three different types of mechanic auto shops out there:  dealerships, large national chain shops, and smaller independent repair shops.  Each has its own advantages and disadvantages.  For example, dealership mechanics tend to be extremely expensive, but will be specialized to work on your specific make/model.  High end cars and work that will be covered by your car’s warranty should probably be brought to the dealership in order to get the best quality service.  National chain shops, on the other hand, tend to offer the best prices and the lowest quality service.  These kinds of places are often staffed by entry-level mechanics with little experience.  Chain shops are a good choice for basic repairs like an oil change or new battery, which do not require much expertise.

The third category, smaller independent mechanics, will usually be your best choice for general repairs.  Independent mechanics tend to have prices somewhere in between chain shops and dealerships, but there is a lot of variability.  Because of the wide variation in price, skills, and services, looking at independent mechanics is when you need to put the extra effort in to making sure that the company you go with is trustworthy.  Fortunately there are some signs to look for as indications of the mechanic’s quality including: whether or not the repair shop is certified by an affiliated trade group like the American Automobile Association (AAA) or the Automotive Service Association (ASA), complaints about the company registered with the Better Business Bureau, and any warranty they offer on their work – the longer the better.  If you don’t feel like putting in all the effort researching the mechanics available in your area you can also try using TalkLocal to automatically connect you.  TalkLocal uses an algorithm that takes into consideration ratings, reviews, and past performance when matching you with a service professional, so you can sit back and let them do the work for you.

How to Set Up Spam Filter in Thunderbird

Friday, October 26th, 2012

How to Set Up Spam Filter in Thunderbird Computer Repair

Many people use Mozilla’s Thunderbird client to manage their email and news feed accounts. One of the special features included in Thunderbird is an advanced spam filter that analyzes your actions and adapts to create personalized filtration settings. In order to take full advantage of this filtration system, you will need to change some settings in Thunderbird so it can start learning, analyzing, and filtering on its own. Read more to learn how to set up the spam filter in Thunderbird.

To access these spam mail settings:

1. Open up Thunderbird.

2. Click Tools > Options from the drop-down menu.

3. Go to the security section in the options window.

4. Click on the “Junk” tab.

5. Check both the “When I mark messages as junk: Move them to the account’s junk folder” option and the “Enable junk filter logging” option. You may choose whether or not to mark junk messages as read at your discretion.

Once these settings have been enabled, Thunderbird’s filter will be activated. The filter works by watching what kinds of email messages you read, and what kinds of email messages you mark as spam. It then analyzes patterns in your tendencies to automatically classify spam mail as junk. You will need to train the filter by manually marking spam emails as junk; over time, the filter will get better at detecting spam messages and fewer will get through to you. Be sure to periodically look through the junk mail folder to check for any messages that may have been mistakenly classified as spam.

If you want to get more advanced with your message filtering, Thunderbird provides you with the ability to create your own custom message filter rules. You can use these rules to automatically sort, tag, forward, or delete your incoming mail based on whatever criteria you want to set. You can also use them to further modify and customize your spam filter. The how-to of creating custom message filters can get a little complicated, but check out this article, published by Mozilla, for an in-depth guide on how to set up your own rules. Once your rules are in place, all you have to do is sit back and let Thunderbird’s automatic filtering system do the work.  Congratulations on taking the first step towards a spam-free inbox.

If you happen to need additional computer assistance, TalkLocal can connect you to a local professional in minutes.

Moldy Smell in Washer

Thursday, October 25th, 2012

Moldy Smell in Washer Appliances Repair

Moldy washers are pretty gross, especially when you consider that this machine is supposed to make your clothes cleaner! Use bleach or another mold cleaner to wipe the inside of your washing machine, taking care to especially clean the rubber seal that’s located between the door and the inside of the machine. There are ways to get rid of the moldy smell in your washer. Use a quarter cup of powdered dish detergent on the hottest water setting to completely get rid of the mold in your washing machine. Try opening the small door at the bottom of your washing machine and letting the water drain out. There might be a lot of water trapped inside, so get a bucket and be prepared to clean up the water. However, the best method to stay mold free is to prevent mold from forming in the first place. Here are the most common reasons mold forms inside a washing machine:

 Using too much detergent — A lot of people follow the instructions on the detergent bottle and pour in too much detergent. Detergent that creates a large amount of suds is more likely to cause mold to develop. Use 1/3 of what the bottle recommends, unless the clothes are heavily soiled.

–  Using fabric softener — Fabric softener is a source of food for mold and bacteria, and encourages mold growth on the inside of the tub. Use dryer sheets or dryer balls instead.

–  Using only cold water to wash your clothes — Hot water kills most bacteria and mold, while cold water provides a moist environment for fungi to grow. Try making your hot water load the last load of the day.

–  Not using the machine for a long time — This gives time for mold to develop without interruption by running water. If you’re going to be on vacation or won’t be using the washer for a while, make sure to fully dry the inside first. Leave the door of your washing machine to let the water dry faster.

–  Drain pump is blocked — If the filter of the drain pump is clogged, then water may drain more slowly or not at all. The excess water causes mold to develop inside the washer.

Mold is a relatively easy problem to deal with, but washers have a habit of breaking down often and the problem may not be as easy to fix. Use TalkLocal to find a qualified appliance repair professional to remove your washer woes for no additional charge!

Leaking Bathroom Pipes

Thursday, October 25th, 2012

Leaking Bathroom Pipes Plumbers

The dripping of water through leaking pipes is not a sound anyone wants to hear, but with a small investment of time and basic tools, you can save money otherwise spent on a plumber. Most bathroom sink leaks are going to be caused by a bad drain pipe, loose pipe connection, or bad drain flange. Each of these problems is easily fixable.

For all leaky pipes, run the water to determine where exactly the leak is located. Now, depending on your problem, see what steps would need to be taken to fix leaking bathroom pipes.

Bad Drain Flange

1. Shut down the water in the house.

2. Loosen the slip nut that connects the sink trap to the main draine line, but not to the extent of disconnecting the sink trap.

3. Pull down on the sink trap to disconnect it and move it out of your way.

4. Unscrew the slip nut that connects the sink trap to the pipe coming out of it using channel lock pliers. If your sink drain has a stopper this will not need to be done. Instead, disconnect the stopper mechanism from the pull stem. There is a thumbscrew that connects the two. Unscrew the thumb screw to release the stopper mechanism.

5. Remove the nut connecting the sink to sink drain using a wrench.

6. Lift out the sink drain and remove any old plumber’s putty. If the flange is bent or damaged, replace it.

7. Replace the plumber’s putty by rolling up a small ball and forming a thin rope. Then set the

putty on the underside of the drain flange. Now fit back the sink drain and secure it back on

using the retaining nut.

8. Wrap plumber’s tape around any of the pipe threads.

9. Reconnect all pieces in reverse order that you disconnected it.

10. Tighten the slip nuts using channel locks.

Replacing Sink Drain Pipes

1. Shut down the water in the house.

2. Disconnect the sink trap from the wall drain pipe using channel lock pliers.

3. Remove the pipe coming from the sink drain and the drain assembly. You will be left with one disconnected piece consisting of a tail piece and a sink trap.

4. Get a new tail piece and a sink trap from a hardware store.

5. Wrap plumber’s tape around the exposed pipe threads.

6. Slide a slip nut on the unthreaded part of the tail piece.

7. Connect the tail piece the to the sink drain using a slip nut and channel lock pliers.

8. Connect the sink trap and the main drain with a slip nut.

9. Connect the sink trap to the tail piece using another slip nut.

Loose Connections

1. Tighten the sink drain flange with a wrench. Turn the retaining nut a quarter turn.

2. Tighten all of the connections between pipes under the sink using channel lock pliers.

3. Disconnect sections that will not stop leaking when tightened.

4. Clean old plumber’s tape off of threads and reapply new plumber’s tape.

5. Secure drain lines using channel lock pliers.

If none of these methods work calling a plumber may be necessary. TalkLocal can connect you to high quality plumbers in a matter of minutes.

Clean Dusty Curtains

Thursday, October 25th, 2012

Clean Dusty Curtains Maid Services

Curtains get dusty quickly for a reason – they divide the outdoors and the inside of your house. As the air shifts in and out of the house, the dust in the wind get caught and build up in the curtains over time.  Read on to learn how to clean dusty curtains.

Cleaning your curtains using liquid and chemicals would surely clean off the dust off, but such tidiness comes at the cost of wearing out your curtains. So it is generally recommended that you dust off the curtains by using a vacuum cleaner, feather/static duster, etc.

When dusting off your curtains, start at the top of the curtains; this is so that the dust won’t fall into the parts you have cleaned already. You may also want to take out the curtain and take it outside to clean it. Dusting the curtain inside of your house could mean that the dust from your curtain is going to float around your house.

Concentrate on the folded areas in your curtains when dusting; these are the particular areas in which the flow of air gets trapped in, leaving the dust buildup. Straighten out the folded areas and dust carefully as to not get the dust on yourself. You might want to consider wearing a mask.

If you feel like you need to use water to get some of the larger dust particles off, make sure that the general area is dusted first – smaller particles of dust can smear into the curtain with water, leaving a mess.

Of course, don’t forget to clean both sides of your curtains. Dust can easily migrate between the rooms in your house, spreading out the mess. Take special care to clean out all curtains together if anyone in your house is allergic to pollens or dust.

Additional Help

If you feel like you need professional help to clean dusty curtains, TalkLocal can help with finding the correct local experts in this case, saving you time and energy in what may be a stressful situation.

My Computer Turns On and Off by Itself

Thursday, October 25th, 2012

My Computer Turns On and Off by Itself Computer Repair

Have you ever called a computer repair store saying “my computer turns on and off by itself”? This is a problem that can be so frustrating, especially when you’re in the middle of working on something important. If this happens to you, check for the obvious problems before reading this guide. How are the connections between the power supply and the computer? There could be a connection problem in the power line or the computer battery might be too worn out to charge itself, resulting in a computer turning off quickly after it was turned on.

What’s the problem?

It could be that the power supply is incompatible with your computer. If you use an extension cord too long or are using a 220V adaptor for a 110V outlet, there is a chance that little to no power is actually reaching your computer — try a new power outlet.

Check the power button on your computer — press it to see how the computer reacts to you pressing the button. If the computer turns off, try to turn on the computer again by pressing the button to see how long it takes for the computer to turn on again. A longer lag time between power generally indicates a more extensive problem.

Try holding the power button when turning on the computer to see if it changes anything. Sometimes the difficulties in the power connection originate from the problems with the power button.

Depending on the environment in which you operate/store your computer, there may have been damage to your computer that is too extensive for you to fix. Liquid (rain, drink, etc.) may have seeped into your computer and short-circuited your computer, resulting in a computer that cannot handle power.

Or it may be that frequent and large variations of temperature (you store your laptop in a car during summer, frequent heating and cooling, etc.) may have damaged your computer as well. For these problems, it is encouraged to seek professional help.

If the computer your are having problems with is a new computer and you are sure that it is not damaged, the problem may be caused by the misconfiguration of the settings in your computer. Consult a professional.

Additional Help

If you feel like you need professional help on what to do when computer power turns on and off, TalkLocal can help with finding the correct local experts in this case, saving you time and energy in what may be a stressful situation.

Natural Way to Get Rid of Ladybugs

Thursday, October 25th, 2012

Natural Way to Get Rid of Ladybugs Pest Control

People have been reporting more and more ladybug infestations in their homes — something that has occurred rarely before. This is because the ladybugs that are infesting your home are actually Asian lady beetles that were introduced to the United States in the late 1980s to control aphid populations. However, they have become pests themselves as they reside in homes in the wintertime to hibernate. Homeowners have reported ceilings and attics being covered in these ladybugs, especially in the colder seasons. It’s very hard to keep them out of your house, as they have the ability to squeeze under cracks and find holes that you never knew existed. Pesticides are an option, but many have the possibility of harming your children, pets, or the environment. These are some tips if you are looking for a natural way to get rid of ladybugs.

– Tape up as much of the cracks in your home as possible. It’s hard to cover them all, but hopefully this will reduce the influx of ladybugs to manageable levels.

– Vacuum the ladybugs up with the tube attachment, and release them outside. Vacuuming will most likely not kill the ladybugs, but don’t keep them inside the bag because they will find a way out!

– Use lemon scented candles at the entrances and the windows of your house, as ladybugs dislike the smell of lemons.

– Hot Shot Kitchen Bug Killer is safe to use in areas with food, and it doesn’t harm children, pet, or the environment either. You may even get rid of a few other kinds of bugs!

– Since many ladybugs only want to use your home as a hibernation area for the winter, they won’t move around too much or wreak havoc. You can even stick them in a box and put them in your freezer to hibernate, and release them next spring in your garden.

Asian lady beetles can be extremely annoying when they cluster in your house, and some have even been known to bite people when they feel threatened. Find a professional pest control service that will get rid of your ladybug problems with TalkLocal at no additional charge.

How to Clean Invisalign Braces

Thursday, October 25th, 2012

How to Clean Invisalign Braces Dentists

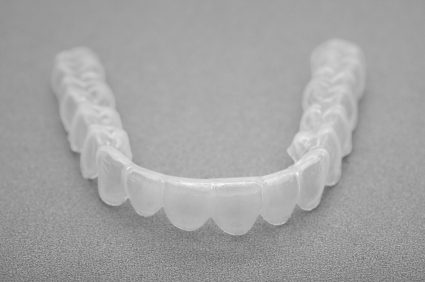
Invisalign trays are renewed in intervals of two weeks. Although brushing the aligners generally works, they begins to fuzz up  after some time. So it is recommended to learn how to clean them most efficiently as soon as possible when you start using them. Read this guide to learn how to clean Invisalign braces.

When cleaning them with water isn’t working perfectly, it’s time to try using a special solution. There are several commercial products available, including one distributed by Invisalign itself. Among these you can choose one based on your needs and budget.

1. Invisalign products – Cleaning products distributed by Invisalign are specifically designed for Invisalign braces, and it is likely the most dependable one. However, they come at a steep cost—a set of cleaning materials designed for 50 uses sells for about 75 dollars.

2. Denture cleaner – Many dentists recommend denture cleaners to clean the braces. Most Invisalign brace users report success when using them. Though this is much cheaper than the name brand solution, it will still cost you some money.

3. Baking soda – The cheapest option is to make your own solution using a common household item: baking soda.

Homemade cleaning solution

1. Take a small amount of baking soda and put it on the brush of the toothbrush.

2. Apply some moisture on the braces themselves. Run them through water and shake the excess water off.

3. Begin brushing the inside and outside of the braces. Take care to reach into the concave spots (the sharp insides in which water is trapped in). This is usually where the germs get trapped and begin clouding your braces. Do not apply excess pressure to your toothbrush when cleaning because the abrasiveness of the brush may wear out the braces.

4. You can even try using a toothpick. Dab some water on the toothpick, sprinkle some baking soda on the tip, and reach into the hard spots to clean up the buildup.

Additional Help

If you feel like you need professional consultation on how to clean Invisalign braces, TalkLocal can help with finding the correct local experts in this case, saving you time and energy in what may be a stressful situation.