What to Ask when Hiring an Electrician

Tuesday, October 23rd, 2012

What to Ask when Hiring an Electrician Electricians

Finding the right electrician to do work on your house is a matter of both safety and quality.  So before you even consider getting electrical work done, you’ll definitely want to know what to ask when hiring an electrician.  The following questions cover the right questions to ask to ensure you get the right professional for the job.

Are you licensed?

In most states, electricians are required to be licensed, so make sure that you’re only considering hiring one that is properly licensed.  Usually, they will either be a master electrician, who has at least two years of professional experience installing and designing systems, or a journeyman, who has professional experience for installation.

Will you provide references?

Electrical work is often hard to judge since the majority of it is hidden within walls or out of sight.  Talking with people who have worked with the electrician before will tell you a lot about the quality of work and the personality of the electrician you’ll be working with.

Are you insured?

The electrician you hire must have insurance in liability and worker’s compensation, especially due to the potential dangers of electrical work.  Make sure you get a contractor with at least $500,000 covered by insurance.

What kind of expertise or training do you have in the type of work you are doing?

Electricians must be familiar with the specific building codes and contexts they’ll be working in since electrical work can vary drastically.  Electrical work that is acceptable for a residential area often times would be a violation if used in a commercial area.  Additionally, if your job requires specialty work such as home automation work or solar paneling, make sure they have the necessary qualifications and experience with the specialty.

Are they willing to give an estimate and what does it include?

The electrician should be able to give at least an approximate estimate of the work, and make sure that the estimate also includes incidentals, such as repairing drywall or fixing up holes from the electrical work.

Will the work be guaranteed?

The professional you hire should stand behind their work.  In most cases, electricians assume the responsibility for the electrical devices and fixtures they install.  You’ll want to know that if there ends up being a problem with the electrical work, the electrician will do what’s necessary to repair it.

These are the basic questions you’ll want to ask when hiring an electrician.  While these questions covered the major facets that you’ll want to check when hiring an electrician, there are many other questions you may want to ask if you feel they are necessary, such as seeing a work in progress or who specifically will be doing the work (since the person you’re talking may not be actually doing the work).  If you want to be sure you already are talking to a high quality professional, you can always use TalkLocal.  TalkLocal will connect you to a highly rated local electrician in just minutes.

Methods to Backup Pictures from iPhone to PC

Tuesday, October 23rd, 2012

Methods to Backup Pictures from iPhone to PC Computer Repair

iPhones and PC computers are notorious for their difficult compatibility, but it is possible to get the two to work together.   While it is much easier to sync an iPhone with a Mac computer, you can also backup to a PC.  Transfering pictures is as easy as plugging your phone into your computer with a Mac, but with a PC it takes a couple more steps.  Continue reading for some helpful methods to backup pictures from iPhone to PC.

Two options:

–  Manual

–  Automatic via iCloud

When attempting to backup the pictures you have on your iphone, you have two different options.  You can either manual do so by plugging in your phone, or you can rely on apple’s wireless backup system that is integrated into your phone.

Manual transfer

1)     Connect your iphone to your computer with the USB cable.

2)     Click import pictures and videos form the autoplay window or go to start, computer, right click on iphone icon, and click import.

3)     Enter a folder name where you want to save these pictures.

4)     Let them load completely onto your computer.

5)     View the pictures in the My Pictures section of your computer.

Using iCloud backup

1)     Make sure your computer and iphone are both on the wireless internet.

2)     Plug your phone in to charge next to your computer.

3)     The pictures should be transferred to your iCloud account wirelessly.

4)     Log into you account from your computer and view the pictures.

Note: you can log into your iCloud account to view the pictures from any computer as long as you have your apple ID and password.

If you have problems backing up pictures from your iphone to your PC computer you should seek professional help.  Use TalkLocal to be put in contact with reliable, local IT service companies.  Simply input your problem, location and availability, and within minutes you should be connected to someone who can help. 

Computer is Running Slower than Usual

Monday, October 22nd, 2012

Computer is Running Slower than Usual Computer Repair

If your computer is running slower than usual, it can be extremely frustrating. Perhaps you have done what seems like everything to fix the problem—or you have done nothing at all because you don’t know where to start. A slowly functioning computer is a sign that there is probably an underlying problem. Read the following article if you want to make your life easier and speed up that turtle of a computer.

With Microsoft systems, there are particular registry cleaners that can be used to speed up your computer significantly. The reason that registry cleaners help speed up your computer is because they remove all unnecessary and redundant files from your computer. For example, if you have installed and uninstalled programs, there may still be useless files floating around your computer. Use a registry cleaner to get rid of these unneeded files.

If you have low RAM, this will also cause a slow computer. In order to fix this problem, update your RAM. The RAM is the memory portion of your computer. Check your storage space. If you have a lot of files and systems running on your computer, you may be simply using too much space. Think about purchasing an external drive or deleting old, unwanted files.

Use a surface that promotes air circulation towards your computer. If your computer overheats, it will run slower than usual. For example, having your computer sit on a blanket in your lap is most likely not the best arrangement for optimal computer usage. Soft surfaces retain heat, so use a hard, smooth table or desk instead.

If you computer is still running slow or you need help repairing a different computer problem, check out TalkLocal, a free service that helps you find high quality service providers. You will be connected within minutes to professionals right in your neighborhood!

Sour Smell in Dishwasher

Monday, October 22nd, 2012

Sour Smell in Dishwasher Appliances Repair

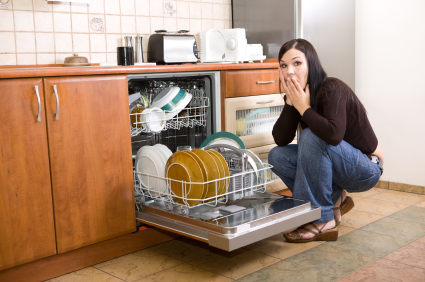
There are some pretty bad smells in the world. A sour smell in your dishwasher ranks pretty high on that list. A bad smell can originate in a number of ways, but once you find the source, it is fairly easy to get rid of the smell. So how exactly do you get rid of a sour smell in a dishwasher? Keep reading to find out.

One source is food residue. Although the food typically goes down the dishwasher’s drain as it is supposed to, small food particles and residue can remain. These can cause a sour odor if left alone too long. To get rid of this, clean the bottom of the unit with vinegar (preferably white vinegar) and rinse it thoroughly with hot water.

Another source of a sour smell can be the dishwasher hose. If the hose is not installed properly or if it is set in a position that does not allow it to drain efficiently, stagnant water can create a bad, sour smell. This hose is probably inside the kitchen cabinet below the sink and brings water to and from the dishwasher. If stagnant water is inside the hose, this foul water may be used to wash your dishes, resulting in bad odors all around.

Dead remains can also be a source of terrible smells coming from your dishwasher. Small pests like mice make their nests in warm places such as insulation and can die inside. Their dead remains create a staunch, rotten smell and the only way to remedy this is to locate the pests and replace the insulation. If possible, pull the dishwasher out and inspect the insulation for any sign of pests or pest remains.

And finally, if none of these solutions seem to work, run an empty cycle after pouring a few cups of vinegar or lemon juice into the bottom of the unit. This should freshen the smell of the dishwasher and get rid of some of the odors.

Following these steps, you should be able to get rid of the sour stench yourself, but if you feel more comfortable having a professional take a look at it, consider using TalkLocal. TalkLocal is a free service that will connect you with top-quality, reputable appliance repair companies in your neighborhood within minutes. Just enter in your specific problem, location and availability, and up to three companies will call YOU directly, saving you the time and stress of finding one yourself.

Roof Gutter Replacement

Monday, October 22nd, 2012

Roof Gutter Replacement Roofers

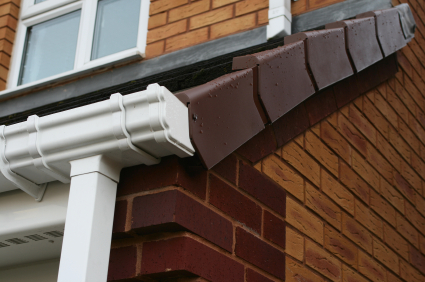
A rusted or leaky gutter dirties the walls and causes erosion. So it is generally a good idea to replace the gutter before it’s too late and the damage becomes too extensive. Replacing your gutter isn’t too much work and it’s cheaper to do a roof gutter replacement than to redo your house to fix up the property value.

How to Replace Your Roof Gutter

First, mark the locations of the gutters before taking the old gutters out. Make sure that your marks are lined up parallel to ground level so that the water won’t rush to one side and flood the gutter when it rains. The marks are best observed by a bright color seen some distance away.

Once the markings are up and ready, carefully dispose of the old gutters. Unscrew the screw in the way that it does not damage the base the gutter was screwed into. You should do this by keeping the screwdriver steady and working slowly.

Using the new parts, install the drop outlets first. You will want to put them in the same spots unless you had problems with overflowing; they are usually spread out about 30 to 40 feet apart from each other.

Install the brackets for the gutters next, taking into account the evenness of each bracket. An unusually high or low bracket will disrupt the consistent flow of water on your gutters. Make sure that the brackets are even by placing a long wooden stick across the brackets.

Then attach the gutter sections, attach the ends to the gutter sections, and secure the down spots to finish up the job. You may want to make sure there are no leaks/unevenness in the replacement. For that, get a garden hose and spray water on your roof to simulate a rainfall. If you see irregular or wrong water flow, identify and fix the problem.

Additional Help

If you feel like you need professional help on roof gutter replacement, TalkLocal can help with finding the correct local experts in this case, saving you time and energy in what may be a stressful situation.

Toilet Wax Ring Replacement

Monday, October 22nd, 2012

Toilet Wax Ring Replacement Plumbers

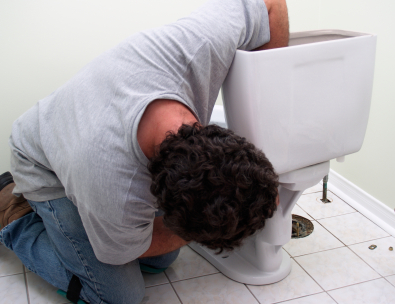
A toilet wax ring is what seals your toilet base to the floor/toilet flange below it. There may be a breakage of the wax seal if you start to notice any of the following:

– your toilet is loose or wobbles from side to side

– there is water or dampness around the base of your toilet

– your toilet leaks and leaves stains on the ceiling below

Toilet wax ring replacement is not extremely difficult, but be prepared because it can be a messy, heavy task. If you are replacing the seal yourself, you will need: a replacement wax seal and wax seal installation kit (available at most hardware stores), a trash bag, gloves, and a plastic putty knife.

How to Replace the Wax Seal

1. Turn off the water supply

2. Flush the toilet a couple of times to empty the water completely.

3. Use a sponge to dry up the remaining water in the bowl.

4. Unscrew the nuts on the base of the toilet that holds it to the floor.

5. Disconnect the supply line for the water (the silver coil connected at the back of the toilet).

6. You will have to rock the toilet side to side to loosen it from its current seal and to break the caulking that is keeping it in place.

7. When it is disconnected, be sure to grab the toilet from the bowl and not the tank. Move the toilet and flip it on its side so the base of the toilet is facing up.

8. remove the wax and old rubber seal from the floor and the remaining wax on the bottom of the toilet.

9. Take the new seal and put it in place.

10. Seal the toilet on the new ring. This can be easily done by sitting on it and rocking it side to side to make sure the seal had adhered to the wax base.

11. Replace the bolts and caps to the base and reconnect the water line.

12. Turn the water supply back on and let the bowl fill with water.

13. Flush the toilet and do a damage check for leaks or problems with the newly installed wax ring.

If you are having trouble with the project on your own and would feel more comfortable contacting a professional, try using TalkLocal to find one near you. TalkLocal is a FREE service that will connect you with top-quality, reliable plumbers in your neighborhood, within minutes. Just enter in your problem, location and availability and TalkLocal will contact multiple companies, who will then call YOU directly, ready to help. Save time and stress from searching for the right, most affordable plumber on your own, and let TalkLocal do it for you!

Car Leaking Transmission Fluid

Monday, October 22nd, 2012

Car Leaking Transmission Fluid Auto Repair

Transmission leaks, while they may be a fairly common car problem, are incredibly important to fix as soon as possible. If you have a car leaking transmission fluid, you should first check that the liquid is actually transmission fluid, as a correct diagnosis of your problem is the first step toward solving it. Park your car on a level surface after running the engine for a bit. Transmission fluid usually has a red color (or brown, if it’s dirty and ready to be change).  It should be oily to the touch and smells much like petroleum.

Why it matters

Transmission fluid is a critically important fluid for your car’s transmission.  It not only cools and lubricates the transmission, but also helps transfer the power from the engine to the transmission. Without this fluid, there would be insufficient pressure to fully operate the transmission, which would cause overheating—an extremely expensive damage to your transmission.

How to Fix it

Now that you know it is a transmission leak, you should then proceed depending on the severity of the leak.  If the leak is minor (just a few drops on the ground), you can use a high-quality bottle of stop-leak.  Make sure that the stop-leak is appropriate for your make and model, as they can differ significantly. Add the contents of the stop leak into your car’s transmission dip stick tube to return the transmission fluid to the correct level.

If it’s a major leak (more than a few drops), then you should take your car to get serviced at a dealership or an auto-repair/transmission repair center. While a bottle of stop-leak may temporarily help your transmission leak, you’ll ultimately need to bring in your car to get repaired (the sooner the better). Fortunately, TalkLocal can help you in this case. TalkLocal can help you find a high quality auto repair center in just minutes, so you don’t have to worry about finding a quality mechanic to repair your car.  You’ll be back on the road in no time!

Toilet will not Stop Running Water

Friday, October 19th, 2012

Toilet Will Not Stop Running Water Plumbers

A constantly running toilet can waste a lot of water and cause you to spend more money. Follow these steps if your toilet will not stop running water:

Step 1: Open the lid to the toilet tank. The tank includes all the inner workings of the toilet. Look inside to see if anything is tangled or unattached.

Step 2: Adjust the lift chain. Jiggle the toilet handle to free up the lift chain. If the toilet stops running, adjust the chain inside the tank. The chain may become wrapped around the lift arm and you may need to adjust the position of the chain. Simply disconnect the hook from its slot and reconnect at the next slot on the float arm. If this doesn’t work, check to see if the float arm has become disconnected. The top of the float should be slightly above the water level.

Step 3: Check for leaks with a dye tablet. Dye tabs are available at most hardware and plumbing supply stores. After flushing, simply drop the dye tablet into the bowl as the water begins to fill back up. If you tank is leaking, the water will begin to turn the same color as the tablet. The flapper valve that does not seal properly may be the culprit. For an easy fix, turn off the shut-off valve located below the tank and flush the toilet to “empty it.” Remove the flapper and replace it with a new one. If the flapper valve seat is cracked, you will have to replace the entire unit. You can find one at any local hardware store.

Step 4: Check the ball-cock assembly. If you have followed the previous steps and everything seems to be in working order, you may need to replace the ball-cock assembly. First, empty the tank and then replace the ball-cock assembly using an assembly kit. Make sure the follow the instructions carefully.

If you are still experiencing toilet problems, try consulting a professional. TalkLocal will connect you to a reliable plumbing contractor in minutes!

Oven Timer Not Working

Friday, October 19th, 2012

Oven Timer Not Working Appliances Repair

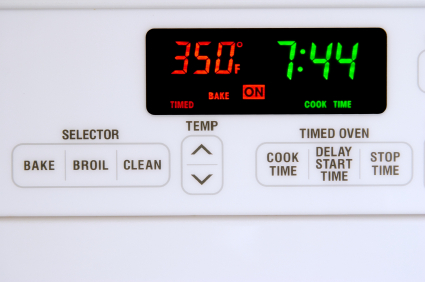
If your oven timer is not working, you should first check check your oven’s manual and make sure that everything is set correctly. If you cannot find anything wrong in the manual, you can try the following things.

Test for Power

1. Make sure that everything is turned off or you could electrocute yourself. To be sure that the power is off, check that the clock, timer, and oven light are all off.

2. Find the housebreaker or fuse.

3. Disconnect the fuse or turn the breaker off of the 220-volt wall plug.

4. Pull the plug on the oven.

5. Turn the breaker back on.

6. Test the wall outlet by plugging something else in and seeing if it works. If you plug something else into the outlet and it does not work, than the problem is with your power outlet.

Test the Terminal Block

1. Make sure you have disconnected all power.

2. Locate the terminal block in the back of your oven, where the power cord is connected to the oven’s circuity.

3. Find the terminal block wires (there will be three or four) and check for any damage. CAUTION: Do NOT touch any bare wires or terminals.

4. Turn the breaker or fuse on for a short period to see if the terminal has power. If your terminal block does not have power, it is likely an issue with the wiring in your house.

Test the Oven Timer Itself

1. Make sure you have disconnected all power.

2. Move the oven away from the wall.

3. Take off the back cover of the oven by unscrewing the screws. You will be able to see the back of the timer clock. If there is a glass panel, take it off.

4. To test if the timer/clock is working, set the VOM to the ohmmeter function and set the range to R x 1.

5. Touch a test lead to each terminal of the fuse.

6. Look for the clock motor leads and take them off of the circuit.

7. Put a test lead on each clock motor wire. If there is not continuity, there is a problem with your clock and you will need to replace it

If you have figured out the problem and prefer a professional make the repair, you can use TalkLocal to connect with up to three high quality appliance repair professionals in your area that is available when you are.

Get Rid of Jailbreak on iPhone

Friday, October 19th, 2012

Get Rid of Jailbreak on iPhone Computer Repair

Jailbreak is a good tool that can be used to make any iPhone into a Wi-Fi hotspot, emulator, etc. However, this voids any warranties from service providers and Apple. Also, the iPhone becomes unstable and vulnerable to malicious attacks. If you don’t want to take these high risks, there is way to get rid of jailbreak from your iPhone. Unfortunately for most phones, the only way is to restore, though some phone that use AT&T have a second option. Read on to find out more.

Restore

If you are looking to get rid of jailbreak on any phone, follow these steps:

1. Backup any media saved on the iPhone.

2. Install the latest version of iTunes on your computer.

3. Launch iTunes.

4. Connect iPhone to your computer with the USB cable.

5. When the iPhone is detected on iTunes, click on the iPhone icon under Devices.

6. Click on Summary > Restore.

7. Select Backup when prompted. This backup only saves the settings of the iPhone.

8. Select OK when prompted.

9. Check the box for Restore Backup.

10. Select the recent backup when the Set Up Your IPhone page has opened.

11. Click Continue to restore iPhone to before jailbreak.

If you use AT&T, you can also try the following method:

1. Insert your AT&T sim card with active service into your iPhone.

2. Launch iTunes.

3. Connect iPhone to your computer using the USB connector.

4. Click Yes when prompted by Carrier Software Update. This re-locks your iPhone.

If you need additional help, TalkLocal can help you find a local computer repair service. It’s a completely free! Just go to TalkLocal’s website and submit your problem, availability, and location, and you will be on the phone within minutes with someone who can help you with your specific problem.