Exterior Home Painting Tips

Friday, September 28th, 2012

Exterior Home Painting Tips Painters

Painting the exterior of your house takes a lot of effort and preparation. If you do not paint your house carefully, you will end up with an unattractive and blotchy paint job, which decreases its life expectancy. There are many factors that contribute to a well-painted house that can be easily overlooked. So before you begin, read over these exterior home painting tips.

The first step you take should be to check the exterior of the house. Check for dirt stains, mildew, paint that is chipping, etc. It is important to get rid of obstructions to create a smooth surface for the paint. You can even sand down the walls before painting. A power hose washer is also strong enough to get rid of these obstructions. More specifically, you can use a mildew remover solution which is available at many hardware stores. If this area on your house is highly susceptible to mildew, you can also purchase a mildew resistant additive you can put into your paint for future protection.

This is also a good time to take care of rotting wood. Repair small pieces of rotting wood with caulk, or replace the rotting wood completely. Also check for leaky gutters and pipes, as well as pests and rodents that may cause damage down the road.

After checking the exterior of your house, it is time to prepare the painting materials:

– You will need a ladder and—depending on how sturdy the ladder is—someone to hold it steady. The ladder you use may also mark up the walls. Tape a towel to the tops of the ladders in order to avoid marking up the walls. To prevent streaking, paint your house from top to bottom.

– Make sure to use painter’s tape for windows, lights, and doors. This will help maintain straight and clean edges.

– The fastest and most efficient way to paint is to use an airless paint spray. If you do not have one, you can rent one. Remember that the paint particles will drift some distance in the wind, so keep cars and other valuables at a distance.

– If you do not want to use a air spray, use a paint roller at first and then use a three to four inch bristle brush to touch up the spaces you could not reach with the roller.

– Use an oil primer in addition to latex or acrylic to add extra protection.

– If you are using multiple cans of paint for the exterior, try to mix them all together so that the paint remains consistent throughout the whole house.

– If you are painting the ground, it would be best to add sand into the paint. This is beneficial because it adds traction while walking.

If you feel like you cannot handle the job, use TalkLocal to find a professional painter.
 

Glass Stuck in the Garbage Disposal

Friday, September 28th, 2012

Glass Stuck in the Garbage Disposal Plumbers

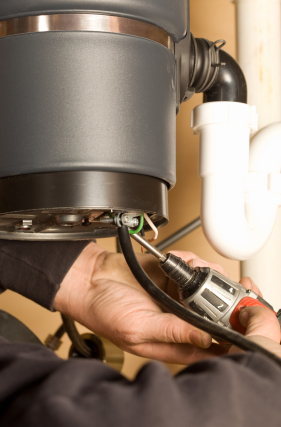
The garbage disposal in your kitchen is a convenient way to remove scraps and leftovers, but when objects, such as glass, get stuck, the mechanism can become jammed and stop working properly. Read the following methods to find out how to clean out the glass stuck in the garbage disposal.

1) Disconnect your garbage disposal appliance from the main power source — This is to make sure that its not accidentally turned on while you remove the glass, which could cause serious injury.

2) Remove any large pieces of glass with pliers — Use needle-nose pliers to remove all the large pieces of glass that you can find.

3) Dislodge the glass — If you can’t move the glass, you’ll need to dislodge it first. Remove all pieces of glass you can easily reach with pliers.

4) Vacuum the garbage disposal — Use a wet-dry vacuum to remove smaller shards of glass. Simply hold the opening of the hose over the top of the garbage disposal and let the vacuum run until you can’t hear anything be sucked up anymore. If the sink isn’t wet, you can use a normal vacuum if you cover the end of the extension tube with a nylon stocking secured with a rubber band.

5) Reset the garbage disposal

a. Reconnect the garbage disposal to the power source.

b. Partially cover the drain with a plate.

c. Turn on the cold water.

d. Turn the garbage disposal on.

e. If the disposal still jams, there’s probably glass stuck in it. Turn it off, turn off the water, and repeat the process from the start.

6) Remove the garbage disposal from the sink

a. Use your product manual to remove the garbage disposal from the sink.

b. After you remove the disposal, carefully remove any remaining glass.

c. Reinstall the garbage disposal following the instructions on your manual.

If you still have questions or problems with your garbage disposal, use TalkLocal to get in contact with a professional who can help you now.

Cannot View My Network Computers

Friday, September 28th, 2012

Cannot View my Network Computers Computer Repair

A common problem in networks is the inability to view My Network Places or Network Neighborhood of all the systems that are in the workgroup. This problem may lead people to wonder “why can’t I view my network computers?”  We will discuss what prevents you from viewing network computers and the possible solutions for successfully seeing those computers.

Computer Not in Workgroup

Your computer may be in the wrong workgroup. To be able to see all computers in the network, you must make sure they are all connected to the same workgroup. Go into your Properties and verify that the workgroup name is the same as for the other computers. If not, you can change the workgroup name in order to join the correct workgroup.

Not Connected to Network or Network Discovery Disabled

Another issue could be that your computer is not connected to the network. If you are not connected, simply connect to the network or set up a new network. If the network discovery is disabled and blocking you from seeing other computers in your network, you need to turn on network discovery by going to Network and Sharing Center >> Change Advanced Sharing Settings >> turn on Network Discovery >> Save.

Password Protected Sharing

When the Password Protect Sharing is enabled, you will not be able to view your network computers. Disable password protected sharing by going to your Control Panel >> Network and Internet >> uncheck “Password Protected Sharing.”

If you are having further difficulties viewing your network computers, TalkLocal can help connect you with the right IT professional in your local area. Just fill out a service request on the website, stating your availability, location, and service need. It’s that simple.

Seva Call Launches in Pittsburgh

Friday, September 28th, 2012

Seva Call Launches in Pittsburgh Seva Call

Today is a big day for the Seva Call team because our service launches in Pittsburgh! With the help from three Carnegie Mellon University students and one University of Pittsburgh student,  Manpreet Singh, the president of Seva Call, returns to Pennsylvania to launch a virtual concierge service to the consumers of Pittsburgh. Along with Singh, Seva Call’s founder and CEO Gurpreet Singh is excited to launch their service in Pittsburgh, especially because many of the summer team members attended college around the Pittsburgh area.

Is the Steel City ready for a hassle-free way of getting connected with high quality businesses? No more looking through that local phone directory that has thousands of listings for different businesses. No more spending hours on the phone or computer and being disappointed (more like frustrated) when you can’t get the help you need. Don’t worry, Pittsburgh, Seva Call is here to the rescue! The life of a Pittsburgh consumer will be easier than ever with the launch of Seva Call

This service is not only great for consumers to use, but it is also convenient for local businesses to fill those empty spots in their schedule. Businesses have the opportunity to accept or decline consumers based on their busy schedules.  Seva Call is here to help create more business opportunities for those local Steel City businesses.

Have a problem, Pittsburgh? Use Seva Call to help solve that problem quickly. It’s a simple solution that will get you exactly what you need.

Car Door will not Unlock with the Key

Friday, September 28th, 2012

Car Door will not Unlock with Key Auto Repair

If your car door will not unlock with the key, but the key is still working to start the car, then the problem is most likely with the lock on your car door rather than the key. Read on for potential problem areas.

One possibility is that the lock cylinder needs new tumblers. These could be replaced or you could replace the entire lock. You will need a locksmith that specializes in auto locks in order to do this.

Another reason that your lock may not be working is that the latch assembly is jammed. In order to check for this, you can take off the door trim panel and check the rods. If the rods are not the problem, you can then take off the lock. You will probably have to take the entire door handle assembly out in order to do this.

After you have taken the lock out, put your key in the lock (make sure you do this or the tumblers and springs will fall out) and then remove the retainer holding in the inner piece of the cylinder. There may be a lock cap that you will have to take off first.

Once you have taken the lock cylinder apart, check and see if any of the tumblers are not flush with the inner cylinder. File down any that are not. Put everything back together and see if your lock is now working.

If you are not able to perform these fixes or they do not work, then you may need to contact an auto repair professional or a locksmith. You can use TalkLocal to receive up to three phones calls in minutes from high quality auto repair professionals and/or locksmiths in your area that are available when you are.

Ceiling Fan is Making a Clicking Noise

Friday, September 28th, 2012

Ceiling Fan is Making Clicking Noise Electricians

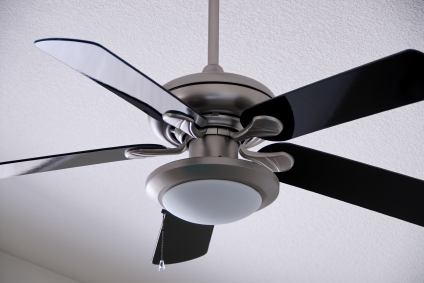
So your ceiling fan makes noises while it is turning? You might be scared that it might fall down on you or your loved ones, potentially hurting someone very badly. It’s actually a legitimate concern. Noise indicates that there is a physical problem with your fan, and parts might break off the fan if the problem goes unresolved. Read on if your ceiling fan is making a clicking noise.

Immediate Action

Noise from the fan installment can be two things: a problem with the rotors or a problem with the mounting of the rotor device itself. Check the components listed in this guide in order to identify and troubleshoot the problem.

A misplaced blade in the ceiling fan will throw off the balance of the rotor device, making it spin out of control and causing some of the internal components to collide with one another.  This makes the clicking noise that you are fearing. Needless to say, collision between the internal components of the rotor is not good. The fan may fall apart if the internal parts wear out.

If the imbalance and the speed at which the blades are turning is big enough, it may even cause the entire ceiling fan to shift as the blades go around. Look for a gap between the ceiling and the base of the fan installment as the fan moves to identify this problem.

Also, check if the center of the blades (the main axle of the rotor) is stationary as the blades in your ceiling fan are turning. If the center stays stationary, then the blades must be balanced. If the base of the fan and the center stays constant, the balance is not a problem at all – there must be some external problem.

Possible external problems can include the wind from the fan constantly hitting something making a noise or the blades of the fan itself hitting something.

Additional Help

If you feel like you need professional help on identifying ceiling fan loud clicking noise, TalkLocal can help with finding the correct local experts in this case, saving you time and energy in what may be a stressful situation.

Why are my Teeth Yellow?

Thursday, September 27th, 2012

Why are my teeth yellow Dentists

Your teeth are exposed to the world every day. A person’s smile can be the first feature we notice when meeting someone new, and it is often involved in making that “first impression.” Growing up, we all heard the prized directions to brush and floss twice a day, both in the morning and at night to retain a perfect, white smile. Though, whether it is a result of your eating, smoking or brushing habits, you may find your teeth to be a yellowish shade. This might cause you to ask yourself “why are my teeth yellow?” Read on to learn more about causes and solutions to yellow teeth.

What causes yellow teeth?

Naturally, teeth have a layer of protection called enamel, which helps to keep your teeth white and shiny. If you smoke, drink too much coffee or soda, eat a lot of sugary or acidic foods, or fail to brush, floss and use mouthwash enough, this can cause the dentin to wear away, resulting in the yellowing of your teeth. These refer to situations of extrinsic (or external) staining. There is also something called intrinsic (or internal) staining on the insides of your teeth, which may be a result of medicines that you took when you were a young child, excessive consumption of fluoride, or even trauma that can cause bleeding on the inside of your teeth.

Yellowing may also be caused by your genetics and/or age. As bad as this may sound, you may simply have yellower teeth than others because of your particular genetic makeup. In addition, as you get older, your enamel may wear down therefore making it easier to stain your teeth yellow through diet, smoking, or lack of dental hygiene.

What can you do about it?

The solutions for whitening your teeth are quite simple. If you smoke, drink a lot of coffee or acidic substances, or eat a lot of candy or other sugary foods, either cut down on the intake or quit altogether. You can also improve your dental hygiene by brushing more often (if you don’t already brush twice a day), flossing , and getting your teeth cleaned by a dentist regularly. You can also try using teeth-whitening toothpastes or strips purchased either over-the-counter or prescribed by your dentist.

If none of these remedies are taking effect, you may want to see a dentist for other options. If you need to find one in your area, try using TalkLocal. TalkLocal is a FREE service that will connect you with top-quality, reputable dentists in your neighborhood, within minutes. Simply enter in your problem, availability and location and TalkLocal will contact multiple specialists, who will then call YOU directly, ready to help.

Moving with Plants

Thursday, September 27th, 2012

Moving with Plants Moving and Storage

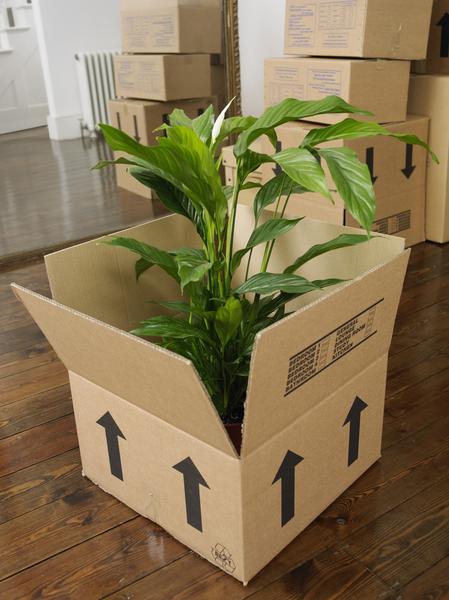
Are you planning to move and wondering what you should do about moving your precious plants to your new home? How will you find a mover that will be willing to move your plants? Read on for tips on moving with plants.

Check State Laws

If you are moving to a new state, you need to check the laws for the state where the plants will be relocated. Some states, such as California, Florida, and Arizona, have laws against bringing certain plants across the border and guidelines for how to properly sterilize your plants before bringing them.

Transplant Plants in Plastic Containers

Clay and glass pots are fragile and you don’t want them to break during the move. Plastic containers are good temporary containers for transporting plants with breakable pots. Make sure to transplant your plant into a container of approximately the same size as the one your plant was previously in, as a change in pot size can be shocking for the plant.

Sterilize Your Plants Before Moving

Make sure to kill any bugs, mildew, and diseases that your plant may have before moving so you don’t transfer these things to your new home. Bug bombs, bug power, and pet flea collars can all be useful for sterilizing your plants. You can also research remedies for any specific problems that your plants may have. If you cannot cure something before moving day, leave that plant behind.

Prune Your Plants Before Moving

Prune your plants to keep them more compact for moving. Pruning will also make them more attractive looking. You can prune by pinching back newer growth with your thumb and forefinger. Remember not to prune succulents and ferns because they do not respond well.

Water Your Plants Normally Before Moving

Even if you anticipate warmer temperatures in the area you are moving to, you should still water your plants as you normally do. If you overwater your plants, they could contract a fungus (warm weather) or freeze (cold weather).

Find a Mover That Will Move Your Plants

Some movers may be unwilling to move your plants because they are perishable items–particularly if you are moving more than 150 miles–so you should make sure ahead of time that you find a mover who can accomodate your plants. With the help of TalkLocal, you can find local movers within minutes. TalkLocal matches you with movers who can meet your specific need, so you dont have to waste time finding help move your plants to your new home.

What to do when Water Leaks from the Ceiling

Thursday, September 27th, 2012

What to do when Water Leaks from the Ceiling Plumbers

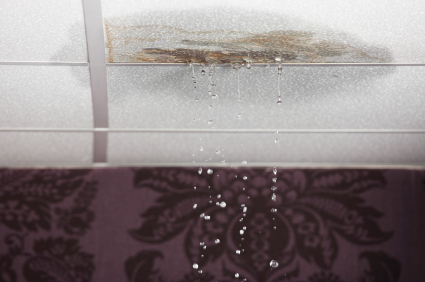
Locating the source will help you figure out what type of professional to call. If there is a floor above the leaking ceiling (i.e. a second story above a first story ceiling), then the leak may be coming from several sources.

Check out this list of possibilities about what to do when water leaks from the ceiling.

Possibilities:

Toilet – If the wax ring between the floor and the toilet is worn out, every time the toilet is flushed it produces a leak flowing through the ceiling. You can purchase a new toilet wax ring and have it shipped overnight from Amazon starting at $8.99.

Shower – If the leak is happening while the shower is running, this may be due to a cracked tile or the shower faucet. If there is leakage while the shower is not running, there is a problem with the water pipe.

What to do when water leaks from the ceiling:

1. Place a bucket under where the ceiling is leaking to catch the water. You can purchase a bucket from Amazon and have it shipped overnight starting at $5.60.

2. To avoid the ceiling collapsing in, poke a small hole in the ceiling to allow the water to drain into the bucket.

3. Determine if the leak is a result of plumbing in your home or if it is due to the ceiling. If the leak only occurs when it is raining, that is indicative of a roofing issue. On the other hand, if there is water leaking when there is not a storm, the problem is most likely due to a plumbing issue.

To check if it is a roofing issue:

1. Wait for the roof to dry and climb to that area of the roof.

2. Check the shingles around the leak source and remove any damaged shingles with a pry bar. This is an easy and common fix.

3. Replace the damaged shingles with the new shingles by working your way from the bottom of the leaky area to the top.

a) Slide a few inches of the last row of new shingles under the old shingles.

b) Add a bit of roofing tar along the top and bottom of the new shingles that you slid under the old shingles and press down for a few seconds to allow them to set. You can purchase roof tar from Amazon and have it shipped overnight starting at $4.71.

c) To repair the appearance of the ceiling after the plumbing or roof is repaired, use some spackle and paint.

If a leak still persists or you cannot figure out the source of the leak, a professional may be the best option to avoid damaging your home further or hurting yourself in the repair process. To reach a high quality plumber or roofer in your neighborhood immediately, call TalkLocal. You will reach a professional who can fix your problems at a time that is most convenient for you.

The owner of this website is a participant in the Amazon Services LLC Associates Program, an affiliate advertising program designed to provide a means for sites to earn advertising fees by advertising and linking to Amazon properties including, but not limited to, amazon.com, endless.com, myhabit.com, smallparts.com, or amazonwireless.com.

Interior Home Painting Tips

Thursday, September 27th, 2012

Interior Home Painting Tips Painters

Follow these 10 interior home painting tips to make your painting projects go smoother and faster with a professional quality finish.

1. To avoid lap marks, roll the full height of the wall and keep a wet edge – Lap marks are those ugly stripes caused by uneven layers of paint buildup. They occur when you roll over paint that’s already partly dry. To avoid lap marks, it is important to maintain a “wet edge.” To do this, start near a corner and run the roller up and down the full height of the wall, moving over slightly with each stroke. Move backward where necessary to even out thick spots or runs. Reload the roller often so that it’s always at least half loaded. Keep the open side of the roller frame facing the area that’s already painted. That puts less pressure on the open side of the roller, so you’re less likely to leave paint ridges.

2. Mix several cans of paint in a large bucket for a consistent color throughout the room – Paint color may vary slightly from one can to the next. If you have to open a new can in the middle of the wall, the difference may be noticeable. Mixing the paints together eliminates the problem. The best way to do this is to estimate the amount of paint you’ll need and mix it in a 5-gallon bucket (a process called “boxing”).

3. Let the paint dry, then cut the tape loose for a perfect edge – Once paint dries, it forms a film between the wall and the tape. Simply removing the tape tears pieces of dried paint off the wall. To avoid this, cut the tape loose for a perfect edge. Wait at least 24 hours for the paint to dry, and then use a sharp utility knife or box cutter to slice through the film. As you cut the paint, pull up the tape at a 45-degree angle.

4. Paint the trim first, then the ceiling and the walls – Professional painters follow a certain order when painting a room. They paint the trim first, then the ceiling, then the walls. They do this because it’s faster and easier to tape off the trim than to tape off the walls. When painting the trim, you don’t have to be neat. Just concentrate on getting a smooth finish on the wood. Don’t worry if the trim paint gets onto the walls (you’ll cover it up later when painting the walls). Once the trim is completely painted and dry, tape it off (using an “easy release” painter’s tape), then paint the ceiling, and then the walls.

5. Prime and texture wall patches to avoid a blotchy finish – A quick coat of primer will eliminate flashing and texture differences. To match texture, prime with a roller, feathering out the edges. Choose a roller thickness to match the surrounding wall texture.

6. Clean dirty surfaces so the paint can form a strong bond – Paint will easy chip or peel off if painted over dirty, oily surfaces. Before painting, clean dirty areas with a deglosser or heavy-duty cleaner intended for pre-paint cleaning. Wipe the cleaner in a circular motion using a lint-free abrasive pad. Start at the bottom and work up. Be sure to wear rubber gloves and eye protection when using theses cleaners.

7. Roll paint along the edges for consistent texture – Corners and areas next to trim that are painted with only a brush have a noticeably different texture than the surrounding paint. To create a consistent texture, brush on the paint, then immediately roll it out with a 3” roller before the paint dries.

8. Use cotton drop cloths rather than plastic – Spills and splatters will happen regardless of how careful you are, so it is important to prepare for them. Use canvas drop cloths in your work area to protect the floor from spills. The thick canvas stays in place, so you don’t need to tape it, and you can use it to cover any surface.

9. Feather out paint where you can’t keep a wet edge – You can’t cover large areas like ceilings, extra-tall walls or stairwells in single, continuous strokes. The best way to minimize lap marks on these areas is to feather out the paint along the edges that you can’t keep wet. The thinner, feathered coat of paint will avoid the buildup that causes the lap mark.

10. Sand trim between coats for an ultra-smooth finish – For a smooth finish, sand the trim with a fine-grit sanding sponge before applying each coat of paint. Let the first coat of paint dry for at least 24 hours before lightly sanding again and applying the second coat of paint. After each sanding, vacuum the trim and then wipe it down with a tack cloth to remove the dust.