Headlights Dim While Driving

Thursday, September 27th, 2012

Headlights Dim While Driving Auto Repair

You are driving to a gas station when your headlights start to dim. Your headlights are not completely broken, but they do tend to fluctuate in brightness. Even if the dimming is temporary and returns to normal brightness, it is best to examine the problem now in case your headlights fail completely when you are on the road. Try the following tips if your headlights dim while driving. If you need to purchase a new car headlight bulb, you can find high quality bulbs on Amazon and have them shipped overnight starting at $6.98.

A common reason for intermittent headlight dimming is a bad alternator. But before you test the alternator, you must check that the battery can start the alternator. The battery is responsible for initially powering the alternator, but relies on the alternator to stay charged.

Checking the battery

1.     Turn off your car.

2.     Put the red part of the voltmeter to the red battery terminal.

IMPORTANT: Do not let your skin touch the battery.

3.     Do the same for the corresponding black parts of the voltmeter and battery terminal.

4.     Test the battery. If it measures to be over 12.2 volts, then it can start the alternator. You can find the top rated car battery tester and have it shipped overnight starting at $8.99.

Check the alternator

1.     Disconnect the voltmeter.

2.     Start your car.

3.     Turn on the headlights.

4.     Rev the engine to 2,000 RPM. This should cause the alternator to go into high gear.

5.     Reconnect the voltmeter to the battery, being careful not to let the battery touch your skin.

6.     Test the battery. If the voltage fluctuates between 13 and 14.5 volts, then your alternator is working properly. If the voltage stays the same or decreases, then you may need to fix or replace your alternator. You can find the top rated car alternators on Amazon and have them shipped overnight starting at $33.92.

If you are not sure if the alternator needs to be fixed, see if your car shows other symptoms.

Symptoms of a bad alternator

Warning light comes on

In most modern cars, there is a warning light shaped like a battery on the dashboard. It can be marked by an “ALT,” which stands for alternator. Pay attention to this light because it can flicker on and off if the alternator is having problems.

Growling noise

Drivers report hearing a growling or whining noise when their alternators are failing. This is because the alternator pulley is not aligned with the accessory belt or because the pulley bearings are worn out.

Burning rubber/hot wire smell

The burning rubber smell indicates that the pulley is causing friction on the belt. The hot wire smell indicates the alternator is overworking the rotor and stator.

When in doubt, it is safest to have your car checked by a professional. TalkLocal can help you find local auto repair services in minutes and address the problem of dimming headlights before it gets worse.

The owner of this website is a participant in the Amazon Services LLC Associates Program, an affiliate advertising program designed to provide a means for sites to earn advertising fees by advertising and linking to Amazon properties including, but not limited to, amazon.com, endless.com, myhabit.com, smallparts.com, or amazonwireless.com.

How Do I Backup my Music from my iPod to my Computer

Thursday, September 27th, 2012

How Do I Backup my Music from my iPod to my Computer Computer Repair

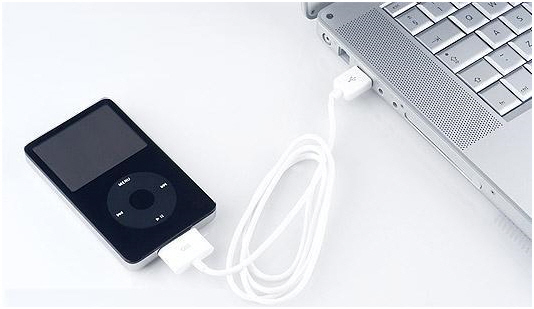
Carrying an iPod with you is a great way to listen to all the music you love on the go. However, because our iPods go everywhere with us, they are susceptible to damage and theft. It is a safe practice to back all of your music files onto your computer because–contrary to what some of us think–iPods are not invincible. Don’t let one bad accident with your iPod not wipe out your music collection. A common question asked is “how do I backup my music from my iPod to my computer?” Don’t worry, backing up your music is easy and highly recommended. Here’s how to do it :

If you are using Windows:

  1. Connect your iPod to your computer. If iTunes pops up, make sure it is not on auto sync. If it is, close it immediately.
  2. Go to “My Computer” and find your iPod under “Portable Devices.” If it doesn’t show up there, go to Control Panel >> Portable Media Devices.
  3. Once you find your iPod, double click it (or right click and click “explore”).
  4. Windows hides some files and folders by default. To see them, go to Options >> View >> Show Hidden Files and Folders.
  5. Find the Music folder.
  6. Select all the files.
  7. Drag and drop the content into a folder on your computer.
  8. Go into iTunes Preferences.
  9. Under the Advanced tab, check the boxes by “Keep iTunes Music Folder Organized” and “Copy files to iTunes Music Folder when adding to the library.”
  10. Drag and drop the new folder into iTunes.

If you are using Mac OS X, it might be a little trickier. Mac recognizes an iPod as strictly an iPod and does not allow you to open it up in Finder like a normal external disk. However, this can be done using utilities such as iPodDisk, Expod, and Anapod CopyGear.

If you need additional computer help, TalkLocal can connect you to a local professional in minutes!

Painting Over Wallpaper

Wednesday, September 26th, 2012

Painting over wallpaper Painters

Most home improvement experts do not recommend painting over  wallpaper because the results are usually less than perfect. The practice demonstrates poor craftsmanship because wallpaper textures and seams can show through. The paint job will not last as long as painting on a clean surface because the moisture from the paint can weaken the wallpaper’s adhesive, which will create bubbles in the paper. Painted wallpaper is also difficult to remove later on, which is a pain if you expect to renovate in the future.

Should you remove the wallpaper before painting?

On the other hand, removing stubborn wallpaper can create further problems, such as crumbling drywall or plaster. So for some homeowners, painting over wallpaper is the lesser of two evils. Keep in mind that patchy wallpaper cannot be painted; you must work with wallpaper that is in good condition–with curling or loose edges at most.

If your wallpaper is peeling and patchy, continue reading “How to Remove Wallpaper” below. If your wallpaper is in good condition, skip this next section and read “How to Paint over Wallpaper” below.

How To Remove Wallpaper

Materials:
Wallpaper scorer
Hot Water
Fabric Softener
Spray Bottle
Wide Putty Knife
Dish Detergent
Bucket
Sponge
Towel

1. Spread drop cloths around the base of the walls.

2. Remove all switch plates and outlet covers.

3. Create holes in the wallpaper with a wallpaper scorer.

4. Mix 3 parts hot water and 1 part fabric softener in the spray bottle.

5. Spray a small section of the wall. You should be able to strip the wallpaper from this section within 15 minutes.

6. Let the solution soak for three minutes.

7. Pull an edge of the wallpaper upward. Use the putty knife to help separate it.

8. Repeat steps 5 through 7 until all the wallpaper is removed.

9. Mix a tablespoon of dish detergent with hot water in the bucket.

10. Wipe the walls with this solution using the sponge.

11. Rinse the walls with water.

12. Dry the walls with a towel.

How To Paint Over Wallpaper

Materials:
Strong Adhesive
Stain-killing Paint
Emery Board
Paint

1. Glue down any curling edges with a strong adhesive. Press and hold until secure.

2. Apply two coats of stain-killing paint. Let it dry between coats.

3. File down any visible seams with an emery board.

4. Apply the top coat of paint.

Stuck Deadbolt Lock

Wednesday, September 26th, 2012

stuck deadbolt lock Locksmiths

After a long day of work, you return home and find you can’t open your front door. A stuck deadbolt lock can be a frustrating discovery. This is a common problem between seasons because extreme weather changes can cause the house foundation to shift and doors to misalign.  The door shifting may cause the deadbolt to be caught under the door’s weight.

Try the following methods to free the deadbolt:

  • To free the deadbolt from the doors weight, try putting your body’s weight against the door while turning the lock knob. You may need to lift or pull the door to figure out how the pressure is distributed.
  • Try spraying a household lubricant in between the door and the latch plate. Wait for three minutes to let the solution dissolve any interfering debris before attempting to open the door.
  • If the door does not loosen, slip a credit card or screwdriver between the door and latch plate. Wiggle it around to push the bolt out of the latch plate.

If the door is still stuck, you will have to use a mallet to remove the hinges and take down the door. Once the door is removed, you can check to see if the problem is a broken deadbolt or unaligned door. If you’ve freed the door, you take the following steps to prevent a pressure problem in the future.

Preventing a Stuck Deadbolt Due to Pressure

  1. Use charcoal or a type of marking medium to cover the deadbolt.
  2. Close the door.
  3. Turn the lock knob until the deadbolt hits the latch plate.
  4. Open the door to see where the charcoal has marked in the latch plate. The marked area will need to be adjusted to accommodate the misalignment. You can move the latch plate or cut out interfering material.

This should prevent the door from becoming stuck in the future. You should also check for rusting on the latch plate because the rough parts may catch the bolt. If you need to have your lock replaced, a locksmith is just a phone call away with TalkLocal.   Go to the TalkLocal website to fill out a short request form and get connected with a local locksmith in 90 seconds!

How Often Should a Maid Come

Wednesday, September 26th, 2012

how often should a maid come? Maid Services

More households are hiring maid services as our lives get progressively busier. However, not all houses need an intensive cleaning every week, and many people want to find the perfect balance between a clean home and their budget. A common question asked amongst homeowners is “how often should a maid come?” Most maid services offer a great deal of flexibility in their cleaning services, so you can find a schedule that works for you. Read on to learn more about how often you should hire a maid service.

Factors to consider

Houses with smokers, pets, and children will need to be cleaned more often. If there are individuals in your home who suffer from allergies, more frequent cleaning will also be needed, especially during allergy season. You should also hire a maid after any renovation or remodeling is done in the house.

Weekly

This is a good frequency for households with a lot of children, pets, or hectic events. If your household is extremely busy, this might be the option for you.

Bi-weekly

Many households choose this plan, as it isn’t excessive and still manages to keep the house looking good.

Monthly

When the house is just starting to get out of control, call a maid in to help suppress the mess. The maid will give your house the intensive cleaning that it needs. This is a good schedule for homeowners that take trips frequently and do not spend a great amount of time in their home.

One Time

If you need your house cleaned before or after a big party or vacation leave, this is the option for you. A maid will come take care of the one-time mess and be out of your hair.

If you want your house cleaned, TalkLocal can help you find local maid services in a matter of minutes. Just go to TalkLocal’s website and submit a service request stating your service need, location, and availability.


What is a Computer Virus and How Does it Spread?

Wednesday, September 26th, 2012

What is a computer virus and how does it spread Computer Repair

Sometimes computers can be your best friend, but at other times it can be your worst enemy. Just like human beings, computers can get “sick” with a virus. So you might be wondering, what is a computer virus and how does it spread? Well, in the strictest of terms, a computer virus is a program that has the ability to replicate itself and to spread from computer to computer. Other malware, such as spyware, adware, computer worms, and Trojan horses, are often mistakenly called viruses.

When you download a file from the internet, whether intentionally or otherwise, there is a chance that a virus could be hidden within the file. Executing the file also causes the virus to be activated,which sends the virus to look for programs to infect. Upon infecting these programs, the virus then duplicates within the program, just like a biological virus, and continues the cycle.

What are the different types of viruses?

There are four types of viruses: program, boot sector, macro, and e-mail. Program viruses spread when the program is executed, spreading to the other programs on your computer. When an infected program is uploaded to another computer, the process then repeats. A boot sector virus is one loaded through a floppy disk and then proceeds to infect the rest of your hard drive. Floppies loaded afterward are then also infected with the virus, which spreads to other computers when loaded. Since floppy disks rarely used now, boot sector viruses are not as common as they were before. Macros work with macro applications such as Microsoft Word, Excel, and Outlook. When a document that is infected with a macro is opened up, the program and all the files it opens are also infected. E-mail viruses infect your e-mail account when an attachment is opened. Then, the virus sends the infected e-mail to everyone in your address book using your account.

Is your computer infected with a virus? Need help getting rid of it? Use TalkLocal to find a computer technician to help you with your infected computer. TalkLocal will save you time by finding a qualified computer technician who can meet around your schedule.

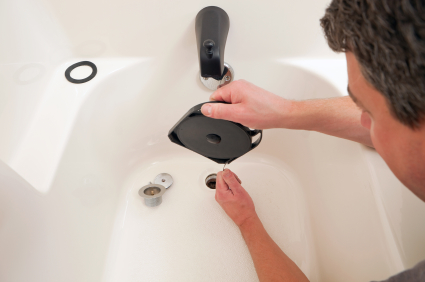
Help with Unclogging a Drain

Wednesday, September 26th, 2012

Help with Unclogging a Drain Plumbers

A clogged drain can be your worst nightmare if you don’t know how to fix it. It’s often simple enough to do yourself, but many people don’t have the time or patience to deal with it. If you do, here are a couple of tips and tricks to help with unclogging a drain.

Unclogging a Drain with Baking Soda

Before you attempt to clear your drain, try pouring a mixture of baking soda and white vinegar (about one cup) into the drain. Next, try stopping it up with an old rag and then rinsing with hot water after a few minutes. If that opens the clog, ta-da, you’re done! If that doesn’t work, gather your tools for some basic plumbing maintenance.

Remove the Trap

You might need to remove the trap (the U-shaped pipe under the sink) to open a clogged drain. Put a bucket under the trap to catch any water when you remove it. Clear out any residue in the trap before reattaching it. If you’re still having plumbing problems after removing the trap, try plunging the sink.

Use a Snake

If neither of those tips work, try using either an manual or electric snake. A snake is a metal spiral that you push into the clogged drain. You turn the crank and that makes the snake reach further into the clog. This makes you be able to break it up and pull it out.

Seek Professional Help

If your drain is still clogged, it may be time to call a plumber. One way to seek immediate service help for your drain problem is through TalkLocal. This free online service will contact plumbing services in your area for you. Just tell them your service need, location, and availability to talk to a professional on the phone in minutes.

How to Remove Smoke Odors From your Home

Tuesday, September 25th, 2012

How to remove smoke odors from your home Maid Services

Smoke not only smells bad, but when it lingers in your home, it can permanently ruin your carpets and furniture with its pungent odor. Learn how to remove smoke odors from your home by reading the tips provided below.

– There is a good chance that the odor has settled into your carpet, curtains and even the upholstery on your furniture. Try sprinkling baking soda over the surfaces of your furniture and carpets, and let it sit for a couple hours or even overnight, then vacuum it up. You may even need to steam wash your carpets.

– Be sure to wash or dry clean your curtains frequently. Try washing your walls and ceiling as well.

– Air out your house frequently. Open all doors and windows for an extended period to make sure a breeze is coming through.

– Place small bowls of vinegar or boxes of baking soda around your house to absorb the odors.

– You may need to resort to more expensive solutions, like repainting your walls, reupholstering your furniture, and/or recarpeting your floors.

– Lastly, try to avoid smoking in the house. It can make a huge difference.

If none of these suggestions are working, you may want to locate a maid or cleaning service to scrub your house clean. Check out TalkLocal, a free service that can connect you to high-quality, reputable cleaning services in your neighborhood within minutes. Simply enter your specific problem, location, and availability, and TalkLocal will find local companies who will then call you directly, ready to help.

Thermostat Display Blank

Tuesday, September 25th, 2012

Thermostat Display Blank Heating & Cooling

You are trying to set the temperature in your home, but the thermostat display is blank. Before you freak out or call professional help, check to see that the battery in the thermostat is still good if your display system requires a battery. If that isn’t the problem, continue reading this guide.

Loss of Power from Other Sources

In order to troubleshoot the problem, you will need to check the wirings inside your display and find out which ones are working and which ones are not. Basically you need to check for power flowing on the wiring—for this, get a voltmeter.

A voltmeter is a device that measures the amount of electrical difference (flow) between two points of a circuitry. You can measure the electrical flow by attaching the two metal tips of the voltmeter to the wires you want to test.

Disassemble your thermostat display to the point where you see four types of wiring. Two of the wires should be black—these are high voltage wires, (120V/240V) so you don’t want to mess around with them yet. You should also see the two smaller wires that are not black.

One of these smaller wires should be marked to be 24V, either in your display manual or in hardware. Locate that wire and test the voltage with the voltmeter to the ground/wall. If the voltmeter reports the flow of 0V, this indicates that the fuse on the circuit board is blown. The blown fuse is making your thermostat display blank in this case. Replace it.

If the 24V is not a problem, carefully check (with rubber gloves) the voltages of the 120V and 240V wires with your voltmeter. If you find a problem with any of those wiring, backtrack the problematic wiring through until you find the problem or reach an AC component. If the connected component does not work, the component will have to be replaced.

Consult a Professional

If you are not sure what you are doing, consult a professional to avoid damaging your system. TalkLocal can help with finding the correct local experts to help you in this case, saving you time and energy in what may be a stressful situation.

How to Stop a Toilet from Running Constantly

Tuesday, September 25th, 2012

How to stop a toilet from running constantly Plumbers

Want to stop losing money from the constantly running water in your toilet bowl? Want to stop that pesky toilet sound of the water refilling? Here are a few helpful tips and tricks on how to stop a toilet from running constantly.

First, get acclimated to the state of your toilet; flush the toilet a few times with the cover off and observe the flushing process. Wiggle the handle a few times and if this doesn’t work, check out these helpful tips!

1. Make sure the guide rod and chain are straight and not twisted.

2. Release the flapper. The most common issue leading to a running toilet is the flapper being stuck open. To remedy this issue, reach in and close the flapper with your hand so the pipe is sealed off. Make sure the flapper (or ball, depending on your toilet model) are aligned with the hole and go directly into the hole when being lowered. If you lift the ball and realize there is water in it, the ball itself will need to be replaced. You can purchase a new ball to your local home improvement store.

3. Correct the water level. Another cause stimulating leaking toilets is an excess of water in the tank. The water level should be about one inch (2.5 cm) below the top of the overflow pipe. If the level is too high, there is excess pressure in the tank, which produces leaks. If this is the case, bend the float arm down. If there is not enough water in the tank, bend the float arm upwards.

4. Use a dye test. Place food dye or a dye tablet into the tank and wait 15 minutes. If you see the dye in the bowl after the 15 minutes, there is a leak in your toilet that needs further correction.

If you have tried the above tips or if the dye test is positive, a plumber is your best option to target the source of the leak. TalkLocal is a great resource that will connect you directly with a plumber who can  fix your faulty toilet.