Posts Tagged ‘flooring’


Fixing Warped Hardwood Floors is Easier than It Looks

Friday, August 14th, 2015

Warped hardwood floors are troubling. Nobody wants to see their beautiful wood floor bulging at the center (crowning) or lifting at the edges (cupping) – but luckily, these issues can be solved without ripping up the whole floor. Warping happens when wood absorbs an uneven amount of moisture; the more saturated areas will expand and protrude. This is why the first of the four techniques we’ll show you for fixing warped hardwood floors involves warping them back into place!

Counter-Warping (For Minor Warps):

This technique can only be used if the warp is minor and the wood still somewhat pliable. All you need to do is wet down the warped area and place a cinder block or two over it for 24 hours. The weight of the cinder blocks (which you can get at your local Lowe’s or Home Depot) should force the wood to press back into uniformity with the rest of the floor.

Sanding Down (For Minor to Intermediate Warps):

It’s a little more labor-intensive, but more severe warps can be handled by fitting a drum sander with 20-grit paper and vigorously sanding in a diagonal motion. You’d be surprised how much of the thickness of the wood can be removed with this technique. Because you’ll need to apply a new finish afterwards, try to use progressively finer sandpaper as you grind the wood down further.

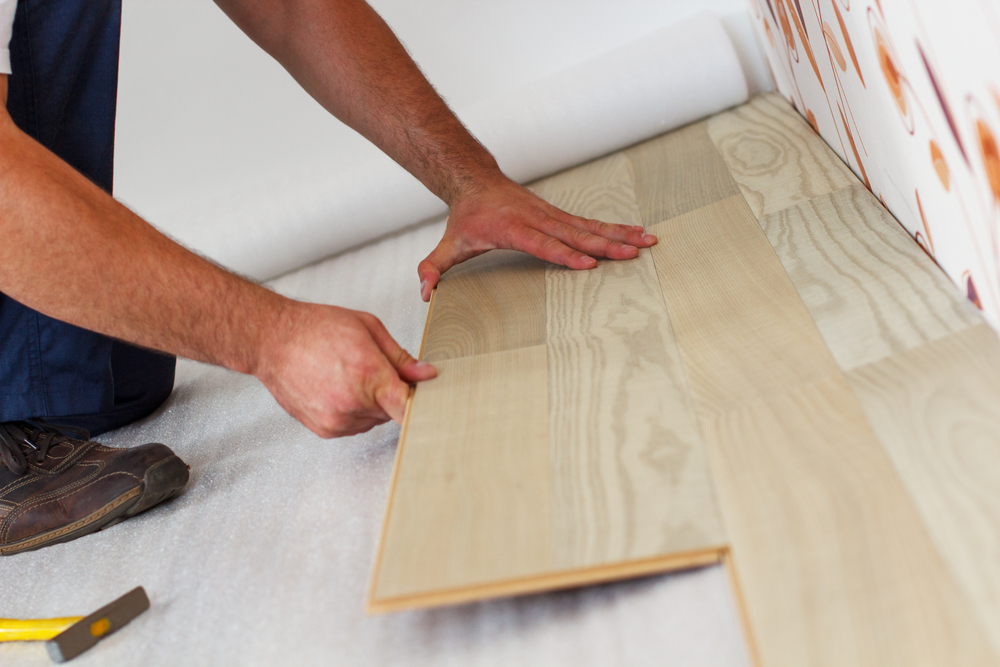
Replacement (For Severe Warps):

You should only rip up and replace the wood after exhausting all other options. Start by finding a suitable replacement, and then get up the old floor. This procedure will vary depending on what type of wood your floor is made of and how it’s been fixed to the floorboards. Fix the new wood in its place, and then treat it so it looks uniform, using paint, stain, or finish.

TalkLocal (For Extreme Warps):

The nastiest of warps are best handled by a professional. Let us take care of that for you. Head over to TalkLocal, where we’ll give you free, full access to our unique search system; with our help, the experience of finding a handyman will be smoother than your beautiful new floor.

DIY Laminate Flooring Installation: Experience Q&A

Thursday, June 18th, 2015

shutterstock_250769293

TalkLocal marketing strategist Dallea Caldwell recently renovated her own floors, replacing the kaleidoscope of carpet and vinyl and wood with a single layer of smooth Beachwood laminate. For those interested in DIY laminate flooring installation, we’ve interviewed her about the experience.

Q: Dallea, why did you decide to do your own renovation rather than hiring a professional contractor?

A: The big thing was the cost. I did a bit of research and found out I could save around $2000. I knew going in that I wanted to use laminate flooring – I’d seen Beachwood in stores and liked how it looked – and, as it turns out, laminate is pretty easy to install.

Q: Walk me through the process – what’s the first step in a DIY project like this?

A: Getting the proper materials. I had a bit of DIY experience so I knew right away, I was going to need mallets and saws – a bunch of them. Specifically, I needed round saws, handheld saws, rubber mallets, and these rubber plants called tappers, which are used to tap together the interlocking layers of the laminate. But the biggest thing was help: renovating flooring requires manpower! So I called up some family members and told them to bring other necessities, like crowbars, hammers, saws, siding and such.

Q: After everyone had arrived and you had all your tools, how did you start?

A: Part one, the hard part, was getting up the flooring you already have. It was quite a task due to the smorgasbord of flooring types in my open-layout first floor; it was like a crash course in floor ripping. All in all, it was a really time and labor intensive process, from cutting strips of carpet to finding and scraping linoleum glue to prying up wood boards – and don’t get me started on the hours spent pulling up and nailing down staples and nails. The staples were like an endless game of pop goes the weasel.

Q: Sounds taxing. Was this a messy undertaking?

A: Very much so. I wanted the new flooring to be level; that meant every little thing, regardless of its material, had to be swept clear before the new flooring was to be installed. This soon turned out to be a very dusty affair; if you’re allergic to dust, be sure to take your medication before starting this project. The other problem with dust is that, like sand, it will find its way everywhere. In my case, it infiltrated the cat food – the poor kitties were vomiting all night long.

Q: What was the next step?

A: Then comes the actual installation. At first, it seemed like it was going to be awful because the laminate seller had unloaded this mountain of planks from an eighteen wheeler right in my garage; having to move the planks from place to place was honestly the hardest part. Installing was easier. You see, the trick is to just move in a linear fashion, like you’re mowing a lawn. The laminate we chose already had padding, and the laminate interlocks so that few pails were needed, so it was just a matter of lining everything up. As long as you keep moving in single directions, you’ll be able to cut the material to fit tight or peculiarly shaped areas. Which reminds me: this step requires some serious sawing. I had a great table saw, which only required an hour’s assembly, and was critical for precise cutting; you don’t want to waste wood, especially when a 1×2” plank bridges the space between the laminate and the wall.

Q: This all sounds like a ton of work. Was it worth it?

A: Sure, it was all hard, but remember: $2084 in savings. And the satisfaction of knowing that I made the floor myself, seeing the floor transform from an ugly patchwork to a beautiful, smooth surface – it was fantastic. Surprisingly, it proved not a bad family weekend.

And there you have it. However, some projects are too expansive to tackle even with your entire extended family. These are best handled by a professional. Head to TalkLocal and we’ll quickly set you up with the perfect contractor for free and without any hassle.

DIY Laminate Flooring: 5 Things you Need to Know

Saturday, June 6th, 2015

shutterstock_272247716

Laminate is a versatile and relatively inexpensive flooring option. It’s also easy to find; you won’t have to drive into a town you’ve never heard of to see a specialist selling the design you’re after. For those interested in installing, say, DIY laminate flooring or wondering how to install laminate flooring, here are five quick points about the material to make your life a bit easier.

1.      “Laminate” flooring refers to the lamination process. It’s like laminating a piece of paper; this process fuses layers of different materials to create something stronger, more versatile, and better insulated. A complete piece of laminate flooring consists of a compound layer, usually made of melamine resin.

2.      Different types of laminate flooring are fused in different ways. Most laminate needs to be “tapped” together with a special tool, but some types also require gluing. Though this requires more work, glued laminate is less prone to separating after installation. Lower quality, glueless laminate is the most prone to separation, typically needing to be “re-tapped” every so often.

3.      Laminate flooring comes with rubber underlaying, on which the pieces are positioned. This makes a DIY project much easier; it allows you to figure out how to cut and align the pieces of laminate before laying them down. It also lets you decide how to cut smaller pieces to fit special areas, such as edges, cupboards, and door entrances.

4.      Though relatively durable, laminate flooring requires occasional cleaning. Water, if left too long, can infiltrate planks and cause warping, and dust and dirt particles render it more susceptible to scratching.

5.      The vinyl top of laminate flooring is very versatile in appearance. There are types of vinyl top for almost any type of wood and, recently, for many times of stone, as well. This makes laminate flooring a great choice for almost any room in the house.

If you’re wondering how to install laminate flooring, check out this article, where we ask a TalkLocal employee about her experience installing her own laminate flooring so you can see how it’s done. If you don’t have the time or would prefer the expertise of a professional, head to TalkLocal – our free service will quickly connect you to a local handyman.

Benefits Of Brick Flooring

Wednesday, May 15th, 2013

Benefits Of Brick Flooring - Heating and Cooling

Brick can beautify your home in a lot of ways with a lot of different looks. The benefits of brick flooring are overwhelming and make brick flooring a very attractive option for any homeowner.

Some of the biggest benefits of brick flooring include:

Great insulator: This is one of the primary benefits of brick floors — they can aid in the heating of your home. Bricks are unique in the fact that they take a while to heat up (whether from the sun or a heater), but when they do, they stay warm for a long time. If your brick flooring is exposed to the sun, it can keep your home warm long after the sun has gone down. Others opt to pair brick flooring with a heating mechanism underneath, because the bricks are so effective at maintaining that warmer temperature.

Durability: If you take care of it properly, your brick flooring can last decades. It’s incredibly durable and resistant to damage. With carpet tile, and even wood flooring, you may find yourself replacing or updating every few years. Brick flooring doesn’t need that.

Cost: Prices range depending on what type of brick flooring you want, but they remain pretty affordable. With the natural or rustic look they can provide your home, you can decorate a room with brick flooring with almost any style or taste. With tiles, wood and carpet, you usually have to spend more to get a specific look.

Natural: Brick is made of natural materials like clay and shale. There are not any harmful chemicals that may loosen up and hurt you. Since these are naturally-occurring materials, brick also develops over time through wear and tear, giving it a homey, unique look.

Safe: One of the biggest benefits of brick flooring is that brick is fireproof. If ever there were a fire emergency in your home, this is one less thing to burn up.

Maintenance: Maintaining brick floors is pretty easy. Wiping up or cleaning brick is simple due to its smooth, hard surface. The naturally grainy look of brick also hides dust and crumbs that fall on it. That way, if you don’t have a chance to sweep before company comes over, no one will even notice.

Get Brick Flooring Installed In Your Home

Brick is both aesthetically pleasing and functional to heating and cooling your home. There are countless different designs, colors and textures to choose from. If you are interested in having brick installed or have more questions, TalkLocal can connect you with local companies or professionals that offer such services.