Archive for the ‘Computer Repair’ Category


Blue Screen Error: Driver IRQL Not Less Or Equal

Tuesday, February 12th, 2013

Blue Screen Error: Driver IRQL Not Less Or Equal - Computer Repair

So you have an intimidating error message on your computer. “Driver IRQL Not Less or Equal” error usually occurs when there is a problem in the compatibility between the particular software or driver in operation and the operating system of your computer. There are two ways you may be able to fix this error.

Method 1: Using the Safe Mode

The Safe Mode is a mode of computer operation that boots up only core components needed for the computer to function. That means that any downloaded programs in your computer will have no effect since they are not put into operation. The safe mode is generally used to remove/undo poorly configured software that might be interfering with the operating system.

Try using the Safe Mode to solve the problem. Follow these steps:

1. During the computer bootup, enter the Safe Mode by pressing the F8 Key.

2. Enter the Safe Mode and uninstall the software/driver that you think is causing the problem. Reboot the computer to check if everything is in working order.

Method 2: Not Using the Safe Mode

For some reason if you are not able to access the Safe Mode, try fixing the error at your hard drive. For this you will need to acquire the corresponding windows disk or recovery disk to your operating system.

1. During the computer bootup, press the F2 Key to Enter the BIOS menu.

2. Go into the boot menu inside the BIOS menu and set the initial boot device as the disk.

3. Save these settings and exit the BIOS menu.

4. Insert the disk into the CD/DVD rom if you have not already.

5. Boot your computer with the disk.

6. In the recovery console mode, type “chkdsk /r” in the prompt.

7. Confirm by typing “y”.

8. Now you should be able to access the hard drive. Access the drive and fix the issue.

Additional Complications and Advice

If above recommendations do not resolve the issue, it means that there are additional complications in your computer, including but not limited to: damaged hardware, or the lack of usable RAM.

At this point it is recommended that you call for help from the local experts. TalkLocal can help you find quality local professionals in your area who will be available to help you when you need them.


Slow Internet Connection

Tuesday, February 12th, 2013

Slow Internet Connection - Computer Repair

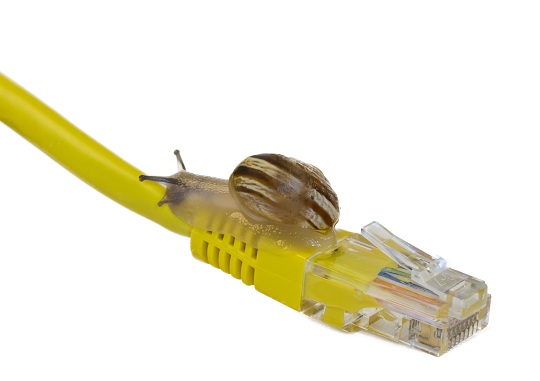
Is your internet connection too slow?  There are many things that can affect your internet connection speed, from wireless interference, to viruses, to problems with your internet service provider.  A slow internet connection may indicate that there is some problem with your network.  Here are some tips to improve your internet speed.

1.  The first thing you should do when diagnosing your connection is to run a free online speed test. Compare the results of this test to the speed that your Internet Service Provider (ISP) is supposed to provide you.  If the test results are significantly lower than the speed listed by your ISP, try again on another computer.  If both computers are running slowly than the problem may lie with your ISP and you should contact your service provider to get it resolved.

2.  If one of your computers is running slower internet speeds than the other, it may have a virus or spyware.  Run a thorough scan on your computer for each and remove any threats that are detected.  If you need a good free antivirus program you can try Avast! or ThreatFire.

3.  Wireless signal interference is a very common cause of a slow internet connection.  If you are connected through a wireless network your signal may be interfered with by household appliances or other wireless networks, as well as by the actual building structure.  To avoid these problems you can try positioning your wireless router for optimal signal broadcasting.

4.  Closing programs that you are not using can free up memory that may be needed for your internet connection.  Additionally, check to see if your computer’s hard drive is full.  Your computer can use free hard drive space as virtual memory so getting rid of any files you don’t need can improve your computer and connection speed.

5.  Upgrade!  If your computer is more than five years old, it may not have the power necessary to quickly access newer website content.  If you can find no other problems, it might be time to upgrade to a newer system.

Additional Help

If you continue to experience a slow internet connection, or if you would like professional help, use TalkLocal! We will connect you with up to three computer technicians in your are who will be available to help you when you need them!

Install Mac OS X on PC

Monday, February 11th, 2013

Install Mac OS X on PC - Computer Repair

Install Mac OS X on PC

While Macs are extremely expensive, you can actually run the Mac OS X on a PC without the financial burden of buying a Mac. Often referred to as a “Hackintosh,” this process can now be performed without even using a Mac.

Step 1: Checking Your Hardware

Before you even begin to prepare installing Mac OS X onto your machine, you’ll first want to make sure that the computer hardware you have on your PC can run Mac OS X:

You’ll also need a retail DVD of OS X Snow Leopard and an additional blank CD. You should assemble the hardware according to the manufacturer’s specifications and ensure everything is situated correctly.

Step 2: Preparing the Boot Disc

There are two boot disk images which allow for direct OS X installation, iBoot or Empire EFI.  You should go ahead and burn those images onto the blank CD.  However, you cannot simply copy the file onto the blank CD.  You must use a CD program to write the image onto the CD.

Step 3: Configuring the BIOS

There are only a couple of changes necessary.

1. In the Advanced BIOS features, you should set CDROM to be the first boot device, USB-HDD as the second, and the Hard Disk as the third.

2. In the Integrated Peripherals, you should set SATA to run in AHCI mode.

3. In Power Management, HPET Mode should be set to 64-bit mode.

Step 4: Installing Mac OS X

1. Insert the burned disc with iBoot or Empire EFI and eject the disk when a screen shows iBoot-Supported (or Empire EFI equivalent).

2. Insert the Mac OS X DVD and after a couple of seconds, press F5, and then Enter when the CD pops up.

3. You should then set up your partitions accordingly with Mac OS Extended (Journaled) as the format and GUID Partition Table as an option.

4. Install on the partition you just partitioned out.

Step 5: Installing the Boot Loader

When you reboot the computer, you need to first boot the machine with your burned CD and select the partition you created earlier to boot into OS X.  You then need to download Multibeast to install the boot loader (alongside all the necessary drivers).

Based on your hardware configuration, your specific hardware options will have different selections in Multibeast.  Allow Multibeast to install and then reboot your computer.  Your computer should work without needing the iBoot or Empire EFI CD anymore!  Congratulations!  You did it!

Additional Help

However, this entire process is quite complex, and if you don’t feel comfortable installing Mac OS X by yourself, use TalkLocal to contact a local IT Professional. We will connect you with up to three professionals in your area who will be able to help you out!

Desktop Monitor is Upside Down

Sunday, February 10th, 2013

Desktop Monitor is Upside Down - Computer Repair

The screen on your computer’s monitor may randomly turn upside down. This can be a confusing and frustrating issue when it occurs. Luckily, there is a quick and easy fix for when the screen on your desktop monitor is upside down.

Cause of Upside Down Computer Monitor

A few things can cause an upside down computer display. Viruses, accidental keystroke, and even some downloads can turn your computer screen upside down. However, you can easily rotate your screen so that it is in the proper position.

How to Rotate Computer Monitor Screen

There are two possible solutions to fix a computer screen that is upside down. The first one is put pressing  Alt + Control + Up Arrow key until your monitor is right side up. You may also try Alt + Control + Down arrow key. However, this does not always work. You can also try manually resetting the monitor’s display.

To manually reset the monitor’s display:

1)     Go to Properties by right-clicking on your screen.

2)     Select “Settings.”

3)     Click on “Advanced.”

4)     Go to “Graphics Driver” or “Intl Extreme Graphics” tab.

5)     Select “Graphics Properties.”

6)     Depending on your operating system, you will either click on “Rotation” or click on “Display Settings.” If you select “Display Settings,” you will uncheck “Enable Rotation” followed by clicking “Apply.”

After you have fixed you monitor’s display, you should scan your computer for viruses, as an undetected virus may have caused the computer screen to flip in the first place.

Additional Help

If you need further assistance, contact TalkLocal to connect you with the best IT professionals in your area. We will connect you with up to three professionals in just minutes, who will be available when you need them.

How to Defragment Windows 7 Computer

Saturday, February 9th, 2013

How to Defragment Windows 7 Computer - Computer Repair

Is a slow Windows 7 computer ruining your day?  One of the easiest ways to speed up your computer is to defragment your computer.  This simple task can make your computer significantly faster and can take between several minutes and a couple of hours.  For Windows 7, defragmentation is a weekly scheduled task, so for the majority of users, fragmentation shouldn’t be a large issue.  However, if you ever want to defragment your computer manually for good measure, the actual process is extremely simple and easy to execute.

How to Defragment Windows 7 Computer

– Go to the Windows Start menu

– Type in “disk defragmenter” in the search bar, and the defragmenting tool will pop up

– Select the disk drive that you want to defragment and press the “Defragment Disk” button.   The entire process is automated and will inform you once it’s finished.  It’s that easy!

What is it doing?

As you continuously use the data on the hard disk, the data starts to become disorganized.  As you pull out specific data and then return the data to the slots, the computer can’t return each byte of data perfectly.  Rather, the data becomes fragmented and scattered all over the place.  Therefore, when you need to pull out that specific piece of data again, the computer has to first find the data that’s been scattered all over the place.  This chaos can slow down your computer considerably and defragmenting restores order to that chaos, speeding up your computer significantly.

Additional Help

If ever you need help speeding up your computer, or are wary of changing anything in your system, it always helps to consult a professional. TalkLocal will connect you with up to three high quality computer technicians in your area who will know how to properly clean up the clutter on your computer.

Free Tools for Spyware Removal

Friday, February 8th, 2013

Free Tools for Spyware Removal - Computer Repair

Spyware is a type of computer software that monitors the actions of a computer user and can fall into a number of categories:

Getting rid of spyware can be very difficult, but the right spyware removal software can be very effective. There are several free tools for spyware removal available for download online.

Free Tools for Spyware Removal

Additional Help

If you think your computer has spyware, or if you would like a professional opinion on effective spyware removal techniques and programs, use TalkLocal. We will connect you with up to three professional computer technicians in your area who will be available to help you when you need it. TalkLocal is a free service, so try it today!

Touch Screen on Computer Not Working

Thursday, February 7th, 2013

Touch Screen on Computer Not Working - Computer Repair

The world of technology has expanded rapidly within the last decade, and the fruits of humankind’s hard labor have been received.  Having computers with touch screen capabilities is the next revolutionary product.  But not everything is flawless.  Even the most advanced technology has faults.  When you have such an amazing product but your touch screen stops working, it can be very frustrating.

Touch Screen on Computer Not Working

When your touch screen stops working it could be a result of a couple of things:

1) The software could be malfunctioning

2) Cameras could be misaligned

3) Computer updates could be missing certain drivers

4) The screen itself could be damaged

The Solution

If your software is malfunctioning then you should either try to reinstall it or get rid of any viruses that could be attacking it. This is not a very serious issue and is easily fixed.  There are many different types of software and you should look up what type you have and address the problem accordingly.

Another issue could be that the cameras/sensors are misaligned.  This problem could be more serious and may need professional attention.  Before taking any serious steps you can always try to do a diagnostic on your computer and see if you can fix the issue by yourself.

A lot of people complain that the touch screen stops working after they update their operating systems.  Sometimes the newer updates are missing certain drivers that were present in prior versions so your touch screen will not function properly.  You can revert the new installation or reinstall the old version in order to fix the issue.

Another way to solve your problem could be to do a scroll lock calibration.  To do this you will need to rapidly press scroll lock five times.  Then click the top left of your screen and hold down until you hear a beep.  The mouse should move automatically to the top right after this you can click and hold again.  Do this for the remaining two corners as well.  Once this could be complete your screen should be working properly.

Continuing Problems

If you still have issues even after attempting the above listed solutions you should seek professional help.  Use TalkLocal to be put in contact with a reliable local business within minutes.  Simply input your problem and availability and TalkLocal will connect you with up to three professionals who will be able to help you.

Reinstall Operating System on Toshiba Laptop Using Recovery Partition

Wednesday, February 6th, 2013

Reinstall Operating System on Toshiba Laptop Using Recovery Partition - Computer Repair

For whatever reason if you have changed the operating system of your Toshiba laptop and would like to return it back to its original factory settings, there are a few ways in which you can go about doing this.  To use a recovery partition you can take the following steps.

How to Reinstall Operating System on Toshiba Laptop Using Recovery Partition

In order to reset the computer back to its original factory settings with the operating system it came with you should use a recovery partition.

1. Restart your computer. As it starts up again you should continuously hit the F8 key until the advanced boot option screen appears.

2. You can select “Repair Your Computer”, your country, and hit Okay.

3. The System Recovery Options Screen should appear and you can click on restore application.

4. Follow the on-screen instructions. When prompted, select the full factory recovery option.  After a few minutes your recovery will be completed.

If this process does not work there is another way to reinstall the operating system on your Toshiba.

1. Turn your computer off and remove all plug ins such as the mouse, keyboard, USB’s, etc.

2. Hold down the zero button when you power your computer back up.  You can release it when the recovery warning screen appears.

3. The screen should offer a choice of operating systems so you can select whichever you want.  There will be a warning about how all data will be rewritten if you reinstall the OS. Just hit yes and continue.

4. The recovery wizard will open and you can select Recovery of Factory Software, and continue as directed.

Continuing Problems

If you still have problems with your computer and cannot seem to reinstall an operating system on your Toshiba laptop using the recovery partition you should attempt to seek professional help.  Don’t know where to look? Use TalkLocal to be put in contact with reliable local businesses within minutes.  Simply input the problem you are having along with your availability and TalkLocal will do the rest.  You don’t have to do any work and you will be connected to an extremely knowledgeable IT service company who can help you solve your problems.

IP Address Conflict With Another System on the Network: Windows XP

Tuesday, February 5th, 2013

IP Address Conflict With Another System - Computer Repair

If you’ve seen the error “There is an IP address conflict with another system on the network,”, then you’re most likely having internet connectivity problems.  Fortunately, this problem has a simple and easy fix.

Cause of the Problem:

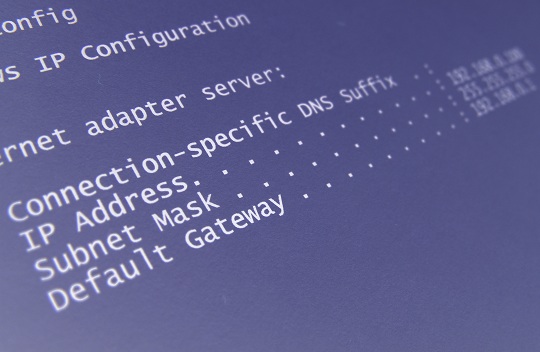
Every single device connected to your router is assigned a unique IP address so that Windows XP will know how to communicate with the device.  However, due to certain circumstances or changes to the network, it’s possible that the same IP address was assigned to multiple devices.  When you boot up your computer, Windows XP requests the full table of IP addresses (most likely stored in a central location like your router) and checks whether or not there are conflicts.  If there are conflicts, Windows XP’s protocols will detect and warn you accordingly.

Solving the Issue:

To solve the problem, the simplest solution is to ask your router to renew and reassign all the IP addresses on the network.  In order to do this, just follow this simple 5-step procedure:

Additional Help

If you don’t feel comfortable changing IP addresses or if you don’t understand exactly how to renew the DNS cache, you can always use TalkLocal to connect with highly quality local IT professionals immediately. We will connect you with up to three professionals in your area who will be able to help you when you need it.

Search Engine Virus Removal

Monday, February 4th, 2013

Search Engine Virus Removal - Computer Repair

Are you unable to use your favorite search engine like Google, Bing, or Yahoo! because you keep getting uncontrollably redirected to some other site?  Or maybe you have a strange search toolbar at the top of your browser that you are unable to get rid of?  If you are experiencing either of these problems it is likely that your computer has been infected with what is colloquially called a “search engine virus.”  These viruses are generally a type of adware or malware that infect your computer in order to bombard you with pop up ads or trick you into paying for fake antivirus software.  Luckily they are usually relatively simple to remove with just a few steps.

Search Engine Virus Removal

1.  The first thing you need to do is to install an anti-malware program on your computer if you do not have one already.  There are many great free options for malware scanning and protection out there; two of the most popular programs are Spybot Search and Destroy and Ad-Aware.

2.  Once you have the software installed, open the program and run a complete scan of all of the hard drives on your computer.  These scans typically last somewhere from a few minutes to an hour.  When it is done, the program should give you options for removing all of the harmful programs and files that it detected, follow the instructions to remove all of the threats.

3.  Restart your computer and check to see if your problem has been resolved.  If it has not, it is possible that the malware program has made some changes to files on your computer that were not detected by the anti-malware scan.  These hidden changes can be very tricky and hard to discover.  Check out this blog for details on how to check for and fix some of the most common occurrences.  It provides detailed instructions and step-by-step solutions with pictures to show you how to restore any infected files.

4.  Once the problem has been solved, be sure to leave your anti-malware program of choice on in its real time protection mode if it has one.  This will help to prevent your computer from being infected with more malware/adware in the future.

Additional Help

If you were unable to fix your problem following these steps, it may be time to get some professional help.  Use TalkLocal to get in contact with a reliable local computer technician within minutes.  Just enter a description of your problem, availability and location and TalkLocal will connect you directly to someone who can help.