Archive for the ‘Computer Repair’ Category


Connecting Laptop To TV Wirelessly With Windows 7

Saturday, June 1st, 2013

Connecting Laptop To TV Wirelessly With Windows 7 - Computer Repair

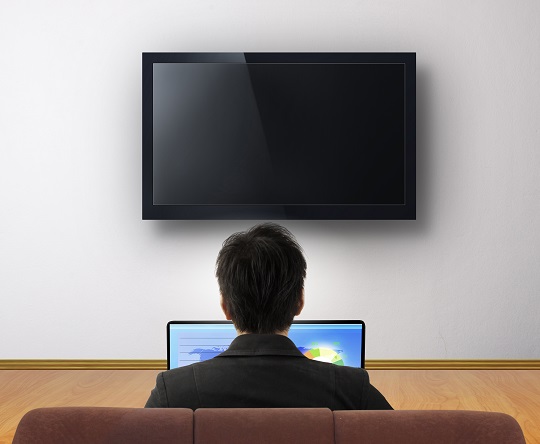
If you enjoy streaming movies, TV shows, or even sports on your laptop, you know that the smaller screen is one of the trade-offs for online streaming. But this is quickly changing. Now you can have a big screen laptop without all the wires and cables. Laptops with WiDi, or Intel Wireless Display, can connect to a receiver connected to your TV.

Connecting Laptop To TV Wirelessly With Windows 7

With Intel WiDi:

1)     Plug the receiver of your wireless detection device into an outlet. Connect the HDMI cable attached to the receiver into your TV. Make sure the TV input is set to HDMI.

2)     If your laptop has built-in WiDi, press the WiDi button.

3)     If you do not have a WiDi button, open Start and search for “Intel Wireless Display.” Select your receiver and connect.

Connecting Laptop To TV Wirelessly With Standalone Wireless Adapter

If you do not have built in WiDi, you can purchase standalone adapters, which will allow you to wirelessly transmit the display signal to the TV:

1)     Plug the receiver of your wireless adapter into an outlet, and connect the HDMI cable to your TV. Set the input on your TV to HDMI.

2)     Plug the transmitter device into your laptop.

3)     Click Start and search “Connect to an External Display.” Select your wireless adapter from the drop down menu.

Need Professional Help?

If you are having issues with connecting your laptop to your TV wirelessly with Windows 7, use TalkLocal. We will quickly connect you with high-quality, local IT technicians who will be ready to help you when you need it most. And best of all — our service is free!

Best Laptop Brands 2012

Friday, May 31st, 2013

Best Laptop Brands Of 2012 - Computer Repair

In 2012, technology tied in with laptop computers continued to evolve. Laptops got smaller, thinner, and brighter, all while computing power increased.

Some manufacturers managed to stay up with the times, producing some of the most useful laptops on the markets. Others fell behind. Here, we will investigate the best laptop brands 2012.

Apple

This might not be a huge surprise to users, as Apple has slowly transformed into the standard for laptops and other high-tech gadgets. Touting products like the MacBook Air and MacBook Pro, everything from the design of their laptops to the technical support that services them have been rated highly by users and the media.

The MacBook Air was particularly a huge seller with it’s ultra-thin design that featured a screen which displayed eye-popping graphics. This helped carry Apple to be at the top of the best laptop brands of 2012.

Hewlett Packard

While we’re on the topic of trusted brands in laptops, let’s not forget HP, which had another stellar year as one of the best laptop brands of 2012. Like Apple, the company has been around for a long time, and users are starting to realize they can trust HP products. The company did not dash the hopes of their users as they scored well by critics.

Many users might argue that Apple is the superior laptop for multimedia use, but this was not the case in 2012. Riding high with the help of its Beats Audio technology, HP became the top laptop for multimedia. The company’s HP Pavilion Series was also a hot seller in 2012.

Lenovo

For the last two years now, Lenovo has inched its way to the top of the laptop industry, just under Apple. This is not a surprise to Lenovo users, who have noticed that the company offers plenty of innovation, but keeps their products at a very affordable price. For every Apple product, there is a Lenovo product to match, including its ThinkPad X1 Carbon to counteract Apple’s MacBook Air.

Choosing The Right Laptop

If you are trying to decide which type of laptop you want, or if you need it repaired, make TalkLocal your first stop. We are able to connect you with service professionals in your area that can help with such issues. Try out our free, easy service.

Cost Of Getting A Hard Drive Cleaned

Thursday, May 30th, 2013

Cost Of Getting A Hard Drive Cleaned - Computer Repair

When it comes time to get rid of a computer, you need to take the right steps to protect any sensitive information that might still be on it. To do so, you will need to get your hard drive cleaned. Manually erasing files one-by-one or reformatting your hard drive is not going to do the trick. You need to have it cleaned.

The cost of getting a hard drive cleaned is not a set figure. The cost simply depends on which avenue you take to clean your hard drive. You can potentially pay hundreds of dollars or even do it yourself for free.

Here is a breakdown on some of the cost of getting a hard drive cleaned. If there is information stored on the hard drive you will need, make sure to back it up first.

Physically Destroying The Hard Drive

If you are disposing of the computer and not trying to re-sell it, physically destroying the hard drive is a great way to ensure sensitive information does not leak out. There are a few ways of destroying hard drives.

Hammer

This might be your favorite because it comes with a healthy dose of destruction. Taking a hammer — or hammer and nail — to a hard drive will completely destroy it and the information left on it will not longer be retrievable. This is actually a very common practice among computer owners.

Degausser

This ruins the magnetic field of the hard drive and therefore destroys the information. If you use a Degausser wand, the hard drive will not be usable again. The cost of getting a hard drive cleaned with a Degausser includes the cost of the wand, which is about $500. Professionals can also do this for you, which will cut down on the price.

Data Destruction Software

If you want the hard drive to be usable after cleaning, you will want to use data destruction software, to make sure that all of your information is removed from your computer. This type of software ranges in price. Some of them are free, while others are $40 to $60. It is important to read reviews on each software before using them. After all, your privacy is on the line.

Trust The Professionals

Cleaning a hard drive yourself can result in errors. Those who are trained in such a process are more reliable. If you want to contact a local IT professional to take care of this, use TalkLocal. We let you skip the long search process and find the right professional for you right away.

Scanner Lamp Error

Wednesday, May 29th, 2013

Scanner Lamp Error - Computer Repair

A printer-scanner can be very frustrating if it malfunctions, especially if multiple people use it. A common error that appears on scanners and copiers is “Scanner Lamp Error.” If you want to know what to do when your copier has a scanner lamp error, just read below.

What Is A Scanner Lamp Error?

When you get a scanner lamp error you will see the display screen light up. The scanner light will also light up, but then nothing else will happen. You will then see the message on either the display or your computer saying “Scanner Lamp Error”.

Why Does the Scanner Lamp Error Occur?

1)     The bulb in your scanner could have blown out.

2)     Your mirror frame could be dirty which confuses the scanner.

3)     The transportation lock could be affecting scanning ability.

4)     The entire jack assembly could be malfunctioning.

5)     You may have an improperly assembled product.

How To Fix A Scanner Lamp Error

To fix this error, you first need to know the cause. If the bulb is blown out you will have to buy a replacement and install it.  If the mirror frame is dirty you should try to get inside and clean all 5 mirrors in it so that the scanner is not fooled by a few specs of dirt.  If the transportation lock is what is causing the malfunction you should attempt to move it a couple of times to free it. Also leave the lock in the open position.  In the case that the entire jack assembly is malfunctioning or you have an improperly assembled product you should probably try to get the entire product replaced through the manufacturer.

Need To Get Your Scanner Repaired?

This seems to be a common problem with HP 3300 series printers and scanners, which includes the 3300, 3330, and 3380 models.  If you cannot seem to find the problem, do not want to have to trash the entire scanner, or if the product is no longer under warranty, you should probably try to get in contact with a computer repair technician. Use TalkLocal to be connected with reliable, local companies within a matter of minutes, for free.

Why Use A Virtual Machine?

Tuesday, May 28th, 2013

Why Use A Virtual Machine? - Compter Repair

A virtual machine is a computer that is run virtually, from almost any location. Virtual machines are convenient because they allow you to access your files, email, and anything else on your computer from another location. They are great for people who travel or need to bring their office work home with them. Many people wonder, why use a virtual machine? There are many benefits to virtual machines; here are a few of them.

Try New Things

If you want to try something new, but do not want to load it on your computer, you can build a virtual machine and use the new program on it. Virtual machines can be built to use completely different operating systems than the actual computer.

Create A Home Office

If you need to bring your files home from work or school, you can use a virtual machine to create a complete office that mimics the one you use. You can add specific software and even access and transfer files between machines.

Create A Kid-Friendly Computer

If your children like to use your computer but you are afraid that they will harm it or accidentally download a virus, let them work on a virtual machine. The virtual machine will let your children use the computer anyway they want, but will not harm your original files or anything outside of the virtual machine you have created.

A virtual machine may sound like something complicated, but it doesn’t have to be. You can find many software programs that will help you create your virtual machine. You can also find tutorials online. Why use a virtual machine? Why not? Virtual machines can give you peace of mind while working on your computer or letting other people use it. They are a great source of protection for you and your PC.

Need Help With A Virtual Machine?

If you need help setting up a virtual machine, or run into issues while using one, hop on TalkLocal to put the word out to local computer repair professionals who are eager to work with you. We make the search process easy, and our service is completely free!

Windows 8 Common Issues

Sunday, May 26th, 2013

Windows 8 Common Issues - Computer Repair

No operating system is perfect. Users are always going to have their share of gripes with whatever system they are working on. This includes Windows 8.

If you use Windows 8 and have run into certain problems, check to see if they fall on our list of Windows 8 common issues.

Windows 8 Not Recognizing The Printer

One of the Windows 8 common issues shows up when users try to print. Occasionally, their print job will be interrupted, delayed or not registered at all. In this case, it might be worth reinstalling your printer all together.

Each printer comes with a driver CD.

1. Uninstall the printer if you had previously installed it.

2. Go to the start menu and click “Devices and Printers”.

3. Choose to add a device and pick the driver. Once you install the printer, restart your computer to see if that did the trick.

Automatic Restarts

Few things are more frustrating then when your computer randomly restarts by itself — especially if you were in the middle of something. This is a very widely experienced problem on Windows 8 but can luckily be tempered.

1. If you go to the start menu and type “power,” you can access the power options.

2. Uncheck the box that says “Turn on fast startup,” even though it is recommended. This should help curb the issue.

Windows 8 Is Freezing

Not too uncommon from the issues other operating systems face, Windows 8 has a propensity to freeze. In this situation, you should check to see if a new program or driver was either install or updated. If it was, try removing the program to see if it is the source of the constant freezing. You can also always run System Maintenance troubleshooting to identify the issue.

Are Your Issues More Serious?

These are just a few of the Windows 8 common issues. If you run into something more serious and need the help of a computer repair professional, use TalkLocal to find one. We can connect you with one in your local area that is able to help out. You won’t have to waste your time talking to people who will either try to charge you too much or don’t even have the knowledge to fix your problem.

Sound Level Control Is Stuck On the Desktop

Saturday, May 25th, 2013

Sound Level Control Is Stuck On the Desktop - Computer Repair

How annoying is it when you are using your computer and something gets stuck on your desktop?  What if it was the sound level control? Now, not only are you listening to something at the wrong level, but you cant get the box to go away either!  Well there is a way fix it when the sound level control is stuck on the desktop.

Why Things Get Stuck On the Desktop

When running Windows XP, a stuck sound level control seems to be a very common problem.  The issue seems to be that there is no way to remove them.  This problem may be a result of a slow computer system.  It could also be because the sound check takes a while to load from the systray, due to how many processes are working in the computer.  Instead of clicking around over and over, you should wait and give your computer time to react.

How To Fix A Stuck Sound Level Control

If you give your computer a reasonable amount of time to catch up and nothing continues to happen, you should move on to take other steps.   Try to right-click on the volume in the icon tray to see if you have a choice to close or exit.  You could also try to open the dialogue box and see if the problem could be fixed from there. Another recommendation is to hit ALT+F4 to close the current window.

Computer Troubles Slowing You Down?

If you cannot seem to get this issue resolved it may be time to get help.  If you are looking to get in contact with a professional computer repair technician, go to TalkLocal.  Just tell us your problem, your availability, and your location, and we will do the rest.  Within minutes you will be connected to a reliable, local technician who can help you out.

How To Replace the Power Supply On A PC Or Mac

Friday, May 24th, 2013

How To Replace the Power Supply On A PC Or Mac - Computer Repair

There is nothing worse than pressing your computer’s “On” button and getting no response. Before you go into complete panic mode over files that may have been lost, learn how to replace the power supply on a PC or Mac.

How To Replace the Power Supply On A PC Or Mac

1. Try plugging your computer into other electrical outlets to make sure you are using a working outlet. If you check multiple outlets without any success then you probably need to replace your computer’s power supply.

2. Turn off your computer. Make sure your computer is turned completely off and is unplugged before you begin taking it apart.

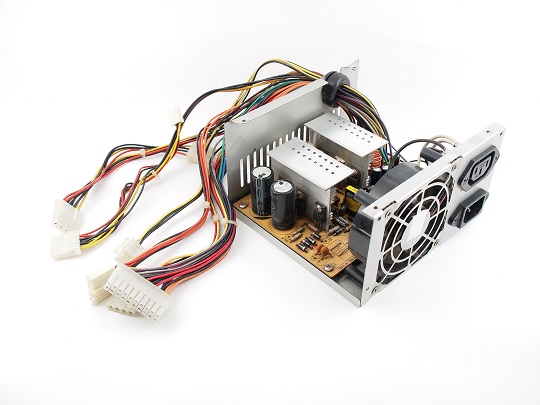
3. Remove the case of the computer by removing the screws with a simple Phillips screwdriver. Locate the power supply inside the case and identify the necessary wattage. The power supply is the large metal box mounted in your computer where you AC power cord plugs into. The wattage for your new power source should either equal or exceed the original power source wattage.

4. Purchase a new power supply. Bring your computer’s power supply information to a local computer or electronics store. If you have a Mac it is probably easiest to visit your local Apple store. Prices vary depending on your computer’s age and brand.

5. Remove your old power supply and install your new one. For easier access, turn your computer onto its side. Remove the power supply by unscrewing the screws from the mounting holes. Set the power supply to the side without detaching any cables or connectors.

6. Next, slide your new power supply into the case so that the mounting holes line up. Secure your new power supply in place by using the removed screws. One by one, carefully remove each connector from the old power supply and attach it to the same location on the new power supply. Once everything is secured you can screw the cover back onto the case.

7. Test out your new power supply. When everything is back in place you can try plugging your AC power cord into a nearby outlet. Turn on your computer and you should be ready to go! Remember to back up any valuable files so that you don’t lose them if another emergency pops up.

Still Need Help?

If you still need help with your computer’s power supply, or you want a professional to install a new one for you, just use TalkLocal. We’ll connect you with up to three, high-quality computer repair technicians in your area. Seva Call will find the help you need in just minutes, for free!

How To Install RAM On An iMac

Thursday, May 23rd, 2013

How To Install RAM On An iMac - Computer Repair

The quickest and most cost-effective way to increase the speed on your iMac is by replacing the RAM. Follow these easy steps to learn  how to install RAM on an iMac.

1)    Find Out Which Type Of iMac You Have

Check the Apple website to find out what model you own, what kind of RAM it takes, and how much memory it can hold. Typically, the iMac comes with 4GB of RAM in two-2GB memory modules, which takes up two of four memory slots on the iMac. Owners will usually increase memory by keeping the original 4GB and adding two more 4GB memory modules for a total of 12GB of memory. You can buy RAM on websites like Macsales.com, Newegg.com, and Amazon.com.

2)    Access the Memory Bay

After unplugging your iMac, lay the monitor on a soft surface with the screen facing down. With a Phillips screwdriver, unscrew the three screws that hold the plate covering the compartment containing the iMac’s RAM. This is located at the bottom of the iMac monitor.

3)    Remove Any Unwanted Memory Modules and Add New RAM

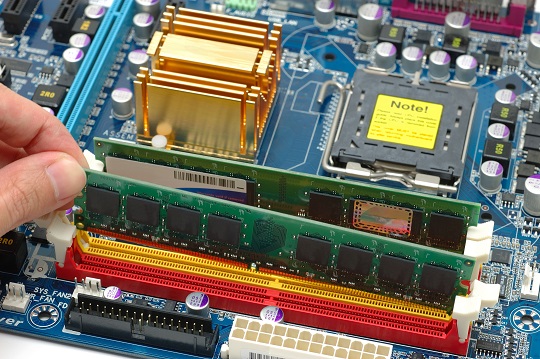
If you have any unwanted memory, you can remove the module by tugging firmly on the plastic ribbon. Once you have room for your new memory, you can slide the modules into the open slots. Simply slide the module into the compartment until you hear a click. Make sure you install the RAM with the labels facing up.

4)    Reattach the memory access plate

Using the three Phillips screws, reattach the memory access plate. Once you plug in your computer and turn on the power, you should access the “About this Mac” section under the Apple logo in the top, left corner of your screen. It should show that your new memory has been installed. Now you can enjoy your faster computer!

Additional Help

If you would prefer to have a professional computer repair technician install your new RAM for you, Seva Call can help you find one. Just tell us what you need, where you are, and when you’re available, and we’ll connect you with up to three, high-quality technicians in your area who can help you out. It’s fast, easy, and free!

Laptop Screen Won’t Turn On

Tuesday, May 21st, 2013

Laptop Screen Won't Turn On - Computer Repair

Few things are scarier than your laptop screen going (and staying) dark when you need to get to your finals paper, thesis, or an important e-mail. Whether you are using a PC or a Mac, Windows, Linux, or something else entirely, if your laptop screen won’t turn on, you need a fast and effective solution.

Determine the Cause

You will want to determine if the problem is with the screen, or the whole laptop. Is the power light on? Can you hear the hard drive or the fan? If so, you can trust that the laptop is still functioning. If not, the problem may be as simple as the power adapter. Biting pets, swivel chairs, and power surges can take out even the most reliable adapters. Trying another power adapter may just do the trick. Keep in mind that if the laptop isn’t turning on at all, that’s a more serious problem that could be related to the motherboard or the hard drive itself. Sorry, but you’ll need to call tech support or take it in for that.

Recycle the Power Source

If the laptop screen won’t turn on despite receiving power, you may need to do what’s called recycling the power source. This involves unplugging the laptop and removing the battery completely. You may need a screwdriver for this. When the battery is out, reattach the power adapter and turn the laptop on, holding the power button down for a good 10 to 12 seconds.

Hard Restart

Mac users may have success performing what’s called a hard restartThis involves pressing and holding the power button until the computer shuts down on its own. Wait 20 seconds, then press the power button once to restart. If this does not solve the issue, your next step is calling the good people at Applecare.

If all seems to be in order but your laptop screen won’t turn on, you may simply want to attach an external monitor for the time being. This will reduce the portability of your laptop significantly, but it will also give you some much-needed functionality, and allow you access to your files.

Get help

This could be considered a computer emergency, which requires the swift help from a computer repair professional. TalkLocal can track down a local professional in a matter of minutes and get you on the phone with them. Thousands of people have used our free service. Try for yourself.