Archive for the ‘services’ Category


Garage Door will not Open

Wednesday, November 21st, 2012

Garage Door will not Open Garage Door Repair

There are many problems that could cause your garage door not to open. Read below for some of the most common issues and solutions if your garage door will not open.

First, check that you operator is plugged in. If it is, check that there is power supplied to the outlet by plugging something else into the outlet.

Next, check that the photo eye detectors are lined up. These will be on both sides of the garage door; they keep garage doors from closing when an object is in the way. You can loosen or tighten the wing nuts on the sensors until they align. The detectors may be disrupted if they are dirty or if there is something in front of them. You can try cleaning the eyes of the detectors with a tissue. It is also possible that the eyes got wet and are now damaged.

Next, check the batteries on your remote. Remotes will usually last longer than batteries. If changing the batteries doesn’t work, you can also try reprogramming your remote.

Try the emergency release handle in the middle of your garage. If you can manually open the garage door, then that means the problem is an electrical issue with either the motor or remote.

If you have checked all of these things and none of them seem to be the problem, you may need to contact a professional to figure out the problem with your garage door and help you to fix it. If you notice that your torsion spring is broken or the cables have snapped, you should also contact a professional and not try to fix it yourself, as fixing these things can be dangerous if you do not know what you are doing. With the help of TalkLocal, you can be on the phone with up to three high quality professionals within minutes. All three businesses will be in your area and they will be available when you are.

5 Fun Thanksgiving Activities for Kids

Wednesday, November 21st, 2012

5 Fun Thanksgiving Activities for Kids Party Planners

Thanksgiving is such a fun time of year for adults and children alike, and if you plan on throwing a party for thanksgiving it is important to provide children with entertaining activities to take part in. Here are a few examples of festive and fun Thanksgiving activities for kids.

The Turkey Trot is a simple activity for young children. To do the turkey trot, find an open area to play in like your yard. Instruct the children to form their arms into wings and imitate turkeys. This is a silly activity that will have everyone giggling and the best part is it involves imagination. The kids can be fancy turkeys, scary turkeys, baby turkeys, or whatever they can imagine!

Free the Fowl is a festive version of Kick the Can. One player is chosen as “it” and a can or football is placed in an open space. “It” will count to a predetermined number while the other children hide and when “it” is finished counting, he or she will try to tag the others. If a player is tagged, he or she must freeze. Any unfrozen player can kick the can. If it’s kicked, the frozen players are freed. If all the players are frozen, “it” wins.

Wall Football is a variation of Pin the Tail on the Donkey. To prepare for this game, design a large field goal on a wall using paper and tape. Cut out football shapes using brown paper with a tape roll on the back and have kids write their name on their football. Spin blindfolded kids around three times and have them stick their football on the wall. Getting the ball inside the field goal boundary is worth three points. After several rounds, the child with the most points wins.

Teaspoon Pass will keep little hands busy. Place five shelled peanuts on a plate. The object of the game is for children to pass the nuts along using their spoons without dropping any nuts.

Hand Turkey – a time-tested favorite activity is tracing your hand and decorating it like a turkey! Children can use glue, yarn, glitter, markers, and crayons. Hanging the festive art on your walls will give the children a sense of pride.

If you’re occupied with cooking, no worries! Simply call TalkLocal to be connected with professionals. They’ll help you find a party planner who can give you a hand and make the day seamless, fun, and stress-free. Happy Thanksgiving!

Garbage Disposal Not Working But Humming

Wednesday, November 21st, 2012

Garbage Disposal Not Working But Humming Plumbers

With Thanksgiving coming up in just a few days you don’t want a broken garbage disposal. If the garbage disposal isn’t working and only makes a humming sound when you turn it on, the flywheel is most likely stuck or there’s an obstruction between it and the impeller blades. The humming noise is a result of the motor unsuccessfully attempting to spin the blades. Fortunately, the solution to solve the problem is simply to move the blades in the opposite direction to dislodge the obstruction. Read more if your garbage disposal is not working but humming instead.

Important: Turn off power to the garbage disposal for your safety and never put your hand into the garbage disposal chamber.  If you are unsure of how precisely to turn off the power, it would be best to call a plumber to take care of this problem; your safety should be your first priority.

1. Take the Allen wrench that came with your garbage disposal and insert it into the flywheel-turning hole in the bottom of the wheel.  If you cannot find the allen wrench, pick one up from the hardware store that sold your garbage disposal.

2. Turn clockwise to loosen the impeller blades from the obstruction. It should be able to turn the flywheel freely when the blades are unobstructed.

An alternative method of fixing your garbage disposal is to use a broom handle or another wooden object to free the impeller blades.  All you have to do is place the broom against the impeller blades and then apply leverage to free the flywheel. The flywheel once again should turn completely freely once the obstruction is cleared out.

However, if at any time you don’t feel safe or are unsure of what you are doing, you can always use TalkLocal to contact local high quality plumber to look at your garbage disposal in just minutes!  You’ll be talk to a real live plumber almost immediately for free!

Should I Buy a LCD TV or Plasma TV?

Wednesday, November 21st, 2012

Should I Buy a LCD TV or Plasma TV? - Uncategorized - Seva Call Blog

Should you buy an LCD TV or a plasma TV? Here are some facts to consider and help you decide!

Image Quality

LCD can also boast increased image brightness and reduced susceptibility to glare, as well as lighter weight and thinner screens. If the TV is going to have sunlight or other bright lights reflecting off it during use, LCD may be the best choice. If weight and size are top concerns because the TV is going to be mounted on the wall, then LCD is a good choice for that too.

Plasma generally has a better contrast ratio, better color accuracy, greater color saturation, deeper shades of black, the ability to track motion without lag, and a wider side-to-side viewing angle. If the TV is mostly going to be used in a dark room and picture quality is the main concern, plasma is a great choice. Plasma screens look great, and few things inspire envy like a 60 inch plasma screen.

Consider your purse

Those wanting a budget TV with a smaller screen should look to LCD. Plasma screens also have higher electricity usage, so businesses and people watching their electric bills may prefer LCD for that reason.

Additionally, Plasma screens range from 42 inches to 60 inches, measured diagonally. The difference in price (relative to the size of the screen) has considerably narrowed, however, so there’s a good argument to be made for deciding primarily on features. While there are LCD TVs available that are cheaper than any same-sized plasma TV, that is sometimes achieved by sacrificing quality with the LCD picture.

Other Factors

Another (random, but valid) consideration, LCD is better for those more than 6,500 feet above sea level. At high altitudes, plasma screens have trouble adjusting and may make buzzing noises.

Technology is always changing, however, and the prices and capabilities of plasma and LCD will change along with it. Engineers are working to make LCD pictures sharper and more colorful, while others are working to make plasma technology lighter and thinner.

If you jsut want to keep your old TV, and not bother about buyig a new one, give us a call at TalkLocal to find professionals that can fix your favorite old TV for you!

Card Games for Thanksgiving

Wednesday, November 21st, 2012

Card Games for Thanksgiving - Uncategorized - Seva Call Blog

For many people, Thanksgiving provides a time and venue for families to spend time with one another. If you have a large family, this can mean a lot of children running around or a lot of guests who want entertainment as well as food. Keeping some inexpensive playing cards on hand can give your guests something fun to do as they socialize with friends and family. Read on to learn more about some classic card games for Thanksgiving that you can use to make your holiday lively and entertaining for all your guests.

Go Fish

The game “Go Fish” has seemingly been around forever, and many kids and adults of all ages enjoy it. The game works for 2-6 players. Each player begins the game with 5 cards. The rest of the cards form the draw pile. Players take turns, and on each turn the player asks an opponent for a specific type of card, saying something like, “Bob, give me all your fives,” or “Lucy, give me all your diamonds.” If the player being asked has any of the types of cards requested, he or she must give them to the player who requests them. If he or she does not, the player says, “Go Fish.” The person who asked for the card now must take a card from the draw pile. The goal of play is to collect four of a kind—all the kings, all the twos, etc.–and discard them from one’s hand. The first player to run out of cards ends the game, and the person with the most sets of four wins.

Crazy Eights

This game works for 2-6 players as well, and many people like to add variations and twists on the basic game to make it more complicated or more fun. Each player begins with 5 cards, and the cards that are left form the draw pile. The dealer flips over the top card of the draw pile to create a discard pile. Play rotates in a clockwise direction with each player attempting to run out of cards by discarding them. To legally discard a card, it must match either the rank or suit of the card already on top of the discard pile. If, on your turn, you don’t have any cards to discard legally, you must take a card from the draw pile until you receive one you can discard. Eights are considered wild, and players can place an eight on the discard pile at any time. The person who plays the eight can simultaneously call for a change in suit. Only another eight or a card matching the suit change can be discarded on top of an eight.

If you’re looking for more party planning ideas, search TalkLocal to find a reputable party or event planner.

How Much does it Cost to Remove Snow from a Driveway?

Wednesday, November 21st, 2012

How Much does it Cost to Remove Snow from a Driveway? Snow Removal

Winter time is great.  Everyone looks forward to the holidays, and snow makes them even more magical.  But at the end of the day, we’re stuck wondering who’s going to plow the snow so we can get our cars out of the driveway.

Getting snow out of the driveway is one of those odd jobs for which we are never really sure whether we’re paying too much or too little. So, how much does it cost to remove snow from a driveway?

Snow removal methods

– For a 1-4 car driveway, a snow plow will cost anywhere from $20 to $60 per push, depending on the area you live in and the equipment being used. If the snow is no more than 12” deep, one visit should do it, but if more than one visit is required, the second visit could be up to double the cost of the first.

– To remove snow from the driveway using a shovel, snow blower or a lawn mower, the effort required is more and the price is also going to be higher. This can range from $65 to $75 per visit. This may vary depending on the amount of snow, length of driveway, shape of driveway, etc.

– In the case of walkways, snow plows cannot be used. Hiring someone to shovel it can cost anything from $5 to $20, depending on who is doing the work and how much snow there is to shovel.

Need Snow Removal Help?

If you’re experiencing trouble clearing your driveway or walkway on your own, or you would like to be put in touch with a snow removal company, use TalkLocal for free today. Simply enter a brief description of your service needs along with your location and availability, and TalkLocal will connect you to up to three professionals in your area ready to help.

5 Amazing Vegetarian Stuffing Recipes

Wednesday, November 21st, 2012

5 Amazing Vegetarian Stuffing Recipes - Party Planners - Seva Call Blog

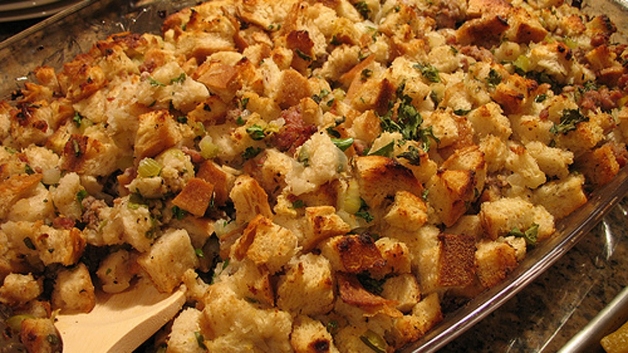
With Thanksgiving tomorrow, cooks everywhere are turning to their trusted cookbooks and perusing online sites for stuffing or dressing recipes, whichever you prefer. There is no shortage of recipes and we all have our favorites. Most stuffing recipes have some form of meat in them, like bacon or sausage or a meat broth. However, the thoughtful cook will be mindful of vegetarian friends by preparing a vegetarian stuffing recipe. Following are five amazing vegetarian stuffing recipes.

Chestnut Stuffing
Serves 16

Ingredients:

  • 2 cups chestnuts
  • 2 teaspoons poultry seasoning
  • 1-1/2 cups margarine
  • 2 loaves day-old bread cubed
  • 1/2 cup chopped onion
  • 3 eggs
  • 1 teaspoon salt
  • 1/4 cup milk
  • 1/4 teaspoon pepper

Directions:

1. Preheat oven to 350 degrees F.
2. Slit surface of chestnuts with sharp knife. Cover with water in medium saucepan and boil 25 minutes or until tender. Drain, peel, and chop.
3. Melt margarine. Stir in chestnuts, onion, salt, pepper, and poultry seasoning. Sauté until tender, about 3 minutes. Transfer to baking dish. Add bread cubes and toss.
4. Beat eggs and milk, pour over bread mixture and toss again.
5. Bake 30 to 45 minutes until crisp and golden brown.

Herb Stuffing
Serves 12

Ingredients:

  • 1-1/2 loaves cubed bread
  • 1 tablespoon olive oil
  • 2 medium carrots, finely chopped
  • 2 medium celery stalks, finely chopped
  • 1 medium onion, finely chopped
  • 1 cup fresh parsley leaves, coarsely chopped
  • 3/4 teaspoon poultry seasoning
  • salt and pepper to taste
  • 2-1/2 cups vegetable broth

Directions:
1. Preheat oven to 400 degrees.
2. Grease shallow baking dish.
3. Arrange bread on two, large ungreased cookie sheets; toast 15 minutes or until golden. Turn once during baking.
4. Sauté vegetables in oil until tender, stirring occasionally.
5. Stir in seasoning.
6. Reset temperature to 325 degrees.
7. Place bread in large bowl. Add broth and vegetable mixture. Toss until moistened.
8. Spoon into baking dish, cover with foil and bake 30 minutes.
9. Remove foil and bake 15 minutes or until golden.

Cranberry Stuffing
Serves 12

Ingredients: 

  • 14 slices bread, cubed and lightly toasted
  • 1-1/2 cups dried cranberries
  • 2-1/2 cups apple juice
  • 1 red onion, diced
  • 2 celery stalks, diced
  • 3 cloves minced garlic
  • 2 tablespoons vegan margarine
  • 1 teaspoon thyme
  • 1/2 teaspoon sage
  • 1 tablespoon parsley
  • salt and pepper to taste
  • 1/4 teaspoon ginger
  • 1/4 teaspoon cinnamon

Directions:
1. Preheat oven to 350 degrees.
2. In large bowl toss bread, sautéed vegetables, cranberries, juice, and seasonings.
3. Spoon into greased baking dish.
4. Bake 20 to 25 minutes.

Cornbread, Leek, Pecan Stuffing
Serves 12

Ingredients:

  • 2 cups pecans
  • 16 cups coarsely broken cornbread
  • 3 tablespoons vegan margarine
  • 4 celery stalks, chopped
  • 4 leeks chopped (white and pale-green parts)
  • 1-1/2 tablespoons fresh thyme, chopped
  • coarse salt and freshly ground pepper
  • 2-1/2 cups vegetable broth
  • 4 eggs, lightly beaten

Directions:

1. Preheat oven to 350 degrees.
2. Toast pecans for 7 minutes. Chop and combine with cornbread in large bowl.
3. Add sautéed vegetables, broth, herbs, and beaten eggs with cornbread mixture. Toss.
4. Transfer to baking dish. Bake 30 minutes until golden.

Mushroom Stuffing
Serves 8

Ingredients:

  • 4 tablespoons vegan margarine
  • 2 large onions, chopped
  • 6 stalks celery cut in thin slices
  • salt and pepper
  • 1-1/2 lbs. assorted mushrooms, halved
  • 1 can vegetable broth
  • 1 cup fresh parsley, chopped
  • 3 eggs, beaten

Directions:

1. Preheat oven to 400 degrees.
2. Sauté vegetables, add mushrooms, cook covered 7 minutes. Cook uncovered 15 minutes. Add to large bowl.
3. Add bread, broth, seasonings, and beaten eggs.
4. Place in greased dish.
5. Bake 25 minutes, covered. Bake 20 more minutes uncovered.

So here’s hoping you have a great, inclusive, and happy Thanksgiving! If you need to contact professional party planners, or have questions, contact TalkLocal. It is quick and easy.

Engine Oil Capacity Chart for All Vehicles

Wednesday, November 21st, 2012

Engine Oil Capacity Chart for All Vehicles Auto Repair

Knowing the engine oil capacity of your vehicle is important for maintenance. There are many types of engine oils out there. You can find the top rated engine oil on Amazon and have it shipped overnight starting at $17.47. You can easily verify the oil capacity of your engine through a few resources. First, the owner’s manual contains all the specifications of the vehicle. In the index, look for “oil” and it should direct you to the page that contains the specs about the car’s engine oil capacity. Second, the manufacturer’s website has all the information you need about your vehicle’s model and everything that comes with it. Navigate the manufacturer site to discover your engine’s capacity. Third, Autozone specializes in cars, and you will be able to find the engine oil capacity chart for all vehicles. Follow these steps to learn how to find your engine’s oil capacity:

1)   Go to Autozone’s website (linked above).

2)   Click “Repair Help.”

3)   Click “Specifications” on the left hand panel.

4)   Choose the year, make, model and engine of your vehicle.

5)   Click “Specifications” from the list that appears underneath your vehicle.

6)   Click “Engine Oil Type/Weight/Capacity.”

7)   The information about your engine oil capacity should be displayed.

If you want to figure out your oil level without the help of a computer, you can use the old-fashioned method that just requires a dipstick. First, make sure your engine has been turned off for at least five minutes. Then, remove the dipstick. Your manual can help you locate it. Wipe the dipstick clean with a rag and reinsert it all the way. Pull it out once more and see where the oil level reaches on dipstick. Based on how much of the dipstick is covered, you can gauge how much oil is in your vehicle and how much of the full capacity it is occupying. Once you know the type of engine oil you need, you can find that type on Amazon and have it shipped overnight.

If you are having difficulties with your vehicle, you should consider taking it to a mechanic. TalkLocal can help connect you with the best local mechanic at your convenience.

The owner of this website is a participant in the Amazon Services LLC Associates Program, an affiliate advertising program designed to provide a means for sites to earn advertising fees by advertising and linking to Amazon properties including, but not limited to, amazon.com, endless.com, myhabit.com, smallparts.com, or amazonwireless.com.

What Color Paint goes with Cherry Wood Cabinets?

Wednesday, November 21st, 2012

What Color Paint goes with Cherry Wood Cabinets? Painters

Thinking about painting your kitchen, but want to make sure the color is consistent with the theme you already have? In this situation, is important to correctly accent the color of your wood cabinets. If you’re wondering what color paint goes with cherry wood cabinets, consider the following tips.

Dark Colors

The natural color of cherry wood makes it stand out against dark colors. Dark reds or browns will allow the wood to blend in perfectly. Using dark colors is good for rooms such as a library, dining room or study for a cozy feel.

Earth Colors

Earth colors work as well because they compliment the cherry wood natural color. Colors such as olive green, celery green or sand give you a nice subtle and neutral color. Earth tones give cherry wood cabinets a modern twist.

Warm Colors

Warm colors will complement the cherry wood’s warmth. Go with oranges, reds or yellows to give the room a cozier feel. Warms colors are also good in the kitchen because of their airy and vibrant feel.

Light Colors

Use the light colors to make the small room feel bigger, more inviting and appealing. Light blue mixes with the reddish wood and breaks the color up. This makes the cabinet pops up.

Tips on Picking a Color

1.      Use paint chips to experiment with different colors in a room.

2.      Avoid certain reds. They can clash with cherry cabinet’s natural red.

3.      Look at the style of the room and find out what its need. Does the room need to be more comforting, airy or calm?

If you’d like to hire a professional painter to help you choose a color or do the job for you, consider using TalkLocal. TalkLocal will connect you to up to three professional painters in your area within minutes.

Roof Shingles Lifting Up

Wednesday, November 21st, 2012

Roof Shingles Lifting Up Roofers

Shingles that lift up are usually a problem with homeowners who have recently installed a new roof within the past six months. There are several possible reasons, but the most common one is that the shingle adhesive hasn’t had enough heat to fully seal yet, which causes the shingles to lift up. Lifting shingles usually occurs on the north side of the house, as that side gets less sun. If you think that this is the case, wait a bit longer for the adhesive to seal and the shingles will naturally fix themselves. Glue works best when the temperature is above 50 degrees F. Roofs installed just before the cold months might take until the next summer to lay completely flat.

Wind can also cause roof shingles to lift up. If you want to fix this yourself, you will need: a caulking gun, roof sealant, and a utility knife. Follow these steps to fix your roof shingles lifting up.

1. Cut the opening of the roof sealant at a 45 degree angle.

2. Load it into the caulking gun.

3. Take off the shingle with the utility knife.

4. Apply a generous amount of roof sealant.

5. Press the shingle back in place.

6. Weight it down with a heavy object, such as a brick, for at least 24 hours.

Defective shingles may also be a problem, as some are not as resilient to temperature and moisture changes and are more prone to becoming bent out of shape. If you think this may be the case, call the shingle manufacturer.

Roof shingles could lift up due to a variety of reasons, and in order to get the best idea why, you should find a reliable inspector to examine your roof. It’s also not a good idea to fix a problem that affects a large area on your own. Use the free service TalkLocal to find a reliable and highly rated roofing company to help you with your lifting shingles!