Archive for the ‘Plumbers’ Category


Ideas For Remodeling A Basement: Plumbing

Sunday, June 2nd, 2013

Ideas For Remodeling A Basement: Plumbing - Plumbers

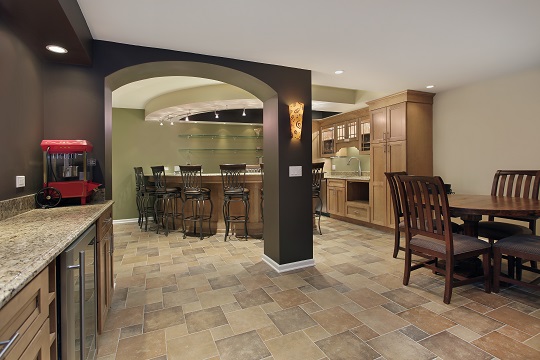
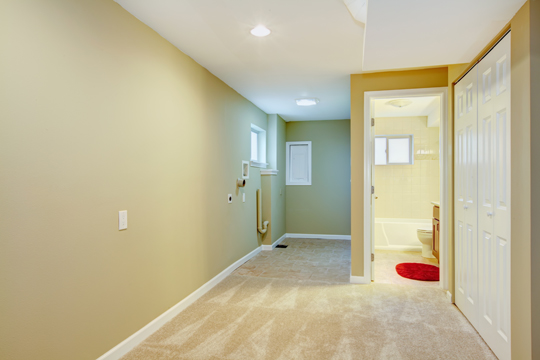
Remodeling a basement is a chance to let your taste speak for itself. You can turn that room into anything you want it to be. Maybe you want to relax, or maybe you want a work station. Maybe you are even adding on to the family and need a new bedroom or playroom. No matter what your ideas for remodeling a basement are, to achieve the ultimate convenience, you’ll need a bathroom.

When toying with ideas for remodeling a basement bathroom, consider these tips:

Water can be messy. Make sure there aren’t already leaks or issues with piping before you get started. Double-checking that now can save you a world of trouble later. Check the outside walls for moisture, check the downspouts to make sure they aren’t clogged, and examine for any signs of possible flooding. Basements and bathrooms are both already the most common sites for mold growth. Insuring there is little to no extra water will help avoid increasing that risk.

Piping can be tough. Generally, it is easier to add a bathroom where there already is a bathroom. If it’s at all possible for your basement bathroom to go beneath an existing bathroom, your piping and water work will be significantly easier. However, in some cases, this is just not possible. If not, make sure that you know how much of which supplies you need so you don’t have to leave the pipes unconnected.

Lighting in bathrooms is a big deal. If there’s one room of the house you’d prefer to be well-lit, it’s probably the bathroom. Since basements don’t typically have windows, you want to consider what kind of lighting scheme you need in your basement bathroom to illuminate the room in case there are days when you need to follow your entire hygiene routine there.

You Will Most Likely Need Some Help

Once you have decided exactly what you want in your basement bathroom, you’ll need to plan out the specifics of water, sewage, etc. This process should also involve contacting all of the necessary professionals to help on the project. Instead of spending hours doing so, just log on to TalkLocal and get it taken care of in minutes.

Our exciting new service instantly connects you with local professionals who are able to help. It’s easy and free.

How To Make Basement Less Damp

Sunday, April 28th, 2013

How To Make Basement Less Damp - Plumbers

Dampness of the basement is caused by the buildup in humidity. One of the most direct ways to fight against this humidity is to install and operate a dehumidifier for your basement. Install it in the place where you feel is the most damp. However this is  not exactly fixing the problem – it is a workaround for an existing dampness. Read this guide to learn how to make basement less damp, which will help to keep mold out of your basement.

What to Do

1. You can’t control the humidity outside your house — the weather does that entirely. But you can control the humidity inside your house by making sure that the humid air outside doesn’t seep into your house by securing your windows. After a heavy rainstorm or humidity buildup outside, make sure that your windows are closed. It’s just a good practice.

2. There is also a possibility that the washer or dryer lines in your basement have a leak — so the humidity inside these lines is getting released into the basement air, making it damp. Check the lines for leaks, with a protective glove, while the washer or dryer is in operation.

3. Windows are not the only place where the outside air can get inside your house. Check for cracks in the wall. After that, check to see that there are no unnecessarily large gaps between the door frame and the door to the basement (if you have an external door to your basement).

4. Any cracks in the walls, windows, or door frames can be fixed by adjusting the frames or using epoxy sealant. Apply the sealant over the cracks and let it dry for a couple of days. Of course, if your basement is already humid, it may take longer for the epoxy seal to dry.

5. If you are using a dehumidifier, try using a heater instead during the colder months. This is because dehumidifiers do not work at low temperatures. A heater will dry up the dampness, effectively performing the same task as a dehumidifier while also warming your basement.

Additional Help

If you feel like you need professional help on how to make basement less damp, TalkLocal can help with finding the correct local professionals for you. We will connect you with up to three professionals in your area in just minutes.

Unclog A Sink Drain

Sunday, April 21st, 2013

Unclog A Sink Drain - Plumber

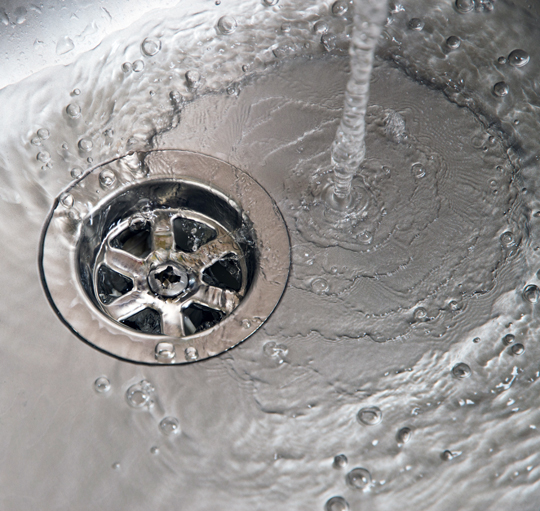
It can be frustrating (and disgusting) to be brushing your teeth, only to realize your sink is filling fast and not draining. Surprisingly, there are ways to unclog a sink drain without using chemicals. Although strong chemicals often work to fix the problem, they can damage your pipes and cause a larger, more costly mess in the long run.

How to Unclog A Sink Drain

1. Wait for water to slowly drain. If it is fully clogged, scoop out as much water as possible and use an absorbent towel to soak up the rest. Then, use a pair of tweezers or needle nose pliers to remove any visible debris in the drain. Next, take a piece of wire with a bent hook-end and use it to fish out any debris that is not visible on top. Try running water to see if it drains.

2. If this does not work, use duct tape to cover the air hole in the sink. After putting a thin layer of petroleum jelly on the ring of a plunger, place it over the drain hole and fill the sink with about an inch of water. Thrust the plunger up and down for about two minutes. Remove the tape and plunger, and run some water to see if the drain is cleared.

3. If it is still clogged, place a bucket under the P-trap and use a pipe wrench to remove the nuts which hold it in place. Flush the P-trap out in a bucket so as not to reintroduce the debris to another drain. Replace the P-trap using a cloth under the wrench to reduce scratching. Run water to check for leaks and drainage.

4. If this still does not solve your problem, remove the P-trap again and insert a drain auger into the pipe. Begin rotating until you feel resistance. Reverse your rotations repetitively until the debris comes loose. Replace the P-trap and run water for a few minutes to clear the drain.

Get Help Immediately

These methods should unclog a sink drain. If they do not and you are concerned about your mechanical abilities, you may need to hire a professional plumber. TalkLocal can find one in your area quickly and easily. Simply type in a little bit of information about your problem and we’ll have qualified professionals call you in a matter of minutes.

Different Types of Sinks for Kitchen

Sunday, March 24th, 2013

Different Types of Sinks for Kitchen - Plumbers

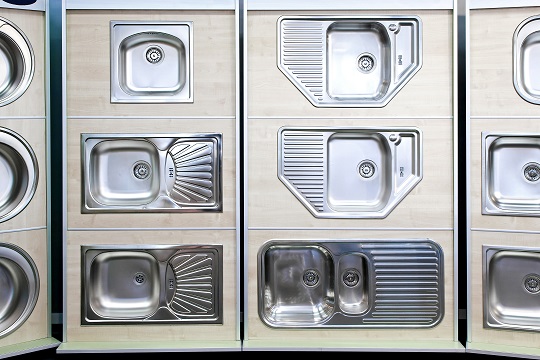
The sink is definitely the most-used installment in the kitchen (aside from the fridge, which isn’t really an installment). And it is important to choose the best type of sink in order to maximize your convenience and to add to the value of your home. Read this guide in order to find out about different types of sinks for kitchen, so you can choose the best one for your home.

Undermount Sinks are mounted below a countertop in order to eliminate the annoying traditional “bump” around the sink, and are quite common sinks for modern kitchens. It is mainly designed this way to minimize the waste of space and to look appealing. Although poorly installed undermount sinks leak, quality epoxy and silicone-lined sinks should look subtle and be highly useful.

Drop-In Sinks are exactly what they sound like: they have rimmed edges, with some loss of usable surface area on the countertop. These rims hold the sink in place when it is installed by being “dropped-down” into place. These are the most common, and usually the cheapest type of sinks available.

Composite Sinks are similar to undermount sinks, but are made with a “composite” material that is more appealing to the eyes (as opposed to bland metal) and also more durable (impact and temperature variations). Because of the different material with out of which theyvare made, composite sinks tend to be more expensive, but also easier to install, as they aren’t very heavy.

Bar Sinks are small sinks that are designed for small-duty use such as cleaning out glasses or washing fruit, as opposed to more heavy-duty work like washing dishes. They are easy to install as they are small, and can add a lot of convenience to a home bar area, or as an alternate sink on the opposite side of the kitchen from the primary sink.

Cast Iron Sinks are known to be both durable and customizable. Cast iron is naturally a very workable material. Also, being customizable allows for the cast iron sink installment to fit into your home much easier. However, these sinks are much heavier than any other material, and thus, likely must be installed by a professional.

Additional Help

If you feel like you need professional consultation on deciding between different types of sinks for kitchen, TalkLocal can find a highly-qualified professional plumber for you. We will connect you with up to three plumbers in your area within minutes.

Garbage Disposal Troubleshooting

Sunday, March 17th, 2013

Garbage Disposal Troubleshooting - Plumbers

A garbage disposal helps with grinding food into the sink without throwing food into the trash. Usually, garbage disposals can be fixed without the need of a plumber. However, you may not always need a plumber to keep your garbage disposal from acting up. Here are some tips for garbage disposal troubleshooting.

WARNING: Never Put Your Hands Inside the Garbage Disposal.

Humming Noise

If you hear a humming noise, shut down the garbage disposal immediately. Humming noises come from the motor. This means either that there is a stuck flywheel or that the motor is malfunctioning. To remove the jam in the flywheel:

1. Insert pliers into the disposal  and twist them to dislodge any obstructions in the flywheel.

2. If that does not work, insert a ¼ inch Allen wrench port on the bottom, center of the disposal under the sink to wiggle the masher plate (inside the disposal) to dislodge any obstructions.

3. If everything has been dislodged and the garbage disposal still does not work, replace the motor.

Leaking

There can be different leaks in various places of the garage disposal. The common leaks are at the sink flange, the dishwasher connection, and the discharge drainpipe.

Sink Flange Fix

1. Turn off the garbage disposal.

2. Loosen and remove the unit from the mounting flange.

3. Tighten the mounting bolts.

4. If they are already tight, loosen the bolts and reapply the plumber putty between the bolt and the sink.

5. Tighten the bolts and remove any excess putty.

6. Recheck the disposal for leaks

Dishwasher Connection Fix

1. Tighten the clamp on the dishwasher hose connected to the dishwasher inlet.

2. If the hose is leaking, it will need to be replaced.

Discharge Drainpipe Fix

1. Check the tightness of the bolts on the disposal’s discharge drainpipe.

2. If re-tightening the bolts does not work, remove the bolts and the pipe, and replace the gasket.

3. Reinstall the bolts with the new gasket and tighten.

Find A Plumber

If these fixes do not work, the garbage disposal may need to be replaced. For garbage disposal installation use TalkLocal. We will connect you with up to three high-quality plumbers in your area, within minutes!

Toilets That Use Less Water

Wednesday, March 13th, 2013

Toilets That Use Less Water - Plumbers

Everyone seems to be trying to go green and help the environment. One of the many things that you can do to help Mother Earth is to consider purchasing one of the many available toilets that use less water.

Some toilets use less than a half-gallon of water per flush. This is significantly less than traditional toilets, especially if those traditional toilets are constantly running or malfunctioning in other manners. Imagine how much money a water conserving toilet could help you save on your monthly utility bills.

Toilets That Use Less Water

These types of toilets work by offering a larger water hole, which makes it easier for wastes to be flushed down the drain. An air system is also used to help remove waste. These types of systems are often used on trains and airplanes. Water sense toilets are increasing in popularity. The following are a few of the top brands of water conserving toilets.

Toilets that use less water may be a bit more expensive than traditional toilet designs, but toilets that conserve water pay for themselves with the long-term savings that they provide.

There are a ton of perks and benefits in opting for a water conserving toilet. You will save money and help conserve fresh water at the same time. It is a win-win situation.

Find Plumbers Who Know Water Saving Toilets

TalkLocal helps introduce businesses with customers seeking their products or services. Save yourself time and frustration by letting us do the work for you.

How to Change your Shower Head

Friday, December 7th, 2012

How to Change your Shower Head Plumbers

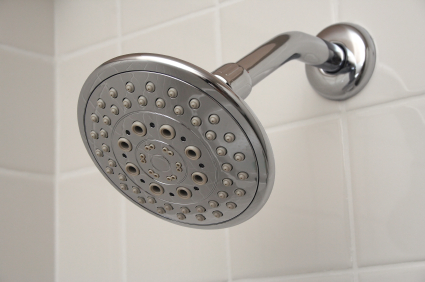
Changing your shower head is one of the quickest and easiest ways to make your bathing experience more enjoyable. It is amazing the difference that water pressure can make with a quality shower head. You can go from a mediocre shower experience to a truly relaxing experience that will help you unwind after a long day. Check out the following steps for how to change your shower head to create a soothing, comforting environment in your shower!

A few things to consider:

–  Do you have a wall-mounted faucet or a ceiling faucet?

–  Would you like to replace your current system to a self controlling handle that is connected to a line of tubing so you can direct the shower head wherever you would like?

–  Check out your water pressure. Make sure your water pressure is adequate for the type of shower head you are pursuing. If the water pressure is too low and you would like to purchase a rain shower head, it may be quite frustrating to have very little pressure as you attempt to wash your hair.

The five steps to change your shower head:

1. Turn off the water supply.

2. Remove the previously installed shower head and remove any excess dirt or debris around the attachment site.

3. Apply the Teflon tape clockwise around the attachment site to provide a cushion to prevent leaks. Applying the tape clockwise keeps it from coming undone as you tighten the new shower head. The Teflon tape seals the connection between the wall and the shower head to prevent leaks.

4. Follow the instructions for the new shower head and attach it to the wall.

5. Point the head away from you and turn on the water. As the water flows into the bath, make sure there are no leaks. Stand back and gaze at your completed project! After that, jump in the shower and get clean because you probably smell bad after your hard work!

If you are having trouble or would like professional plumbing help, check out TalkLocal! You will be directed to quality plumbers right in your neighborhood who can help you out at a time that works best for your schedule! Give TalkLocal a try — best of all, it is free to use!


How to Fix Loose Shower Tiles

Monday, December 3rd, 2012

How to Fix Loose Shower Tiles Plumbers

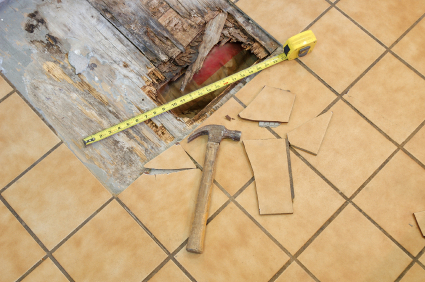
Loose shower tiles are something that must not be left unattended because they can cause water and debris to build up, making the fixing process harder as time passes. Fixing shower tiles is not a hard job and can easily be done at home with just a few tools. Read all about how to fix loose shower tiles below.

You will need:

Grout saw

Hammer

Chisel

Water

Sponge

Mortar

Putty Knife

New Tiles (optional)

How to Fix Loose Shower Tiles

1. Check if the tile comes out by hand. If it does, just remove it. If the tile does not come out by hand, use a grout saw to remove the grout surrounding the loose tile.

2. Use a hammer and chisel to slowly chisel it out from the bottom.

3. Once the tile comes off, clean up the space behind the tile with a hammer and chisel.

4. If the tile is still in once piece and you think it can be reused, then clean it with water and scrub it well. If not, use a new one.

5. Apply a thin layer of mortar to the back of the tile with a putty knife.

6. Fix the tile in place and press it in to secure it.

7. Remove any excess mortar that seeps out of place using the putty knife and sponge.

8. Fill the spaces around the tile with pre mixed grout using the putty knife.

9.  Wipe off excess grout with the sponge.

If you don’t have the time to fix loose tiles in the bathroom, you can hire a local professional to fix it for you. Just tell TalkLocal your service need, location, and availability, and we’ll do all of the searching for you. Within minutes of submitting your service request online, you will be on the phone with high rated local businesses who can help fix your loose bathroom tiles.

How to Fix a Loose Shower Head

Thursday, November 29th, 2012

How to Fix a Loose Shower Head Plumbers

Shower heads are susceptible to a bunch of issues. Leaks can sprout, the swivel can become too tight or loose, and water may not stream out of every hole. Problems arise, and when they do, reading this guide will allow you to know how to fix a loose shower head.

The first step is to locate the water shutoff valve for the shower and turn that off to eliminate the water supply to the shower. The next step is to release all the water contained in the shower head and pipes by opening the shower faucet and letting the remaining water out. Next, you will want to do is cover the drain so as to prevent any loose pieces from falling down the drain.

With these preliminary steps out of the way, the next step is to remove the shower head, either with large pliers or by twisting it with your hand if able. Once it comes off, there should be a screw in the middle of the head, which needs to be unscrewed to take the head apart. It may be a good idea to take a picture at this point so you can have visual aid of what the head looks like before attempting to fix it.

Clean every piece that you are able to clean, while also taking note of the condition of the pieces within the head. If they look like they need to be replaced, then they probably do, as this could contribute to the issue. Or, you could purchase another shower head to minimize your troubles and save yourself time.

Cleaning every piece can often be the most important part of fixing a loose shower head. You can use a brush to clean grime and a toothpick to open the spray holes. It may also be a good idea to soak the entire head in vinegar to give it a thorough cleansing.

Once all this has been done and all the pieces put back in their proper place (refer to your picture if need be), simply screw the shower head back on. With the interior clean, the shower head should work as smoothly as it did when it was first purchased.

If you followed these steps and still need help, don’t fret. TalkLocal is here to help! TalkLocal is a free service that will connect you with top-quality, reputable plumbing companies in your neighborhood within minutes. Just enter in your specific problem, location and availability, and up to three companies will call YOU directly, saving you the time and stress of finding one yourself.

Drano Not Working on Sink

Saturday, November 24th, 2012

Drano Not Working on Sink Plumbers

Due to Drano’s toxicity, many people choose not to use it to unclog their pipes and drains. It can be dangerous for humans and may damage some of the piping. Other times, people give Drano a chance, but it simply does not work. At the end of the day, they are still stuck with a clogged drain and/or pipes.

If Drano is not working on your sink, it’s time to take matters into your own hands. First, set up a bucket with several towels underneath it. Unscrew the pipes under the sink. Newer pipes are generally designed so that you can unscrew them with your hands. For older pipes, you may need to use a large wrench to disconnect the pipes. There will be some pipes that come completely off. Carefully take these pipes and put them in the bucket. Be aware that there will be water in these pipes so try not to spill any of it.

Use a long pointed tool, such as a screwdriver, to unclog the pipes you just removed. There will be hair, dirt, and grease on the pipes walls that have turned into a gel-like substance. Take the pipes outside and continue scraping at them until they are clean. Make sure to scrap hard enough to clean the walls yet not hard enough to break, crack, or damage the pipes. You should also use a power hose afterwards to get the inside of the pipes spotless.

Go back to the sink and use the screwdriver to unclog the sink and the attached pipe. Make sure to put the bucket under the open pipe to catch all of the junk in the pipes. Scrape and poke with a screwdriver to break off any obstructions in the piping. You may also use pliers to pull out anything that may be stuck. Now that you have spent some time cleaning the top part of the pipe attached to the sink, make sure to get the bottom half as well. Do the same to the bottom half of the pipe until the pipe is clean when looking through it.

Now put the piping back together. Make sure to screw the piping back on firmly and securely to prevent leaks. You may want to use a washer when screwing the pipes back, just in case. If you don’t have the time to do this yourself, TalkLocal can find you a high quality plumber in your area in minutes!