Feeding Dogs Human Food

Tuesday, February 5th, 2013

Feeding Dogs Human Food - Veterinarians

Some pet owners are staunch advocates of no human food for dogs in any circumstance, while others believe that there is nothing wrong with feeding dogs human food once in a while. Not all human food is dangerous, but if you’re ever even slightly unsure, do not feed it to your dog. To help you remember what is unacceptable, here is a list of human food that is definitely dangerous for dogs to ingest:

– Alcohol

– Apple seeds

– Avocados: Haas avocados are fine and can be good for dogs. Other South American varieties of avocados, however, are poisonous to dogs.

– Cooked bones: They are more brittle than raw bones and can crack and rupture your dog’s stomach.

– Bread dough

– Caffeine

– Chocolate

– Coffee (grounds, beans, brewed)

– Corn cobs

– Eggs (raw)

– Fat trimmings

– Fish: Specifically, raw salmon can contain a parasite carrying a virus that only affects dogs.

– Garlic: It is beneficial in very small doses (such as garlic powder) for dogs over 20 pounds, but has the same dangerous effect as onions if fed in large quantities.

– Grapes

– Liver

– Milk/ice cream/dairy products

– Moldy foods

– Mushrooms/mushroom plants

– Nutmeg

– Nuts (macadamia nuts, walnuts, chestnuts, and more)

– Onions and onion powder

– Pits from peaches, plums, cherries & apricots

– Potato leaves/stems/green skins

– Raisins

– Rhubarb leaves

– Salt

– Tobacco & nicotine products

-Tomato plants/leaves/stems: However, the fruit is fine.

– Xylitol (found in sugar-free products)

Additional Help

If you think that your dog has consumed one of the above human foods, or if you’re wondering if you should feed your dog that piece of bologna or not, call your vet! If your dog is acting strange after eating something new, this might be an emergency, in which case you should use TalkLocal to get access to a qualified vet within minutes. We will connect you with up to three professionals in your area who will be able to help you when you need it.

How to Remove Weeds from Backyard

Tuesday, February 5th, 2013

How to Remove Weeds from Backyard - Landscapers

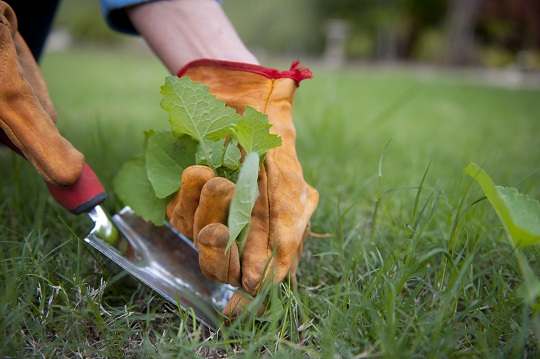
One of the most important steps in cleaning up your garden is locating and removing weeds. Not only are they not the most attractive plants, but they take up space that could be used for plants of your choosing. The serious issue with weeds is that they suck up the water and other nutrients from surrounding plants, hindering their growth. Thus, eliminating untamed weeds is a necessity.

How to Remove Weeds from Backyard

When removing weeds, it’s crucial to make sure that the entire root of the plant is taken out of the ground. If only the foliage is removed, the weed will stay put and will continue to grow and hog up the nutrients. If this happens, be sure to use a spade to get under the dirt to remove the root of the weed. Using herbicides should be the last option as they are harmful chemicals that can ruin plants you don’t want to destroy. In the future, if you want to have the easiest time removing weeds, try to start weeding as soon as possible; the more time they have to grow, the more difficult it will be to remove them.

Once you’ve removed your weeds, it is essential to add fertilizer or mulch to the area. This will aid in hindering the growth of even more weeds. Also, the more grass and other plants that flourish in your garden, the less space there will be for weeds to take over. Make sure you follow the package’s instructions for mulch or fertilizer, as adding too much can smother your plants, while adding too little still allows weeds to grow.

Additional Help

While these tasks may seem simple, they can become a nuisance after some time. If you would like a professional to assess your yard and remove weeds as part of a process to re-do your land, be sure to use TalkLocal to find an available landscaper for you. We will connect you with up to three professionals in your area who will be available to help you when you need it most.

My Tax Refund is Incorrect

Tuesday, February 5th, 2013

My Tax Refund is Incorrect - Accountants

Getting your tax refund is a great feeling.  You pay thousands of dollars to the government, so when you receive a little bit of that back, in return it brightens your day.  But what happens when your tax refund is incorrect?  If it’s more than what you thought you were getting it can be amazing, but when its lower than what you expected, you feel disheartened.  So how do you correct the mistake?

Possible Reasons Your Tax Refund is Incorrect:

1)     You owed a debt and part of your refund was used to pay it.

2)     You made a mistake when preparing your tax return.

3)     The IRS made a mistake.

The most annoying thing about tax refunds is that the IRS does not assume any responsibility for the taxpayer or their errors.  You should make sure that everything on your forms is correct and double check for accuracy before signing and submitting your taxes.

What You Can Do if Your Tax Refund is Incorrect

If there is a problem with your tax refund then there are a few steps to take.  You can wait and see if you get a letter in two weeks.  The refunds you receive come in a lot faster than the letter that explains why your return was adjusted.  If there was a change the IRS will send this letter explaining their actions.

If you want to talk to someone about your incorrect tax return you can all try calling 1-800-829-1040.

– When prompted press 2, and 2 again.

– You will be asked to type in your social security number and then you can press 1 two times to confirm that you entered it in correctly.

– Listen to the prompts, but do not take any actions.

– You can then just wait to be connected to a real life person.  This process should take about 30 minutes but it is one of the only ways to get in contact with someone.

In the case that you cannot connect to someone in this manner you could also go online or on the phone and pretend that you want to pay your account.  This will ensure that someone will be in touch to talk to you almost immediately because they are looking to make money.

Check the IRS’s website and go to the option about “where’s my refund” to see information about any delays or corrections on  expected refunds.

Further Help

If you cannot seem to figure out what is wrong with your tax return you should seek professional help.  Use TalkLocal to be put in contact with reliable local businesses within minutes.  Simply input your problem and availability and TalkLocal will do the rest.  Almost immediately you will be connected to tax company or accounting firm who can help you out.

IP Address Conflict With Another System on the Network: Windows XP

Tuesday, February 5th, 2013

IP Address Conflict With Another System - Computer Repair

If you’ve seen the error “There is an IP address conflict with another system on the network,”, then you’re most likely having internet connectivity problems.  Fortunately, this problem has a simple and easy fix.

Cause of the Problem:

Every single device connected to your router is assigned a unique IP address so that Windows XP will know how to communicate with the device.  However, due to certain circumstances or changes to the network, it’s possible that the same IP address was assigned to multiple devices.  When you boot up your computer, Windows XP requests the full table of IP addresses (most likely stored in a central location like your router) and checks whether or not there are conflicts.  If there are conflicts, Windows XP’s protocols will detect and warn you accordingly.

Solving the Issue:

To solve the problem, the simplest solution is to ask your router to renew and reassign all the IP addresses on the network.  In order to do this, just follow this simple 5-step procedure:

  1. Bring up the command prompt.  This can be achieved by going to the “Start” menu and selecting “Run”.  When the Run window pops up, type in “cmd” (this and the following commands should be without quotes) and press OK.
  2. Enter “ipconfig/all” and hit enter.  This should bring up a list of all the IP addresses (and other information) for the devices installed in your computer.
  3. Type in “ipconfig/flushdns” and hit enter.  This command resets the cache that stores host names (that identify devices) and their corresponding IP addresses.
  4. Enter “ipconfig/release” and hit enter.  This command releases the IP addresses for all current network devices and adapters.
  5. Type in “ipconfig/renew” and hit enter.  This command automatically reassigns IP addresses to all DHCP configured devices.  At this point, the problem should be solved, but if you want to be certain, you can type in “ipconfig/all” to check the list of IP addresses yourself.

Additional Help

If you don’t feel comfortable changing IP addresses or if you don’t understand exactly how to renew the DNS cache, you can always use TalkLocal to connect with highly quality local IT professionals immediately. We will connect you with up to three professionals in your area who will be able to help you when you need it.
Extension Springs vs Torsion Springs

Monday, February 4th, 2013

Extension Springs vs Torsion Springs

Extension Springs vs Torsion Springs

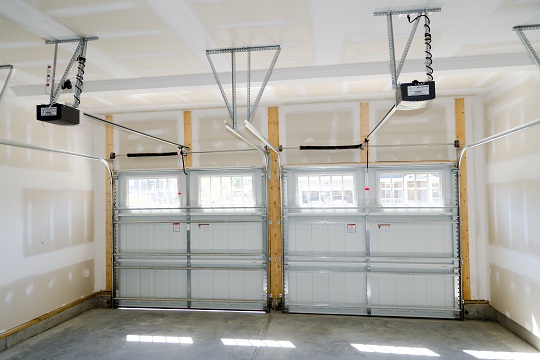
If you are rebuilding or installing a new garage door for your home, one decision you may face during the process is whether to use extension springs or torsion springs for the garage door system. These are the most common springs you could choose from, and they both provide great features and benefits. This article will help you distinguish the differences of extension springs vs torsion springs.

Extension springs are the most widely used of the two, while torsion springs tend to be of a more elaborate, sophisticated design of growing popularity. There are different types of springs within each category. For example, the different types of torsion springs include: standard, EZ-set, Wayne Dalton TorqueMaster, standard commercial, steel rolling door, and one-piece curtain door torsion springs. Extension springs can be sectional garage door or one-piece garage door extension springs.

In general, extension springs get their name because of their function of stretching, or “extending” when force is applied to them. They are usually installed on the sides of the garage door and attached to the door’s swing arms. The more force that is applied, the farther the spring will extend. Extension springs usually span between 5,000 and 10,000 lifts.

Torsion springs, on the other hand, are a function of “torque.” Therefore, when pressure is applied, the springs twist and coil. Torsion springs can be found at the upper section of the door, mounted to the header of the door. They are usually much stronger, and thus more expensive, than the extension springs, and retain a longer life of 15,000 to 20,000 lifts.

Additional Help

If you are looking for a garage door professional to help you with your project, try using TalkLocal to locate one near you. TalkLocal is a free service that will connect you with top-quality, reputable professionals in your neighborhood, within minutes. Simply enter in your specific problem, location, and availability, and TalkLcoal will contact multiple companies, who will then call YOU directly, ready to help.

Dog Still Smells After a Bath

Monday, February 4th, 2013

Dog Still Smells After a Bath - Veterinarians

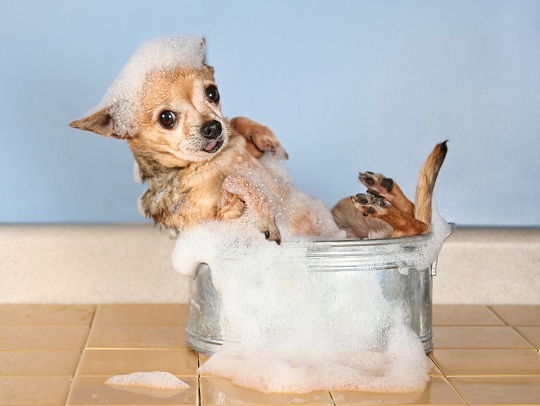
If your dog still smells after a bath, it is probably due to the infamous wet dog smell. Why is it we smell better after taking a shower while dogs smell worse? Dogs produce a great deal of oil on their skin, which becomes a perfect breeding ground for bacteria. When their skin is wet, the bacterial particles evaporate off their skin and into your nose, making the smell much stronger. Some dogs produce more oil than others, specifically breeds that swim often. Other dogs are just more active than most and enjoy jumping into smelly places. Here is a list of tips and things to watch out for in order to solve your smelly dog problem.

Preventing the Wet Dog Smell

First, make sure the shampoo is actually reaching the dog’s skin. If your pet has long fur, the shampoo and water may have a hard time penetrating through tangles of thick fur. Make sure to always blow dry your dog after a bath, otherwise bacteria will grow in the dog’s wet fur and make it smell worse later. Choose a shampoo that has antimicrobial properties to kill the bacteria hiding in the dog’s fur. However, you should not have to wash your dog more than once a month, otherwise you will disrupt the natural oils on your dog’s skin, which may be counterproductive and actually increase the amount of oil.

Exceptions (Atopy) and Solutions

The above tricks will only work if your dog isn’t suffering from atopy. Atopy is a skin condition in which the skin of your dog becomes incredibly itchy and inflamed due to either a food or seasonal allergic reaction. This causes your dog’s skin to produce more and more oil, creating a breeding ground for bacteria and bad odors. In this case, washing your dog may actually irritate it further. Contact a veterinarian immediately to obtain the correct medication to counteract the skin reaction. If you’re having trouble finding a veterinarian who fits into your schedule, use TalkLocal to immediately find a veterinarian to fix your smelly dog problem for good. TalkLocal will connect you with up to three veterinarians in your area who will be able to help you.

Water Smells When Ironing Clothes

Monday, February 4th, 2013

Water Smells When Ironing Clothes - Appliances Repair

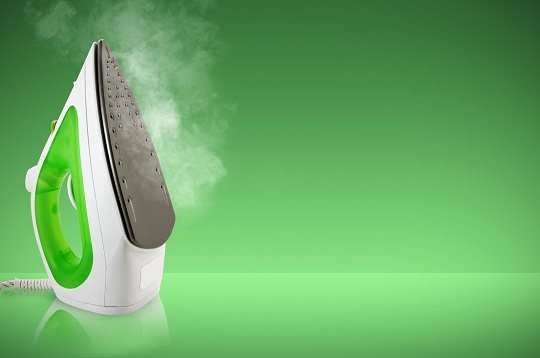
Ironing our clothes makes us want to wear them because they look new. The water in the iron used to spray our clothes helps us achieve the crisp look. However, when that water makes our clothes smell like a sewer, we would rather pick the wrinkly shirt than the putrid one. Keep reading to learn why the water smells when ironing clothes and how to prevent it from happening.

Why Water Smells When Ironing Clothes

Every electric iron has a reservoir for water that is used to spray clothing. It is easy to remember to fill it up when you need to, but we often forget to empty out that water. As a result, the stagnant water smells bad. You will need to clean the water tank in order to remove the stench.

Vinegar is the best item to have in your pantry because of its multipurpose uses, particularly for cleaning. All you will need to clean the fill tank of the iron is vinegar and water.

1. Unplug the iron and empty the water reservoir.

2. Fill the tank with vinegar and let it sit for 10-15 minutes.

3. Plug the iron back in and turn it on to the steam setting.

4. Grab a white cloth and steam it until the tank is empty. This may take a few minutes.

5. Once the tank is empty of vinegar, unplug it and fill it with water.

6. Plug the iron back in and turn it on the to steam setting again. This time you will steam water to remove any remaining vinegar residue. You do not want your clothes smelling like vinegar!

7. You may want to repeat step 6 once the tank if empty of water to ensure that you have completely removed all traces of vinegar.

Additional Help

Do not forget to empty out the reservoir regularly! If you are having more problems with your iron, TalkLocal can help connect you with local appliance repair professionals. We will connect you with up to three high quality repair professionals in your area who will be available to help you when you need them.

How to Remove Water Stains from Wood

Monday, February 4th, 2013

How to Remove Water Stains from Wood - Maid Services

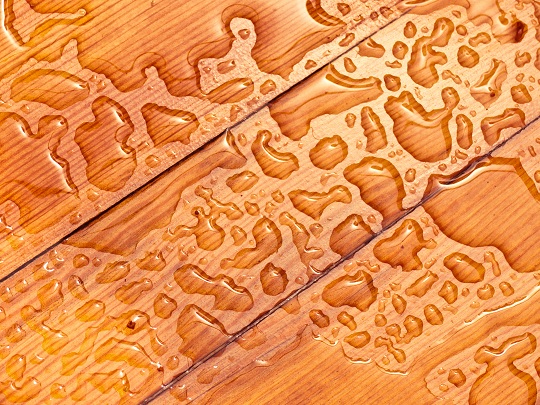
Water stains can be the most annoying stains to remove from wood. There are two types of water stains that can be appear wood, white and black. White stains occur when the water stain has not penetrated the wood. Black stains occur when the water has penetrated the wood. We have some tips for you on how to remove water stains from wood.

White Stains

1.       Rub the stain with mineral oil on a rag. Leave overnight and repeat if it is not reduced.

2.       If the stain is not removed, buy mineral spirits, which remove stains in the wax.

3.       In a well-ventilated area, apply mineral spirits to a rag and rub into the stain with gloves. If it works, apply a new coat of furniture polish.

4.       If the mineral spirits do not work, prepare a mix of baking soda and non-gel toothpaste.

5.       Apply the baking soda mixture to a damp rag and rub with the grain.

6.       If it works, clean the area and apply furniture wax.

Black Stains (Sanding)

1.       Sand the stain gently with sandpaper to remove the finish (#100 grit) and feather edges (#150 grit).

2.       Sand the stain with #150 grit and feather edges around the area with steel wool.

3.       Remove the sanding dust.

4.       Lightly coat the area with varnish several times to match the original finish.

5.       Feather the edge of the new varnish with steel wool to eliminate bumps.

6.       Use wax to polish the area.

Black Stains (Bleach)

1.       Remove the finish of the wood with sandpaper (#100 grit).

2.       Pour bleach in a container.

​3.       Dip a brush in the container and brush over the stain.

4.       Wait for a few hours so the bleach can evaporate and the stain can fade to the wood’s original color.

5.       Clean area to remove bleach completely.

6.       Lightly coat the area with varnish several times to match the original finish.

7.       Feather the edge of the new varnish with steel wool to eliminate bumps.

8.       Use wax to polish the area.

If none of these processes work, or if you are uncomfortable with repairing your own wood floor, just use TalkLocal. We will connect you with up to three high quality cleaning professionals in your area who will be available to help when you need them.

Seva Call Launch Rocks Rockin’ Rochester, New York

Monday, February 4th, 2013

Seva Call Launch Rocks Rockin’ Rochester, New York - Seva Call

Seva Call founder Manpreet Singh has finally brought his call-saving hero Seva Man to Rockin’ Rochester, New York where they’ll shake-down the drudgery of the Google Search and decoy method of finding a professional needle in The High Falls Smoke Stack. With Seva Call, a fast find for a quick fix is at every Rochesterian’s fingertips.

Seva Call is a virtual concierge that allows customers to quickly and securely contact small businesses that meet their service and availability needs.  Seva Man explained what makes Seva Call a better solution than the traditional methods saying, “Available and affordable may have an alphabetical advantage in the dictionary, but few small businesses top the listings in the Yellow Book or even search engine results”.

So, whether you have frozen pipes or dropped your white hot garbage plate  all over the carpet; chipped your tooth in an ice-hockey related brawling incident or are getting sued for knocking someone else’s teeth out in an ice-hockey related brawling incident,  Seva Call can navigate the more than 13,019  local business to find a plumber, dentist, carpet cleaning service, or lawyer– all in minutes and according to your schedule. If you’re a Rochester resident in distress, just  visit www.talklocal.com, enter your request, and leave the sleep-deprivation to that sleepless coastal city to the south.

Search Engine Virus Removal

Monday, February 4th, 2013

Search Engine Virus Removal - Computer Repair

Are you unable to use your favorite search engine like Google, Bing, or Yahoo! because you keep getting uncontrollably redirected to some other site?  Or maybe you have a strange search toolbar at the top of your browser that you are unable to get rid of?  If you are experiencing either of these problems it is likely that your computer has been infected with what is colloquially called a “search engine virus.”  These viruses are generally a type of adware or malware that infect your computer in order to bombard you with pop up ads or trick you into paying for fake antivirus software.  Luckily they are usually relatively simple to remove with just a few steps.

Search Engine Virus Removal

1.  The first thing you need to do is to install an anti-malware program on your computer if you do not have one already.  There are many great free options for malware scanning and protection out there; two of the most popular programs are Spybot Search and Destroy and Ad-Aware.

2.  Once you have the software installed, open the program and run a complete scan of all of the hard drives on your computer.  These scans typically last somewhere from a few minutes to an hour.  When it is done, the program should give you options for removing all of the harmful programs and files that it detected, follow the instructions to remove all of the threats.

3.  Restart your computer and check to see if your problem has been resolved.  If it has not, it is possible that the malware program has made some changes to files on your computer that were not detected by the anti-malware scan.  These hidden changes can be very tricky and hard to discover.  Check out this blog for details on how to check for and fix some of the most common occurrences.  It provides detailed instructions and step-by-step solutions with pictures to show you how to restore any infected files.

4.  Once the problem has been solved, be sure to leave your anti-malware program of choice on in its real time protection mode if it has one.  This will help to prevent your computer from being infected with more malware/adware in the future.

Additional Help

If you were unable to fix your problem following these steps, it may be time to get some professional help.  Use TalkLocal to get in contact with a reliable local computer technician within minutes.  Just enter a description of your problem, availability and location and TalkLocal will connect you directly to someone who can help.