Trunk will not Latch

Monday, December 10th, 2012

Trunk will not Latch Auto Repair

Leaving your trunk open when you are driving is illegal in some states, especially if it is not secured by cables or ropes. An open trunk can obstruct your view and put you and others in danger. Most people do not forget to close their trunk, but rather, are unable to because the latch broken. If the trunk will not latch on your car, try the following solutions before visiting a repair shop.

Clean up

If your car is dirty, debris can prevent the latch from connecting to the chassis correctly. Examine the area around the latch and chassis. Remove any large parts pieces of dirt with your hands. Go back with a vacuum and remove small pieces that you cannot grab.

Apply pressure

You need two people to do this: one inside the trunk and one outside. Have somebody get into the trunk of your car. Once one person is inside, the person on the outside should push down on the trunk at the same time that the person inside releases the release mechanism. The trunk can sometimes get jammed, but applying gentle pressure should fix the problem. Furthermore, you can add some lubricant to the problem area.

Check for trunk damage

If there is a dent in your trunk, the latch my not be able to align properly. You can pop the dent out yourself if you have the right tools. Otherwise, take your car to a repair shop.

Check for latch damage

If the latch is bent out of shape, it may not attach properly to the car. Look for any damages on the latch that would prevent it from fitting. Has something recently hit your car? Have you used a lot of force on your trunk? If you find damages, find a replacement piece for your car from a local garage or your car manufacturer.

Additional Help

If you need help finding a local garage that has your replacement part, use TalkLocal. Fill out a service request online and specify the car part you need. Then TalkLocal will match you with up to three local repair services that have the item in stock and can meet when you are available. Don’t waste time visiting repair shops that can’t help you; let TalkLocal do the searching. After submitting your request, you will recieve a phone call from a local business within minutes!


What Type of Animals do Veterinarians Work With?

Monday, December 10th, 2012

What Type of Animals do Veterinarians Work With? Veterinarians

Know what type of animals veterinarians work with is important for your pet’s safety and health. There are many types of animals that veterinarians work with, inside and outside of their main offices.  Knowing where to take your animal can be confusing if you do not understand the different types of veterinarians and their roles.  The following is a break down of the types of animals that veterinarians work with.

–  Companion animal veterinarians: These specialized veterinarians are mostly located at the private practices you see while driving through your neighborhood.  In these clinics, vets work with dogs and cats, along with other pets such as rabbits, birds, hamsters and ferrets.  This is the place to go when seeking health related questions and procedures (from operations to vaccinations) for your pets.

–  Equine and Farm: These two types of veterinarians work on horses and farm animals, respectively.  Within this group are horses, cattle, chickens, turkeys, alpacas, sheep and many more.

–  Marine veterinarians: This section of vets work in places ranging from amusement parks to research facilities.  Marine veterinarians work with marine animals such as whales, dolphins, sea turtles, sharks and sea lions.

–  Research veterinarians: Researchers have an important role in not only developing vaccines but also studying animal behavior while in captivity or around humans.  Usually you can find these vets in research labs within medical facilities or pharmaceutical companies.

–  Food safety veterinarians: A large number of veterinarians fill this category.  These vets have the role of ensuring the food safety of inspecting the products from animals that will go on the market.  They make sure all products are compliant with governmental regulations.

If you are unsure who to call when seeking advice about your animal, or would like to schedule an appointment, use TalkLocal.  Within minutes you will be connected to up to three veterinarians in your area willing to help.

Apartment Cleaning Checklist Before Moving Out

Monday, December 10th, 2012

Apartment Cleaning Checklist Before Moving Out Maid Services

Moving out of your apartment can be a hassle, especially making sure your apartment is squeaky clean before you leave. Make the transition easier by using an apartment cleaning checklist before moving out. The following is a list of common locations throughout your apartment that need to be cleaned in order to avoid extra costs added to your final rent payment.

What you will need:

– Cleaning products (Soft Scrub, 409, Pledge, Pine Sol, etc.)

– Mop & bucket

– Paint brushes & paint

– Sponges

– Broom & dustpan

– Various cleaning & dusting cloths

Cleaning the kitchen:

– Dishwasher – Make sure all of your dishes are done and out of the sink so you can have plenty of room to clean the rest of the kitchen.

– Stove and Oven – It is best to unplug the oven/stove before cleaning it. Use 409 to clean the surfaces of appliances such as stoves, ovens and refrigerators. When cleaning the oven and stove, remember to clean under and behind it as well. The unit is usually quite easy to slide out from its normal location. To clean the inside of the oven, use baking soda with water as a great, cheap cleaning agent.

– Refrigerator – As with the stove/oven, clean behind and under the refrigerator. Also clean the outside surface for scuff marks and other residue buildups. Using 409 is great for the exterior as well as the shelves and the inside.

– Counters and Cabinets – Pledge is a great option for cleaning the surfaces of your cabinets.

Cleaning the bathroom:

– Toilet – Use a toilet brush to remove any water stains. In addition, disinfect the bowl and rim.

– Counters, sinks, medicine cabinet – Wipe down all of these areas to freshen them up and get rid of any water marks.

– Shower – Use a towel and wipe down the inside of the shower and clean out the drain.

 Cleaning floors and carpet:

– Floors – Sweep the floors to get rid of any large objects and follow it up with a mop (usually with Pine Sol and water) to get rid of the dust particles.

– Carpets – Vacuum the carpets and sprinkle baking soda to get rid of any musty smells.

Other things to remember:

– Walls – Use a warm, wet cloth to wipe down the walls. Also, paint over any scuffs, repair any holes, and take out extra nails, etc that you may have used to hang objects throughout your apartment.

– Trash and Recycle Bins – Go throughout your apartment and get rid of any extra trash that you may have collected after going through the apartment cleaning checklist before you move out.


If you read through this list in preparation of moving out and realize that you don’t have the time or effort to thoroughly clean your apartment, consider hiring a made service to professionally take care of the job. Use TalkLocal to connect you to several highly rated maid services in your area within minutes.

How to Change your Shower Head

Friday, December 7th, 2012

How to Change your Shower Head Plumbers

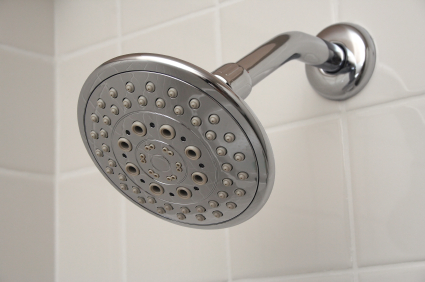
Changing your shower head is one of the quickest and easiest ways to make your bathing experience more enjoyable. It is amazing the difference that water pressure can make with a quality shower head. You can go from a mediocre shower experience to a truly relaxing experience that will help you unwind after a long day. Check out the following steps for how to change your shower head to create a soothing, comforting environment in your shower!

A few things to consider:

–  Do you have a wall-mounted faucet or a ceiling faucet?

–  Would you like to replace your current system to a self controlling handle that is connected to a line of tubing so you can direct the shower head wherever you would like?

–  Check out your water pressure. Make sure your water pressure is adequate for the type of shower head you are pursuing. If the water pressure is too low and you would like to purchase a rain shower head, it may be quite frustrating to have very little pressure as you attempt to wash your hair.

The five steps to change your shower head:

1. Turn off the water supply.

2. Remove the previously installed shower head and remove any excess dirt or debris around the attachment site.

3. Apply the Teflon tape clockwise around the attachment site to provide a cushion to prevent leaks. Applying the tape clockwise keeps it from coming undone as you tighten the new shower head. The Teflon tape seals the connection between the wall and the shower head to prevent leaks.

4. Follow the instructions for the new shower head and attach it to the wall.

5. Point the head away from you and turn on the water. As the water flows into the bath, make sure there are no leaks. Stand back and gaze at your completed project! After that, jump in the shower and get clean because you probably smell bad after your hard work!

If you are having trouble or would like professional plumbing help, check out TalkLocal! You will be directed to quality plumbers right in your neighborhood who can help you out at a time that works best for your schedule! Give TalkLocal a try — best of all, it is free to use!


Learn From the Salesmen Before Buying a Used Car

Friday, December 7th, 2012

Learn From the Salesmen Before Buying a Used Car Auto Repair

As anyone who has ever bought a used car probably knows, it can be a bit of a stressful experience. From trying to figure out what make and model you want and determining if the pre-owned car is in good shape to negotiating the price with a salesman, purchasing a used car can leave even the most level-headed guy or gal feeling overwhelmed. As someone who has worked for years at used car dealerships, I want to share with you some tried and true tips that will help make buying a pre-owned vehicle as easy as possible.

It wasn’t that long ago that people who wanted to buy a used car had two main options: a traditional used car dealership or buy here pay here lots. These days, folks who are in the market for a used vehicle have a lot more buying options to consider. Most traditional car dealerships have plenty of pre-owned vehicles for sale, so it should be pretty easy to find a plethora of places to purchase a car.

Thoroughly Inspect the Car

To be sure that you are getting a used car that runs well, be sure to take the time to examine the car before you sign any contracts, as Beatthecarsalesman.com suggests. As someone who has seen hundreds of pre-owned vehicles, I can personally vouch for this piece of advice. For example, be sure that the car’s body is straight. Stand at the rear of the car and look to see if the rear wheels are lined up squarely behind the front wheels. Look for mismatched paint on the body, which can be a sign that the car was in an accident.

Even if you don’t know anything about engines, look under the hood. Do you see cracked hoses or torn belts? Is anything dripping from the car? Peek under the vehicle and check for pools or fluid. All of these situations are red flags that something might be wrong with the car.

Obtain a History Report

One thing I cannot emphasize strongly enough is to get a full vehicle report before buying a used car. Once you find a pre-owned car that you like, write down the Vehicle Identification Number (VIN) and arrange to get a car-history report before buying. A history report will give information about what the car has been through, including any accidents and possible problems with the odometer. Believe me, I have seen customers who have fallen in love with a used car only to change their minds after seeing the car report.

Because even pre-owned vehicles can cost a pretty penny, I strongly urge you to do your homework first before even thinking about buying used; this will help make the entire process go as smoothly as possible.

How to Invert Colors in Windows 7

Friday, December 7th, 2012

How to Invert Colors in Windows 7 Computer Repair

An optimized color scheme in Windows can put less strain on your eye, which is very efficient for the speed of comprehending what’s on your screen as well as your optical vision. To improve your experience, read below to learn how to invert colors in Windows 7.

What to Do

Click on the Start button on the bottom left of your screen. A search bar should come up directly above the button once your click it. Click on the search bar and type, “magnifier”. Click on the magnifier and it should come up.

When the magnifier comes up, your computer’s screen will zoom itself in. Repeatedly click on the (-) icon until the zoom is normal. Then click on the gray gear on the magnifier application to open up the preferences screen.

On top, there is a scale for adjusting the zoom. Below that is an option for the color inversion. Click on it.

Click on the option and press “OK”. Your colors should be now inverted. If you want to change your settings back, simply access the magnifier again and uncheck the option/move the zoom bar around to your satisfaction.

You can also right click the magnifier application to pin it to the task bar (the bar on the bottom of your screen that shows up what applications you are using) to access it easily on the future. Right clicking the application should bring out the option “Pin to taskbar” that will allow for this.

Benefits

Using inverted color may not only be softer for your eyes but may be saving computer battery. Although it’s minimal, the computer uses less power to represent a black pixel than a white pixel. For a more direct way to save battery, adjust the brightness of your screen.

Additional Help

If you feel like you need professional help on how to invert colors in Windows 7, TalkLocal can help with finding the correct local experts in this case, saving you time and energy in what may be a stressful situation.

Should I Wear a Mask when Painting

Friday, December 7th, 2012

Should I Wear a Mask when Painting Painters

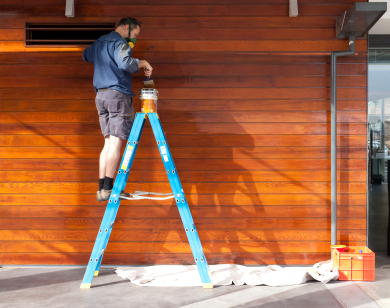
Home renovations/redecorating can be fun but also dangerous if you’re not safe enough. If you’re planning on doing significant painting work or renovations, you may be asking yourself or others, “Should I wear a mask when painting?”  Wearing a mask can be one of the most important precautions that you take.  You often times will need to sand off old paint or do other prep work that will release harmful particles into the air that are extremely harmful if inhaled.  So the bottom line is this: Yes, you should wear a mask if you plan on painting.  You still need to make sure that you’re using the mask effectively to provide the best protection you can get!

The Right Mask

Check that the type of mask you’re currently using fits the type of job you’re doing.  Often times, a simple disposable dust mask will be effective to protect you against the majority of your renovations and painting.  The packaging for the masks will always tell you the recommended uses and applications, so be sure to choose accordingly.  Make sure to also choose a mask with a moldable metal insert so you can fit it to your face.

Facial Hair

Facial hair may create a looser seal, potentially allowing you to inhale harmful dust particles (but not so much for paint fumes).  Shaving your facial hair will allow the mask form to your face and create a tighter seal. 

Use the Double Straps

Masks with double straps will help hold the mask to the top and the bottom of your face, forming a more fitting seal.  Likewise, you’ll want to put the mask on before you put on goggles or any other types of eye wear so they can help create a tighter seal.

Take Breaks

Using a mask keeps all the moisture and heat contained near your face, making extended use extremely uncomfortable, so take frequent breaks to avoid becoming overheated.  Put an alarm on your phone or watch to remind you to take at least a five minute break every hour.  

Wearing a mask during paint renovations is a must for your health and safety.  If you don’t want to deal with wearing masks at all, you can always use TalkLocal to find a local high quality painter to do your paint job for you!

How Often Should you Change your Car Air Filter?

Friday, December 7th, 2012

How Often Should you Change your Car Air Filter? Auto Repair

The car filter makes a car’s engine run more efficiently.  For the engine to run efficient, it needs a clean air supply.  The air filter cleans the air that it takes in for internal combustion, making the engine run.  The air that it intakes is not exactly clean, and as miles or years pass, it begins to deteriorate.  With a dirty air filter, the car’s gas mileage and engine life will decrease.  A dirty air filter will also increase the emissions your car put into the air.  For a car to run efficiently and clean, then the car’s air filter needs to be replaced regularly. How often should you change your car air filter?  Read on for more information.

When?

There are two ways to determine whether a filter needs replaced: mileage and inspection.  In mileage, if the car is driven more than 10,000-12,000 per year, then the car filter probably needs to be replaced every year.  If the car is driven under 6,000 miles a year, then the car filter probably needs to be replaced every two years.  If you are living in a dusty or high air polluted area, make sure to inspect your air filter because these areas could make the filter become dirtier, faster.  To inspect the air filter:

1.      Open hood and locate the black air filter box, (its usually on top or on the side of the engine.)

2.      Unclasp the metal clips and open the box.

3.      Remove the filter and inspect.

If there are is a lot of dirt, then the car’s air filter needs to be replaced.

How?

Replacing an air filter is a very simple process.  Having your air filter replaced by a professional can cost around 20 dollars.  To save money, replace your filter at home with these simple steps:

1.      Repeat instructions for inspecting a car filter.

2.      Throw out the old filter.

3.      Insert new air filter.

4.      Close the box and snap metal clips.

If you are unsure whether or not your filter needs to be replaced, or you would like someone to do it for you, hire a professional.  Use TalkLocal to connect you to the best auto repair technicians in your area today.

What do I do if my Cat is in Heat?

Friday, December 7th, 2012

What do I do if my Cat is in Heat? Veterinarians

A few times during the year, female cats that haven’t been spayed by a veterinarian will go into estrus or “heat” for two weeks, meaning that they’re looking for potential partners to mate with. What do I do if my cat is in heat?  You’ll first want to make sure that your cat is actually in heat at this time by looking for the common symptoms.  During this time, cats will often hold their tail to the side of their body and constantly raise their hind end.  Cats will also be agitated, constantly looking for more attention and calling out with constant meowing, often times so much so that it becomes extremely irritating for their owners.  Fortunately there are a couple of ways to end or actually fully prevent your cat from going to heat.

Pay more attention to your cat

One of the simplest ways to calm your cat during heat is to give your cat extra physical attention, whether it be through petting, playing, or brushing. The increased physical attention will quell your cat’s desire for sensory stimulation.  

Consider mating your cat

If you mate your cat, you’ll stop the current symptoms of heat, but your cat will also most likely become pregnant. While she will no longer be in heat during the gestation period, you need to be sure that you’re willing to prepared for your cat’s pregnancy and litter.

Hormonal Injection

Talk to your local veterinarian about the possibility of hormonal therapy or other medications to temporarily stop the current cycle. For most owners, this is a rather complicated route and involves expensive upkeep. This method is used mainly with pedigree breeders who only want to stop the cycle temporarily. Ultimately, these are all temporary solutions to help deal with your cat’s estrus cycle. If you want to completely prevent your cat from going into heat, you should consider spaying your cat (only if she’s not currently in heat).  TalkLocal can help you find a high-quality local veterinarian who will take extremely good care of your cat.  You’ll be able to talk with a veterinarian about all your options in just minutes!

Can Maids Get Rid of Mildew?

Friday, December 7th, 2012

Can Maids Get Rid of Mildew? Maid Services

You want to clean your home but you notice some mildew in the house. This could lead you to ask “Can maids get rid of mildew?” If you have a mildew problem in your home and are looking to hire a maid to get rid of it, you should first make sure that they can. It is important to understand the mildew and its growth cycle to avoid spending money when you don’t need to.  Mildew is the result of a parasitic fungus.  Read this article on getting rid of mildew for more information.

What makes mildew grow in my home?

Moisture, temperature and food enable mildew to thrive.  For this reason, mildew grows predominantly in bathrooms and kitchens where there is a source of moisture and high temperatures.

How do I keep mildew from growing?

Ventilating the room is a proactive way to decrease mildew growth.  In addition, using chemicals in an option to preventing mildew growth.  After taking a shower, leave the door open and dry the shower walls.

How do I get rid of mildew once it’s started growing?

A 50% percent mixture of water and bleach is one of the better options for getting rid of already formed mildew.  Allow the mixture to sit on the surface that is infected for at least an hour.  After waiting, rinse the area clean with water.  Repeat this step every four or five days for a couple weeks until the mildew is no longer growing.

Can maids get rid of mildew?

Maids can get rid of mildew but only with the assistance of the homeowner.  As described above, treating mildew must happen every 4-5 days alongside ventilating the room and keeping it dry.  Yes, maids can use their tools to get rid of the fungus but only with your help.

To get started on your mildew treatment and eliminate it from your house, use TalkLocal to hire the right maid service for you.  Within minutes you will be connected for free to a high quality professional in your area.