What Should I Do if my Cat has Fleas?

Monday, December 3rd, 2012

What Should I Do if my Cat has Fleas? Pest Control

So, you’ve discovered that your poor feline friend has fleas. You may be asking yourself  “What should I do if my cat has fleas?” Unless you favor natural flea remedies (that are not always successful), it is important to make a visit to the vet. The veterinarian will be able to provide potent flea medicine for your cat, so your pet can start feeling better in a few days. In the meantime, you can use some of these at-home methods to relieve your cat.

Treat Your Cat

–  Fill a spray bottle with equal parts vinegar and water. Spray your pet to temporarily relieve them of fleas (be careful around your pet’s face).

–  Put your pet in the bathtub and administer hydrogen peroxide to your cat’s coat. The fleas should drop off your cat and into the tub.

–  Brush your cat with a flea comb and kill the dislodged fleas by placing them in a bowl of detergent mixed with water.

Treat Your Home

The fleas can jump off your pet and onto furniture and carpet, so it is also important to follow up with cleaning even after your pet has been treated. Fleas that have infested a home can bite the humans that live there, so it is important to treat your home as soon as you discover the fleas.

–  Thoroughly vacuum your home and car. Vacuum under everything including rugs, furniture, etc.  Throw out the vacuum bag immediately after cleaning to ensure the critters don’t crawl back out. You can even hire a reliable carpet cleaning service directly through TalkLocal!

–  After cleaning, spray the house with flea spray.  Follow the instructions carefully and make sure to remove all pets and family members until it is safe to return.

–  Remember to treat your yard, especially the areas where your cat has roamed. Using a professional flea spray, treat your yard according to the instructions.

If you don’t want to remove the pests yourself, TalkLocal can connect you to a local pest control specialist within minutes!

Roof Sagging in Between Trusses

Friday, November 30th, 2012

Roof Sagging in Between Trusses Roofers

When you notice a roof sagging in between trusses, it is usually the result of a damaged or broken roof rafter.  Before fixing the problem, however, it is important to identify the exact cause of the problem.  Other potential causes include damaged roof decking or even an underlying foundation problem.

Inspecting the roof from the underside is the only way to effectively determine the cause of the sag.  Enter the attic and inspect the rafters and the decking.  Take special note of the rafters and decking below the sag that is visible from the outside. Look for:

–  Broken or cracked rafters

–  Broken or twisted metal or plywood gusset plates – used where the lumber members meet on a truss

–  Damaged, rotten roof decking

The best method of repairing any roof damage is to remove the weather sheathing, underlayment, and then the roof decking itself.  However, this is not always possible due to the time of year and/or budget constraints.

Repairing a damaged roof truss or rafter:

The easiest way to bring a rafter or truss member back into shape is to use a piece of steel “L” channel, at minimum 1.5” x 1.5” and at least 2 feet long.

1.  Drill four 3/8” holes in the base of the steel angle stock and four holes in the side. Place the side holes about 1” to the right of the two left side base holes and about 1” to the left of the two right side base holes.

2.  Remove any broken splinters of wood that may prevent the rafter or truss member from re-aligning itself. This can be accomplished with a chisel or reciprocating saw.

3.  Using 3/8” x 2” lag bolts on the bottom of the steel “L” channel, mount the steel “L” channel stock to the truss member or rafter end that is the most difficult to access.

4.  Drill through the holes in the side of the steel “L” channel and insert 3/8” x 2.5” carriage bolts and washers.

5.  With one end of the steel “L” channel securely fastened to the rafter or truss member, draw the broken piece into position.

6.  Choose a lag bolt 3/8” diameter x 1.5” to 2” longer than the gap between the steel “L” channel and the bottom of the truss member or rafter. You want the lag bolt to enter the damaged rafter or truss member by at least an inch before it begins to draw the steel “L” channel to the lumber.

7.  Tighten both of the bottom lag bolts until the washers under the bolt heads are flush with the steel “L” channel. Then tighten the bolt farthest from the crack until the other bolt head is about ¼” from the steel.

8.  Tighten the back bolt so that it is snug against the steel. Start tightening the front lag bolt again and do so until you obtain the ¼” separation on the back bolt. Tighten the back bolt and continue going front to back until the truss member or rafter is snug against the angle steel.

9.  Drill two holes in line with the holes in the side of the steel angle and insert carriage bolts so that the nuts and washers are against the steel angle. Once the truss member or rafter has been reconnected, you may want to add some additional support to that area with a couple 2×4’s.

Damaged or broken gusset plate:

A gusset plate is used to hold the members of the truss together where they meet.  Gussets that are inserted in residential construction are usually very difficult to remove.  Therefore, it is almost impossible to reinstall a metal gusset plate properly in the field or on site.  If you have a gusset plate that has partially or fully pulled away from its lumber members, the best method of repair is to remove the metal gusset and replace it with a ½” thick plywood gusset on both sides.

Damaged roof or decking:

Damaged roof decking can only be properly repaired from the topside of the roof. This entails removing the roof sheathing and the damaged decking in the area where the damage exists.

TalkLocal will help you find reliable roofing professional in minutes!

What Type of Dimmer Switch do I Need

Friday, November 30th, 2012

What Type of Dimmer Switch do I Need Electricians

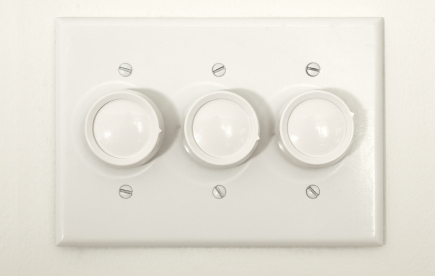
There are times when you want the light to be just right for a romantic evening or a relaxing movie.  Dimmer switches make this possible, and are used to control the lighting in a room.  They can even save energy and increase the lifespan of your light bulbs.  Dimmer switches can dim any type of light bulb except compact florescent light (CFL).  If you’re asking yourself the question, “What type of dimmer switch do I need?” read on for more information to help you choose the right one.

Switch/Slide Dimmer

These dimmers are the most basic and are the most widely used.  They can attach to the wall, floor or directly in table lamps.  There are also switches that can be plugged into the wall outlet.  They usually have a rotator knob which adjusts the light.  The slider offers smoother action than the rotator knob.  These are also the most inexpensive type of dimmers.

Touch

These adjust lighting by touching a panel.  These can be put on the wall or can be connected to a lighting device.  This type of dimmer switch is best for people looking for a simple way to dim their lights.  On the negative side, these dimmer switches usually have a limited selection of lighting.

Remote

Remote dimmers are usually the highest quality dimmers.  The sensor is found on the wall, but can be control by a remote.  This gives the user a variety of lighting settings.  Your favorite lighting setting can even be programmed into the control.  On the downside, they are pricier than a regular switch dimmer.

Automatic Dimmer

This type of dimmer is currently the best on the market.  These dimmers appropriately adjust lighting according to the lighting outside.  This gives the best lighting for a certain room at a certain time.  This option has benefits of saving energy by giving optimal lighting for a room.  On the downside, these are the most expensive dimmers.

If you’re having trouble deciding on a dimmer type or experiencing difficulty installing it, you should consider hiring a professional.  Use TalkLocal to be put in contact with multiple highly rated electricians in your area within minutes!

For installation of dimmers, use an electrician. For electricians, use TalkLocal. TalkLocal can connect you to the best electricians in your area.

What are the Cheapest Replacement Windows?

Friday, November 30th, 2012

What are the Cheapest Replacement Windows? Window Replacement

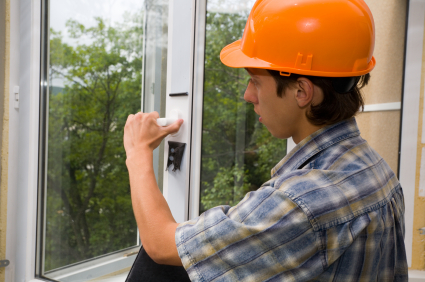
Time for some home improvement, but you’re wondering what are the cheapest replacement windows. Just like with hardwood flooring, consumers can total up a fortune in window replacements due to the multiplication factor. Take for instance a $2 difference in hardwood floor pricing. For 1000 square feet, that can total a numbing $2000 extra. The same goes for window replacements. Most homes have at least 20 windows. If they all need replacing, a difference of $100 in price can rack up a costly bill. Before you go spending a fortune on replacement windows, read the following tips.

1. Avoid the name brands. Traditional big name brands such as Pella, Andersen, Milgard, and Marvin typically have higher prices, even for their low-end windows. Do some research online to find similar windows from less well-known companies.

2. Go for common styles. The cheapest styles tend to be double-hung, sliders, fixed, and casement windows. Save some cash by avoiding fancy shapes and styles.

3. Seek out “contractor grade” windows. Anything called “architectural grade” is bound to be more expensive.

4. Avoid authorized dealers. They usually offer only one brand of windows. Without competition, the dealers can charge a higher price. That being said, don’t be afraid to comparison shop.

5. Question extra features. Low-e coating can be nice, but it often isn’t worth the extra price. Burglar latches should not cost you extra and you can save money by purchasing specialty hardware (pulls, cranks, etc.) yourself at a local hardware store.

6. Get the cheap materials. Vinyl windows are by far the least expensive windows available. Wood and fiberglass windows will cost you extra.

7. Negotiate price. Every window replacement company, even authorized dealers, will negotiate price. You can save hundreds of dollars by asking for a price 20% lower than the original. If you find a better deal elsewhere, don’t be afraid to ask them to match the price and even go lower.

Once you find the right windows, TalkLocal can help you find the best window replacement professionals in your area!

Can I Upgrade from Leopard to Lion

Friday, November 30th, 2012

Can I Upgrade from Leopard to Lion Computer Repair

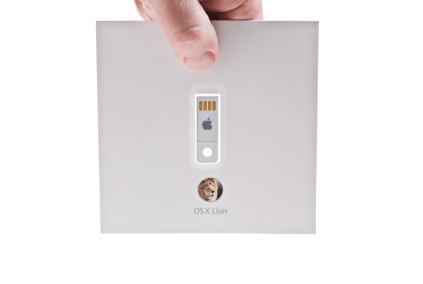
It’s time for an upgrade, and you’re wondering “can I upgrade from Leopard to Lion?” Before upgrading to a Lion, make sure that your Mac can run Lion. Legally, if you only have Leopard, you need to upgrade to Snow Leopard first before you upgrade to Lion. This means that you will need to purchase Snow Leopard as well.

How to Upgrade

The latest version of the OS X system is currently Mountain Lion. Read on to learn how to upgrade to this latest version of Lion. Your Mac must be one of the following models in order to run Lion, according to the apple website:

– iMac (Mid 2007 or newer)

– MacBook (Late 2008 Aluminum, or Early 2009 or newer)

– MacBook Pro (Mid/Late 2007 or newer)

– MacBook Air (Late 2008 or newer)

– Mac mini (Early 2009 or newer)

– Mac Pro (Early 2008 or newer)

– Xserve (Early 2009)

1. Once you confirm that your computer can run Lion, make sure that your version of Snow Leopard is updated.

2. Click on the apple icon on your Mac located on the top left corner of the your screen. A menu will come up.

3. Click on the second option, marked as “Software Update…” This should update your Snow Leopard to the latest version, v10.6.8.

4. Go to your Mac App Store.

5. Download the OS X Mountain Lion.

6. Follow the onscreen instruction on how to install the software. The OS X Mountain Lion is scheduled to be available in July 2012.

Additional Help

If you are having a problem with downloading, visit a local apple store for direct help. If you have a different problem that was not addressed by this guide, then contact professional help for upgrading your system. TalkLocal can help with finding the correct local experts in this case, saving you time and energy in what may be a stressful situation.

Should I Replace a Cracked Windshield

Friday, November 30th, 2012

Should I Replace a Cracked Windshield Auto Glass Repair

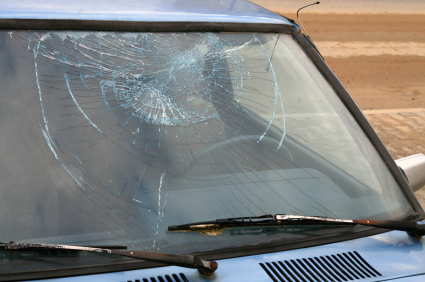
Should I replace a cracked windshield? You may be asking yourself that same question if you have a crack in windshield. A cracked windshield can, along with being annoying, pose as a potentially dangerous problem.   Whenever a rock or other projectile chips or cracks your windshield, it can cause a crack—even a tiny—that can eventually spread and compromise the structural integrity of your car. For example, if you get into a car crash, your windshield actually acts a structural support that keeps your roof from caving in.  Likewise, the airbags usually expand towards the windshield and any weakness in the windshield may shatter, endangering everyone in the car.

Fortunately, with modern technology, the majority of the cracked windshields now can be repaired without needing to replace the entire windshield, saving you both time and money. Most chips can be repaired by injecting a special resin into the windshield, sealing the crack and preventing further cracking.

Replace or Repair?

This all depends on the severity of the crack. The resin injection technique normally works well with quarter-sized chips and cracks up to three inches long, while some specialty repair shops may use another technique that allows repair of cracks up to 12 inches long. Make sure you check with an auto-glass repair store before deciding your course of action. Major impacts with large objects are beyond repair and most likely will require windshield replacement. If the damage was larger than the cracks mentioned previously, it is safest to get an entire windshield replacement.

It’s strongly advised to repair your cracks as soon as possible, since they may spread if left untreated. Dirt, water, and other grime can seep into the crack, lowering the effectiveness and the clarity of the repair.  TalkLocal can connect you to high quality local auto glass repair shops so you can get that cracked or chipped window fixed as soon as possible with minimal effort on your part. You’ll be back on the road in no time!

Lost the Key for a Safety Deposit Box

Friday, November 30th, 2012

Lost the Key for a Safety Deposit Box Locksmiths

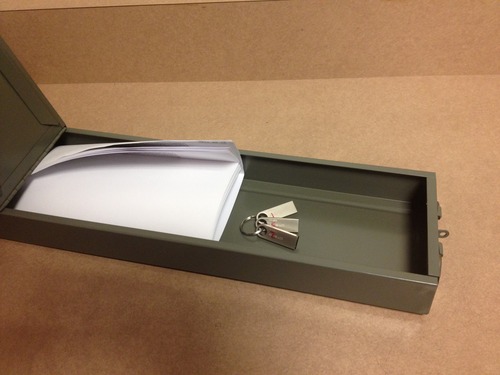
Many people invest in safety deposit boxes to hold their jewelry, money and important documents.  These boxes are individually secure containers held in banks that act as storages that protect against theft, fire, floods, etc.  They are opened when the key given to the owner of the box and the key held by the bank are used simultaneously.  If you lost the key for a safety deposit box, it may cost you.

The first and most important thing to do in the case that you misplaced your safety deposit box key is to keep looking! The process to replace your key is long, annoying and expensive.  Without having your key, the bank will have to drill the box open at your own cost.  This process can cost up to $150.  Another option you have is to replace the lock, but this also costs money and is only slightly cheaper if you have one of the keys.

The bank does not keep an extra set of keys for your safety deposit box because of safety and privacy issues.  There is only one set and that is given to you so if you lose it you will need to get a whole new lock/set of keys.

In order to get into your box without your key you will have to go through an elaborate process.  First you must go to your bank with a valid government issued identification. The bank will have to verify your identity and schedule another appointment to have the box drilled. The owner of the box and the bank representative need to be present when the safety deposit box is being drilled.  Remember, the cost of drilling and replacing the lock/keys is all on you.

If you are looking for help with your problem you should seek professional help.  Use TalkLocal to be put in contact with reliable local locksmith almost immediately. Simply input your problem and availability, and TalkLocal will do the rest.  Within minutes, you should be on the phone with a qualified company who is ready to help you out.

Mouse Poison Safe for Dogs

Friday, November 30th, 2012

Mouse Poison Safe for Dogs Pest Control

Is mouse poison safe for dogs? Generally speaking, no, but it depends on the type you use. Regular mouse poisons are usually harmful for pets. Commercial rat poison leads to internal bleeding and death when ingested by a rat. For humans and dogs, ingestion of these poisons can also cause internal bleeding and death without treatment. However, there are some safe poisons that can be bought or homemade. There also some alternatives than using rat poison.

Safe Mouse Poison

There are commercial rat poisons on the market that are safe for all pets and humans. Eradibait is a natural rat poison which is safe to non-rodents due to its plant material composition. It kills rodents by capitalizing on their unique digestive system. The poison causes dehydration, which induces blood thickening and circulatory collapse. The mouse will then go into a coma and die. This particular poison is only sold in the UK and must be bought online. There are also other all natural, non-toxic rat and mouse products out there that you can purchase in the United States. You can find different types of safe mouse poisons on Amazon and have them shipped overnight starting at $10.95. There is also a homemade poison you can try that is made with baking soda. The homemade concoction kills rodents by causing an internal carbon dioxide build-up. Make this pet-friendly mouse poison following these instructions:

1.      Mix 1 cup of flour, 1 cup of sugar, and 1 cup of baking soda in a bowl

2.      Place small amounts of the mix onto small plates

3.      Spread peanut butter or other food around the edges of the plates

4.      Put places into highly active rodent areas of the house

Alternatives

There are also many alternatives that can eliminate the mouse infestation without the use of potentially harmful rodent poisons.

1.    Live Traps- Live traps allow you to capture the mouse and dispose of it on your own. The downside, however, is that with large infestations, this may not be effective and may slow the process of eliminating them from the house. You can find and purchase mouse and rat live traps on Amazon and have them shipped overnight starting at $9.97.

2.    Kill Traps- Glue and snap traps can be used to kill rodents with only a minor risk of injury to your pets. Once again, the downside is low effectiveness and efficiency. You can find and purchase mouse and rat kill traps on Amazon and have them shipped overnight starting at $7.98.

If you’re still experiencing rodent problems after trying all of the methods listed above, you should consider hiring a trained professional. TalkLocal can connect you to several highly rated pest control professionals in your area within minutes. Simply enter a brief description of your service needs along with your location and availability, and TalkLocal will do the rest.

The owner of this website is a participant in the Amazon Services LLC Associates Program, an affiliate advertising program designed to provide a means for sites to earn advertising fees by advertising and linking to Amazon properties including, but not limited to, amazon.com, endless.com, myhabit.com, smallparts.com, or amazonwireless.com.

Different Types of Roofs for Homes

Thursday, November 29th, 2012

Different Types of Roofs for Homes Roofers

When designing and building your own home, you can choose from a variety of different types of roofs for homes.  These styles range from modern to traditional.  Listed below are different types of commonly used roofs.  See which one will work for you and your future home.

Mansard Roof

This type of roof is made up of four slopes, two on each side of the home. The lower slope is always steeper than the upper slope. The flatter upper slope may or may not be visible from the ground.

Gambrel Roof

The Gambrel Roof is very similar to the Mansard Roof. The main differences are that the gambrel has vertical gable ends and the roof hangs over the façade of the home.

Saltbox

The Saltbox roof gives a home a more modern feel. It is an asymmetrical long pitched roof with one short side and one very long side. It often results in a home that is one story in height on one side of the building and two stories on the other side.

Pyramid Roof

As the name suggests, this is a roof that is shaped like a pyramid. This roof is typically used on small portions of a roof, like this, or on small structures such as a garage or pool house.

Hip Roof

The Hip roof is very similar to the pyramid design, but instead of coming to a point the roof is flat on top.

Gabled Roof

This type of roof looks like triangles from the front of the home. It can come in a variety of types, including the Cross Gabled Roof.

Flat Roof 

As the name implies, this is a roof that is completely flat. This design is more common in modern home designs and sometimes has rooftop access, a perfect place to entertain guests on a beautiful day.

Skillion Roof

This type of roof is a single sloping surface. It is often used on just one portion of the home, or used in modern designs on a multi-level home to create unique shapes and patterns.

Curved Roof

The curved or arched roof is typically used on a single portion of the roof, such as the entrance to a patio. However, some modern designs have a curved roof over the entire structure.

If you’re looking for a contractor or roofer to do the job for you, use TalkLocal.  This completely free service will connect you to up to three service professionals in your area who are willing to help.

How to Fix a Loose Shower Head

Thursday, November 29th, 2012

How to Fix a Loose Shower Head Plumbers

Shower heads are susceptible to a bunch of issues. Leaks can sprout, the swivel can become too tight or loose, and water may not stream out of every hole. Problems arise, and when they do, reading this guide will allow you to know how to fix a loose shower head.

The first step is to locate the water shutoff valve for the shower and turn that off to eliminate the water supply to the shower. The next step is to release all the water contained in the shower head and pipes by opening the shower faucet and letting the remaining water out. Next, you will want to do is cover the drain so as to prevent any loose pieces from falling down the drain.

With these preliminary steps out of the way, the next step is to remove the shower head, either with large pliers or by twisting it with your hand if able. Once it comes off, there should be a screw in the middle of the head, which needs to be unscrewed to take the head apart. It may be a good idea to take a picture at this point so you can have visual aid of what the head looks like before attempting to fix it.

Clean every piece that you are able to clean, while also taking note of the condition of the pieces within the head. If they look like they need to be replaced, then they probably do, as this could contribute to the issue. Or, you could purchase another shower head to minimize your troubles and save yourself time.

Cleaning every piece can often be the most important part of fixing a loose shower head. You can use a brush to clean grime and a toothpick to open the spray holes. It may also be a good idea to soak the entire head in vinegar to give it a thorough cleansing.

Once all this has been done and all the pieces put back in their proper place (refer to your picture if need be), simply screw the shower head back on. With the interior clean, the shower head should work as smoothly as it did when it was first purchased.

If you followed these steps and still need help, don’t fret. TalkLocal is here to help! TalkLocal is a free service that will connect you with top-quality, reputable plumbing companies in your neighborhood within minutes. Just enter in your specific problem, location and availability, and up to three companies will call YOU directly, saving you the time and stress of finding one yourself.