Why is my Paint Peeling in the Bathroom?

Wednesday, December 5th, 2012

Why is my Paint Peeling in the Bathroom? Painters

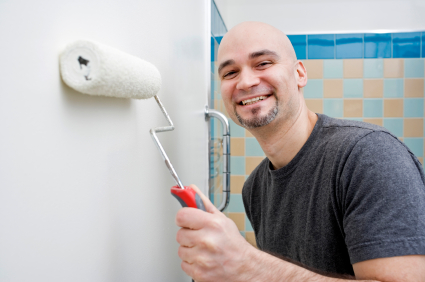
You notice that your bathroom walls are not looking so good and you keep asking yourself,  “Why is my paint peeling in the bathroom?” The most common reason for paint peeling in a bathroom is the sheer amount of moisture absorbed by the paint. If your bathroom paint is frequently exposed to moisture, eventually it will peel. When getting out of the shower or bath, try not to get too much water on the walls. Some factors, on the other hand, are out of your control, such as the water vapor after a shower, which will occur no matter how careful you are. The easiest solution is to always turn on the bathroom ventilation fan after a shower to quickly drain away the moisture before it soaks into your walls. If you don’t have a ventilation fan, leave the bathroom door open after a shower.

If it’s too late, and paint is already peeling in your bathroom, here are some tips for a more water resistant paint job when you redo your walls.

1. Use a scraper to remove the old and peeling paint from the walls.

2. Fill up any cracks you find to make the wall as smooth as possible.

3. Use a mold and mildew resistant primer that binds tightly to paint.

3. Select paint with a high sheen, as the higher the sheen the less moisture it will absorb. Satin or semi-gloss paints are the best for bathrooms.

4. Use an oil-based paint as opposed to a water based paint. However, if you use an oil based paint, make sure the room is well ventilated as oil-based paints can be toxic when wet. To check if the paint in your bathroom is water based, rub it with ethanol; the paint becomes soft and comes off, then it is water based.

A moist bathroom that has peeling paint also has a high chance of having mold behind the paint, so you should get a professional painter’s evaluation of your needs. He/she will recommend the paint that’s best suited to your bathroom. To find a professional painter, use TalkLocal for free to book an appointment on your schedule right now!

What to do when my Dog is Constipated

Wednesday, December 5th, 2012

What to do when my Dog is Constipated Veterinarians

Constipation is defined by the inability to defecate normally.  Like in humans, older dogs are more prone to the condition, though it can happen to any dog at any age.  If you notice that your dog is straining when trying to poop, your dog may be constipated.  Read on for tips on what to do when your dog is constipated.

Primary Causes

Swallowing objects that are not easily digested, such as hard pieces of bone, buttons, coins, grass and sticks most commonly causes constipation in dogs.  Other causes include slower intestinal processes, parasites, enlarged prostates, concurrent kidney disease, hernias, or simply swallowing grass or hair.

Immediate Care

If you notice a thread or string in the anus, do not pull it.  This can cause internal damage.  Also note:

–  Always wear rubber gloves when dealing with feces and related anal problems.

–  If you can see grass in the anus, gently ease it out.

–  If feces are matted around the anus, trim carefully with scissors.  (For longhaired dogs, particularly small ones like Yorkies, you may need to soak the dog’s bottom in warm water before you begin trimming to make it more comfortable.)

–  Wash the anal region with warm, soapy water and apply a soothing water-soluble jelly (such as K-Y) to the inflamed area.

–  Take t he dog’s temperature.  If it is abnormally high or there is blood on the thermometer or resistance when inserting the thermometer, see your veterinarian

Veterinarian Care

If your pet has trouble defecating for several days, is vomiting, or seems abnormally uncomfortable, take him to a veterinarian immediately.  The vet will run tests to discover the problem.  Depending on cause, the vet may administer fluids intravenously or even recommend surgery.

Prevention

Since the ingestion of foreign objects is a primary cause of constipation, it is important to control the habit as much as possible.  This includes the ingestion of grass and sticks.  Avoid giving your dog bones.  Instead, substitute a nylon chew toy.  Keep your dog hydrated by providing water regularly.  As your dog ages, change his dog food to a senior-dog brand that has more fiber.  Also, neutering your male dog at an early age will prevent growth of the prostate, which can lead to constipation.

If you have any questions or concerns about your dog’s digestive system, it is important to consult a certified professional.  Use TalkLocal to find a reliable veterinarian quickly and easily!

When should I Change my AC Filter?

Wednesday, December 5th, 2012

When should I Change my AC Filter? Heating and Cooling

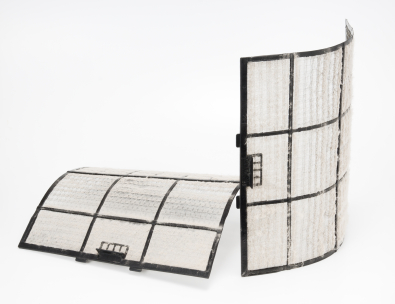
One of the cheapest things you can do to maintain your home A/C system is to change out the filters, as dirty filters can release dirt and pollutants into your home that can damage your health and equipment. Asking yourself, “When should I change my AC filter?”  will depend on several factors about the environment that your A/C system is servicing.

Type of Filter

The quality of filter you use will significantly impact how often you need to change the filter. As a general rule of thumb with standard 1″ to 3″ air filters, you should change them out approximately every one or two months. However, if you are more sensitive to dust or have allergies, you may want to upgrade to a high quality filter that usually lasts longer (these have a higher upfront cost).

Overall Air Quality

The lower the air quality in the home, the more often you’ll need to change out your A/C filter since it will be picking up more debris and pollutants in the air. This can be influenced by many geographical factors, such as if you live near warm, dusty climates or by high levels of air pollutants (from factories and other industrial sites). Likewise, the amount of smoking, mold, or moisture deposits can decrease the air quality in the home and, correspondingly, the life of your A/C filter.

Occupancy of the Home

The number of people and pets living in the home will also impact the life of the air filter.  Pet dander and hair can quickly block up your AC filter. In general, the more traffic there is in your home, by pets or people, the more often you should change your filter. Vacation homes that are hardly used other than the summer can last up to a year before needing to be changed.

If you want to contact a HVAC service to replace your filter, TalkLocal can connect you directly to a high quality local business in minutes!

Should I Repair or Replace my Roof

Wednesday, December 5th, 2012

Should I Repair or Replace my Roof Roofers

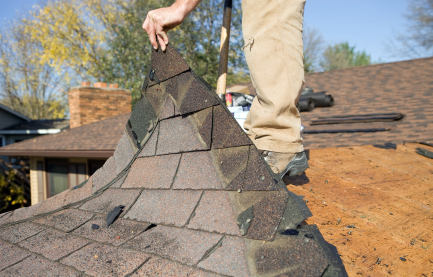
Roofs are one of the most critical parts of a home to repair and maintain. The roof keeps the home dry and prevents any water damages. With damaged or worn shingles, water can seep through the roof, rot the wood, and cause bigger problems for your house. You should be repair loose shingles immediately because they are easily damaged during storms. If you keep asking yourself , ” Should I repair or replace my roof?”, you should estimate the time it would take to do each and see what works best for you. Take into consideration how long the job will take and if the weather will permit. Also, how much are you willing to spend? You should also consider the age of the roof. Roofs that are under twenty years old should be fine with just a repair. Furthermore, loose roof shingles are easy to fix and can be done without a professional.

Materials

– Pry Bar

– Roofing Cement

– Hammer

– Replacement Shingles

– Galvanized 1 ¾ inch roofing nails

– Ladder

How to fix loose shingles

1. Climb the ladder to the roof. Remember do not go on the roof when is wet or slick.

2. Examine roof for loose shingles. To check for loose shingles, try to lightly pry at shingles. If they come up easily then they are loose and need to be repaired.

3. Pry the tab portion of the shingle to expose the nails that attaches them to the roof.

4. Slide the pry bar under the nail and pry out the nail. Repeat until all the nails are out of the loose shingle.

5. Remove the loose shingle and examine it and the shingles near it for damage. If the loose shingles is damaged, remove and trash damaged shingles. If is loose shingle is not damaged, insert the shingle back into place and re-nail the shingle down with an additional roof nail.

6. Apply roofing cement on the underside and edges of the original or replacement shingle and press it back into place. Use utility knife if necessary to fit the replacement shingle in the spot of the trashed shingle.

7. Nail the original or replacement shingles into place.

8. Cover nail heads with some roofing cement.

If you want shingles replacements from a professional, use TalkLocal to find the best roofers in your area.

What to do when you Lost your Keys to your Car

Monday, December 3rd, 2012

What to do when you Lost your Keys to your Car Locksmiths

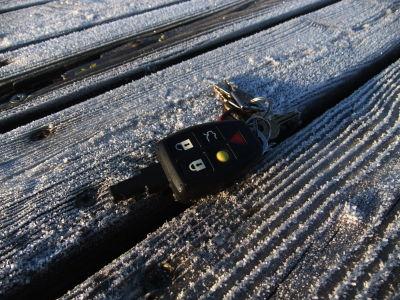
Everyone has lost their car keys at least once.  If this has happened to you, read on for information on what to do when you lost your keys to your car.

First, retrace your steps and look for them.  More often than not, you’ve just misplaced them and forgotten about it.  If this is not the case and you don’t have a set of spare keys, this leaves you with no option other than to have a new set of keys made.

–  Locate your VIN (Vehicle Identification Number).  This is usually in the vicinity of the driver’s side dashboard.  Call your local dealership and provide your VIN.  They can duplicate your key with this information alone.

–  Check if your insurance policy includes Roadside Assistance Coverage, which generally includes 24-hour locksmith services for when you lose your keys or lock them in the vehicle.  If you do, call your insurance company.  They will dispatch a locksmith professional to come to your car’s location and make duplicates.

–  Call a locksmith’s company and give them your VIN.  They will be able to make a duplicate key which you can pick up from them.

To get in touch with a locksmith’s company in your area today, use TalkLocal.  This completely free service will connect you to up to three high quality professionals within minutes.

Prevent Back Injuries when Shoveling Snow

Monday, December 3rd, 2012

Prevent Back Injuries when Shoveling Snow Snow Removal

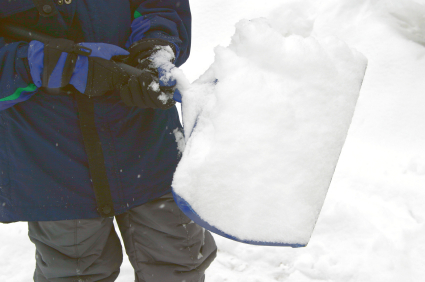
Shoveling can be one of the most tedious chores to do when winter rolls around.  Not only is it cold and miserable, but it is also exhausting and potentially dangerous if done the wrong way.  Many people suffer from back injuries when they shovel, but this is an avoidable outcome. Prevent back injuries when shoveling snow by making sure to take the right precautions.

Things to consider:

1)     Your shovel

2)     Your muscles

3)     Your body

4)     Your technique

The first thing to look into is finding a good shovel.  Many new shovels have more ergonomic designs that can reduce the amount of stress on your back.  They also have better metal on the bottom that allows you to remove snow and ice with ease.  You should look for a shovel that alleviates some of the effort for you.  Try a shovel with a curved handle that can adjust to height, which will reduce the amount of bending you do.  You will be required to bend your legs and back only slightly while still getting the same amount of snow off the ground.  If you want, a lighter shovel may also reduce the amount of weight you are throwing around.

Another thing you should be aware of is your muscles.  Make sure to move around and warm them up so that they are more flexible when it comes time to do the job.  Cold, tight muscles are more prone to injury or seizing up.  Anything that increases your heart rate and keeps you warm will make your shoveling experience less painful.

Furthermore, you need to be aware of what your body can handle.  You should shovel small amounts of snow frequently rather than strain yourself all at once.  Lifting large amount of snow very slowly is actually worse for your back.  If you feel as though your body cannot handle the shoveling, you should stop and hire a snow removal service to finish the job for you.

Finally you should always practice safe lifting technique when shoveling snow.  Face the mound you want to lift with your feet and hips squared.  Bend from your hips, not your back, while pushing your chest out.  This will allow you to lift with your knees bent.  Grip your hands as close to the blade as possible, and avoid twisting at odd angles when dumping the snow. You should also walk to the place you want to unload the snow rather than reaching/tossing it.

If you are looking for a snow removal company use TalkLocal to be put in contact with reliable local businesses. Simply enter a brief description of your service needs along with your location and availability, and within minutes you should be on the phone with a professional willing to help.

Laptop Battery will not Charge

Monday, December 3rd, 2012

 Laptop Battery will not Charge Computer Repair

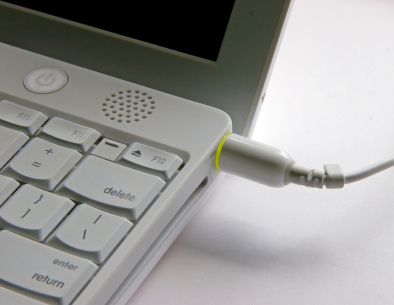
If you are plugging your laptop computer into charger, but it does not appear to be charging there are a number of problems you could be having. This article will help you to figure out why your laptop battery will not charge.

Not Plugged In

This may seem simple, but before you try to figure out if there is a problem with your computer or battery, make sure that you are actually plugging your computer in. Check that the cord is all the way pushed in to both your computer and the outlet. Check that any detachable parts of your cord are attached all the way. If you are plugging your computer into a power strip or extension cord, make sure that the power strip/extension cord is plugged into the wall. If there is a switch, make sure it is turned on. Also, make sure that your battery is properly seated inside your computer. If everything is plugged in, you should also try plugging your computer into a different outlet to see if there is a problem with your outlet.

Battery not Working

To check whether or not your battery is working, remove it from your computer and then plug your computer into an outlet. If it turns on and works correctly, then the problem is your battery and you will probably have to get a new one. If it is a new computer, contact wherever you bought it and let them know they sold you a defective battery.

Problems With Your Charger

Inspect your power cord. Are there any kinks or breaks? Have any parts been chewed by a pet or caught in a vacuum cleaner? Is the brick discolored, warped, or expanded? Does it smell like burnt plastic? If you said yes to any of these questions, you will likely need to replace your charger. If there are detachable parts, you may only have to replace the part that is broken.

Laptop Overheating

Overheating can cause the battery not to charge until it has cooled down, especially if you are using an older laptop with outdated cooling technology. Your laptop may also overheat if you have it on a blanket, your lap, a couch, or a bed. If your laptop feels hot, turn it off, unplug it, and rest it on a flat, fully ventilated surface until it cools down. After it has cooled down, check to see if it will charge properly.

Update Your Drivers (Windows)/SMC (Mac)

If none the above things are working, the problem is most likely coming from inside your computer. If you are using a Windows computer, you can try updating your drivers.

1. Open the Control Panel.
2. Click on Device Manager.
3. Open each option under Batteries (battery, charger, and “Microsoft ACPI Compliant Control Method Battery”), bringing up a Properties window for each.
4. In each Properties window, go to the Driver tab and click Update Driver.
5. When you have updated the driver in all three, restart your laptop and try plugging it in again.

If you are using a Mac computer, you can try restarting your System Management Controller (SMC).

1. Shut down your computer.
2. Unplug your charger from your computer, if it’s still connected.
3. Remove the battery.
4. Press and hold the power button for five seconds.
5. Release the power button.
6. Reconnect the battery and charger.
7. Press the power button to turn on the computer.

Contact a Computer Repair Professional

If you have tried everything above and your laptop is still not charging when you are plugging it in, you may have to contact a computer repair professional. With the help of TalkLocal, you can receive phones calls within minutes from up to three high quality computer repair professionals in your area that are available when you are.

How to Fix Loose Shower Tiles

Monday, December 3rd, 2012

How to Fix Loose Shower Tiles Plumbers

Loose shower tiles are something that must not be left unattended because they can cause water and debris to build up, making the fixing process harder as time passes. Fixing shower tiles is not a hard job and can easily be done at home with just a few tools. Read all about how to fix loose shower tiles below.

You will need:

Grout saw

Hammer

Chisel

Water

Sponge

Mortar

Putty Knife

New Tiles (optional)

How to Fix Loose Shower Tiles

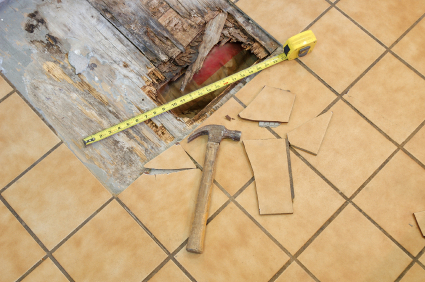
1. Check if the tile comes out by hand. If it does, just remove it. If the tile does not come out by hand, use a grout saw to remove the grout surrounding the loose tile.

2. Use a hammer and chisel to slowly chisel it out from the bottom.

3. Once the tile comes off, clean up the space behind the tile with a hammer and chisel.

4. If the tile is still in once piece and you think it can be reused, then clean it with water and scrub it well. If not, use a new one.

5. Apply a thin layer of mortar to the back of the tile with a putty knife.

6. Fix the tile in place and press it in to secure it.

7. Remove any excess mortar that seeps out of place using the putty knife and sponge.

8. Fill the spaces around the tile with pre mixed grout using the putty knife.

9.  Wipe off excess grout with the sponge.

If you don’t have the time to fix loose tiles in the bathroom, you can hire a local professional to fix it for you. Just tell TalkLocal your service need, location, and availability, and we’ll do all of the searching for you. Within minutes of submitting your service request online, you will be on the phone with high rated local businesses who can help fix your loose bathroom tiles.

How to Install a Car Radio

Monday, December 3rd, 2012

How to Install a Car Radio Auto Repair

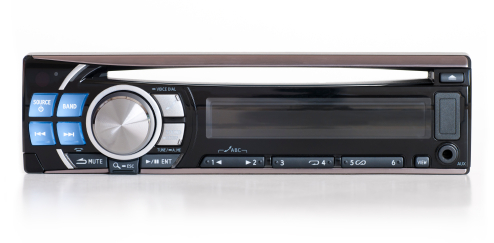
Time to give your old car a makeover? One of simplest things to do is to upgrade the radio. Installing a car radio is an easy do-it-yourself task. Different car makes have slightly different methods to install a car radio, but the general instructions are fairly similar. Read below for detailed instructions on how to install a car radio.

Removing the Car Radio

1. Detach the negative cable from battery to prevent any injuries.

2. Detach radio from panel. The car radio is either attached by screws, a cover, or a panel.  Screws can be removed by a screwdriver and covers can be popped off. Panels are a little more complicated, so refer to the car’s instruction manual.

3. Pull the second panel out slowly until it unsnaps.

4. Remove any screws or bolts that are keeping the radio in place.

5. Gently pull out the radio to access the cable that attaches the radio to the car. Unplug it.

Installing the New Car Radio

1. Plug in the cable of the new radio.

2. Put the radio in place without crushing or mangling the wires. This prevents the radio from becoming damaged.

3. Screw any remaining screws to the radio tightly.

4. Replace the plastic panel and screw it on tightly.

5. Replace the outermost panel and screw on tightly as well.

Installation Issues

If you are having problems installing a new unit, many auto repair companies have car radio installation services. If you are looking for auto repair companies, use TalkLocal. This completely free concierge service is the best at connecting you with high quality auto repair companies in your area. Just go to the TalkLocal website and submit your problem, location, and availability. Within minutes, you will be on the phone with real people who can help with your specific problem at your convenience.

What is a Lift and Slide Door

Monday, December 3rd, 2012

What is a Lift and Slide Door Window Replacement

I’m sure that you’re familiar with a typical door: you turn the doorknob and push the door at the hinges to turn at a 90 degree angle.  They’re simple to install and easy to maintain, but they less efficient when it comes to space.  Hinge free doors, like a lift and slide door, do not require the door to turn at an angle.  What is a lift and slide door?  A lift and slide door minimizes the space lost in opening/closing doors as it not only uses a sliding system to operate, but also utilizes outdoor space to blend in with the indoor spaces.

What is a lift and slide door?

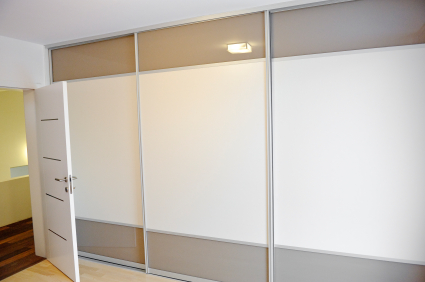
Lift and slide doors are slide doors that are set up like walls in your house, except they are designed to be opened when needed by sliding rather than opening at an angle.  The outdoor space adjacent to these doors generally has tiles that are similar to the ones inside the door in your house.  Since the tiles indoor and outdoor are similar, opening the wall-like lift and slide door successfully integrates the outdoors into your home, perfect for an event like a barbeque.

How you can have one in your home 

Lift and slide doors, due to the amount of work needed to plan and install them, are not considered a do-it-yourself project.  Not only you will have to install the large sliding doors, but also the framework and the matching outdoor tiles.  Therefor, it is recommended that you consult a professional when planning to install a lift and slide door.  Also, keep in mind that the optimal settings vary per house.  There are various factors you may want to account for including the direction of the sunrise, nearby sounds and wind currents.

TalkLocal can help you find the best local professionals to install your lift and slide door, saving you time and energy in what may be a stressful situation.