Network Connection not Working after Power Outage

Wednesday, November 28th, 2012

Network Connection not Working after Power Outage Computer Repair

Routers and modems are already fickle pieces of hardware in the first place, and when hit by a power outage, practically anything can happen to your network connection. However, try these basic solutions if you find your network connection not working after a power outages. Chances are your connection will magically start working again.

Reset your router

This renews your IP address and restarts your router, which gets rid of most system errors within the router. Since the router is like a mini-computer, restarting it will solve data corruption and memory leak problems just like how restarting your computer solves many common system errors. This is a quick catch-all method that usually solves most networking problems.

Connect directly to your modem

Wireless connections in general are unstable, and your problems may be fixed by simply connecting directly to the modem through an Ethernet cable. Even if using an Ethernet cable may not be plausible in the future, use this method to determine the location of the problem. If your internet works when connected to the modem but not to your router, the problem lies within your router.

Reinstall your network adapter drivers

Go to the drivers and devices page of your computer manufacturer and find the newest network adaptor driver for your computer model. You may have to provide the serial number of your computer in order to download the driver. If your computer does not have internet, download the driver from a computer that does and transfer the file to the problem computer through a USB drive. Double click on the driver and install.

Buy an external network adapter

There’s a chance that the power surge blew the internal network adapter, but you’ll still be able to access the internet through an external network adapter. They’re relatively cheap, starting from around $15 online.

Networking issues are common even without a power outage thrown into the mix, so they can be very complicated. It’s best to consult a professional technician if you find your network connection not working. Use TalkLocal for no additional charge to find one now!

Is it Safe to Paint while Pregnant if you Wear a Mask

Tuesday, November 27th, 2012

Is it Safe to Paint while Pregnant if you Wear a Mask Painters

You’re pregnant and preparing for the newborns room so you might be wondering, is it safe to paint while pregnant if you wear a mask?  If you have already inhaled paint fumes, do not worry because there is only a small chance that birth defects will actually result.  However, the following is a list of precautions alongside some information to keep you informed so you can make the best decisions for you and your child when painting while you are pregnant.

Wearing a mask can be beneficial if you are painting while you are pregnant.  However, it is very important to pay attention to the type of masks you are purchasing along with taking other necessary precautions to reduce the risk of birth defects.  Wearing a mask is a great option when painting while you are pregnant but if you take other precautions, wearing a mask may not be necessary.

Are there preferred styles of masks to buy?

Yes – buy respirator masks. Check on the back of the box to make sure they are approved to keep out both debris and fumes.  Many masks are made to simply keep out debris but the main issue with paint while you are pregnant is the fumes.

What type of paint is the safest?

The safest paints to use are latex (or acrylic) paints.  Latex paints are not made with the more harmful materials that are used in other paints.  Working in well-ventilated areas is imperative while using even latex paints.  In addition, if you feel sick at all, take a break and get some fresh air.  Check out this helpful link to gather more information – painting while pregnant.

What types of paints are more harmful than others?

Oil-based paints are more harmful than latex paints and should be avoided.  Exposure to oil-based paints has a much higher risk of miscarriages.  If you do have to be around oil-based paints, make sure the area is well ventilated, your skin is covered and your time is limited in the exposure area.

What is something that I may not be aware of?

Remember lead paint?  Even if you are not painting with lead paint, you should still take precautions.  Be aware that you are not sanding or scraping any old paint that may be lead paint.  This will release the fumes into the air and may cause major problems for you or your child.

These precautions only reduce the chances of harm; none of these steps will completely eliminate the threats.  In order to keep yourself and your child completely free from harm, hiring a painter is the best option.  To find a painter that will come at the exact time that fits your schedule and is in your area, use Seva Call.  You will be directly connected to mutliple highly rated painters within minutes.

How to Shovel Snow from your Roof

Tuesday, November 27th, 2012

How to Shovel Snow from your Roof Snow Removal

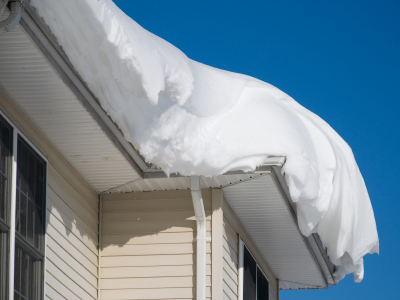
A snow day has its pros and cons; you get to take a day off from work, but you need to clean up the snow as well. Shoveling your driveway is rather easy, but getting rid of the snow on your roof can be a much more daunting task. Learn how to shovel snow from your roof with the steps & tips provided below.

Is it worth it?

Are you worried that your rooftop could collapse under the weight of all that snow piled up? You may be right – but you may be wrong, too. The possibility of your rooftop collapsing happens under very specific conditions:

1.  Your roof is naturally very weak.

2.  The snow piled up on your roof melts and refreezes under the cold weather, more snow builds up, and repeats the same process. This results in a more compact buildup of water (ice) on top of your roof, which weighs much more than snow. Your roof is much more vulnerable to a collapse with a much greater weight above it.

Unless you know that your roof has had problems in the past or there has been large fluctuations in temperature with constant snow, you do not need to clean the snow on your roof. The snow should melt naturally as temperatures rise.

Shoveling your roof

Follow this guide in order to learn how to shovel snow from roof safely:

– Materials needed: Suitable clothing for snow work, Snow Shovel, Ladder, Roof Rake

– Optional: One other person, Rock Salt

1.  First, clean up the ground near the roof that you will place the ladder on.

2.  Place the ladder firmly against the walls of your house so that you can reach the roof.

(Have one other person hold the ladder, if possible.)

3.  Using the roof rake, carefully drag the snow to the ground.

(If you find that snow has melted into ice, sprinkle some rock salt on the ice.)

4.  Use the snow shovel to clean up the snow on the ground.

If you feel like you need professional help cleaning up snow, Seva Call can help with finding the right local experts for your job, saving you time and energy in what may be a stressful situation.

Electronic Locks vs. Mechanical Locks

Tuesday, November 27th, 2012

Electronic Locks Vs. Mechanical Locks Locksmiths

Electronic locks vs. mechanical locks is one of the great debates in the gun safe world. This debate extends not only to the gun safe world but also concerns other groups looking to safely secure their items while wanting to maintain an ease of access. Both electronic locks and mechanical locks have many pros and cons. Listed below are the main points to remember when deciding between an electronic lock or mechanical lock for a safe. Electronic locks are usually faster to open, however they are not quite up to speed with the durability and longevity of mechanical locks. Check out this video demonstrating the time comparison between electronic and mechanical locks.

Electrical Locks

Pros:

– Faster to open, resulting from the keys and keypad

– Minimal light is needed to read the keypad

– Glasses are rarely needed due to the increased font size

– Easier to change the code- there is no need to have a technician change the code for you

– Because you do not need a technician to set the lock, you do not have to worry about someone else knowing the combination.

Cons:

– Must remember to change the battery

– Items can be trapped in the event of an electrical failure


Mechanical Locks

Pros:

– Longer life span- breakdown from electrical reasons is eliminated

– Increased durability due to focus on non-electrical aspects

– Worry free concerning electrical failures

Cons:

– Forgetting to turn the dial leaves an easy access to burglars

– Tumblers can become misaligned


Deciding on a lock can be a pretty major decision if your valuables are at stake. If at any time you need a locksmith, use TalkLocal to connect you directly to a locksmith in your area. This free service will connect you to a quality locksmith within minutes.

How well do Maids Clean

Tuesday, November 27th, 2012

How well do Maids Clean Maid Services

How well do maids clean? It depends on a number of factors. The quality of maid services can differ from company to company, so it can be kind of tricky when you’re looking for the right one.

Choosing the right maid service

First and foremost, make sure you check the reviews of the different maid services you are considering hiring. Using TalkLocal to connect you to several local businesses will also give you the opportunity to read reviews while you wait. You can also visit websites such a Yelp that are well known for providing good reviews and ratings.

Check on specifics

Another thing to check on if you’re worried about the quality of cleaning is what the particular maid service includes when cleaning your home. Some services might provide more than others when it comes to specifically what they agree to clean. Call the company or check their website to make sure.

Try out your options

Aside from these two main factors, you can only really tell how well the maid service cleans after you’ve used them. Try several different ones before you decide to hire one long-term. Every maid service is different; when it comes to hiring the right one, make sure you consider all these factors when making your decision.

Can you Transfer Data from One PS3 to Another

Tuesday, November 27th, 2012

Can you Transfer Data from One PS3 to Another Computer Repair

Have you bought a new slim PS3 to replace your old and clunky PS3? If you have, then you probably you are probably wondering, can you transfer data from one PS3 to another.  The answer is: yes you can.  Without transferring you will lose all of your data from the previous PS3. PS3 has two simple ways of transferring your files—Ethernet Cable or USB.

Ethernet Cable Transfer

1. Update the system software of both PS3s to their latest version.

2. Prepare PS3 to send the data or source system. If there are multiple users on the source PS3, create PlayStation Network account.

3. Connect two PS3s with an Ethernet Cable.

4. Connect both PS3s to a separate TV inputs on the TV.

5. Turn on the PS3s.

6. Go to TV input of the source PS3 (the one that is transferring the files).

7. Check the source PS3 is connected to the Internet. If not, go to “Network Connections” > options > system options > “Data Transfer Utility.”

8. Follow instructions on online data transfer and trophy syncing. Trophies must be synced or you cannot transfer trophy information.

9. Switch the TV to the PS3 getting the files.

10. Go to options > system options > “Data Transfer Utility” > “Transfer Data from the other PS3 System to This System.”

USB Transfer

1. Choose the content to be transferred.

2. Insert USB flash drive into the source PS3.

3. Click the triangle button on the chosen content.

4. Click “Copy” to have the content be automatically copied to the USB flash drive.

5. Turn off the PS3.

6. Insert the USB.

7. Turn on PS3 and XMB bar will appear.

8. Click the triangle button and the “Display all” option.

9. Click the triangle button on the data you want to transfer.

10. Click “Copy.” The data will begin transferring.

These two ways will get your files easily transferred and and you can resume playing Uncharted 3 in no time. If you have difficulties transferring files or would like some professional help, contact TalkLocal. TalkLocal will connect you with the best professionals in your area for free.


Car AC Blowing Hot Air Only

Tuesday, November 27th, 2012

Car AC Blowing Hot Air Only Auto Repair

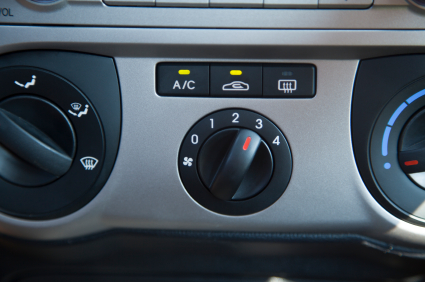
When you get into a hot car in the summer, the first thing you want to do is blast the A/C. It may take a while for the air to get cool, but if your AC continues to blow hot air only, there may be a problem. Driving in the heat can become a miserable and even dangerous task if you don’t have a working A/C. Read below to get reasons why your car AC blowing hot air only.

Lost charge of refrigerant — To see if your car has lost the charge of the refrigerant, you should use an A/C pressure gauge. In the engine, you should connect to the high side of the service port in the high-pressure hose that runs between the compressor and the condenser. This will tell you if there pressure in the system. If there is not enough pressure, your air conditioning may be out or refrigerant or it may have leaked out. You should vacuum out the air and recharge the system with refrigerant. Any extra air will reduce cooling and make the compressor very noisy.

Compressor isn’t engaging — Another potential issue may be with the compressor.  You should see if it is properly engaged when you turn on the air conditioning. If it does, the problem is inside the HVAC unit itself.  If it doesn’t then try to jump the compressor clutch wire directly with the battery.  If this works, then the problem is with the A/C compressor relay or pressure switch. If it doesn’t engage, then the clutch is broken.

Obstruction in system — If both the refrigerant and compressor are working, there may be an obstruction somewhere in the system. The orifice tube is located in the high-pressure hose. A blockage here will stop the refrigerant from getting into the evaporator and circulating. If this tube is blocked, then the high side pressure reading will be lower than normal. You should try to get in and get rid of the obstruction.

Getting Help

If you cannot seem to figure out what the problem is with your air conditioner, you should seek professional help. Use TalkLocal to be put in contact with reliable local businesses almost immediately.  Simply input your problem and availability and TalkLocal will do the rest. Within minutes your should be connected with a qualified HVAC company.

Install Roof Shingles Tips

Tuesday, November 27th, 2012

Install Roof Shingles Tips Roofers

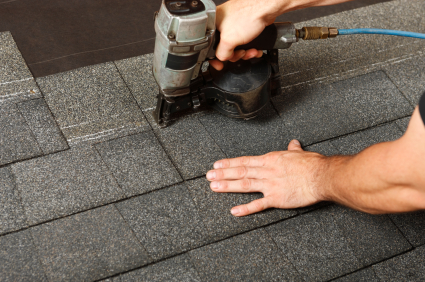
Installing shingles can be easy, yet dangerous. Being on a roof brings potential risk of injury and does not guarantee that the job will be done. If you still decide to tackle the job on your own, here are some tips on installing shingles.

Work with Others

Have at least one person working with you on the roof. If an injury occurs, they help you immediately. Another person also speeds up the process of repairing shingles such as preparing the shingles for the roof. Try to have two people to work with you, one on the roof and one on the ground. The one on the roof can stop potential injury and speed up installation, while the ground person does the preparation.

Use Felt

Felt is the layer before the shingles are being installed.  Some people believe felt is unnecessary because proper installation of shingles is enough to stop water leakage. Others say felt will help you with roof leakage down the road. Mistakes can occur during installation and more protection does not hurt, so using felt is a precaution.

Install Flashing

Flashing is where a roof connects to something that is non-roof, like a chimney. These sections are where the roof leaks most of the time from improper installation of flashing. Flashing is usually a thin piece of aluminum which is installed before the shingle installation. To install flashing:

1. Measure and cut the flashing to appropriate length for needed section.

2. Apply flashing to the section with the middle of the flashing in the groove of the valley.

3. Staple one inch from the edge of the flashing.

4. Begin roofing and applying fascia board.

5. Use tar for extra protection.

Measure Carefully

1. Put the end of the measuring tape on the bottom edge of the roof.

2. Walk straight up to the roof’s peak. Record the distance.

3. Measure the roof from side to side in the same way. For triangular section, measure the distance along the edge of the roof and the distance to the peak of the triangle from the center of the bottom edge.

4. Multiply length and width measurements to find square footage.

5. Add ten percent to the total square footage.

6. Divide the total square footage by 100 for the total squares of shingles needed.

These tips should help you into the right direction in installing shingles correctly and saving your home from water damage. If you want a home improvement professional for the inspection of your roof, use TalkLocal. TalkLocal can connect you with high quality professional in your area for free.

Drano Not Working on Sink

Saturday, November 24th, 2012

Drano Not Working on Sink Plumbers

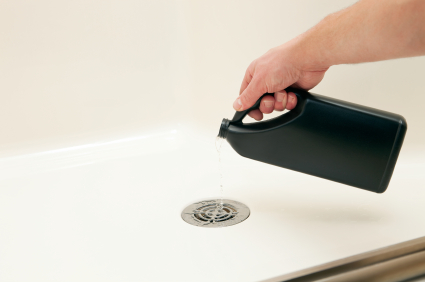
Due to Drano’s toxicity, many people choose not to use it to unclog their pipes and drains. It can be dangerous for humans and may damage some of the piping. Other times, people give Drano a chance, but it simply does not work. At the end of the day, they are still stuck with a clogged drain and/or pipes.

If Drano is not working on your sink, it’s time to take matters into your own hands. First, set up a bucket with several towels underneath it. Unscrew the pipes under the sink. Newer pipes are generally designed so that you can unscrew them with your hands. For older pipes, you may need to use a large wrench to disconnect the pipes. There will be some pipes that come completely off. Carefully take these pipes and put them in the bucket. Be aware that there will be water in these pipes so try not to spill any of it.

Use a long pointed tool, such as a screwdriver, to unclog the pipes you just removed. There will be hair, dirt, and grease on the pipes walls that have turned into a gel-like substance. Take the pipes outside and continue scraping at them until they are clean. Make sure to scrap hard enough to clean the walls yet not hard enough to break, crack, or damage the pipes. You should also use a power hose afterwards to get the inside of the pipes spotless.

Go back to the sink and use the screwdriver to unclog the sink and the attached pipe. Make sure to put the bucket under the open pipe to catch all of the junk in the pipes. Scrape and poke with a screwdriver to break off any obstructions in the piping. You may also use pliers to pull out anything that may be stuck. Now that you have spent some time cleaning the top part of the pipe attached to the sink, make sure to get the bottom half as well. Do the same to the bottom half of the pipe until the pipe is clean when looking through it.

Now put the piping back together. Make sure to screw the piping back on firmly and securely to prevent leaks. You may want to use a washer when screwing the pipes back, just in case. If you don’t have the time to do this yourself, TalkLocal can find you a high quality plumber in your area in minutes!

Car Air Conditioner Not Cold Enough

Saturday, November 24th, 2012

Car Air Conditioner Not Cold Enough Auto Repair

Car Air Conditioner Not Cold Enough

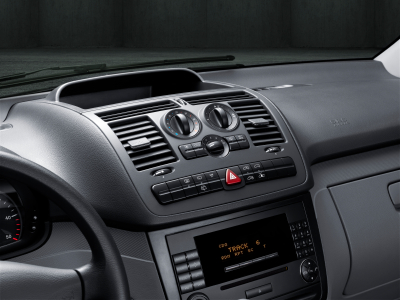
Nice, cold air conditioning in your car is definitely a must-have, especially for those 90-degree summer days. Unfortunately, people often complain that their car air conditioner is not as cold as it should be. This summer, if your A/C isn’t up to par, we might be able to help.

Your A/C could be malfunctioning for a number of reasons. The most common problem people encounter is due to an incorrect Freon charge. Freon is the cooling component installed in your car. If the amount of Freon is off by even a couple ounces, this could be your problem. If you’re hearing a clicking noise from inside your car, this could indicate a low Freon charge. If you diagnose this as the problem, be careful trying to fix it on your own; an overcharged Freon level can cause your A/C to malfunction as well.

Another cause to the problem could be that your radiator or condenser is clogged with dust or dirt. Although less common than a Freon problem, this does tend to happen around the beginning of summer. This would cause your A/C temperature to be higher than normal because it would reduce the airflow that passes through the radiator and condenser. This is a problem that gets worse over time, so catching it early is key. To prevent this, try cleaning out your radiator with a pressure washer every so often.

If you’re not very knowledgeable about cars or mechanics, try bringing your car into the dealership you purchased it from. If you no longer have a warranty and your dealer’s rates are too pricey, try using TalkLocal. We can connect you to a highly rated local service professional within minutes of submitting your online request. It is a completely free service that will save you time and money.