Keeping your House Cool in the Summer

Saturday, November 24th, 2012

Keeping your House Cool in the Summer Heating and Cooling

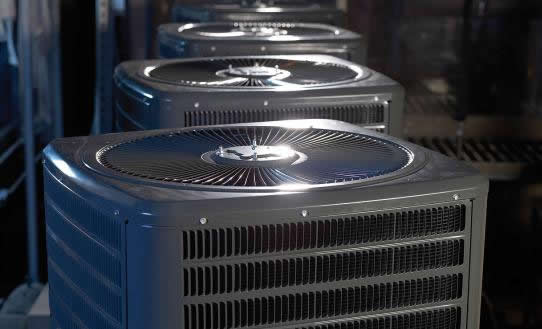
Summer is a great time to go outdoors and bask in the sun’s warmth. However, when we go indoors, we expect that warmth to stay outside. Instead of blasting your air conditioner–and driving a hole in your wallet–try the following cheap or free ways in keeping your house cool in the summer.

Doors and Windows

– Cover your windows with white shades or blinds. Close them over windows that face south and west during the day.

– Close the doors inside your house, or else you will waste energy cooling rooms you are not using.

– Hang bamboo shades or woven screens outside of windows. This can block up to 80% of the sun’s heat.

– Ventilate your house by opening all the doors and windows in your house. The temperature should be less than 77 degrees, so evenings and cool days work best. Keep your house tightly sealed during the day.

Maintenance

– Make sure your air conditioner ducts are insulated.

– Ensure that your fireplace damper is closed and sealed.

– Clean your air-conditioning filter monthly during the summer. An accumulation of dust can limit air flow.

Less Technology

– Turn off dehumidifiers; they create a bigger cooling load, so the air conditioner must work harder.

– Turn the thermostat down to 115 degrees on your water heater. This temperature should still provide comfortable water usage.

– Turn off your air conditioner if you leave the house for more than an hour.

– Move lamps or other heat-producing objects away from your thermostat.

– Use compact fluorescent light bulbs instead of incandescent ones because compact fluorescent ones use 1/5 of the energy while providing the same amount of light.

– Use a microwave instead of a conventional oven, when possible.

– Use your dishwasher in the evenings when the weather is cooler since it is a heat-generating machine. Opt to air dry dishes instead of using the machine.

If these tips aren’t enough to beat the heat, use TalkLocal to contact local heating and cooling companies.

Should I Shovel Snow Off my Flat Roof

Saturday, November 24th, 2012

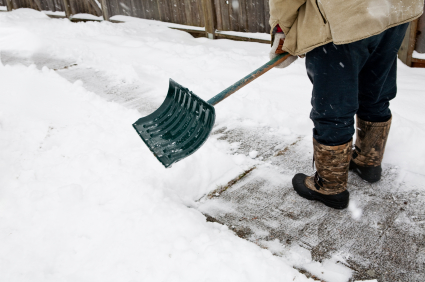
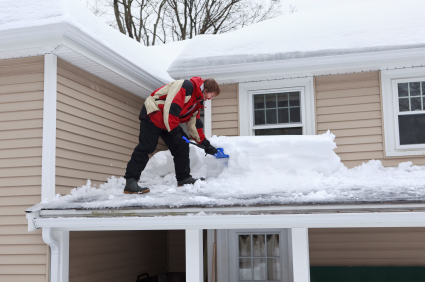
Its snowing outside and you are probably wondering, should I shovel snow off my flat roof.  Here is a simple rule of thumb you can use to help if you are concerned: shovel snow off your roof if it exceeds two feet in depth. If you want to play it safe, do not let the snow exceed a foot or a foot and a half. Two feet of snow weighs about 30 lbs per square foot (more details below), which is about how much the average house’s roof can withstand. Some stronger roofs in areas with great snowfall can withstand over 40 pounds of snow per square foot.

The earlier calculation of 30 lbs is based on a 25% moisture density. On average, saturated snow weighs approximately 20 pounds per cubic foot. The moisture content of snow ranges from 1% to 33%, which means that snow can weigh from 1 pound per cubic foot to over 21 pounds per cubic foot.

Calculation: S x 1.25 = P

  S = inches of snow on the roof (depth)

  1.25 = weight of 1 sq ft of snow for each 1 inch of depth

  P = Pounds per square foot (lbs/sq ft)

Example: If the snow on your roof is 20-inches deep, should you shovel it off?

20-inch roof snow depth x 1.25 lbs/sq ft = 25 lbs per sq ft of snow load

In this example, you should shovel it off since it is very close to the roof’s limit.

Important: If there is any ice build-up on the roof, you need to account for this in the formula. Add 5.2 lbs for each 1-inch of ice depth.

Remember you can always check your roof snow load by cutting a one foot by one foot square of snow from your roof and weigh it in a plastic bag to determine is getting close. Don’t forget to account for ice build-up as well.

Please be aware of the potential dangers of shoveling or raking snow from a roof. Besides the potential damage to your roof, there are other factors to worry about such as a person sliding off the roof or falling off the ladder.

If you want more information on what your roof can withstand, TalkLocal can help you find a local roofer to consult with.

Lost Favorites in IE9

Saturday, November 24th, 2012

If you use Internet Explorer as your web browser and recently upgraded to the new IE9, you will want to be able to access the favorites window in order to visit all of your bookmarked sites.  Your favorites should have been automatically imported from IE8 when the new version was installed.  If you switched to IE9 from a different browser like Google Chrome or Mozilla Firefox, you will need to manually import your bookmarks if you want to keep all of the same favorite websites. Most browsers provide an option to export your bookmarks to a file that you can use for this purpose.  This is a relatively simple process; you can find a great short step-by-step guide on this tech blog. Read on for more help on recovering lost favorites in IE9.

Once your favorites have been added, you may have some trouble actually finding them in the IE9 browser.  Microsoft has made some layout changes in this newest version of Internet Explorer that can be confusing, especially if you are used to the older IE8.  In previous versions, the favorites button was on the top left corner of the browser screen, but it has been moved across to the top right corner in the new one.  Clicking this button will display the familiar favorites panel, which should contain all of the pages that were imported either automatically or manually.

You might also be wondering what happened to the Favorites toolbar that used to be at the top of your browser page in IE8.  This toolbar provides quick access to all of your favorites and can be very useful for navigating to sites that you visit frequently.  Fortunately, the favorites bar is still around in the new version of Internet Explorer; it just isn’t visible when you first start using IE9 because the browser default sets all toolbars as hidden.  Enabling the favorites bar is simple; just right click the top of your browser window to the right of the “New tab” button. Then, click the check box next the toolbar you want to view.  If you are having trouble, Microsoft has created a cool instructional video detailing the steps you need to take that is available to watch here.

If you are unable to import your bookmarks on your own, or encounter a bug or error, you may want to get in touch with a professional computer repair service.  The best way to find a quality technician in your area is with TalkLocal.  All you have to do is enter your basic info and a short description of your problem and TalkLocal will automatically connect you with someone who can help!

Where Do Bed Bugs Come From

Saturday, November 24th, 2012

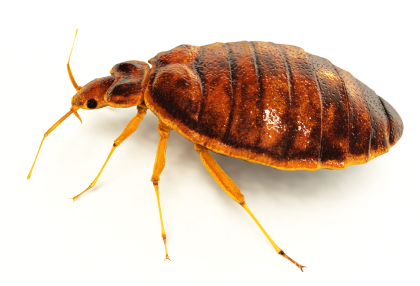
Bed bug infestations seem to come out of the blue, so you might be wondering where do bed bugs come from? You are a happy sleeper one night, then you are covered in bites the next night. They dwell in dark places, so this may explain why you have more bites where your clothes fit tighter, such as your pants waistband. You may be wondering how the bed bugs were able to invade your home in the first place, but there is not necessarily someone to blame. Bed bugs are transported from other infested locations into your home, so this means a bug latched onto a member of your house and entered your home. There is not a practical way to avoid bed bug infestation without closing yourself off from the outside world. Bed bugs tend to infest public places like hotels, motels, and even movie theaters. Public sitting areas are a prime spot for bed bug transportation because they can live on furniture and jump from person to person!

The best way to keep bed bugs away is to examine your surroundings when staying at a new place, such as a hotel. If there are rust-colored spots on the sheets, this is a sign of bed bugs. During the day, bed bugs are usually within five feet of the bed, so keep your luggage and clothes elevated. Upon returning home, inspect your clothes to make sure you are not bringing any home. Stick your clothes in the dryer for fifteen minutes to kill any bed bugs you may have missed. To keep your home clean, wash your sheets regularly and tidy up. The less clutter you have, the fewer places there are for bed bugs to hide. When inspecting your home, remember to check cracks and crevices that do not receive much light. If you need help finding an exterminator in your area, TalkLocal will help you find a qualified exterminator in minutes!

Garage Door will not Open

Wednesday, November 21st, 2012

Garage Door will not Open Garage Door Repair

There are many problems that could cause your garage door not to open. Read below for some of the most common issues and solutions if your garage door will not open.

First, check that you operator is plugged in. If it is, check that there is power supplied to the outlet by plugging something else into the outlet.

Next, check that the photo eye detectors are lined up. These will be on both sides of the garage door; they keep garage doors from closing when an object is in the way. You can loosen or tighten the wing nuts on the sensors until they align. The detectors may be disrupted if they are dirty or if there is something in front of them. You can try cleaning the eyes of the detectors with a tissue. It is also possible that the eyes got wet and are now damaged.

Next, check the batteries on your remote. Remotes will usually last longer than batteries. If changing the batteries doesn’t work, you can also try reprogramming your remote.

Try the emergency release handle in the middle of your garage. If you can manually open the garage door, then that means the problem is an electrical issue with either the motor or remote.

If you have checked all of these things and none of them seem to be the problem, you may need to contact a professional to figure out the problem with your garage door and help you to fix it. If you notice that your torsion spring is broken or the cables have snapped, you should also contact a professional and not try to fix it yourself, as fixing these things can be dangerous if you do not know what you are doing. With the help of TalkLocal, you can be on the phone with up to three high quality professionals within minutes. All three businesses will be in your area and they will be available when you are.

5 Fun Thanksgiving Activities for Kids

Wednesday, November 21st, 2012

5 Fun Thanksgiving Activities for Kids Party Planners

Thanksgiving is such a fun time of year for adults and children alike, and if you plan on throwing a party for thanksgiving it is important to provide children with entertaining activities to take part in. Here are a few examples of festive and fun Thanksgiving activities for kids.

The Turkey Trot is a simple activity for young children. To do the turkey trot, find an open area to play in like your yard. Instruct the children to form their arms into wings and imitate turkeys. This is a silly activity that will have everyone giggling and the best part is it involves imagination. The kids can be fancy turkeys, scary turkeys, baby turkeys, or whatever they can imagine!

Free the Fowl is a festive version of Kick the Can. One player is chosen as “it” and a can or football is placed in an open space. “It” will count to a predetermined number while the other children hide and when “it” is finished counting, he or she will try to tag the others. If a player is tagged, he or she must freeze. Any unfrozen player can kick the can. If it’s kicked, the frozen players are freed. If all the players are frozen, “it” wins.

Wall Football is a variation of Pin the Tail on the Donkey. To prepare for this game, design a large field goal on a wall using paper and tape. Cut out football shapes using brown paper with a tape roll on the back and have kids write their name on their football. Spin blindfolded kids around three times and have them stick their football on the wall. Getting the ball inside the field goal boundary is worth three points. After several rounds, the child with the most points wins.

Teaspoon Pass will keep little hands busy. Place five shelled peanuts on a plate. The object of the game is for children to pass the nuts along using their spoons without dropping any nuts.

Hand Turkey – a time-tested favorite activity is tracing your hand and decorating it like a turkey! Children can use glue, yarn, glitter, markers, and crayons. Hanging the festive art on your walls will give the children a sense of pride.

If you’re occupied with cooking, no worries! Simply call TalkLocal to be connected with professionals. They’ll help you find a party planner who can give you a hand and make the day seamless, fun, and stress-free. Happy Thanksgiving!

Garbage Disposal Not Working But Humming

Wednesday, November 21st, 2012

Garbage Disposal Not Working But Humming Plumbers

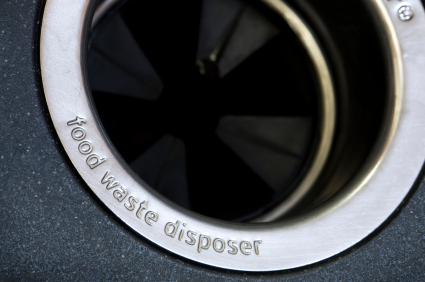
With Thanksgiving coming up in just a few days you don’t want a broken garbage disposal. If the garbage disposal isn’t working and only makes a humming sound when you turn it on, the flywheel is most likely stuck or there’s an obstruction between it and the impeller blades. The humming noise is a result of the motor unsuccessfully attempting to spin the blades. Fortunately, the solution to solve the problem is simply to move the blades in the opposite direction to dislodge the obstruction. Read more if your garbage disposal is not working but humming instead.

Important: Turn off power to the garbage disposal for your safety and never put your hand into the garbage disposal chamber.  If you are unsure of how precisely to turn off the power, it would be best to call a plumber to take care of this problem; your safety should be your first priority.

1. Take the Allen wrench that came with your garbage disposal and insert it into the flywheel-turning hole in the bottom of the wheel.  If you cannot find the allen wrench, pick one up from the hardware store that sold your garbage disposal.

2. Turn clockwise to loosen the impeller blades from the obstruction. It should be able to turn the flywheel freely when the blades are unobstructed.

An alternative method of fixing your garbage disposal is to use a broom handle or another wooden object to free the impeller blades.  All you have to do is place the broom against the impeller blades and then apply leverage to free the flywheel. The flywheel once again should turn completely freely once the obstruction is cleared out.

However, if at any time you don’t feel safe or are unsure of what you are doing, you can always use TalkLocal to contact local high quality plumber to look at your garbage disposal in just minutes!  You’ll be talk to a real live plumber almost immediately for free!

Should I Buy a LCD TV or Plasma TV?

Wednesday, November 21st, 2012

Should I Buy a LCD TV or Plasma TV? - Uncategorized - Seva Call Blog

Should you buy an LCD TV or a plasma TV? Here are some facts to consider and help you decide!

Image Quality

LCD can also boast increased image brightness and reduced susceptibility to glare, as well as lighter weight and thinner screens. If the TV is going to have sunlight or other bright lights reflecting off it during use, LCD may be the best choice. If weight and size are top concerns because the TV is going to be mounted on the wall, then LCD is a good choice for that too.

Plasma generally has a better contrast ratio, better color accuracy, greater color saturation, deeper shades of black, the ability to track motion without lag, and a wider side-to-side viewing angle. If the TV is mostly going to be used in a dark room and picture quality is the main concern, plasma is a great choice. Plasma screens look great, and few things inspire envy like a 60 inch plasma screen.

Consider your purse

Those wanting a budget TV with a smaller screen should look to LCD. Plasma screens also have higher electricity usage, so businesses and people watching their electric bills may prefer LCD for that reason.

Additionally, Plasma screens range from 42 inches to 60 inches, measured diagonally. The difference in price (relative to the size of the screen) has considerably narrowed, however, so there’s a good argument to be made for deciding primarily on features. While there are LCD TVs available that are cheaper than any same-sized plasma TV, that is sometimes achieved by sacrificing quality with the LCD picture.

Other Factors

Another (random, but valid) consideration, LCD is better for those more than 6,500 feet above sea level. At high altitudes, plasma screens have trouble adjusting and may make buzzing noises.

Technology is always changing, however, and the prices and capabilities of plasma and LCD will change along with it. Engineers are working to make LCD pictures sharper and more colorful, while others are working to make plasma technology lighter and thinner.

If you jsut want to keep your old TV, and not bother about buyig a new one, give us a call at TalkLocal to find professionals that can fix your favorite old TV for you!

Card Games for Thanksgiving

Wednesday, November 21st, 2012

Card Games for Thanksgiving - Uncategorized - Seva Call Blog

For many people, Thanksgiving provides a time and venue for families to spend time with one another. If you have a large family, this can mean a lot of children running around or a lot of guests who want entertainment as well as food. Keeping some inexpensive playing cards on hand can give your guests something fun to do as they socialize with friends and family. Read on to learn more about some classic card games for Thanksgiving that you can use to make your holiday lively and entertaining for all your guests.

Go Fish

The game “Go Fish” has seemingly been around forever, and many kids and adults of all ages enjoy it. The game works for 2-6 players. Each player begins the game with 5 cards. The rest of the cards form the draw pile. Players take turns, and on each turn the player asks an opponent for a specific type of card, saying something like, “Bob, give me all your fives,” or “Lucy, give me all your diamonds.” If the player being asked has any of the types of cards requested, he or she must give them to the player who requests them. If he or she does not, the player says, “Go Fish.” The person who asked for the card now must take a card from the draw pile. The goal of play is to collect four of a kind—all the kings, all the twos, etc.–and discard them from one’s hand. The first player to run out of cards ends the game, and the person with the most sets of four wins.

Crazy Eights

This game works for 2-6 players as well, and many people like to add variations and twists on the basic game to make it more complicated or more fun. Each player begins with 5 cards, and the cards that are left form the draw pile. The dealer flips over the top card of the draw pile to create a discard pile. Play rotates in a clockwise direction with each player attempting to run out of cards by discarding them. To legally discard a card, it must match either the rank or suit of the card already on top of the discard pile. If, on your turn, you don’t have any cards to discard legally, you must take a card from the draw pile until you receive one you can discard. Eights are considered wild, and players can place an eight on the discard pile at any time. The person who plays the eight can simultaneously call for a change in suit. Only another eight or a card matching the suit change can be discarded on top of an eight.

If you’re looking for more party planning ideas, search TalkLocal to find a reputable party or event planner.

How Much does it Cost to Remove Snow from a Driveway?

Wednesday, November 21st, 2012

How Much does it Cost to Remove Snow from a Driveway? Snow Removal

Winter time is great.  Everyone looks forward to the holidays, and snow makes them even more magical.  But at the end of the day, we’re stuck wondering who’s going to plow the snow so we can get our cars out of the driveway.

Getting snow out of the driveway is one of those odd jobs for which we are never really sure whether we’re paying too much or too little. So, how much does it cost to remove snow from a driveway?

Snow removal methods

– For a 1-4 car driveway, a snow plow will cost anywhere from $20 to $60 per push, depending on the area you live in and the equipment being used. If the snow is no more than 12” deep, one visit should do it, but if more than one visit is required, the second visit could be up to double the cost of the first.

– To remove snow from the driveway using a shovel, snow blower or a lawn mower, the effort required is more and the price is also going to be higher. This can range from $65 to $75 per visit. This may vary depending on the amount of snow, length of driveway, shape of driveway, etc.

– In the case of walkways, snow plows cannot be used. Hiring someone to shovel it can cost anything from $5 to $20, depending on who is doing the work and how much snow there is to shovel.

Need Snow Removal Help?

If you’re experiencing trouble clearing your driveway or walkway on your own, or you would like to be put in touch with a snow removal company, use TalkLocal for free today. Simply enter a brief description of your service needs along with your location and availability, and TalkLocal will connect you to up to three professionals in your area ready to help.