Dell Tablet PC Touch Screen Not Working

Monday, November 12th, 2012

Dell Tablet PC Touch Screen Not Working Computer Repair

Having a Dell tablet PC is like having a million possibilities are the end of your fingertips.  Tablets offer a wide array of things to do from staying connected, to being productive, to having fun.  You won’t ever be bored with your Dell tablet.  But what happens when your dell tablet PC touch screen is not working?  This certainly impairs the functionality of your tablet.  Continue reading for some possible problems and solutions to this particular issue.

Potential problems

–  Bad installation

–  Drivers missing

–  Missing software

–  Corrupt update

Solutions

If you are having problems using the touch screen on your dell tablet pc you should try to fix it as soon as possible.  The first thing you need to do is power the device off and turn it on again to see if it is a simple glitch with the tablet.  If this doesn’t work you can try to hard reset it as well.  If your problem persists, you may have a bad installation.  You should wipe the entire device clean and try to re-install the hardware.  This is a lengthy process, but worth it if it takes care of your problem.

Sometimes when you are using a device or running a certain program the drivers you need on your tablet may go missing/get deleted.  In this case you should re-download the correct updates on your computer for the drivers.

Another common problem is that the software or system does not have all the updates it needs to function properly.  You should check to make sure that everything is up to date and that you have the latest versions of all programs and applications.  Many times incorrectly installed software will cause your tablet to malfunction.

Many people have complained that the most recent windows update has caused more problems than it solved.  These corrupt updates are known to cause transient and long term problems especially with the touchscreen.  You should uninstall the update and return to the old version until Windows fixes the problem.

Continuing problems

If you continue to have problems with your Dell tablet PC touch screen, you should seek professional help.  Use TalkLocal to be connected with reliable local IT service companies.  Simply input your problem, location and availability, and TalkLocal will do the rest.  Within minutes you should be connected to a local computer repair technician who is willing to help.
 

How to Tell when to Replace Car Tires

Monday, November 12th, 2012

How to Tell when to Replace Car Tires Auto Repair

It is extremely important to make sure your car’s tires are functioning properly at all times. This means knowing when it’s time to replace them.  There are many indicators that will give you guidance as to when tires need to be replaced.  Up-to-date tires will not only keep your car running smoothly, but may also save your life by providing the necessary traction for safe driving.  Read on for more information on how to tell when to replace car tires.

Checking the quality of your tires

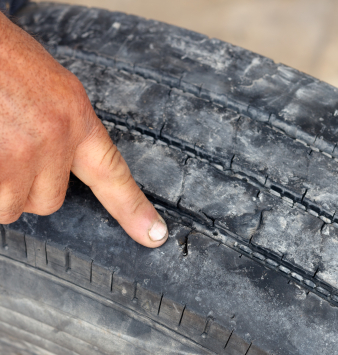
–  Use the tire’s thread wear bars.  These indicators are installed into most tires and are invisible.  They become visible where the rubber has been worn down to a certain point.  These bars are usually diagonal bars that appear on the tire.

–  Use a penny.  Take a penny and place it upside down in the thread with Lincoln’s head facing you.  If you cannot see any of the hair on the top of Lincoln’s head, you are good to go and you do not need to worry about replacing your tires.  If you can see some of the hair on Lincoln’s head, it is time to look up coupons and shop around for car tires.  If you are to the point where you can see the very top of Lincoln’s head or beyond, your tires are a hazard and you need to replace them immediately.

–  Use a tread depth indicator or gauge.  This is an easy and accurate way to measure you tire treads.  If you have a gauge, you can measure the treads on your own, or you can stop by your local automotive store and they might even check your tire treads for free.  Check out this tire tread gauge for some do-it-yourself guidance.

To get a professional opinion and to have your tires changed, use TalkLocal to connect you for free to a professional in your area today.

Best Steam Carpet Cleaners Reviews

Friday, November 9th, 2012

Best Steam Carpet Cleaners Reviews Carpet Cleaners

Sometimes a simple vacuuming won’t clean your carpet as well as you would like.  There can be stubborn stains or patches of dirt that you just can’t seem to get out. When this is the case, you should use a steam cleaner to clean the carpets on a much deeper level.  But, which steam carpet cleaner does the best job? Below are the best steam carpet cleaners reviews:

Cost Warranty Special Features Pros Cons
Bissell ProHeat 2x $330 Limited, One year Built in heater Easy to clean, fast drying Heavy, tough to push
Bissell QuickSteamer $110 Limited, One year Works best for quick freshening Extracts most water, easy to maneuver Not for deep clean, no tools
Hoover Platinum F7412900 $400 Limited, Six year LED headlight Spot cleaning, easy to fill Heavy
Hoover SteamVac Dual V $210 Limited, One year Spill Pickup function, automatic shutoff Wide handles, easy to maneuver Heavy, not great in heavy soil
Kenmore Professional Floor and Carpet $159 One year 3-in-1 cleaner, carpet to hard wood floor easy to use Distorts carpet fibers, no tools

If you do not plan on using a carpet cleaner often, then you may want to consider renting one instead of shelling out the money to buy one. Before purchasing a carpet cleaner, you should also consider future uses of the appliance and whether you will be remodeling, perhaps replacing carpet with tile or hardwood. A carpet cleaner is no small purchase so make sure it is worth your money.

Continuing Problems

If you continue to have problems with your steam carpet cleaning you should seek professional help.  Use TalkLocal to be put in contact with reliable local carpet cleaning businesses.  You don’t have to do any work! Simply input your problem and availability and within minutes you should be connected to someone who can help you out.

Cat will not Stop Meowing

Friday, November 9th, 2012

Cat will not Stop Meowing Veterinarians

If your cat will not stop meowing, it can not only be annoying, but sometimes worrisome as well.  This can be happening for a number of reasons, usually none of which are anything serious.  Read on for more information on why your cat might be meowing nonstop.

Causes

Usually, cat meow for the same reason as babies would cry.  Cat meow to tell their owner they’re hungry, thirsty, or want some attention.  Kittens, on the other hand, have some more specific reasons why they may meow.  Kittens sometimes meow when they have hypothermia, or when pushing out waste, so pay close attention to their health.  Kittens under four months old cannot urinate or defecate  unless their genitals or anal areas are stimulated.  This might cause them pain and frustration, therefore causing them to meow.  In general, different breeds of cats meow more than others.  For example, a Siamese cat usually meows more frequently than other cat breeds.

Solutions

The following tips might work to calm a constantly meowing cat:

–  Satisfy any of the cat needs or wants.  Clean the cat litter box regularly, supply their bowls with food and water regularly, and play with cat regularly.

–  Ignore the cat.  Ignoring the cat’s meow can discourage the cat from meowing because you are not showing any reaction.

–  Use a water spray bottle.  When spraying water in a cat’s face, this delivers the message, “Stop.”

–  Scold the cat when meowing, and praise them for stopping.

If none of these solutions work, the problem might be more serious.  You should take your cat to their veterinarian as soon as possible.  If you are looking for a veterinarian in your area, use TalkLocal.  Simply enter a brief description of your cat’s symptoms along with your location and availability, and TalkLocal will do the rest.  Within minutes, you will be connected to multiple highly rated veterinarians willing to help.

Cleaning List Before Baby Comes

Friday, November 9th, 2012

Cleaning List Before Baby Comes Maid Services

A newborn comes with a lot of joy and responsibility, and to make your new job as a parent as easy as possible, there’s a list of things you can do to prepare for your baby’s arrival.  Some of these things relate to cleaning, some to preparing your home and/or nursery, and some to necessary purchases so your new child has everything it needs. Here is a helpful cleaning list for before your baby comes:

– Purchase diapers (disposable and cloth), as well as a carrier/stroller, car seat, breast pump

– Have a crib ready, with a new mattress, sheets, blankets, etc.

– Have a cradle with supply of batteries

– Purchase baby clothes, bottles, bibs, pacifiers, socks, pajamas, etc.

– Purchase bowls, plates, silverware, extra bottles, etc. (You probably won’t need this until baby can eat solid food, but it’s good to be prepared in advance.)

– Prepare your nursery: empty and clean it, paint it, fill in with crib/bedding, curtains, changing stations, etc.

– If you have yet to open and put away all your baby shower gifts, organize and put them away into a dresser in the baby’s nursery for easy access

– Rearrange your living spaces (living room and master bedroom) to accommodate your baby’s arrival (For example, de-clutter your closets, have open spaces for changing stations, etc.)

– Clean your refrigerator, dust and vacuum the house, clean your bathrooms

– Clean your blinds and curtains, wash your sheets

These are all general tasks to do around your home before your baby comes.  In terms of a cleaning list, it is recommended to not go so crazy as to sterilize everything.  It is important for your baby to build up antibodies and its immune system, and having a few common household germs will help your baby to grow up strong and healthy.

If you don’t want to put too much stress on yourself and would rather hire some help to clean before your baby comes, use TalkLocal to find a local maid serice.  TalkLocal is a free service that will connect you to multiple maid services in your neighborhood within minutes.  All you need to do is enter in your specific problem, location and availability, and TalkLocal will contact top-quality, reliable maid services who will then call you directly, ready to help.  This is a busy time for you, so save time from searching through directories and phonebooks for the right, most affordable maid, and let TalkLocal do it for you!

Lost Key to Brinks Home Security Safe

Friday, November 9th, 2012

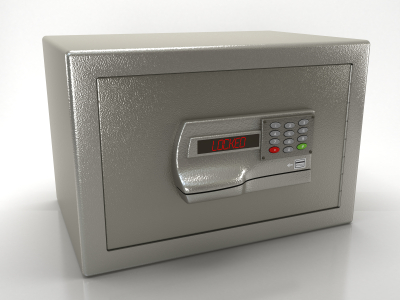
Lost Key to Brinks Home Security Safe - Locksmiths

Brinks is a well regarded home security company that manufactures home safes, among other products and services. Safes made by Brinks come in different models, from fire-proof, to combination, or key operated. In the event of a lost key to Brinks Home Security safe, don’t worry, there is a procedure you can use to get a new copy sent to you.  All you need to do is get in to contact with First Alert, a different home security company that handles Brinks safes because Brinks no longer manufactures them.

Replacing Your Key

First Alert will replace the forgotten combination or lost key to brinks home security safes for a fee that is spelled out in the owner’s manual of your safe.  In order to claim the replacement, you will need to write them a letter including the key, model, and serial number for your safe, as well as contact information and your address.  You will need to get this letter notarized by a registered notary public.  Once you do, send the letter with a signed check or money order for the amount listed in your owner’s manual. This process is difficult, but it is worth it if you want to continue using the Brinks safe.

Additional Help

If you have a Brinks/First Alert security safe in your home, contact the manufacturer for any issues with replacing the key or combination. A professional locksmith who is not licensed with Brinks or First Alert will not be able to replace a First Alert key for you. However, a locksmith will be able to break into a safe for you if you cannot get the key replaced. Breaking into a safe would void the warranty and destroy the safe, so you would have to buy a new safe for your items. Only do this in the most extreme cases.

For any general problems with home locks or lost keys, just use TalkLocal.  All you have to do is enter your name, contact info, and a short description of your problem and TalkLocal will automatically connect you to a quality local company within minutes.

Winter Lawn Fertilizer

Friday, November 9th, 2012

Winter Lawn Fertilizer Landscapers

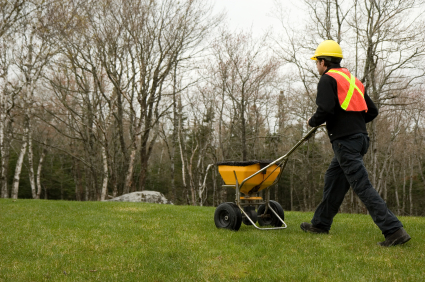
Winter lawn fertilizers are essential. You have worked so hard to keep a crisp, green lawn during the fall and now you can make sure that this same lawn will be back next year. This is where winter lawn fertilizers come into play. The following are a few tips and tricks when it comes to preparing your lawn for the long winter haul.

What will winter lawn fertilizer do for my lawn?

Winter lawn fertilizer will keep your grass healthy. It will allow the grass the strength and health to bounce back when spring comes around. Instead of spending all spring working on bringing your lawn back to life, you will have a great head start if you prepare your lawn for the winter.

How does winter fertilizer strengthen my lawn?

The winter fertilizer will increase the nitrogen storage capacity of your grass for later in the spring. In addition, the grass’s roots will be strengthened from all the nutrients provided by the fertilizer.

Now that I know the benefits of winter fertilizer, what steps do I need to take to prepare my lawn?

One of the first steps is to clear away the debris from your lawn. This is very beneficial for maintaining a healthy lawn. The debris that you need to clear away is called “thatch.” If the thatch is not removed, it will make it more difficult for the thatch to reach the grass. In addition, your grass will be burned. To keep thatch from building up, maintain your lawn regularly and keep it trimmed to an appropriate length.

As winter nears, keep trimming your grass. Ideally when winter comes around and you do your last mow, trim the grass to a length of two to three inches. This is the optimal length of grass during the winter months.

Now that your lawn is groomed to the perfect condition, apply your winter fertilizer as the instructions indicate on the bag or container.

Additional help

Not sure if you have done everything appropriately? Would you like professional help to keep your lawn pristine? Check out TalkLocal, where you will be connected directly to local, high-quality professionals that will help you at the time that is most convenient for your schedule. Give it a try!

How to set up Garage Door Opener

Friday, November 9th, 2012

How to set up Garage Door Opener Garage Door Repair

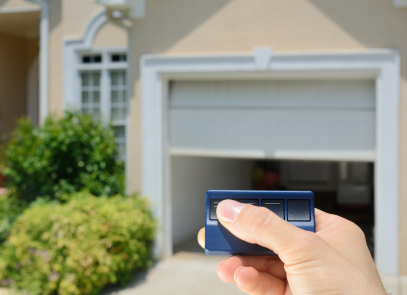
Having a portable garage door opener is very convenient. You can program numerous openers to one garage so that all of your cars have the ability to pull up and roll right in to an opened garage. However, setting up garage door openers is not as simple. But don’t fret, the process is not as daunting as it may seem.

The only two things you will need is your overhead unit, a ladder to reach it, and the opening remote. Learn how to set up a garage door opener by first reading your garage door overhead unit manual to make sure you buy a remote opener that is compatible with it.

The first thing you do is examine the main overhead unit on your garage door mechanics.  You need to find the “learn” or “learn code” on the device. It is a button that can be found on the side or bottom of the unit depending on the model of your garage door.  Make sure to have your remote in hand at this point (you will need it soon). Now, you need to press and release the button on the overhead unit. You should look for a flashing light indicator or listen for a beep to confirm that the garage door overhead unit has entered the programming mode.

Once you decide which remote control button you want to control this specific garage door, you should press and release that button within 30 seconds of pressing the “learn” button on the overhead unit.  Wait for the LED indicator or listen for a beep from the garage door opener remote to confirm that it has been programmed.

That is all you have to do to program your garage door opener.

Continuing Problems

If you have problems programming your garage door remote, you should seek professional help.  Use TalkLocal to be put in contact with reliable local businesses within minutes. You don’t have to do any work! Simply input your problem and availability and TalkLocal will do the rest.  Almost immediately you will be connected with someone who can help you out on the phone.

How to Install Fuel Filter

Friday, November 9th, 2012

How to Install Fuel Filter Auto Repair

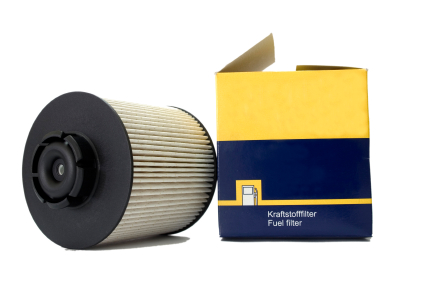
The fuel filter keeps your car moving smoothly by removing any impurities that could clog the fuel injectors.  Some vehicle manufacturers claim that the fuel filter can last for the life of the car, but many professional mechanics recommend changing the filter every 12,000 miles.  Changing the fuel filter on your own can range in difficulty depending on the type of car.  The Car Care Council, an organization focused on helping people properly maintain their vehicles, recommends handing the work off to a licensed professional.  However, if you want to save money and are up to the challenge, you can read the follow to learn how to install a fuel filter on your own.

Tools needed

The specific tools you will need for the job depend on how the fuel filter is connected to the fuel lines.  Examine how the filter is connected to determine whether or not you will need a wrench or pliers.  Other simple tools will come in handy such as a screwdriver, sockets, and a flashlight.

Depending on the type of vehicle you might also need special tools for removing the fuel filters.  Consult your car’s service manual or research details about the vehicle online to determine if any special tools are needed.

Most importantly, you will need to purchase a new fuel filter before you start the job.  These are available at local auto parts stores and typically cost less than $15.  Make sure to know the make, model, and year of your car so that you can purchase the correct filter.

Preparing your vehicle

Changing the fuel filter will release flammable fumes and small amounts of fuel, so safety should be a top priority.  Make sure to work in a well-ventilated area, preferably outdoors, and clean up any fuel spills as quickly as possible.

Protect your skin and eyes by wearing safety goggles and disposable nitrile gloves.  Nitrile gloves offer much better protection from solvents like gasoline then latex gloves.  Of course, don’t smoke or light a flame when working on the car’s fuel system.  It may also be a good idea to keep a fire extinguisher nearby.

You may also need to place your car on a jack before you begin working on the fuel filter.  To do so, apply the car’s parking brake and place blocks against the wheels that will remain in contact with the ground.  This will keep the car from rolling while you are working underneath it.  Follow the instructions in your car’s manual to determine the best way to apply the jacks.  Once the car is high enough off the ground, replace the jacks with jack stands.  This is to prevent the risk of the jack failing while you are working underneath the car.

Removing your old fuel filter

Once you have located the fuel filter, you will need to relieve the pressure in the fuel line.  A common method is to remove the fuse for the fuel pump and run the engine until it dies.  Next, you should disconnect the negative terminal of your car’s battery to minimize the chance of a spark.

Take note of how the fuel filter is connected to the fuel line before removal.  This will come in handy when it’s time to install the new filter.  Before disconnecting the fuel lines, wrap the fuel filter in a towel to catch any spilling fuel.  Then, detach the filter from the mounting bracket and dispose of it.

How to install fuel filter

First, check to see that you are not installing the filter backwards.  Most filters will have an arrow that marks the way fuel should flow through them.  Once you know the correct way to install the filter, secure the filter to the mounting bracket.  Then, attach the fuel lines using any new hardware included with the filter.  Once the filter is in place, replace the fuel pump fuse, reattach the negative battery terminal, and turn on the engine.  Don’t be alarmed if the car does not start right away.  You will probably need to start the car a few times until the pressure in the fuel lines rebuild.  Once the car is running, check for leaks and clean up any spilled fuel.  Then, congratulate yourself for successfully installing a brand new fuel filter!

Need professional help?

No problem!  TalkLocal can connect you to up to three high quality auto-repair professionals in minutes!  Simply enter a brief description of your service needs along with your location and availability, and TalkLocal will do the rest.  Within minutes you will be connected to up to three professionals in your area willing to help.

Best Way to Clean Granite Countertops

Thursday, November 8th, 2012

Best Way to Clean Granite Countertops Maid Services

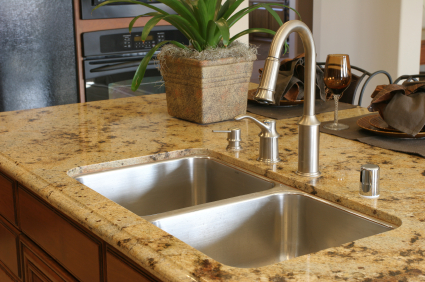
You have a higly-cherished granite countertop in your kitchen, and after all the day’s cooking you find stains covering the beautiful surface.  Sure, you could just clean it up with some dish soap and warm water, but doing so leaves those yucky, unappealing streaks. Continue reading for more information on the best way to clean granite countertops with a streak-free shine.

–  Try using Method’s Daily Granite polish.  This highly popular product is very affordable and will leave your stone countertop with a shiny surface.

–  You could also use Clorox disinfectant wipes to first clean the granite, and then wipe down with a non-vinegar based Green Windex to prevent streaks.

–  We also recommend using a microfiber cloth instead of paper towels to ensure clean and streak-free surfaces.

If you have stubborn stains or are finding that none of these suggestions are working for you, try locating a maid service in your area that can help.  Try using TalkLocal, a free service that will connect you with top-quality, reliable maid services in your area within minutes.  All you need to do is enter in your specific problem, location and availability, and TalkLocal will do the rest.   Save time and stress from searching for the right, most affordable maid service, and let TalkLocal do it for you.