Lawn Aeration Tips

Thursday, November 8th, 2012

Lawn Aeration Tips Landscapers

Mowing and fertilizing regularly are not the only tasks necessary for maintaining a beautiful lawn. The process of aerating once or twice a year can make the prized difference of a healthy yard. Aeration is extremely beneficial in that the holes created through the process allow for additional oxygen, water, and critical nutrients to seep into the soil, improving its root health and development. When soil is compacted and dry, roots are not able to thrive as well as when soil is looser and hydrated – something that aeration can create.

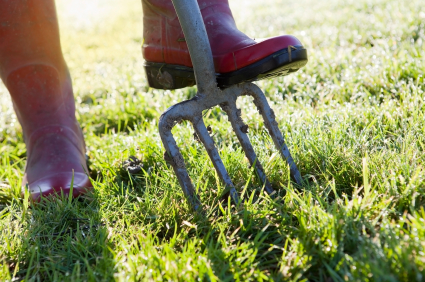
There are two main methods of lawn aeration – either using spikes, which compacts the soil as it presses down and creates holes, or coring, which penetrates down into the soil and removes a “core” cylinder-shaped pack of dirt. You can perform aeration either manually, such as with spiked shoes or coring tools, or through motorized methods, such as having aerators attached to lawn tractors.

Either of these choices is easily available, but coring is generally the more effective method, as it actually pulls out plugs of dirt as opposed to compacting more of it down like spikes would do. Though, the method you choose simply relies on your particular preferences, lawn size, budget, time constraints, and needs.  For example, using a manual coring tool is probably a better choice if you have a small lawn. The larger lawns will require motorized aeration tools to get the job done quickly.

Lawn Aeration Tips:

– The best time of year to aerate is in early spring or late summer/early fall.
– Aerate twice a year if you live in arid/dry climates.
– Water your lawn a day or so before aerating so the soil becomes soft, making it easier to penetrate and remove soil cores.
– Aerate the more trafficked areas of your lawn often. The reason for aeration is because your soil is very compacted and probably oxygen-deficient, so opening up the soil in these areas is necessary.
– After aerating, remove the coils or mow over them to break them up.

If you are having trouble aerating your lawn or would simply prefer professional help, try using TalkLocal to locate a landscaper near you. TalkLocal is a free service that will connect you with top-quality, reputable companies in your neighborhood, within minutes. Just enter in your problem, location, and availability and TalkLocal will contact multiple landscapers, who will then call YOU directly, ready to help.

Mac AirDrop Not Working

Thursday, November 8th, 2012

Mac AirDrop Not Working Computer Repair

Mac AirDrop was released with OS X Lion. It is a convenient way of transferring files between other Macs without a WiFi network. However, all Macs with Lion do not support AirDrop, only Macs equipped with certain hardware support AirDrop. If your Mac AirDrop is not working, read the following about which Macs are able to support AirDrop, when Lion is installed:

  • MacBook Pro (Late 2008 or newer)*
  • MacBook Air (Late 2010 or newer)
  • MacBook (Late 2008 or newer)*
  • iMac (Early 2009 or newer)
  • Mac Mini (Mid 2010 or newer)
  • Mac Pro (Early 2009 with AirPort Extreme card, or Mid 2010)

* The MacBook Pro (17-Inch Late 2008) and the white MacBook (Late 2008) do not support AirDrop.

If your Mac is older than these, you will not be able to use AirDrop because your computer does not have the right hardware. Any Mac that does support AirDrop should have it installed automatically when you install Lion. To access it, open finder and pull down the Go drop down menu. If you see AirDrop, your Mac supports it, if you do not it does not and you will not be able to use it.

Once you click AirDrop, it will open in a Finder window and appear under your Favorites list. To transfer files, the computer your are transferring your files to (which must also have AirDrop capabilities and be in range) must open AirDrop as well and you should see that computer in your AirDrop window. Simply drag the file onto the computer that you want to transfer it to in your AirDrop window and the file will transfer.

If your computer is one of those listed above, but you are still unable to use AirDrop, there may be a problem with your Lion install and you may want to contact a computer repair professional. With the help of TalkLocal, you can be on the phone within minutes with up to three high quality computer repair professionals in your area that are available when you are.

How to Measure Roof Size

Thursday, November 8th, 2012

How to Measure Roof Size Roofers

Measuring the size of your roof can be very tricky.  Your roof is slanted, and therefore has more surface area than one floor of your house has.  To measure your roof, you need to take exact measurements in order to be as close to the correct number as possible. Learn how to measure roof size with the information we’ve provided below.

If you have perfectly rectangular roof sides, then measuring the size of your roof is fairly easy.  You need to concentrate on three things: the rake, (the length of the side that slants down, most likely the shortest length on the roof,)  the length of the house, and overhang on either side are the other two components.  Add the amount of the overhangs to the length of the house and multiply this by the rake to get the total amount of surface area for this part of the roof.  Repeat these steps for each side and add all your results to figure out how much roofing you have.

You can also try to count the amount of shingling currently on your roof in order to figure out how much area it covers.  This is helpful if you are trying to replace the shingles on your roof.  You can use a shingle count method or a sheet count method.  The shingle count is based off of each three tab singles and the sheet count is based off of the panels of shingles needed for each side of the roof.  These two measuring methods are most commonly used when one is trying to reroof their house.

It might be easier to hire a professional to help you with your roofing issues.  Use TalkLocal to be put in contact with reliable local roofing businesses today.  Simply input your problem, location and availability, and TalkLocal will do the rest.  Within minutes you will be connected with someone on the phone who is ready to help you out.

Causes of Low Water Pressure

Thursday, November 8th, 2012

Causes of Low Water Pressure Plumbers

You use water in many aspects of your life: washing your hands, doing dishes and laundry, watering your garden, etc. However, these everyday tasks become more time consuming when you have low water pressure. It could be a serious problem, so you should try and resolve it as soon as possible.

The first thing you need to do is determine how big of a problem the low water pressure is.  You need to see if it is affecting one area such as the bathroom versus the entire property.  If the low water pressure exists in only one fixture, you should seek help for that specific area.  If the entire house is affected, the cause could be corroded piping, a restricted line due to a failed pressure relieve valve, or a low municipal water flow.

To explore the causes of low water pressure in your home, you should buy a hose bib water pressure gage.. These devices are simple to use. You should first make sure there is no water running in the home.  Turn all faucets off, stop using any machines, and stop using hoses. You will need to thread the pressure gage into any hose bib and turn it on.  Record the resulting pressure reading as your static water pressure.

Most urban areas have a water pressure from 20 to 100 psi, but typically you will find your reading to be 50-75.  If your recording is below 40, then you have a problem with the flow of water through your plumbing system.  If the pressure is below 20, then you should contact your local water supplier because it is not an issue with just your house.

Your piping could corrode because of mineral buildup over the years as well as wear and tear.  Unfortunately, there is no good solution to this problem besides replacing the pipes.  If you have partially closed valves this may also cause low water pressure.  You need to ensure that the shut off valve is completely open.  All other valves should also be opened further to verify that water has open pipes to flow through.

Continuing Problems

If you continue to have problems with your water pressure you should seek professional help.  Use TalkLocal to be put in contact with reliable local plumbing businesses within minutes.  You don’t have to do any work! Simply input your problem and availability and TalkLocal will do the rest.  Almost immediately you will be connected with someone who can help you out on the phone.

How to Stop Dog from Vomiting

Thursday, November 8th, 2012

How to Stop Dog from Vomiting Veterinarians

To say that vomiting is an unpleasant experience is to be kind. And for man’s best friend this can be an excruciating experience. Dogs are not supposed to throw up, so when they do, you should be a little worried. Before you figure out how to stop your dog from vomiting, you need to determine the reason for your pet’s sickness and then take action as soon as you possibly can. Some possible reasons are listed below:

– Sudden change in diet

– Growing too fast

– Ate something toxic

– Extreme allergy

– Part of a cheap gnawing toy stuck in digestive track

If your dog is vomiting you should put it on a fast. An adult dog needs to not eat for around 12 to 24 hours and a puppy should not eat for about eight to 10 hours. This gives their stomach a rest and helps to regulate their digestive system. You can give them a small amount of water, but nothing else. After the fast you can start them on a strict diet plan. You need to implement a small bland diet of 2/3 white rice and 1/3 boiled chicken. If the dog can keep it down, then give them another meal of the same composition in four hours. If your pet seems to be getting better, continue with this diet over a few days and gradually put the dog back onto its regular food plan.

If your dog is vomiting frequently you should consider it an emergency and take them to a animal hospital or to its vet. Vomiting can be extremely dehydrating for your pet. Your vet may want to prescribe an antibiotic like Flagyl which kills bacterias and parasties that could cause your dog to vomit. You could also try to give him a homemade medical solution containing two teaspoons of hydrogen peroxide followed by a teaspoon of salt to solve his vomiting problem.

Continuing Problems

If your dog continues to get sick, you should seek professional help.  Use TalkLocal to be put in contact with reliable local veterinarian services.  You don’t have to do any work! Simply input your problem and availability and TalkLocal will do the rest. Within minutes, you should be connected on the phone with someone who can help you out.

Inground Pool Lighting Options

Wednesday, November 7th, 2012

Inground Pool Lighting Options Electricians

Inground pool lights help make your inground pool safer for everyone who uses it, in addition to setting the atmosphere for use at night. Therefore, you need to pick a type of inground pool light that suits your needs best. Read on to explore your inground pool lighting options.

LED — The main attraction of LED lights is that they’re very energy efficient and can save you a great deal of money. LED stands for “light emitting diodes” and are composed of many small individual lights. They come in a variety of colors, which you should take advantage of to make your pool unique.

Halogen — Halogen lights are reliable and energy efficient, as well as environmentally friendly and child friendly. Because they release no harmful gasses, pool owners can rest assured that they’re being green when lighting up their pool.

Fiber Optic — Fiber optic lights are great if you want to keep the electrical source far away from the water, as fiber optic cables merely transmit light and not electricity. This also gets rid of the problem of hot pool lights that might hurt young children. However, fiber optic inground pool lights are not as bright as LED lights, so if brightness is a major issue, then fiber optic pool lights may not be for you.

Solar — Solar pool lights win the energy efficiency contest hands down, as they use zero electricity. They’ll charge in the daytime and then use that energy at night to light your pool. Solar pool lights come in many attractive varieties, including ones that float on your pool and removable ones that can also be used in other areas of your house when you don’t need them for your pool.

Incandescent — The classic incandescent bulb is still used in pools, as they come in a wide variety of wattages. They should all, however, be fitted with 12V transformers to prevent any major electric shocks if any water ever gets inside the sealed bulb.

After you choose the lighting that fits your pool and your needs the best, you’ll need an electrician to install that light. Because you’ll be working so close to water, wiring pool lights can be dangerous, especially when you refill your pool to find that you’ve done it incorrectly. To prevent this from happening, use TalkLocal to find a professional electrician that knows how to work with pool lights.

Steering Wheel will not Return to Center

Wednesday, November 7th, 2012

Steering Wheel will not Return to Center Auto Repair

What do you do if your steering wheel will not return to center position? Having a steering wheel that won’t cooperate is not only annoying, but also dangerous. Check out these helpful tips and explanations so you are informed about how to fix your steering wheel problem.

Weather

The problem may not have anything to do with your car, but rather the weather. If there is cold weather, it may make the steering a bit tighter than normal and that is okay. If the weather is not the problem and you have power steering, check the power steering fluid. If you are experiencing low power steering fluid, fill it to the appropriate level. Remember to maintain the power steering fluid.

Bad Alignment

Another possible explanation is poor alignment. Alignment can be off with your car for several reasons. One reason is the normal wear and tear from using your vehicle. Also, if you hit a curb or go off-roading, your alignment may have shifted. While you are getting your alignment checked out, pay special attention to any ball joints. Sometimes ball joints may be stuck or frozen. This too will result in the steering wheel not returning to the center. If this appears to be a possible problem, lubricate all of the ball joints.

Tires

In addition, rotating your tires may be a simple fix. If your tires are disproportionately worn out, your steering may be faulty. Having worn tires may also cause your steering wheel to vibrate.

Additional Help

If you are having issues with your steering wheel and need help evaluating the situation or doing repairs, check out TalkLocal.  Just tell us your service need, location, and availability and within minutes, you will be directed to professionals right in your neighborhood. Best of all, TalkLocal’s service is completely free!


Home Cleaning Checklist

Wednesday, November 7th, 2012

Home Cleaning Checklist Maid Services

Cleaning your home on your own is a big task, but it is one that is completely necessary.  You should take the time and effort to keep your home looking good because it will improve your overall quality of life.  A livable home environment makes day to day activities easier and more enjoyable.  Make cleaning your home a much simpler process by following a home cleaning checklist.

There are three types of cleaning you should participate in to keep you house looking spic and span.  There is the general weekly cleaning, a more in depth monthly cleaning, and a serious seasonal clean.  When participating in your monthly and seasonal cleans, you should also do all the weekly tasks as well.

Weekly cleaning

–  Vacuum/mop all floors

–  Launder all towels/washcloths/sheets

–  Dust all surfaces

–  Empty trashcans

–  Wipe mirrors

–  Throw out old food

–  Clean toilets/bathtubs/sinks

Monthly cleaning

–  Scrub tiles/grout

–  Launder duvet covers/protectors

–  Clean out fireplace/dishwasher/oven

–  Wipe insides/outsides of trashcans

–  Dust fans

Seasonal cleaning

–  Launder pillows

–  Vacuum mattresses/beds

–  Organize pantry

–  Wipe ceilings/corners of all rooms

–  Organize closets/décor in the house

If cleaning your house on your own becomes too much of a hassle you should seek out professional help.  Use TalkLocal to be put in contact with reliable local maid services within minutes.  Simply input your problem, location and availability, and almost immediately you should be connected to someone who can help.

Is it Safe to Paint a Room with a Baby in the House?

Wednesday, November 7th, 2012

Is it Safe to Paint a Room with a Baby in the House? Painters

Painting rooms is always a complicated task because the fumes that come with the process can be dangerous.  Having an infant in the house adds to the risk of painting because children are much more susceptible to the fumes than adults. Is it safe to paint a room with a baby in the house?  There is a way to paint your house even if you have young children, you just need to be sure to take the necessary precautions.

It is always best to keep the baby out of the house for the time you are painting and while the paint is drying.  Many paints today are a lot safer than they used to be.  Before, lead paint was very common but once the adverse side effects were discovered the paint companies changed their process.  Paint that is considered “non-toxic” is a lot more acceptable. Get the highest rated non-toxic paint shipped overnight from Amazon starting at $12.95. While it is still not good for you, small ingestions will not kill you.  Paint companies are attempting to make paint a more easy to use product by making the fumes less harmful and making the painting process safer for all adults and infants.

When painting a room in a house with an infant you should turn on the exhaust and open all the windows so that the fumes are not trapped within the house.  You should also try to keep the baby as far away from the room being painted.

Types of paint you should stick to:

1)     Latex paint: You can find some of the best latex paint options on Amazon and have them shipped overnight starting at $8.27.

2)     Paints without solvents

3)     Zero volatile organic compound (VOC) paints: You can find some of the best zero volatile organic compound (VOC) paint products on Amazon and have them shipped overnight starting at $28.52.

4)     Paints without cancer causing solvents

5)     Harmony paints/ paints for children’s rooms

The owner of this website is a participant in the Amazon Services LLC Associates Program, an affiliate advertising program designed to provide a means for sites to earn advertising fees by advertising and linking to Amazon properties including, but not limited to, amazon.com, endless.com, myhabit.com, smallparts.com, or amazonwireless.com.

If you are not 100% sure that your paint is fume free and safe, you should seek professional help.  Use TalkLocal to be put in contact with reliable local painting company almost immediately.  Simply input your problem. location and availability, and TalkLocal will do the rest.  Within minutes you should be on the phone with a qualified painter who is willing to help.

Water Coming from Under Toilet

Wednesday, November 7th, 2012

Water Coming from Under Toilet Plumbers

Water coming from under the toilet is an easy problem to fix.  However, if the problem is ignored it can cause serious water damage.  Avoid a leaky toilet disaster with the following instructions.

Diagnosing the problem

Usually, a failed wax seal causes water to pool around the toilet, but in some cases, the problem lies elsewhere.  To find the source of the problem, soak up the water from the floor with a sponge and dry off the toilet.  Wait until a new puddle appears on the floor.  Then check to make sure the water is seeping out from under the toilet and not coming from a loose supply tube, faulty shutoff valve, or cracked tank.

If the water is in fact leaking from under the toilet, you might be able to stop it by tightening the closet bolts that secure the toilet to the floor.  Use a slotted screwdriver or putty knife to pry off the caps that cover the bolts.  Then, use a wrench to alternately tighten each bolt, a little at a time.  Be careful not to apply too much pressure because this can crack the toilet’s base.  Hopefully, tightening the bolts will stop the leak.  If not, you will have to remove the toilet and replace the wax gasket.

Removing the toilet

First, turn off the water at the shutoff valve.  This is usually located behind the toilet, or in the basement or crawl space directly below it.  Turn the handle all the way in a clockwise direction to turn off the water.

Remove the tank lid, flush the toilet and hold down the handle to drain as much water as possible from the tank.  Wipe up the remaining tank water with a sponge.  A small paper cup will help you remove any water left in the bowl.

Disconnect the water-supply tube by loosening the compression nut on the shutoff valve.  Pry the caps from the closet bolts, and then use a wrench to remove the nuts.  Grab the rim of the bowl directly below the seat hinges, and gently move the toilet back and forth to break the wax seal.  Lift the toilet off the floor and lay it on a blanket or piece of cardboard.  Use a narrow putty knife to scrape off the old wax gasket from the bottom of the toilet and from the closet flange in the floor.

Check the flange to make sure it is not cracked or bent.  If you discover that a large piece of the flange is broken off, you will have to replace the entire flange, install a full replacement flange, or fill in the missing piece with a repair strap.  Using a repair strap is the easiest and least expensive option.

To install the curved metal strap, first loosen the two screws that secure the flange to the floor.  Insert a new closet bolt into the slot in the strap before sliding the strap under the flange.  Tighten the flange screws to lock the to lock the strap into place.  Then install the remaining closet bolt in the flange.  If the bolts won’t stand upright, pack a little wax from the old gasket around the base of each one.  Take a new wax gasket and set it down on the closet flange, making sure it’s perfectly centered.  Make sure the new gasket is secured to create a tight seal.

Once you’re ready to replace the toilet, you might want to consider hiring a plumber to help you replace it correctly.  Use TalkLocal to connect you to a highly rated plumber in your area within minutes.