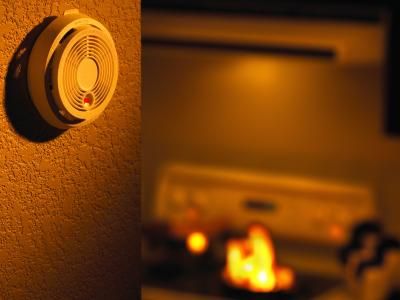
Repair Roof on Mobile Home

Friday, October 19th, 2012

Repair Roof on Mobile Home Roofers

There are a few signs that suggest when it is time to repair the roof on your mobile home. Consider the following symptoms to know when to take action:

– The silver coating material of your roof start to appear thin and accumulate cracks.

– You might see some gaps where there is metal folded over itself.

– At worse, you may start to notice leaks inside your mobile home, signaling holes in the roofing materials.

If you consider yourself a handyman or woman, you might try to attempt repairing the roof yourself. It is extremely important to take precautionary safety measures when completing a task like this. You want to make sure to be stepping on the stable beams of the roof, not between them. Make sure to use a ladder that is tall enough and don’t try to pull yourself up by the materials or pipes on top of the roof.

It is also important to note the specific roofing material that you will need, acquire the correct tools, and maybe even get some help with the project to make everything easier.

If you don’t have any experience with roofing or don’t feel comfortable completing a project like this on your own, contact a roofing specialist. Check out TalkLocal, a free service that will help you locate roofing repair specialists in your area, within minutes. All you need to do is enter your specific problem, your location, and your availability, and TalkLocal will contact top-quality, reliable roofers who will then call YOU directly, ready to help.
How to Repair a Loose Doorknob

Friday, October 19th, 2012

How to Replace a Loose Doorknob Locksmiths

Loose or shaky doorknobs can be annoying to deal with. Fortunately, learning how to repair a loose doorknob is easy. Identify the type of doorknob you have and follow these simple steps to repair it:

Cylindrical Doorknobs 

Look for the slot on the side of the post, right behind the doorknob. Take a small screwdriver and push it into the slot to free the knob. Next, remove the decorative plate that covers the lockset by pushing the spring clip, which is usually located at the edge of the plate. You should see two small screws on a mounting plate. Tighten these screws, and reassemble the doorknob.

Old-Fashioned & Decorative Doorknobs

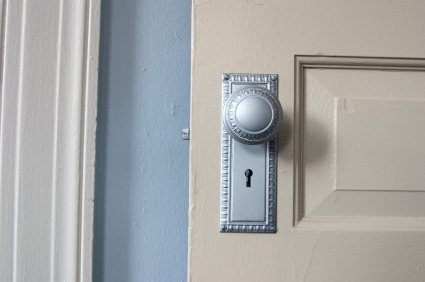
If your lockset is older and more decorative than a normal doorknob, look for a setscrew that will usually be on the side of the knob that secures it to the spindle. Loosen this screw enough so that when you turn the knob, it no longer works the latch. Twist the knob clockwise until it tightens, but make sure it is not too tight against the door, and tighten the screw. Make sure the screw is tight against the spindle.

If you’re still experiencing trouble or cannot figure out how to fix your loose doorknob, try using TalkLocal. Simply enter a brief description of your service needs along with your location and availability, and TalkLocal will do the rest. Within minutes you will be connected to multiple highly rated locksmiths in your area that can help.

Black Smoke Coming Out Muffler

Friday, October 19th, 2012

Black Smoke Coming out Muffler Auto Repair

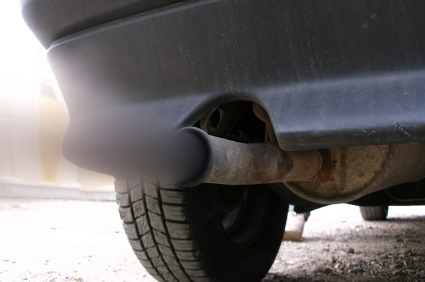
You never want to have to deal with a broken down car, or the inconvenience, the cost, and the stress it entails. Certain signs about your vehicle’s operation and appearance can help signal that it may be time to get a checkup. For example, if you suddenly notice black smoke coming out of your car’s muffler or exhaust pipe, it’s probably time to get your car examined. Read on to see what might be causing the problem.

Black smoke usually means that you are burning oil or fuel, or that you have a very rich fuel mixture in your car. In other words, your engine has a fuel/air mixture that contains too much fuel. This might suggest a problem with your catalytic converter and may be why the converter is no longer flowing efficiently. You may also have a problem with a head gasket in your engine. If you use a diesel engine, the problem may be an issue with the high pressure pump, a broken diesel injector, insufficient air intake, or low fuel pressure. With diesel engines, it is much harder to pinpoint the problem, so it is best to have a car mechanic take a look.

These can be serious problems, so it is take your car to a professional to be on the safe side. Try utilizing TalkLocal to connect with reliable, top-quality car professionals in your area. It’s a free service, and all you need to do is enter your problem, location, and availability, and within minutes, TalkLocal will connect to local automotive businesses, which will then call YOU directly, ready to help.

How to Get Rid of Bugs in Vegetable Gardens

Thursday, October 18th, 2012

How to Get Rid of Bugs in Vegetable Gardens Pest Control

If you’re worried about how to get rid of bugs in vegetable gardens, stop!  As long as you take the right precautions and practice proper upkeep, you can protect your beautiful garden.  The following is a list of common plants along with their insect and bug mates.

Important information:

Not all bugs are bad! Be careful not to overkill or kill the beneficial bugs in your vegetable garden.  Having a few bugs is not an issue, but if you see your garden start to be eaten or wilt, then you need to take the necessary steps to protecting your vegetable garden.  The following is a list of common cures and preventives. In addition, check out this article on getting rid of bugs.

Aphids

Aphids feed on a wide spectrum of plants.  They are best eliminated by either spraying them with the hose or using soapy water.  Once you are able to get them off the plants, they have a very difficult time crawling back up.

Japanese Beetles

Japanese beetles feed on a large variety of bugs as well – up to 300 different types of plants.  These creatures mainly focus on roses and they are easily removed with your hand.  Beetles can be eliminated by placing them in a bucket of soapy water.  The same form of elimination holds true for beetles harming asparagus and cucumber.

Worms

While worms can be beneficial, they tend to do more harm than good for your cabbage.  Using neem oil is a great solution to clearing these pests out of your vegetable garden.

To learn more and obtain a comprehensive list of common pests in vegetable gardens, read this article on common pests.

If you are stumped on what to do or just do not have the time nor energy to deal with vegetable gardens bugs, hiring a professional might be your best bet.  You can enjoy a beautiful garden with the peace of mind that there are no little creatures benefiting off of your hard work.  Use TalkLocal  to connect you directly to a professional for free.  Within minutes, you will be on the phone with up to three highly rated pest control professionals in your area.

How to Clean Grout between Kitchen Floor Tiles

Thursday, October 18th, 2012

How to Clean Grout between Kitchen Floor Tiles Maid Services

If you’ve noticed that your tile floors have looked a little dirty lately, it may be because of the dirt on the grout.  Learn how to clean grout between kitchen floor tiles with the tips we’ve provided below.

General tips

– Treatments for various tile grouts are all similar despite the slight differences in the various locations/causes.  Whether it be a food grout on the kitchen floor or a mildew grout on the bathroom floor, the general idea is to apply acid to dissolve the buildup.

– Applying acid should be done moderately.  Always apply the least acidic of all the acidic solutions initially when trying to get rid of tile grouts to minimize the damage to the tiles as much as possible.  Sudden application of an acid that is too can eat away at the tiles, calling for a much more extensive and expensive repair.

– Vinegar is a popular acidic solution used to clean up your grout.  To minimize the damage to your tiles, dilute the vinegar with water first before applying it on the grout.  More acidic solutions, such as Coca-Cola, can be applied to the grout as well if need be.

– Gradually move into more acidic solutions when the milder ones are not effective.  When using vinegar, you will want to lessen the ratio of dilution to just using straight vinegar.  You may want to heat up the area/air around the grout so that the dissolving process can be more effective.

Extensive Tips

– If household items do not work, consider purchasing a commercial tile and grout cleaner to do the job.  Follow the directions on the labels.

– For even more extensive work, there are even stronger products available, such as chlorine bleach and hydrogen peroxide.  Make sure to dilute these products before you apply them to your tiles.  Don’t forget to follow these directions as well.

If you feel like you need professional help, TalkLocal can help with finding the correct local experts in your area, saving you time and energy in what may be a stressful situation.

Lost Serial Number for Laptop

Thursday, October 18th, 2012

Lost Serial Number for Laptop Computer Repair

Your laptop’s serial number is incredibly important to keep and know, since many companies will use that to verify your warranty whenever you need work done for you computer.  For the majority of laptops, there should be a sticker on the bottom of the laptop that lists your serial number.  However, it’s possible that the sticker got rubbed off or taken off at some point. Fortunately, there are alternative ways of figuring out the lost serial number for your laptop.

Belarc Advisor

The Belarc Advisor is a small program that you can download that will analyze all your hardware installed on the computer.  Your serial number will be shown as part of that analysis.

Command Line

The serial number is also embedded in your BIOS so you can use a terminal or a command prompt to find your serial number.  On a Windows based computer, you should open up the command prompt and type in “wmic bios get serialnumber”, which should work with Windows XP, Vista, and Windows 7 computers.  If you have a Linux based system, open the shell prompt as a root user and type in “hdparm -i /dev/hda”.

Built-in Diagnostic Tool

Based on your manufacturer, they may have built-in diagnostic tools that may be able to recover the serial number.  Talk with your manufacturer to see whether they already have tools for you to use.

If none of the above suggestions worked, then you may want to contact a local IT professional to look for your laptop’s serial number.  TalkLocal, a free online concierge service, can have you talking with a computer repair professional in just minutes!  Just submit your location, availability, and service need onto the TalkLocal websites. It’s easy, quick, and you’ll have your serial number recovered in no time!

How to Replace a Dial Thermostat with a Digital One

Thursday, October 18th, 2012

How to Replace a Dial Thermostat with a Digital One Heating and Cooling

You may want to upgrade your thermostat for reasons of usability, appearance, or even costs on your heating and cooling bills. If you want to change from a traditional thermostat to a digital one, it’s a fairly simply process to complete yourself (if you have the right tools and confidence to operate a couple low-voltage wires). Read more to learn how to replace a dial thermostat with a digital one.

Most digital thermostat displays purchased from a local store will have simple instructions on how to remove and replace the thermostat yourself. You will most likely only need a Phillips or flat-blade screwdriver of the right size to remove and tighten all the screws.

Before beginning though, it is important to turn off the power before you attempt to perform such a task. Though the wires are low-voltage, this is for safety reasons. Generally, there will be two wires that attach to your current dial thermostat. While following directions, you should be able to connect these wires in the correct places and fully install your new thermostat in less than 15 minutes.

If you’d rather not risk doing damage to your wiring or thermostat system, you can contact a heating and cooling specialist to install it for you. Try using TalkLocal, a free service that will connect you with specialists in your area within minutes. All you need to do is describe your service need, list your location and availability, and TalkLocal will contact top-quality, reputable companies who will then call YOU directly, ready to help.
Colors of Paint to Use for Rooms with No Windows

Thursday, October 18th, 2012

Colors of Paint to Use for Rooms with No Windows Painters

Color options may feel limited when you are painting a room with no windows–you don’t want a shade that is gloomy, yet you don’t want a shade that is tacky and bright. The key to selecting colors of paint to use for rooms with no windows is replacing the effects of natural sunlight. Surprisingly, this can be done with both light and dark colors. Consider the following tips before settling for a plain white room.

Light colors

People usually use light colors to brighten a windowless room. Light colors make a room appear inviting and more spacious. You can paint the trims along the ceiling a few shades brighter to bring the eye upward. If you are daring, use vibrant shades like fushia or canary yellow to give the room more life. If you are looking for calmer choices, you can try pastel colors like lilac or mint for a subtle effect. Neutral colors are always a safe bet and can easily match an array of furnishings. Try colors like beige, taupe, sandstone, and gray.

Dark colors

Although most dark colors make a windowless room seem even more cramped, some dark colors are flattering for windowless rooms. Select colors that mimic the natural world; this color scheme will be reminiscent of the outdoors, which will open up the room. Try a dark forest green for a woodsy feel. Use a deep teal to capture the vastness of an ocean. A burgundy shade has the warmth of red roses, and can give a room a romantic touch.

Your color choice can change the entire mood of a room, so spend some time testing a few colors. Remember to view your color choices under indoor lighting rather than natural lighting because that is how the color will appear on the walls. Hire a professional painter through TalkLocal to ensure great craftsmanship. TalkLocal selects high quality service providers based on ratings and reviews, social reputation, and call analytics. Log on to TalkLocal’s website to fill out a short service request. A beautiful room is just a click away.

Connecting a Wire Fire Alarm to an Electrical Panel

Thursday, October 18th, 2012

Connecting a Wire Fire Alarm to an Electrical Panel Electricians

Tired of constantly having to replace your smoke alarm batteries?  Can’t get away from the annoying beep that happens when your batteries are low?  Hardwire your smoke alarm batteries into the electrical panel instead. Connecting a wire fire alarm to an electrical panel is fairly simple, even for those of you who are electrically-challenged.

Materials Needed

– Smoke detectors with interconnect capability (when smoke is detected, other smoke detectors go off)

– Screwdriver

– Wire Stripper

– Ladder

– Wire connectors

– Electrical tape

– Ceiling boxes

– NM cable connectors (if using metal boxes)

– MN 12-2 or 14-2 cable connectors

Instructions

1.      Install a new circuit to the electrical panel on the ceiling or the floor.  It should have about 6 inches of 12-2 or 14-2 NM running out of the work box.

2.      Make a cut in the outside sheath of the NM cable with the wire strippers so you have three independent wires.

3.      With the wire strippers, strip ¾ of insulation from the end of the wires

4.      Take the part of the smoke detector with wires coming out. There should be a black, white and yellow wire.

5.      Place a wire connector over the yellow wire if you are only connecting one smoke detector. (Yellow is used to connect multiple smoke detectors.)

6.      Screw the bare or green wire into the wall box.

7.      Connect the white harness wire to the white wire.

8.      Connect the black harness wire to the black wire.

9.      Wrap a stripe of electrical tape around the base of each connector for each pair of wire connectors.

10.    Put the harness through the smoke detector mounting bracket and put the bracket to the wall box.

11.     Put the wiring harness into the jack on the back of the smoke detector and mount the detector on the bracket.

12.     Connect the smoke detector to the electrical panel.

13.     Check the smoke detector. The “ready” light should be on. Push the “test” button to see if the smoke detector is working properly.

Remember, if your home has multiple floors, it is recommend to have interconnected smoke detectors on each floor. If these steps seem a little too complicated, or for some reason your smoke detecter isn’t working after completing these steps, you should consider hiring a professional. Use TalkLocal to connect you to a highly rated electrician in your area within minutes.

How to Kill Mushrooms in Yard

Wednesday, October 17th, 2012

How to Kill Mushrooms in Yard Landscapers

There are several ways to rid your yard of the annoying mushrooms that sprout over your beautifully manicured lawn and hard grown trees. Here are some methods on how to kill mushrooms in your yard:

Keep your lawn free of excess water (only water your plants as much as is needed by the plants) as excess water will cause fungus and mushrooms to sprout.

Pick up any litter, such as pet excrement and grass trimmings. Mushrooms grow on old mulch, animal waste, and rotting tree stumps, providing mushrooms with nutrients while the excess water helps the mushroom breakdown and digest these nutrients. So keeping your lawn free from all of these will reduce the number of mushrooms living there. It will also prevent spores from neighbors from growing into mushrooms! Additionally, irrigating and aerating the soil better will help with keeping the lawn drier.

Use nitrogen fertilizer to speed up the decomposition of organic matter and reduce the possibility of mushroom growth. Apply one pound of readily available nitrogen for every 1000 square feet. Do not use the slow release or water-insoluble formulations.

Pick the mushrooms up as soon as they appear (before they produce spores). Once this has happened, it is impossible to get rid of the spores as they are all extremely small and not worth spending time on finding and removing. Identify the mushrooms before they mature by making sure that they have no exposed gills. So long as they are not mature, you do not have to worry about spreading spores – even just kicking them at this stage can spare you mushroom spore contagion.

Lawn fungicides, such as Bayleton and Daconil are available to treat your lawns. Of the two, Bayleton is recommended at 1.5 to 3 pounds every 1000 square feet for prevention and 6 pounds for every 1000 square feet for getting rid of a lawn already infected with mushrooms.

If you prefer to use professional landscaping services, let TalkLocal find you professionals quickly and effectively. Just fill out your information on the website and talk to help within minutes!