Removing Tree Root from Lawn

Wednesday, October 10th, 2012

Removing Tree Root from Lawn Tree Removal

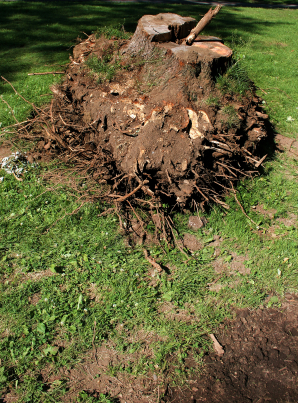
When a tree falls down or gets removed from your lawn, it can leave behind pesky roots.  These roots will destroy the look of your lawn if they are improperly removed. Some roots go deep into the ground or spread out far around the lawn.  You need to take the correct measures when removing tree root from lawn.

Tree roots need to be deep enough to reach the water in the ground but shallow enough to get air and oxygen to the surface. There are three different types of roots that allow trees to receive the right nutrients.  The first type of root is the heavy anchoring ones that come from the base of the trunk.  The second type is the longer transport root extends from the anchors to form a network to find nutrients.  The third type of root is the small roots that branch from the transport roots.  Each of these roots is needed to keep your tree healthy and alive.

The first thing you should do when trying to remove tree roots is change the conditions of your lawn. You can circle the tree with light compost and coarse wood chips to attempt to do this. This mixture will allow air to pass to the roots without overwhelming the tree’s internal system.  The compost should be kept loose and replaced every year.  This will move the roots further into the ground so that you can remove them without causing too much lawn damage.

In order to remove the roots you should make sure the lawn is properly watered so the roots and soil is not too brittle.  You can remove the most surface roots by cutting the roots out cleanly and pulling them out from one central location. You can fill each hole left by the root with more soil.  Use soft topsoil and not composted soil.  In order to take out deeper roots, you should use a stump grinder.  This machine grinds the stump and roots that reach up to one foot into the ground.  The remaining root will decompose and disappear into the lawn without the tree.

If you continue to have problems with roots you should try to install root barriers.  Once you have removed the remaining roots, use buried walls to keep tree roots from expanding too far.

Continuing Problems

If you have more questions about tree root removal you should try to talk to a professional so that you can get the best help possible.  The easiest and fastest way to get in contact with reliable local tree removal services is to use TalkLocal. Just put in your problem and availability and let them do all the work.  Within minutes you will be connected to someone who should be able to help you out.
Waterproof Paint for Bathroom Walls

Wednesday, October 10th, 2012

Waterproof Paint for Bathroom Walls Painters

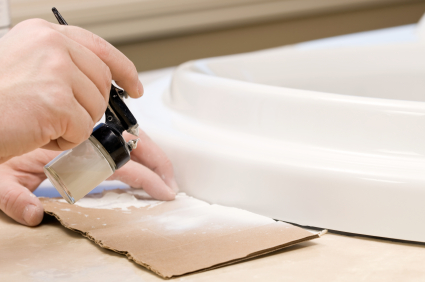
Bathrooms are moist places that likely to harbor mold and mildew over time. If you’re repainting these rooms, you probably want to consider the types of paint that will help to repel the moisture that builds up and causes this unsightly mold and mildew.

There are several types of paint, and here’s a short list and description of each one, leading up to the best waterproof paint for bathroom walls:

Flat paint has a matte coating and is not glossy, which makes it prone to absorbing moisture. Probably something you don’t want in your bathroom.

Eggshell paint has slightly more sheen to it and is washable. Similar to flat, it absorbs moisture, so this would not be the most effective choice.

Satin paint has more gloss than the previous two, and would be most appropriate for lower-use bathrooms such as “powder” or guest bathrooms.

semi-gloss and high-gloss are your best choices for bathroom paint. These types have gloss that repels water, reducing the buildup of mold and mildew spots.

There are also specific types of paint for bathrooms that claim to be mold and mildew resistant. You can find these at any typical paint retailer such as Sherwin Williams or a home improvement store like Home Depot.

If you are having trouble finding the best paint for your bathroom, or would like some professional help in completing the job, try using TalkLocal to locate painting contractors near you. TalkLocal is a free service that will connect you with top-quality, reputable painting professionals in your neighborhood, within minutes. Simple enter in your specific problem, location and availability and TalkLocal will contact multiple companies, who will then call YOU directly, ready to help.

How to Repair Cracked Leather Seats

Wednesday, October 10th, 2012

How to Repair Cracked Leather Seats Auto Repair

Leather seats can really improve the appearance of your car by adding a feeling of affluence and decorum.  Although they can become a pain when they heat up in the summer and freeze in the winter, many people continue to get leather seat upgrades when they buy new cars.  But what happens when these leather seats begin to crack?  They can quickly become an eyesore that ruins the overall appeal of your car. Read on to learn how to repair cracked leather seats.

You can easily fix the cracks that appear on leather seats if you have the right materials.

You will need:

– dish soap

– warm water

– bucket

– a couple cloths

– scouring pad

– denatured alcohol

– 240-grit sandpaper

– blow dryer

– leather prep

– Sport Seal

1. Combine a few drops of the dish soap with warm water in a large bucket.

2. Scrub the entire seat clean with a cloth.

3. Dry it off with a new cloth.  Repeat this process another time but with the scouring pad to get a deeper clean.  This will ensure that there is no dirt or any particles to ruin the seats when you are trying to fix them.

4. Now that the seats are clean you should apply a little bit of denatured alcohol to a paper towel or cloth and wipe every part of the seat down.  Do not let this dry naturally; instead, dry the seats manually with a cloth.

5. Dip the 240-grit sandpaper into the soapy water to soften it a bit.  Sand down the areas of the leather seats with the cracks and the dye will start to move underneath.  Move the lifted dye until the cracks are completely filled and the leather is smooth.

6. Wipe done the seats with a towel and blow dry the seats until they are completely dry.

7. Now that the cracks have been filled, you can protect the patch up you just did.  Apply a thin layer of leather prep to the entire seat.  Follow this with a thin coat of Sport Seal to each of the damaged areas.  Allow this to dry.  This should take care of all the cracks in the leather seats.

Still have cracked seats?

If you still have problems with your cracked leather seats, you should seek professional help.  Use TalkLocal to be put in contact with reliable local auto repair businesses.  You don’t have to do any work! Simply input your problem and availability and within minutes you should be connected to someone who can help you out.


Best Way to Cool Off Laptop

Wednesday, October 10th, 2012

Best Way to Cool Off Laptop Computer Repair

When you feel the underside of your laptop and immediately receive a first degree burn, the gut reaction of many is to throw your laptop in the freezer to cool it down. For the record, that’s something you definitely should not do. There may not be a singular proven fastest method of cooling down your laptop, but this article will present the best way to cool off laptop.

Use on Hard Surface

The name laptop is a bit misleading, as using them on soft surfaces such as your lap will block the ventilation. So don’t use your laptop on your bed, carpet, or on your lap. Instead move your laptop to a hard flat surface.

Dust

If you’ve had your laptop for a while and tend to use it in dusty areas, there’s a high probability that the dust has built up inside your fan and your heat sink. You can either open up the laptop to clean its components or use compressed air in short bursts to clear out the tiny gaps in your heat sink.

DIY Laptop stand

Buy a laptop stand with a fan included to cool down your laptop, or you could even make your own. Here’s a quick and easy idea for an emergency laptop stand: Put the sides of the laptop on top of two books, leaving a gap in the middle. Place an ice pack in the middle gap under the laptop, making sure that it isn’t actually touching the laptop.

Close Processes

Reduce your machine’s workload by closing unneeded processes and programs. Open up Task Manager and click on the processes tab, then click on CPU to arrange the processes from highest CPU consumption to lowest CPU consumption. If there are programs taking up a lot of CPU power that you don’t need right now, close them. However, be careful not to accidentally close a crucial system process!

Lower Quality Video

If you’re watching a high definition movie or playing a 3D game, your graphic card may not be able to keep with the amount of power needed. Try turning the quality settings down to reduce stress on the graphics card.

Give it a Break

Give your poor laptop a break once in a while! Do things that require a great deal of power on your desktop if possible, and don’t remember to shut your laptop down at the end of the day instead of just putting it on sleep.

Additional Help

If you’ve tried all of these options and your laptop is still overheating, there may be a driver or BIOS issue, or the temperature monitoring system in your laptop isn’t working properly. Use TalkLocal to find a skilled computer technician to resolve these advanced problems.

How to Use Shade Cloth in Garden

Wednesday, October 10th, 2012

How to Use Shade Cloth in Garden Landscapers

A shade cloth or shade sail is a device used outdoors to provide shade. The shade can be either for humans, animals, or gardens. These cloths were originally based on the technology from a ship’s sail that was created to protect its sailors from extended exposure to the sun. Over time, these shade cloths are becoming used less by humans as sunscreen and more for gardens to protect plants from the extreme heats of summer. Shade cloths also come in different density levels. In the case of a garden, you will want a shade cloth with a density level between 50-60%.  Read this article to learn how to use shade cloth in garden.

The process of using a shade cloth in a garden is relatively simple. You start out by digging a roughly one-foot deep hole in each corner of your garden.  If your garden is unusually long, you may want to dig an additional hole in the middle of your garden as well. Wooden stakes that are about four to five feet long will be inserted into these holes. These stakes should fill the hole completely and not move around at all. If they holes aren’t filled, simply pour some soil within the hole to completely cover it; stomp on these areas to pack down the soil tightly to keep the stakes in place.

The next step is to prepare the shade cloth material. Chances are, your shade cloth isn’t the exact size you need it to be, so you will need to cut it to accomodate your garden. Use a tape measure and scissors to cut the cloth about four to five inches longer than the length and width of your garden. Be sure not to leave too much or to little space, or else your shade cloth won’t work 100% correctly.

With the shade cloth cut properly, the next step is to place this cloth on top of the wooden stakes. To attach the shade cloth to the stakes, use a staple gun, nails, or even superglue to ensure the cloth doesn’t blow away. To have your shade cloth be as effective as possible, stretch the cloth across your garden as tightly as is possible and secure it to the stakes. Do this to both sides of the cloth. Once you are done, your shade cloth will be protect your garden from the sun’s heat.

If you have completed all these steps and still require assistance in assembling your shade cloth, consider using TalkLocal to find a capable landscaper for you. TalkLocal is a free service that will connect you with top-quality, landscaping companies in your neighborhood within minutes. Just enter in your specific problem, location and availability, and up to three companies will call YOU directly, saving you the time and stress of finding one yourself.

Types of Blown-in Insulation for Your Home

Wednesday, October 10th, 2012

Types of Blown-in Insulation for Your Home Heating and Cooling

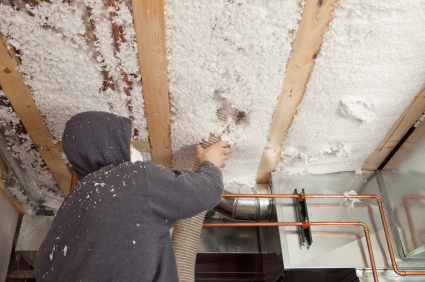
You’ve seen your neighbors getting home insulation and you decide it’s time to consider this for your home too. Home insulation can offer many benefits; not only does it have the potential to significantly reduce your energy bills, but your home will be a more comfortable place to live, it will add value to your property and you are helping the environment by reducing your carbon emissions. Having decided that you wish to proceed with home insulation, you are faced with the task of deciding which type of insulation to opt for. There is a range to choose from, but blown-in insulation is a popular choice. Alternatively known as loose fill insulation, this type of insulation comprises loose particles, which are blown into your attic or cavity wall space – the gap between the interior and exterior wall of your home. Installation of this type of insulation requires someone professionally trained, as the insulation needs to be evenly distributed and this necessitates the use of specialist equipment. Here we consider the three types of blown-in insulation used in properties.

Fiberglass insulation

This type of insulation is made from tiny particles of spun glass fibers – also called glass wool. There are two types available – that produced as a by-product of manufacturing rolls of fiberglass or that specifically produced for the purpose of blown insulation. There should be no difference in their energy saving potential, as long as they are fitted correctly in accordance with manufacturer’s guidelines. However, if you are looking for the most environmentally responsible option, then choose the blown fiberglass produced as a by-product; this will help to conserve resources and reduce the use of landfill. Fiberglass is non-combustible, so does not require the addition of any chemical fire retardants. Although fiberglass is generally an effective insulator, one disadvantage is that it can lose its ability to insulate as temperatures fall; at extremely low temperatures its insulation can reduce to as low as 50%. Despite the concerns about the safety of blown fiberglass – after all it is made up of tiny glass fibers that could be inhaled into the lungs – it is more of a danger to those installing the insulation, as once in your attic or cavity wall it should pose no threat.

Rock wool insulation

This mineral wool is made using the by-products of blast furnaces in industry, with up to 90% of this type of insulation sourced from recycled material. It is resistant to settling, so they maintain their insulation performance over the whole course of their lifespan. Rock wool’s high R-value – the measure of the resistance to heat flow – due to its density, also means that it is a more efficient insulator. Another benefit is its resistance to the entry of moisture, which can otherwise reduce insulating ability. As with fiberglass, it is naturally non-combustible. Rock wool also offers very good sound insulation, which can influence some people’s decision to use it in their cavity walls and even in their ceilings.

Cellulose insulation

Made from recycled newspapers or cardboard, cellulose is another good environmentally friendly choice for your insulation. It retains its insulating ability at all temperatures, but a big downside is that by its very nature it will burn. To sidestep this problem cellulose insulation is treated with chemicals during its manufacture to make it fire resistant; these chemicals also repel rodents and insects, which can otherwise be attracted to insulation.

Choosing a contractor to install insulation

Having made your choice, it’s time to choose a professional to install your blown-in insulation. If your neighbors, friends or family have recently had attic or cavity wall insulation installed, it often pays to ask about their experiences, as nothing counts more than a good recommendation. However, whoever you choose, make sure that it is someone experienced in installing blown-in insulation. Check that they are certified with the Insulation Contractors Association of America or another similar organization. A creditable insulation contractor won’t mind if you ask for references from other home owners who they have provided insulation for. Also check that the insulation contractor has professional cover, so you can have peace of mind that you do not need to worry about any potential damage that might occur during the work; they should be happy to show you their insurance certificate. Finally ask to see a sample label from the insulation that they use and ask for an explanation; this way you can check the R-number and be sure that they are using insulation from labelled bags – if not you can’t guarantee its quality.

Low Water Pressure in Parts of House

Tuesday, October 9th, 2012

Low Water Pressure in Parts of House Plumbers

What happens when you start to get low water pressure in parts of your house?  Everyday tasks like washing the dishes or taking a shower gets harder and it can be extremely frustrating.  When you have low water pressure in parts of the house, it could be a serious problem so you should try and resolve it as soon as possible.

The first thing you need to do is determine how widespread the problem is.  See if it is affecting just one area or the entire house. In order to test the water pressure, you should buy a hose bib water pressure gauge. These devices are simple to use. You should first make sure there is no water running in the home.  Turn all faucets off, stop using any machines, and stop using hoses. You will need to thread the pressure gauge into any hose bib and turn it on.  Record the resulting pressure reading as your static water pressure.

Potential Causes:

The problem could lay with the supply valve, the aerator, or faucet itself.

Supply valve — The supply valve my not be completely open. These types of valves are open when they are turned left and closed when turned right.  You should turn the valve completely left until it won’t turn any further.  If the valve is kinked or crushed, you should replace it.

Aerator — The aerator or filter screen may be clogged which causes low water pressure. The aerator is threaded onto the end of the faucet.  When you remove it, you should use a cloth to protect the part from tool marks. Turn the aerator to the right to remove and inspect the debris found on it. Remove anything that could impede water flow.

Faucet — The faucet itself is not working properly. You should try to replace the entire device so that you prevent further problems or damage.

Continuing Problems

If you continue to have problems with your water pressure you should seek professional help.  Use TalkLocal to be put in contact with reliable local plumbing businesses within minutes.  You don’t have to do any work! Simply input your problem and availability and TalkLocal will do the rest.  Almost immediately you will be connected on the phone with someone who can help you out.

Types of Roof Damage after a Storm

Tuesday, October 9th, 2012

Types of Roof Damage after a Storm Roofers

Save yourself the time inspecting your roof and ask yourself these questions first. If your answers to any of these following questions are yes, it’s time to check up on your roof.

1. Does any part of the ceiling leak inside your house?

2. Do you observe any missing tiles/shingles on your roof?

3. Have you observed strong wind current/hail on your area recently?

Wind Damage

The most common of all the storm damages is wind damage. Wind can either blow and carry away the shingles of your roof or it may blow other objects into your roof, chipping away at the shingles. In extreme occasions you may see that the wind has knocked down or broken off a tree branch. If you are lucky, the tree branch has just fallen on the ground instead of crushing someone’s car or damaging someone’s roof.

If a tree branch does damage your roof, you will need to leverage it if not replace it entirely. Take care to address these damages as soon as possible, because a tear in your roof, along with water buildup, can rot the wooden material below and cause extensive damage.

Hail Damage

One of the other types of damage is the hail damage. This one is pretty straightforward – a block of ice collides into your roof, denting it or knocking out shingles and tiles. Hail damages can be extensive depending on the area you reside. Some areas get hail all the time, while others don’t at all.

It should be remembered that the main factor behind hail damage is the density of the hail, not the size; a small block of ice hurts more than a big ball of snow if thrown into your face. Typically, the kind of hail the makes a sharp noise when hitting your roof causes the worst damage.

Additional Help

If you feel like you need professional help on identifying types of roof damage after a storm, TalkLocal can help with finding the correct local experts in this case, saving you time and energy in what may be a stressful situation.

How to get Rid of Maggots in Trash Can

Tuesday, October 9th, 2012

How to get Rid of Maggots in Trash Can Pest Control

You never want to open up a trash can to be surprised by hundreds of crawling, disgusting maggots infesting the area. Not only does trash usually smell bad, but it can also be a daunting task to clean up when you find these fly larvae lurking in your cans.  Here is how to get rid of maggots in trash can if it ever happens to you.

If you discover maggots inside your home, you need to empty out all trash immediately to prevent further infestation. Once you empty out the inside trash cans, you should thoroughly clean and disinfect the receptacles. You can do this by washing out the cans with boiling water and soap/disinfectant to kill off any remaining larvae eggs. Then, use a mixture of one part vinegar and two parts water to eliminate any odors that attract these insects. Be sure to dry the can out completely and always use a trash can liner to dispose of trash. You may also want to take precautions by disposing of any food waste in smaller plastic bags before throwing in the bigger receptacles to prevent the attracting of flies and other insects while your trash can is filling up.

If you find the maggots in your outside trash cans, you may have to wait until trash day for them to be emptied. After the trash is picked up, complete the same steps as above to clean and disinfect the cans. To get rid of maggots in the trash can and simultaneously prevent future presence, it is very important to fully clean and completely dry out the bins. For your outside cans, let them dry in the sun before re-lining them with trash bags. Maggots thrive in moist conditions, so this step is very important. Again, always use trash bags and, when disposing of food rations, be sure to seal them in smaller bags rather than disposing of them directly into the containers.

If you experience recurring infestations of maggots and/or other insects surrounding your trash, you might want to contact a pest control specialist to help eliminate the problem. Try using TalkLocal to locate one near you. TalkLocal is a free service that will connect you with top-quality, reputable professionals in your neighborhood, within minutes. Simply enter in your problem, location and availability and TalkLocal will contact multiple pest control companies, who will then call YOU directly, ready to help.

Smeg Oven Timer not Working

Tuesday, October 9th, 2012

Smeg Oven Timer not Working Appliances Repair

Smeg ovens are typically high-quality ovens that come in many different shapes and sizes. They offer different models that use both electrical and gas, and they offer different styles and colors to suite every consumer. Unfortunately, Smeg ovens are just as susceptible to breakdown as any other ovens, whether the issue is electrical or structural. One such breakdown can be with the oven timer. Quite a few people have complained about their Smeg oven timer not working. There’s no easy answer to solving this issue, but there are a few steps that can be taken to remedy this.

The first troubleshooting step you want to take is to try resetting the oven. To do this, move the oven away from the wall and remove the power cable from the outlet. Wait about 20 minutes to allow it to reset, then plug it back in to start the oven back up. If you don’t feel like moving your oven, an alternative option would be to reset your circuit breaker. Once you reset the breaker, the oven timer should reset as well.

You can also try holding down all the timer buttons at the same time. Some people have reported that this tactic works at times to reset the timer. Another tip is to consult your user manual. Typically, the manual offers troubleshooting steps that can quickly and easily solve any of your problems.

However, if none of these methods worked to get your Smeg oven timer working again, then it is likely your oven timer has structural damage and will need to be investigated by an appliance repairman or an electrician before more damage occurs. If you are looking for someone to help, consider using TalkLocal to find a capable appliance repairman for you. TalkLocal is a free service that will connect you with top-quality, appliance repair companies in your neighborhood within minutes. Just enter in your specific problem, location and availability, and up to three companies will call YOU directly, saving you the time and stress of finding one yourself.