Kitchen Appliance Breakdown Insurance

Friday, October 12th, 2012

Kitchen Appliance Breakdown Insurance Appliances Repair

After buying a new kitchen appliance, you may be wondering whether kitchen appliance breakdown insurance is worth it. After spending anywhere from a couple hundred to a couple thousand dollars for your appliance, it may not seem like a good idea to spend anymore. The question becomes, is it worth it to spend money on insurance after spending so much money on appliances?

The quick answer to that question is yes, it is definitely worth it. Having the manufacturers warranty is one thing. This warranty generally protects the consumer from appliance breakdown that is the fault of the manufacturer (for example, if a part just randomly stopped working). This warranty is certainly helpful, but what happens if your electricity goes out, then comes back and ends up shorting your appliances circuit? It would be considered your fault and unfortunately, the manufacturers warranty wouldn’t cover this type of incident. That’s why having kitchen appliance breakdown insurance is a crucial. Depending on the type of coverage you buy, these types of insurances can protect you from anything—from surges in electricity to dropping your appliance.

As a homeowner, you never want things breaking, but sometimes it happens. Even if you have homeowners insurance, your major home appliances aren’t typically covered under this. Instead, this covers burglary or natural disasters, such fire. Also, the manufacturers warranty that comes with most appliances usually lasts a year, meaning when your appliance breaks in a year and a half, the repair costs are left completely up to you.

If you want to avoid situations like this, the solution is to purchase kitchen appliance breakdown insurance. This type of insurance (again, depending on the plan you purchase) usually covers any type of breakdown and allows you to find help with just one phone call. This insurance is also a great idea if your appliances are fairly old, as kitchen appliances typically begin breaking down after a few years. You can protect yourself from costs and long waiting times by purchasing kitchen appliance breakdown insurance. Don’t make the mistake of not protecting yourself with insurance.

If you need help deciding what the best type of kitchen appliance breakdown insurance is, or if you need help fixing an appliance, consider using TalkLocal to find a capable appliance repairman for you. TalkLocal is a free service that will connect you with top-quality, appliance repair companies in your neighborhood within minutes. Just enter in your specific problem, location and availability, and up to three companies will call YOU directly, saving you the time and stress of finding one yourself.
Muffler Sounds Loud

Friday, October 12th, 2012

Muffler Sounds Loud Auto Repair

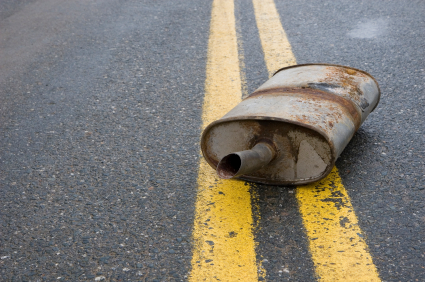
A muffler is a device on the internal combustion engine that reduces the amount of noise emitted by your car exhaust.  You can have mufflers on all types of cars, trucks, and motorcycles.  Your muffler may occasionally make loud noises, but if your muffler sounds loud over a long period of time, something may be wrong. You should check the following points to determine the problem area.

Potential Problems

1)   Exhaust Leak

If you have recently replaced your muffler, then you may think nothing is wrong with your exhaust, but this is not true!  Parts of the exhaust pipe may have been worn down yet not replaced at the same time as the muffler.  These pipes could be leaking air before it even reaches the muffler, which creates a lot more noise.

2)   Rusted Pipes

Another possible problem could be with the piping in your system.  Exhaust pipes can not only leak but also rust completely, leaving your exhaust system incomplete.  The exhaust air released is very loud and even dangerous to your health, so you need to address the problem immediately.

3)   Broken Bolt

The exhaust system is made up of a lot of different pieces of steel.  The entire device is welded and bolted together.  Sometimes these various parts can fail as well.  You may have a broken weld or missing bolt which will cause friction and more noise in your muffler than usual.  Examine the muffler to see if you can identify the issue.

4)   Cracked Manifold

If your exhaust manifold is cracked you will also here a lot of noise.  The air will violently escape through the crack and make noise.  You should see if your muffler or exhaust is cracked in any way.

Continuing Problems

If you have problems with your muffler making too much noise you should seek professional help.  Use TalkLocal to be put in contact with reliable local auto care businesses.  You don’t have to do any work! Simply input your problem and availability and within minutes your should be connected to someone who can help you out.

How Long does it take to Dry a Carpet after Steam Cleaning?

Friday, October 12th, 2012

How Long does it take to Dry a Carpet after Steam Cleaning? Carpet Cleaners

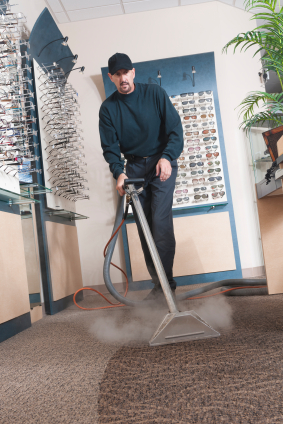
A carpet that is steam cleaned is much cleaner than one that is simply vacuumed.  However, because steam cleaning uses water to clean the carpet, it takes a while for the carpet to be completely dry.  How long does it take to dry a carpet after steam cleaning?  A variety of factors go into the drying time of the carpet, so it’s best to know all of them in order to estimate how long it might take for your carpet to dry.

Carpet Density

Carpets that are denser and thicker will hold more water and take longer to dry.  The carpet padding will also retain water, and its thickness is also a major factor in the length of time it takes for the carpet to fully dry.

Ventilation

Increased ventilation in a room will allow for more evaporation, which means it’ll take less time for the carpet to dry.  Turning on the AC and any fans will also help.  Turn off any heaters, as cold air holds less moisture than hot air.  Heat will also encourage mold growth, especially in humid areas like in your carpet.

Water Usage

The more water you used while steam cleaning, the longer it will take to dry.  Using less water is just as effective as using more, in most cases.

Extraction Cycle

Pass over the carpet multiple times during the extraction cycle in order to extract as much water as possible before the drying process begins.

A professional carpet cleaner will provide the optimum drying settings for your carpet while still giving it a deep clean. Use TalkLocal for free to find a quality carpet cleaner in your area today.

How to Remove Spyware from Android Phone

Friday, October 12th, 2012

How to Remove Spyware from Android Phone Computer Repair

You knew about the dangers of spyware on your computer, but chances are you didn’t think about the fact that you could get Spyware on your Android phone, too. As with any device with internet access, you are susceptible to spyware when you browse the Internet. Here are some tips about how to remove spyware from an Android phone.

1. Check to make sure you don’t have Mobile Spy installed on your phone. Under the “Settings” menu, click into the Applications field. Look through your programs for the following programs:

– Android Toolkit for Mobile Spy Version 5.0

– Smartphone for Mobile Spy Version 4.0

If you see either of these programs on this menu, select them, and tap the Uninstall button.

2. Download an Antivirus App.  There are a few good antivirus apps out there.  Much like on your PC, these help by running regular sweeps to make sure nothing malicious has invaded your phone.  Some of the highest rated free Android Antivirus Apps include:

– Antivirus Free by AVG Mobilation

– Antivirus Free by Creative Apps

– avast! Mobil Security by Avast Software

– Lookout Security and Antivirus by Lookout Mobile Security

– Norton Antivirus by NortonMobile

Some of the highest rated pay apps include:

– Antivirus Pro by AVG Mobiliation ($9.99)

– Security and Antivirus Premier by aWebroot Inc ($19.99)

– MyAntiVirusPro by P. Defender Antivirus ($9.99)

Sometimes, people are unaware that their phone is infected with spyware. Though the symptoms vary depending on the virus, a lagging phone and short battery life are common signs. This is because the spyware is taking up a lot of memory and battery on your phone. If you need any additional help with your Android phone, visit TalkLocal and enter your problem, location, and availability. Within minutes, TalkLocal will connect you with someone who can help you with your problem.

Should Gums Bleed when Flossing?

Thursday, October 11th, 2012

Should Gums Bleed when Flossing? Dentists

Should gums bleed when flossing?

Your gums are a very important part of your oral health.  The gum tissue in your mouth keeps your teeth in place and stops them from wiggling around.  You should take care to properly brush your gums along with your teeth so that they stay healthy and do not decay.  Sometimes when you floss, your teeth and your gums will begin to bleed. This could be the result of a few things, some serious and some not so serious. So, should gums bleed when flossing?  Keep reading to learn more.

Reasons why they bleed:

–  Your gums haven’t been flossed in a while

–  They are oversensitive

–  Gum disease (Periodontal disease)

When your gums are bleeding during flossing it could be a simple issue.  If you haven’t flossed in a while or your gums are very sensitive they will bleed very easily.  When you stimulate them too much, it can become painful and cause bleeding.  This is not too big of a deal.  You should just continue to brush and floss your gums and eventually they will strengthen up and stop bleeding.  If this does not happen and the bleeding continues or gets worse, you may have a more serious problem such as gum disease.

Periodontal disease is a much more serious problem.  It is the breakdown and decay of your gum tissue.  This sickness can attack people of any age.  The main factor is how you care for your teeth, so don’t think that just because you are young you can’t have gum disease.  If you suspect that you have gum disease, see you dentist immediately.

What to do:

–  Brush your teeth for 2 whole minutes and make sure you hit your gums too

–  Floss regularly aka every night

–  Use mouth wash

–  See a dentist if problems persist

If you continue to have problems with your gums bleeding you should seek professional help.  Use TalkLocal to be put in contact with reliable local dentists within minutes.  Simply input your problem, location and availability, and you should receive a call from someone who can help you almost immediately.

Fix a Leaking Pipe Under Bathroom Sink

Thursday, October 11th, 2012

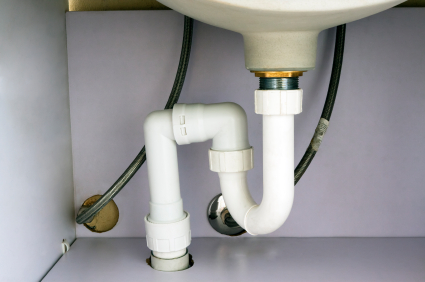
Fix a Leaking Pipe Under Bathroom Sink Plumbers

Fixing the pipes under your bathroom sink can seem intimidating but it is definitely doable. To correctly fix a leaking pipe under bathroom sink, you should identify exactly where the problem is.

1)   The pipes have loose connections.

Sometimes your pipes will leak because a connector has come loose. This is a very simple issue and can be fixed in a snap. To tighten up any loose connections, you will need a pipe wrench, a pair of channel lock pliers, and plumber’s tape.  You should first tighten up the drain flange with the pipe wrench by turning the retaining nut about a quarter of a turn. Now you can tighten the rest of the connections between the pipes using the channel lock pliers. If some sections continue to leak even after being tightened, you should disconnect them and apply new plumber’s tape. Then, reconnect them and see if this stops the leaking.

2)   The pipes themselves are failing.

Another problem that may cause leaking is that the pipes are actually failing and need to be replaced. First and foremost, turn the water off. Use channel lock pliers to remove the pipes from the drain pipe and wall. Take the whole thing to the hardware store so you can find an exact match. Make sure you also get new slip nuts as well. Install the pipes and see if the leaking stops.

3)   The sink’s drain flange has gone bad.

You may have a more serious issue if you sink’s drain flange is broken. You should disconnect the sink trap using the channel lock pliers and swing it out of the way. Use the pliers to remove the slip nut connecting the drain flange to the sink and take out the retaining nut with a pipe wrench. You should inspect the flange and see what needs to be replaced. It could be an easy fix with replacing the plumber’s putty, or something more serious if anything is bent or cracked.

Continuing Problems

If you continue to have problems with your pipes leaking, you should seek professional help. Use TalkLocal to be put in contact with reliable local plumbing businesses. You don’t have to do any work! Simply input your problem and availability and TalkLocal will do the rest. Within minutes your should be connected to someone who can help you out.

How Long can Oil Sit in an Engine

Thursday, October 11th, 2012

How Long can Oil Sit in an Engine Auto Repair

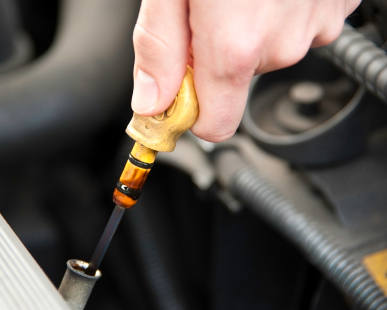
All cars need engine oil to keep their parts well lubricated. Without it, engine components grind against each other and residue builds up inside the motor. Good engine oil maintenance is a critical part of keeping your car healthy and functioning. Not all of us are car experts though and it can be very confusing to figure out exactly what you should be doing to take care of your car. A particular source of frustration for drivers nationwide is figuring out how long to wait between oil changes or asking yourself how long can oil sit in an engine for.  There are a lot of popular myths out there on this subject, but here are some simple guidelines to follow.

Oil change times are most commonly listed in terms of miles driven. That is to say that you should change your oil after driving X number of miles since your last change. This variable will depend on the car you drive and the type of oil that you use. Most modern drivers use synthetic oil, which can last thousands of miles more than traditional petroleum based oil.  You can check on the bottle to see how many miles the oil you use is rated for, but most synthetic oils will be fine driving up to 7,500 miles without a change. Keep in mind that many oil manufacturers tend to underestimate how long their oil will last in order to keep you coming back for refills more often. Because of this it is generally safe to drive one to two thousand miles more on your engine oil than the bottle advertises.

But what if you have a car that is not being driven very often? Answers vary wildly on this topic, but the best estimate for you will depend on the type of car and how frequently it is being used.  You should consult your car’s owner’s manual for specific details; in general, if you are going to let a car sit for more than six months without being driven, you should change the oil beforehand and drive the car for at least ten minutes a month.  This helps to warm up the oil, remove gunk build up, and clean out your system to prevent oil from breaking down too quickly. Maintaining a regimen like this can keep your oil functional for up to two years with minimal driving.

Once you are ready to change your oil, you will probably want to find an auto-technician to do the job for you. If you are feeling up to taking on the task yourself, there is a great step-by-step guide available here.  Otherwise, you should find someone who can service you car.  If you use TalkLocal, you will be automatically connected with a quality local professional in just a few minutes.  All you need to do is provide your contact info and a description of your problem and TalkLocal takes care of everything else!

How to Connect Three Monitors to Macbook Pro

Thursday, October 11th, 2012

How to Connect Three Monitors to Macbook Pro Computer Repair

Using multiple monitors at work can increase efficiency and make doing a lot of tasks a lot easier. Many people like their single screen, but if you are looking to increase monitor space, you can add more screens. A lot of people have graduated to using as many as three monitors. Learning how to connect three monitors to Macbook Pro can be a little more complicated, but not impossible.

If you want to attach two extra monitors, you can use both your VGA plug in as well as a USB VGA adapter cord. This way you don’t have to install any third party programs or add any extra connections. This is a simple way to achieve your goal if your computer can handle it.

In the case that you need to use a third party device such as Matrox TripleHead2Go, you will need to download and install it first. You may need to do this if your computer has DVI instead of display ports. You can connect multiple extra monitors, but your computer will not recognize them separately and, instead, treat them as one.  Using something like Matrox, which is a graphics expansion module, you can increase the amount of display power.

Sometimes your Macbook Pro does not have as large of a video card as it needs to run more than one extra display monitor. In order to rectify this problem, replace your current card with a larger one so that you can use as many monitors as you want.

Mac and Apple product are notorious for their incompatibility with many other electronics, so you should carefully research the types of external monitors you want to use to make sure they will work with your computer.

Continuing Problems

If none of the above related solutions help, you may want to seek professional help. Use TalkLocal to be connected to reliable local businesses within minutes. The process is easy. Simply input your problem and availability on the online service request and TalkLocal will do the rest! Within minutes, you will be put in contact with a qualified IT service company who can help you out.

Installing a Cat5 Connector Wall Jack

Thursday, October 11th, 2012

Installing a Cat5 Connector Wall Jack Electricians

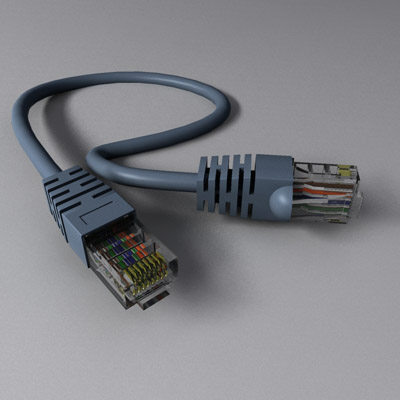
If you want to extend the range of your home internet network, a wireless router is usually your best choice.  But when dealing with a room that a wireless signal is unable to penetrate, like a basement or garage, you might need to use an Ethernet cable running from your modem.  The best way to accomplish this is to install a cat5 wall jack panel in the room where you need internet access and connect it with a cable through the walls to your internet source.  For those with little to no wiring experience, installing a cat5 connector wall jack can be a tricky undertaking, but if you follow these steps you should be surfing the web in no time.

The first step is to actually run the Ethernet cable from the room with your internet modem to the room where you are installing the wall jack.  If you are not familiar with the process of snaking a wire through your walls you should read about it here.  Although simple in theory, this is often the most difficult step for the average do-it-yourselfer.  Those who are unable to accomplish it on their own or uncomfortable making the attempt should probably hire an electrician to take the job on for them.  Getting in contact with a quality local professional is easy if you use TalkLocal, so don’t hesitate to ask for help if you need it.

Now that the cable is in place we will move on to the actual wall jack panel.  Begin by cutting a hole in the wall the size and shape of the panel, wherever you want it to be located.  Then pull the Ethernet cable you ran through the back of the wire box (the part of the wall jack panel that sits inside your wall) and use a screwdriver to screw the box securely to the drywall.  To attach the jack to your cable, you will need to strip the cable end with wire strippers and insert the individually colored smaller wires into the corresponding colored jacks in the back of the wall plate.  Once they are in place you can press the wires into the connections using the punch down tool that should have come with your wall panel when you purchased it. With the cable connected to the jack all that remains is to fit the faceplate of the panel over the wire box and screw it into place.  Congratulations, you should now be able to easily connect to your home network without worrying about all the hassles of wireless connections.

When to Replace Windows in your House

Thursday, October 11th, 2012

When to Replace Windows in your House WIndow Replacement

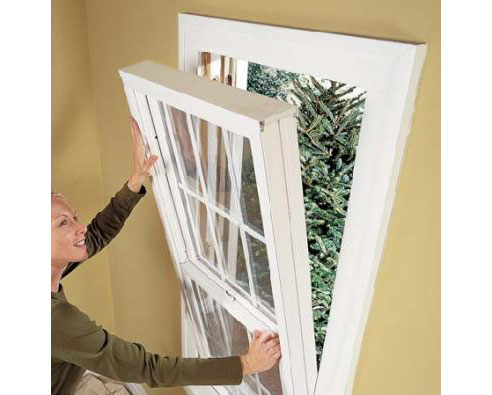
When doing home renovation and upkeep it can be hard to know when to replace windows in your house.  Many people don’t know how old their windows are or what kind of other options may be available.  There are actually a few important reasons for thinking about window replacement, as windows that do not provide proper insulation can cause significant increases in your heating and air-conditioning bills, as well as cause damage to the interior of your home.  Here are a few key signs to help you know when it is time to replace your windows.

 As your home goes through the normal wear and tear of everyday life, wind, rain, and the occasional baseball can put your windows through a serious beating.  Obvious signs that your windows need to be replaced are cracks or holes in the glass, as well as rotting, cracked, or missing trim.  Serious damage like this will let the outside weather in, potentially raising your utility bill and harming your furniture.

There are also some less obvious signs that your windows are not providing proper insulation that are not as noticeable. If your interior pane of glass is cold to touch, or if the area next to your window is colder than the rest of the house, heat is escaping and causing extra strain on your HVAC system.  If you notice these symptoms, try taking a lighted candle and slowly tracing the frame of the window, keeping an eye out for a flickering flame as a sign of a draft.

Once you have determined that your window is drafty or leaking, you can use TalkLocal to find a professional window repair/replacement service.  TalkLocal saves you time and money by automatically connecting you to the best quality professionals in your area.

Even if you don’t notice any of these symptoms, if your windows are more than twenty years old you may want to consider upgrading them.  Newer windows are capable of insulating your home much better and can increase the energy efficiency of your house.  Check out this site for some information about new energy-efficient windows and some other tips for cutting down on the heat loss from your home windows.