Replacing a Steering Wheel

Tuesday, October 9th, 2012

Replacing a Steering Wheel Auto Repair

Replacing a steering wheel can be a difficult endeavor. However, if you have the skills to do it, here are instructions for replacing a steering wheel in a Toyota.

Materials

– New steering wheel
– Safety glasses
– T-30 Torx drivers
– Screwdriver
– Needle-nose pliers
– Puller

Remove Steering Wheel

1. Adjust the steering wheel so that it is straight.

2. Detach the negative battery cable to drain the backup power. Remember to wait at least a minute for the backup to fully deplete. This stops the airbag from deploying when remove the steering, which could cause severe injury. This also stops the horn from sounding when you remove the wheel.

3. Loosen the cover on the side of the wheel using a screwdriver.

4. Unscrew Torx screws that are holding together the airbag module, using the Torx driver.

5. Detach air bag module’s electrical wires.

6. Remove the module from wheel.

7. Detach the electrical wires from the horn and cruise control.

8. Unscrew the wheel-retaining nut.

9. Put the puller to the shaft and pull off the wheel.

10. Turn the spiral cable counterclockwise for three turns. Line up both the red marks.

11. Put the new steering wheel onto the wheel shaft.

12. Screw in shaft nut to 26 lbs. of torque.

13. Reattach horn and cruise control connections, as well as the air module to its designated electrical wires.

14. Change Torx screw and secure with 78 lbs. of torque.

15. Connect the negative batter cable back to the terminal.

Changing the steering wheel can be dangerous, so it is best to contact a professional if you feel uncomfortable fixing the problem yourself. TalkLocal can connect you to the best car mechanics in your area. Just go to the TalkLocal website and submit your problem, location, and availability. Within minutes, you will be on the phone with real people who can fix your specific problem at your convenience. Say good-bye to flipping through the yellow pages. TalkLocal does the searching for you, whether you are looking for a car mechanic or a variety of other services.
No Light on Laptop Charger

Tuesday, October 9th, 2012

No Light on Laptop Charger Computer Repair

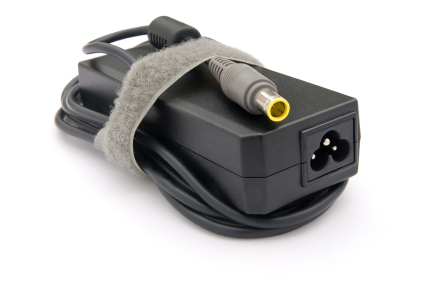
While a laptop charger is usually one of the most resilient pieces of technology that we own, it is still susceptible to failure.  We often times rely on the charger light to see whether or not our laptop is charging, so if it gives a faulty indication light, you may need to get your charger replaced.  You’ll first want to go through these basic troubleshooting steps to see whether or not you can fix the charger yourself.  Of course, before you continue, you’ll want to check you’re using a good outlet and the correct adapter for your laptop.  If all else fails and you still have no light on laptop charger then check out this article.

Check the charger parts seperately

If the LED on your charger doesn’t light up, there are a couple of things you can do to check for errors.  You can swap out the AC plug (that goes into the wall) with another AC plug.  If it starts charging the computer and the light turns on, then you’ll need to order another  AC cord as your current one is faulty.  Check to make sure that the pins aren’t stuck or dirty; you can simply plug and unplug the adapter to and from the port, which should reset the pins to a neutral position.  If you have a Mac, you may want to reset the System Management Controller, which may resolve some unusual system behavior like the LED not coming on.  You can do this by shutting down the computer, disconnecting the power adapter, removing the battery, and pressing the power button for five seconds.

For the Avid DIYer

You can also choose to take the charger apart yourself and examine it for any tears or breaks in the wiring, as this often times will cause the LED to malfunction.   It may be easiest to actually talk with a computer repair professional about this step, as they have the necessary tools and precautions to repair your charger safely.  TalkLocal can connect you with a high quality local professional in just minutes, so you can take care of this problem as soon as possible!

How do you Remove Rust Stains from Carpet?

Monday, October 8th, 2012

How Do You Remove Rust Stains from Carpet? Carpet Cleaners

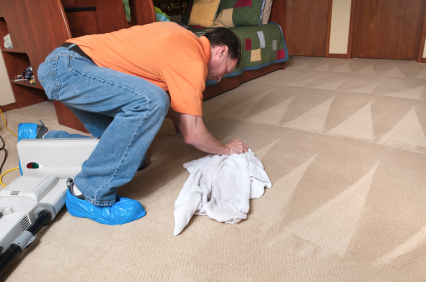
Some would expect to only see rust on metal or iron materials outside of their houses, but if these objects are brought inside and set down, you may discover soon after that rust stains have settled into your carpet.  How do you remove rust stains from carpet?  There are a few easy, cheap methods you can try.

1.  Dish detergent & warm water:

– Take a dull knife and try to gently scrape off any excess rust from the carpet bristles.

– Mix a few drops of mild dish detergent (one with no alkalis) with warm water.

– Blot, don’t rub, the stain with a wet cloth or sponge.

– Let the mixture set in for a few minutes, and then rinse the sponge/cloth and blot with cool, clean water.

2.  Lemon juice and salt: 

– Take a small spray bottle and spray lemon juice and a pinch of salt onto the stains.

– Let sit in for about 5 minutes (but no more than 10 minutes).

– Blot clean with a damp cloth or sponge.

3.  Vinegar:

– Pour a small amount of vinegar onto the stain.

– Let sit for 5 minutes (again, no more than 10).

– Blot clean with a damp cloth or sponge.

If you’re dealing with a stubborn stain, and none of these homemade solutions have worked, it may be worth it to contact a professional carpet cleaner. Try using TalkLocal to locate one close to you. TalkLocal is a free service that will connect you with top-quality, reputable carpet cleaners in your neighborhood within minutes. Simply enter your specific problem, location and availability, and TalkLocal will contact multiple professionals who will then call you directly.  Save time and stress from trying to locate the right, most affordable cleaners on your own, and let TalkLocal handle it for you!

Different Types of Bathroom Vanities

Monday, October 8th, 2012

Different Types of Bathroom Vanities Plumbers

If you’re giving your bathroom a makeover, there are several different types of bathroom vanities to choose from.  Vanities can be very simple, modern, elegant, or even have an antique appearance.  You can choose multiple sinks, multiple mirrors, a vanity with drawers, etc.  It can be beside the bathroom wall, attached onto the wall, or in one of the corners of your bathroom.  The options are endless, and you can even design your own custom display.  The eventual choices are all up to you, depending on your interests, needs and budget.

The simplest type of vanity is one where you have a separate sink that stands alone from your bathroom wall.  This is called a pedestal sink.  This set-up will also include a mounted mirror, a cabinet within the mirror or maybe a shelf attached to the wall to place toiletries.

A second type of vanity is one attached to your bathroom wall.  This can be a cabinet vanity, (where the sink is mounted on top of a cabinet,) or a simple stand-alone sink mounted to the wall.

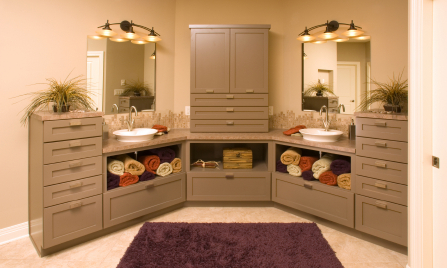
A third option is to have a vanity setup in a corner of your bathroom.  In this case, you may choose a cabinet or mounted stink with a countertop.  A benefit to situating your new vanity in a corner is the privilege of having two mirrors on each wall above the sink.

If you have a larger bathroom, you can choose to set up two sinks, (his and hers.)  Overall, you also have the options of choosing different materials for your new vanity including wood, glass, porcelain, etc.  You may want a more modern, simple look, or an elaborate, antique-style vanity.

Are you considering installing a new vanity?  Need a bathroom contractor for the job?  Try using TalkLocal, a free service that will connect you with top-quality, reputable plumbing/contracting companies in your neighborhood within minutes.  All you need to do is enter in your specific problem, location and availability, and TalkLocal will do the rest.  Save time searching through phone books to find the “right” plumber, and let TalkLocal do it for you!

Cleaning Mineral Deposits from Glass Shower Doors

Monday, October 8th, 2012

Cleaning Mineral Deposits from Glass Shower Door Maid Services

Groundwater often contains higher concentrations of dissolved minerals that will collect on your shower door over time. This mineral can be extremely tough to clean, especially when it builds up over time. Even many of the special mineral deposit cleaners that can be bought in stores aren’t effective at removing the white spots off your glass doors. Luckily, there are cheap home solutions that help with cleaning mineral deposits from glass shower doors.

The mineral deposits on your glass door most likely consist of lime. Vinegar is a fantastic solution to any lime problem. Let vinegar soak on your door for a few minutes, and then scrub it off with a Scotch Brite pad, or something similar. The lime should come right off, but if you’re having difficulties, a higher concentration of vinegar may be needed. Some grocery stores sell highly concentrated vinegar, which is cheap and should get the mineral deposits right off.

After getting the mineral deposits off your shower door, you should take preventive measures to make sure that this situation doesn’t repeat itself.  Rain-X is a popular glass protection spray that prevents mineral buildups. Apply it to the inside of your shower door; your door should stay mineral free from then on. Make sure the room is well ventilated when you’re applying Rain-X, as the fumes could be dangerous in high concentrations. If you can’t apply a protective coating to your glass for whatever reason, make it a habit to regularly dry the inside of the door after showers with a squeegee.

If you really just can not get your shower doors to sparkle, ask a professional maid for help. Getting local professional with years of experience is easy with TalkLocal, the super fast and free site that will connect you to businesses in minutes!

How to Build a Mousetrap

Monday, October 8th, 2012

How to Build a Mousetrap Pest Control

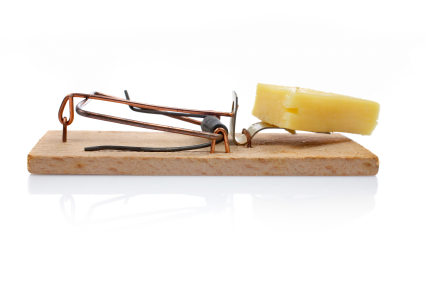
Volatile traps (the kind of trap that slams down on the mouse, effectively killing the mouse upon impact) are difficult and dangerous to build. However it is very easy to build humane traps that will simply trap the mouse without killing it; you can even use everyday household objects. Use the following steps to learn how to build a mousetrap.

Materials needed:

A big basket with smooth insides so that the mouse can’t climb back out, duct tape, scissors, 2L soda bottle, peanut butter, some leftover cardboard.

1. Cut the bottom end of the soda bottle – about 5 centimeters in. You should have a big hole.

2. Dab some peanut butter (or any other sticky bait) to the edge of the cut bottle.

3. Then position and hold the bottle so that the narrow neck of the bottle is perched on the edge of the smooth basket with the cut inside of the bottle positioned over the basket. Find some leverage (cardboard structure, etc) that will hold the bottle in the place.

4. Apply the duct tape between the bottle and the edge of the basket at the outer side to function as a hinge system – the idea is that the weight of the mouse will collapse the bottle’s hinge as the mouse follows the end of the bottle to get to the peanut butter, making the mouse fall and trapped in the basket.

You may want to even add some counterweights to the neck of the bottle so that the trap will be more balanced – but be careful. Too heavy of a counterweight will result in mouse just getting away with the bait. Too light of a counterweight will result in a broken trap.

The placement of the trap is important as well. Try to put it in around area that you know the mice are active while the people around the area are inactive at certain times. Be patient and try new baits and spots as you hunt. You will want to test whether the trap works by gently placing your finger on the bottle near the bait to see if it falls.

Additional Help

If you feel like you need professional help on catching these annoying critters and advice on the best bait to use for mouse traps, TalkLocal can help with finding the correct local experts in this case, saving you time and energy in what may be a stressful situation.

Electronic Door Lock is not Responding

Monday, October 8th, 2012

Electronic Door Lock is not Responding Locksmiths

Most modern cars come with electronic door locks that can be activated from a distance using a small signaling device called a “key fob.”  Like any car part, normal wear and tear can cause this to malfunction. If your electronic door lock is not responding, there are several things that could be going wrong.  Fortunately, many of the possible issues are minor and can be easily dealt with by yourself or a qualified auto mechanic.  Read on for some tips on troubleshooting for your non-functioning electronic door lock.

The most common issue with electronic car doors is the batteries in the key fob dying.  If you get no response at all from your car when you press the unlock/lock button, you should replace the batteries in your key fob; they tend to last for around three years.  Sometimes a key fob will only work when you are standing right next to your car door.  Distance issues like this are also a sign of a dying battery that needs to be replaced.  You may need to take your keys into a same-make dealership to be reprogrammed if they continue not to function after replacing the batteries.

If the issue is not with the key fob, there may be something wrong with the door lock motors or your car’s electrical wiring.  Try locking and unlocking your doors while listening carefully for a whirring or vibration sound.  If you hear the sound, that means that the small motors that operate the electronic locks are burned out and will need to be replaced.  If you don’t hear anything, that means that electricity is not getting to the motors so there may be an issue with a fuse, circuit, or wire inside your car.  First check for any burnt out fuses, if you don’t know how to do this there is a great instructional video available here.

Still having issues after checking for and replacing any burnt out fuses?  There is likely some damage to your car’s internal electrical wiring like a short circuit or broken wire.  Wiring issues can be very hard to detect and fix, so you might want to bring in an auto mechanic to solve your problem.  You can use TalkLocal to automatically connect you to a high quality local professional in minutes.  All you need to do is enter your name, contact info, and a short description of your problem and TalkLocal will take care of the rest.

Adobe Photoshop Not Responding

Monday, October 8th, 2012

Adobe Photoshop Not Responding Computer Repair

If Adobe Photoshop is not responding on your Mac, you can wait for a bit to see if it starts responding. Try not to use more memory while waiting for the program and close out of any programs, windows, and files that you are not using. Do not click within Photoshop until it starts responding again.

If it it does not start responding within 5 minutes, you will have to force quit; be warned that this will lose any unsaved data. For this reason make sure that you save early and often. You can take a screen shot (command+shift+3) to remember any unsaved work you were doing in Photoshop if you have to force quit. To force quit, you can either right click on Photoshop on your tool bar and click “Force Quit” or press the esc key.

It is normal for Photoshop to not respond for a bit when importing large, high-quality photographs, but it should not be happening regularly for tasks that do not require large amounts of memory. To make Photoshop run better, you should close out of all unused programs, windows, and files when running Photoshop. Also, be patient and do not click things repeatedly if they do not work right away.

If you continue to have problems with Photoshop/other Adobe programs not responding, but not with other other programs on your Mac, your issue may be with your version of Photoshop. You can seek assistance at adobe.com

If you are having trouble with all programs on your Mac repeatedly not responding, you may have a problem with your computer and you should contact a computer repair professional for assistance. With the help of Talklocal, you can receive phone calls in minutes from up to three high quality professionals in your area who are available when you are.

How to Move a King Size Bed

Friday, October 5th, 2012

How to Move a King Size Bed Moving and Storage

King size beds can be a hassle to move, but it is still manageable with the help of one or two people. There are a few steps you should know on how to move a king size bed. Before you begin, make sure the pathways in your home are cleared of obstructions so you can move the bed in one swift trip.

Once the area is cleared, you can move either the mattress or the box spring first. If you move the mattress first, you can do more trial and error to figure out the best moving method because it is more pliable. On the other hand, the box spring is lighter and may be easier to handle. Most king size beds are 80 inches by 76 inches, while doorways are about 80 inches in height. You shouldn’t have trouble fitting it through the door, but if you do, just tilt the mattress at an angle. A more common problem is fitting around tight corners or winding staircases. Be sure to plan a few steps ahead for how you will maneuver the mattress so you don’t have to back trackor even worse, dislodge a stuck mattress.

Next, you want to take apart the bed frame. If you still have the construction manual, use it to correctly disassemble the frame. If you have a storage frame, remove the contents of the drawers, and then the drawers themselves. Once the storage frame is transported to the moving van, replace the drawers to give the frame support. Be sure to wrap the pieces of the bed frame in blankets to prevent wooden frames from getting chipped or to prevent metal frames from scratching other objects.

When you get to your new house, unload the bed frame first and before unloading the mattress or box spring. Unwrap the blankets when you get to the actual room you will be setting up inyou wouldn’t want to mark up your new house before even moving in. Reassemble the bed frame, then bring in the box spring and mattress, respectively.

If you are short on help, contact a moving company to help you move your king size bed. TalkLocal can connect you to reliable local businesses that can meet you when you need it. Just go to the TalkLocal website and tell them your service need, location, and availability. Within minutes, you’ll receive up to three calls from local moving businesses that meet your needs.

How to Replace Asphalt Roof Shingles

Friday, October 5th, 2012

How to Replace Asphalt Roof Shingles Roofers

Storm damage, wind, and even time can cause damage to your asphalt roofing. As a result you may notice that it is necessary to replace a few or several of these shingles. Assuming there is no underlying roof or water damage, this is an easy do-it-yourself job with the right materials and an understanding of the steps to follow. Keep reading to learn more on how to replace asphalt roof shingles.

While you could just acquire some cement roofing and re-plaster the loose or slightly damaged shingles, it may be a wiser, longer-term choice to replace these damaged shingles with new ones. Take one of the old shingles to a home improvement store to get a good match of the particular asphalt roof shingles you need.

Wear some work gloves, grab a hammer and some long roofing nails, and head up to the roof with the new asphalt shingles. Start at the top layer of damaged shingles. Use the opposite end of the hammer head to remove the nails. Be sure to inspect the roof underneath for any damages or holes. Work your way down, inspecting the roof as you go.

Now, work your way up when replacing the shingles. Start at the bottom layer, and lay a new shingle in place. Nail in the shingle on each side. For this, you will have to slide the shingle under any already existing panels and secure a nail under these overlapping portions as well. As you nail in each one, work your way up until you have replaced all of the damaged shingles.

Check out this extremely helpful step-by-step video to easily replace asphalt roof shingles in minutes.

If your job is too big or difficult to handle yourself, try using TalkLocal to locate a roofing company near you. TalkLocal is a FREE service that will connect you with top-quality, reliable professionals in your neighborhood, within minutes. Simply enter in your problem, location and availability and TalkLocal will contact multiple contractors, who will then call YOU directly, ready to help.