Posts Tagged ‘painting’


Repainting The Interior of Your Home

Wednesday, November 4th, 2015

beforeandafter

Maybe it’s the lack of vibrant natural light, the predominance of reds, golds, and browns, or the stunning beauty of the pure white snow soon to come; but for some reason, there’s a huge misconception that painting is more of a task to do in the warmer months. Sure, the freshness of spring may put you in the mood for all things new- including a color change, but autumn is as good as any a time to paint the interior of your home. In fact, it may be the best time. Here are some advantages to repainting the interior of your home during the fall months:

Not as Humid — The heat and humidity in the summer months actually makes it harder for the paint to dry and cure properly. The excess moisture from the humidity prevents it from evaporating, and it doesn’t bond to the wall. This will cause issues with the texture of the paint and result in an uneven coat. It also makes the paint dry a lot faster.

Moderately Cooler Temperatures — Those temperate weather seasons like Fall and Spring are great for opening the windows to let the paint fumes out without worrying about letting the heat or A/C out with it. Once the winter hits, painting would put you between fumes and freezing; in the summer it’s that or the fiery heat.

Saves Time for Other Projects — By repainting the interior of your home during the fall or even winter months, you will have time for other projects like gardening, patio upgrades, and painting the exterior of the house — projects that are best done in the spring and summer.

If you’d rather skip all that hard work and relax, let TalkLocal find you a professional that can handle it for you. Best part is — painting contractors are likely to score you a good deal because the colder months are their slower months.

Are Chemical Paint Strippers Harmful?

Tuesday, July 9th, 2013

Are Chemical Paint Strippers Harmful? - Painters

We’ve all been there. Ten years ago, that orange and black striped theme for the living room really sounded good, right? But now, it’s not quite as appealing as you’d hoped. You need to start again, but the colors are so bold that painting over them is tough.

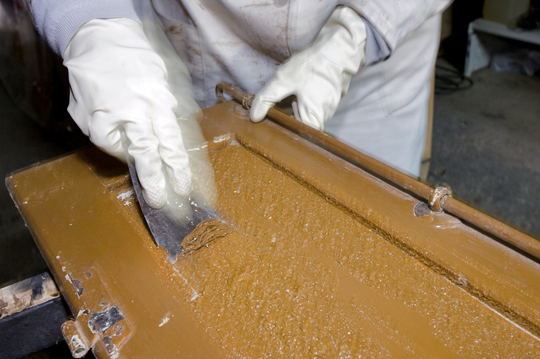
Trying to remove paint can be quite a challenge. Chemical paint strippers can make the process easier, but with all of the chemicals mixed into them, you might find yourself asking: Are chemical paint strippers harmful?

Here’s some information about chemical paint strippers that might come in handy when deciding if you should use them.

Origins: Chemical paint strippers became popular for removing old, lead-based paint without spreading the lead around the room like other techniques might. Although they are popular for keeping us safe from a harmful substance, it must be understood that they include chemicals in their make-up as well.

Chemicals: Different strippers have different chemicals in them, but most of them include some amount of methylene chloride and other abrasive chemicals which can cause paint to peel off. This chemical is typically considered by doctors to be harmful to your health if ingested.

Proper Precautions: Although the chemicals in paint strippers can be harmful, as long as you follow the proper precautions, your health will not be at serious risk.

1. Go outside. Using a chemical paint stripper indoors lets the chemicals build up in your breathing space, thus contaminating the air. If you can take the object you have stripped outside, then do it. If not, open all windows, and turn on fans to help the chemicals blow outside. Also, take many breaks for fresh air.

2. Protect yourself. Wear a good quality breathing mask, goggles, gloves, and long sleeves or pants.

3. Stay focused. Do not eat, drink, smoke, or otherwise ingest anything while using the chemical stripper. If you accidentally get the stripper on your skin or face, wash it off immediately.

Should You Use Chemical Paint Strippers?

Are chemical paint strippers harmful? Well, they can be harmful. If you’re pregnant or unable to follow the suggested safety procedures, then you should not use them. But as long as you do it the right way, you should be able to remove the paint easily and effectively. If you need professional assistance, TalkLocal can connect you with painters in your area who can help. Our service is fast and free.

How To Use Paint Solvents

Friday, June 28th, 2013

How To Use Paint Solvents - Painters

If you need to remove paint, you should use paint solvents. If you know how to use paint solvents properly, you can remove paint from a number of surfaces including concrete, patios, carpets, and walls. Here are some tips for using paint solvents the right way.

How To Use Paint Solvents

1. Apply a small amount of the paint solvent to the areas you wish to remove the paint from. You will need to make sure the paint solvent does not damage the area or surface where the paint is. Paint solvents can be very strong and can eat through certain surfaces. If the solvent removes the paint and does not harm the surface, it is safe to use it.

2. Use paint solvents to clean your paintbrushes and rollers. Simply fill a bucket or sink with paint thinner and submerge your brushes and paint rollers in the solvent. Allow them to soak for several hours or even overnight to clean them thoroughly.

3. Apply paint solvents to a steel brush or steel wool and use it to remove lacquer and stains from furniture and wood. You will need to scrub the solvent into the wood and allow time for it to eat through the shellac or lacquer. Many people do not know how to use paint solvents to remove lacquer and stains and fail to do it correctly.

4. Use paint solvents to thin out paint or create unique designs on your crafts. Combine a small amount of solvent with some paint and stir to mix thoroughly. You may need to add more solvent or more paint to get the desired effect.

When you know how to use paint solvents, the possibilities are endless. If you paint often, you should always keep some solvent on hand to use in any situation. Always remember to wear a mask and gloves when using solvents.

Do You Need A Professional Painter?

Painting a room or building is certainly an art form. When you hire a professional painter, you know the job will likely come out flawlessly.

If you need a painter, turn to TalkLocal. We’ll find a number of local painters and connect you with them directly. You can decide which person or company would be best suited for the job.

Types Of Paint Solvents

Sunday, June 9th, 2013

Types Of Paint Solvents - Painters

Paint solvents are used to thin out paint or remove it from brushes, rollers, and other tools. There are many different types of paint solvents available, and each one works differently.

Some are best suited for certain surfaces, like glass or metal, and others are versatile and can be used on anything. No matter what types of paint solvents you use, be sure to wear gloves and a mask at all times. Solvents can burn your hands and breathing in the fumes can be harmful to your lungs.

Acetone

Acetone is one of the most common paint solvents available. It is clear and has no color. It does, however, have a very strong smell. Many products such as nail polish remover have acetone in them. Although acetone should not be swallowed or inhaled, it is produced naturally by many animals and humans.

Xylene

Xylene is a type of paint thinner that works well with slow-drying paints and lacquers. Xylene is a very strong chemical and is even used in some pesticides. Be very careful when handling it and keep it far away from children and animals at all times.

Turpentine

Turpentine is one of the most popular types of paints solvents available. It can be made from pine trees or crude oil and is extremely flammable. If turpentine is splashed in your eyes, it can cause redness and severe burning. Be sure to wear safety glasses when handling this solvent and store it away from direct heat and power outlets.

If you paint often, you know how handy paint solvents can be. They are not only a convenient way to clean your tools and any paint spills, they can also be used to create a desired color or painting effect. Try the these different solvents to see which one works best for you, and remember to handle them with care.

Find Professional Painters In Your Area

If you want to just trust these strong chemicals in the hands of professionals, you will need to find a painter in your local area. TalkLocal‘s innovative new service makes this easy. Visit our website and detail the services you need. We will connect you with only professionals who are qualified to help with your specific issue. Did we mention it’s completely free?

How To Remove Paint From Glass

Saturday, May 11th, 2013

How To Remove Paint From Glass - Handyman

It happens to the best of us: while trying to freshen up the trim around your windows, you unknowingly splatter paint on the glass. It’s a common mistake, after all, you’re probably not a professional painter.

If you realize the misstep, a quick swipe with a wet cloth can remediate the problem right away. But what if you are on a roll and just don’t see it? You may be left wondering how to remove paint from glass. Don’t worry — we’ve got you covered.

How To Remove Paint From Glass

1. Determine the type of paint (i.e. acrylic, latex, oil-based). Often the paint can will include a label with information on chemical solutions that will remove the paint.

2. Use a straight razor blade to lightly scrape off the paint. If possible, use a piece of cardboard to lightly press on the other side of the glass to prevent breaking. Rather than rubbing the blade, this step should focus on lifting the paint. When the blade gets dull, replace it. Pressing harder may break the glass.

3. If paint remains, use the correct chemical solution for your type of paint and apply according to product directions.

4. After removing the chemical paint stripper, wash the window with soap and water prior to applying a chemical glass cleaner. You do not want the chemicals of the stripper to mix with the chemicals of the cleaner, as it may create harmful gasses.

5. If small flecks of paint still remain, your razor should be able to remove them fairly easily.

Th-s process may be a bit time-consuming and require some elbow grease, but the result is a sharp, clean look to your home. After going through this process once, you will never again need to ask how to remove paint from glass because the process is relatively simple. You also may consider hiring a professional painter to avoid the issue next time altogether.

Further Assistance

If you are still having trouble, or have a massive project to tackle, you may consider hiring a professional handyman to remove the paint. TalkLocal can find you one in your area for free.

Paint Removal From Concrete

Thursday, May 2nd, 2013

Paint Removal From Concrete - Handyman

Sometimes, homeowners will choose to paint the concrete foundation blocks of their home to freshen its appearance. If you have moved into a home where the previous owners chose a house paint in which this idea went horribly wrong, you may be considering methods of paint removal from concrete. While various methods such as sandblasting and power washing may work, the most thorough and trusted method is through the use of a chemical paint stripper.

What You Will Need:

– Chemical paint stripper

– Protective gear as described on the label of the substance

– Paint brush or air-free paint sprayer

– Scraper or squeegee

– Bucket and mop

Paint Removal From Concrete

1. After donning complete protective gear, apply the paint stripper to the paint using the brush or paint sprayer. Don’t use a roller, as it tends to have more back splatter and can be dangerous.

2. Once the layer wrinkles, it is ready to be removed. Use the scraper or squeegee to remove the stripper. A hose or power washer may be used for this step, but it can make for tougher cleanup in the yard or driveway. Run-off from chemicals can also contaminate local waterways.

3. Some paint may be left over after this step. Re-apply the paint stripper and repeat the process until all paint is removed.

4. After all paint is removed, fill a bucket with fresh water and mop the concrete clean.

Taking on a project of this magnitude can be intimidating. The perceived permanence of both concrete and paint may make it seem altogether impossible. With a little elbow grease and the proper precautions, you can increase the look of various pieces of concrete around your home immensely.

Too Much Work?

If solving the process of paint removal from concrete seems like more of a project than you want to handle, a qualified handyman can help you out. TalkLocal can find you one in your area quickly. Our service is completely free, and we can have you speaking with a qualified handyman in minutes.

Paint Removal From Wood

Saturday, April 27th, 2013

Paint Removal From Wood - Handyman

That robin’s egg blue dresser was probably beautiful once upon a time, but now it is peeling and drastically in need of a change. When you want to keep your furniture but aren’t satisfied with the look, you can solve your problem by learning techniques for paint removal from wood, and get your home looking beautiful again.

Tips For Do-It-Yourself Paint Removal From Wood:

– Know what you’re working with. Scrape some of the paint off to see how much you’re dealing with and try to figure out how many layers there are. If you’re working with really old furniture, you might find there is lead paint on the piece, so you need to follow proper safety precautions when working with paint.

– There are different methods for removing paint from wood, but the easiest is using a chemical stripper. This is a caustic, alkali chemical that is low in volatile organic compounds. Despite the safety of the product, you want to make sure your work area is well-ventilated.

– If you find that you don’t have a lot of paint on the product, or that it is a water-based paint, you may be able to use soap and water with a scrubbing brush to remove it. If you choose this technique, make sure you have multiple scrubbing brushes as well as old rags and fresh water to keep washing away the paint.

– You could also use a heat gun instead of a chemical stripper. This will heat the paint from the bottom up using infrared heat, making it very easy to scrape the paint away with no chemical fumes involved.

– Try to avoid using sandpaper. It is not very effective in paint removal from wood and it will tear at the original varnish.

– There are also paint solvents you could use in a well-ventilated area with gloves and a mask for safety.

When All Else Fails

If you find none of these techniques are working, or you need more assistance perfecting your refurnishing, we can connect you with the appropriate professionals in your area. TalkLocal takes the work out of the search and does the tough part for you. After all, you should be focusing on stain colors and drawer handles instead of tracking down the right handyman.

How To Remove Paint From Metal

Thursday, April 11th, 2013

How To Remove Paint From Metal - Handyman

From children’s bicycles to iron handrails, home and business owners often find themselves wondering how to remove paint from metal in order to repaint or create a new look for an old piece. The process is fairly simple, though more ornate pieces may require more hand working than a flat piece. This can easily be a do-it-yourself project, or else any handyman would likely be able to take care of it quickly.

You Will Need:

– Damp or tacky cloth

– Respirator

– Medium grit metal sandpaper

– Fine grit metal sandpaper

– Chemical paint stripper

– Paint brush

– Hose/water

– Optional: Sandblaster

How To Remove Paint From Metal

1. Be sure to wear a respirator to avoid inhaling dangerous metal flakes.

2. Wipe down the piece and remove dirt or rust flakes with a damp or tacky cloth.

3. Use medium grit metal sandpaper to remove any stubborn areas of rust, then use the fine grit to create a smooth finish.

4. Apply the paint stripper with a paint brush accordingly, per the directions on the can. Hose off to remove the chemical when finished.

5. If only a few spots remain, the sandpaper may be used to remove them.

6. Sandblasters are handy for larger and more stubborn projects. They can be rented by the day or purchased at a home improvement store.

7. Wipe down and clean the piece once all paint is removed.

Finding Reliable Help

If this process seems too complicated or time-consuming for you, one of the many benefits of a handyman is that they know how to efficiently work these kinds of projects. They know how to remove paint from metal quickly and safely.

If you are not sure how to get in touch with a qualified professional near you, check out TalkLocal. We connect you with local professionals quickly. You should be speaking to a handyman near you within minutes. The best part is our service is free! If your project has become too overwhelming, find a local handyman now.

Paint Removal From Brick

Thursday, April 4th, 2013

Paint Removal From Brick - Handyman

The natural look of brick offers a lot for your home, whether on the interior or exterior. If you have beautiful brick trapped under paint, these tips for paint removal from brick will help you get back the rustic look you were longing for once again.

Tips For Paint Removal From Brick:

1. Start out with a paint solvent. This should be a gel or a paste and it should be applied generously. Don’t hold back on it. That said, you do want to start off with a small test patch to make sure the solvent will work well.

2. After applying the gel or paste solvent, put some strips of a heavy duty material over top. As the paste gets softer, it connects to the material while disintegrating the paint. At this point, you can peel off the strips. Just make sure you don’t leave little paint chips scattered around your brick surface.

3. If you don’t have enough material, or are working with a significantly large area, just let the solvent soften and scrub it off of the bricks afterwards. Make sure you are using a stiff bristle brush for this so you don’t damage the brick.

4. After scrubbing, rinse the brick off with clean water. If you’re removing paint from a really big section, you might break it up into smaller sections and use more steps to make it more manageable.

5. After removing the paint, you might need to do more work with your brick surface. There might have been a reason why the bricks were painted in the first place. If they are damaged, faded or discolored, you might consider painting them a more natural looking color with only minimal coating. This will hide the damage and give you the brick look you love, whether you’re painting the exterior of your brick home, a fireplace or just a small section.

Seek Help

If this project is too big or too tough to do on your own, you may consider connecting with professionals in your area that can help. TalkLocal can take the work out of that search and connect you with the help you need. Just tell us what you need, where you are, and when you’re available, and we’ll connect you with the right professionals.