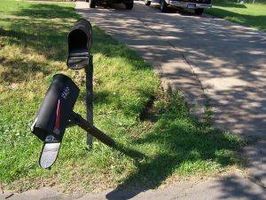
Anything from severe winter weather to an out-of-control car or a group of vandals can cause damage to your mailbox post. Regardless of the cause, you will have to replace the damaged mailbox post at your own expense since the US postal service is not responsible for fixing it. Mailbox post replacement can be a real hassle, especially if you live where there is a high level of snow and it’s common for snowplows to knock down mailbox posts.
However, with some spare time and a few tools and materials, replacing a damaged mailbox post can actually be a doable task for the average homeowner. Here are a few helpful tips to install a mailbox post replacement.
Taking Out the Old Post
The hardest part of this task is to remove the existing mailbox post that has been damaged. The post may already be loose, in which case, give it a good wiggle to pry it loose. Dig some of the earth surrounding the post so you can pull out it easily. However, if the post is still quite secured by the concrete, break the concrete off with a shovel.
Dig to expose all the cement until you can lift the mailbox post to remove it. This is a physically demanding job, so please work with caution. If it proves to be too difficult to pry out the old post, just cut it off at ground level and then install the new mailbox post right next to the old location.
Putting In the New Post
When you’re ready to put in the new post, make sure the height of the post after installation would meet the local postal office requirements. If you chose to use treated wood for your mailbox post replacement, dig two inches deeper and put gravel or small rocks at the bottom up to a few inches up the hole. This will facilitate drainage and prevent rotting at the bottom of the wooden post.
Next, position a wooden stake on each side of the post some three feet away. Cut two strings and tie one end of each piece to the post and the other end to each stake. Use a level tool to ensure that the post is perfectly straight.
Then, mix the concrete and pour into the hole. Leave about 5 inches at the top. Later, you will fill this space with dirt. Let the concrete completely dry. Once it’s already dry, remove the supporting stakes and strings. Fill the top of the hole with dirt.
Finally, attach your mailbox according to the instructions in the installation manual.
Need Professional Assistance?
Seva Call can help you get in touch with a quality handyman in your area. Give us a call before you waste hours searching for the right professional, and we’ll connect you to reliable pros in minutes.
Tags: Mailbox Post Replacement

