Archive for the ‘Roofers’ Category


How to Repair Vinyl Siding

Thursday, January 30th, 2014

How to Repair Vinyl Siding - Roofers

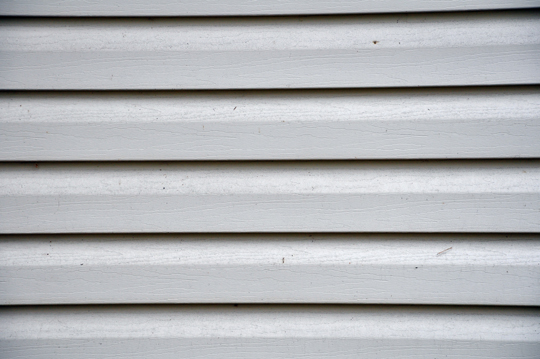
It is impossible to keep your siding damage-free forever, especially if you have children. A hurtling baseball can easily hit the siding and cause a big dent. Fortunately, it is relatively easy to repair vinyl siding. There are a few ways to handle dents or holes in your siding. One option would be to replace the damaged section or do a quick fix to cover up the damage.

Quick Patch Work

To repair vinyl siding quickly, all you need are a few tools and a piece of replacement vinyl to patch up the damaged area.

1. Cut the siding material to a size that is big enough to cover the damage. You can make the patch as big or tight as you want it to be but, in terms of appearance, it would look cleaner if you cut a longer piece so the seams are not too close to each other.

2. Using a sharp utility knife, you will need to cut off the top side or nail hem of the siding so you can slide up that side beneath the existing siding above. You want to make sure to cut higher along the hem so that the pieces will interlock. The bottom section also needs to be cut away. It is more difficult to do this, because all that needs to be removed from here is the curved edge or the buttlock. You will get a straight bottom edge that you can connect to the existing siding. You may need to make two passes with the knife to be able to cut all the way through.

3. Then, take the replacement piece and insert it right over the damaged siding. Make sure to slide it up securely and tightly for a nice fit.

4. Secure the patch with rivets on the buttlock side, attaching it to the existing siding. Ideally, you want to use matching rivets but, if you don’t have these, you can just paint the new rivets the same color as the existing ones.

Generally, you can complete this quick repair in around 30 minutes. You may consider replacing the siding later, but in the meantime, this temporary fix should be enough to tide you over for a few months until you’re able to make the replacement.

Do You Have Extensive Siding Damage?

A hailstorm or some accident can cause extensive damage to your siding. When you need professional skills to handle a complex job, Seva Call offers free assistance to help you find the right contractors quickly and easily.

Roofing Materials for Flat Roofs

Wednesday, January 29th, 2014

Roofing Materials for Flat Roofs - Roofers

If you’re refurbishing your old flat roof or are planning to install a new one, one of the most important factors you need to consider is the roofing material. There are several types of materials for flat roofs, and you should check your options to see which is best for your flat roof.

Here are a few basic features of the most common roofing materials for flat roofs.

Tar Roofs

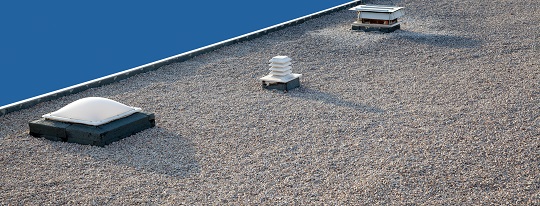
Called built-up roofs, or BUR by professionals, tar roofs are made of hot tar mixed with gravel. They used to be made of a material called tarpaper, which is now replaced with more resistant materials, like fiberglass, for instance. Tar and gravel roofs are cheaper than other materials, but weigh a lot, and it takes a professional to install them. If you choose this type of material, make sure the joists of your roof are reinforced. Also, keep in mind that leaks may be hard to detect in this type of roof.

Modified Bitumen Roofs

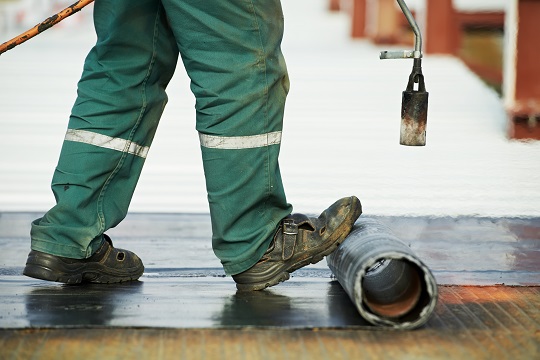
This type of roofing material is similar to asphalt, which is enhanced with rubber or plastic to make it more resistant. It’s a rolled roof material, which can come in one, two, or three layers. Because it involves heating and using a torch-down system for application, it is not recommended to undertake roof installation by yourself.

Rubber Membrane Roofs

More recent roofing materials include those made of rubber membrane. They’re water resistant and withstand sunlight well. Rubber membrane roofs are lighter and easier to install than other flat roof materials. The downside is that they are more expensive than more traditional materials and can puncture easily.

Hire an Expert

Before you choose your roofing material, it is highly recommended to consult a professional. A professional roofer has the expertise to suggest which material is best for your particular roof, considering your house location and climatic conditions in the area. Seva Call can connect you with reliable local roofers in minutes. For free!

Asphalt Roof Sealer

Friday, January 24th, 2014

Asphalt Roof Sealer - Roofers

Roof leaks are some of the most common problems homeowners face when it comes to roof maintenance. Leaks can cause a lot of damage to your roof structure and your entire house; that’s why it is important to make the necessary repairs as soon as possible.

Whether you’re dealing with a roof leak or simply want to insulate your roof to protect it from potential deterioration, it is highly recommended to use an asphalt roof sealer. It helps you avoid potential costly repairs on the long term and increases the life expectancy of the roof.

Below you can find some tips about asphalt roof sealers and how to use them.

Locate the Source of the Leak

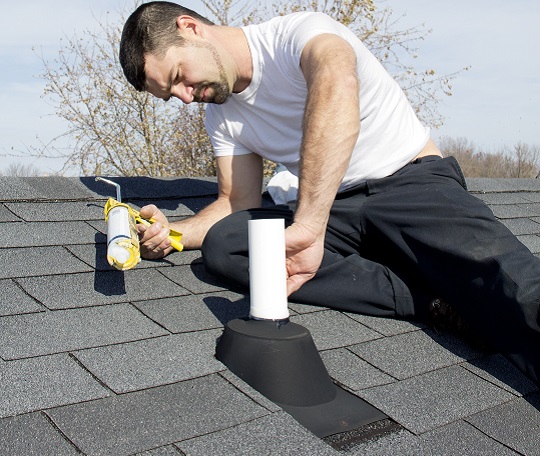
For successful roof leak repairs, the first thing you need to do is locate the leak. If you don’t find the exact spot, which allows water to get inside, and then seal it properly, you will waste time and money. Most often, roof leaks occur in areas such as the chimney, vents, or dormers. Check the flashing, and make sure there are no gaps left after installation.

Apply an Asphalt Roof Sealer

Once you find the source of the leak, you can proceed with the repairs. The easiest way to do so is to apply an asphalt roof sealer, which will create a protective coating, preventing the rain or snow from getting inside the house.

To reduce the risk of potential leaks in the future, use a quality roof sealer to insulate all the weak spots on your roof, such as chimney, vents, or skylights. When you purchase the sealer, check the label to make sure it’s suitable for your kind of roof, and when you apply it, follow the instructions closely.

Consider the weather as well when you endeavor to apply an asphalt roof sealer. Some sealers cannot be applied if the temperature is too low.

Looking for Assistance?

If you have a leaking roof or need help with any kind of roof repairs, Seva Call can give you a hand. We can put you in touch with experienced professionals in your area right away, for free.

Aluminum Roof Repair to Patch up Holes

Monday, January 20th, 2014

Aluminum Roof Repair to Patch up Holes - Roofers

Aluminum roofs are known for durability, but they can still be damaged from hail, heavy winds, and other severe weather conditions. A hole can also develop from corrosion if the roof was improperly sealed. Whatever the reason for that hole in your roof, quick aluminum roof repair is necessary to patch it up immediately and prevent water from entering inside your home.

For this job, you’ll need a piece of aluminum, either a scrap of the original roofing material, or you can buy a new sheet from a hardware store. If purchasing new material, make sure to choose roofing with the same corrugation as your existing roof to ensure the patch will fit tightly and securely. Schedule the repair when you’re expecting sunny weather. Here are the steps for DIY aluminum roof repair.

Be Safe

1. It’s important to wear protective gear before starting work because the edges of cut aluminum are sharp enough to break skin. Wear gloves and a shirt with long sleeves.

2. Use a ladder to get to the roof. If possible, aluminum roof repair should be done from the ladder. If you have to step on the roof, make sure to step only on areas where there are screws, which indicate there’s wooden support underneath the metal sheet.

Make a Patch

3. Use tin snips to cut around the hole to remove its serrated edges and make them even.

4. Take the measurements of this new hole and add 3 inches to it on all sides to get the size of the patch.

5. Take the sheet of replacement aluminum and cut out a patch to size.

6. Place the patch over the hole and trace it around with a grease pencil. Check that the patch is positioned directly over the hole.

Prep the Surface for the Patch

7. Set aside the patch and work inside the traced area that surrounds the hole. You’ll need to put butyl tape inside this area so that you have a 2-inch taped section.

Install the Patch        

8. Put the patch over the taped area.

9. With a power screwdriver, secure the patch by driving screws around its perimeter in 2-inch intervals.

10. Caulk the edges of patch and the screw heads with roofing compound. Allow the compound to dry.

11. Using a paintbrush, paint the patch with roof coating that is suitable for aluminum roof repair. There should be about 2 inches of overlap in between seams.

Call in a Professional Roofer

If the job is too complex for you to handle, you can always count on a professional roofer for help. And you can count on Seva Call to find the best service professionals in your area. Give us the details of your service request, and we’ll match you with up to three, local, qualified roofers. Our search service is fast, convenient, and free. Try us today!

Install Rolled Asphalt Roofing

Monday, January 13th, 2014

Install Rolled Asphalt Roofing - Roofers

Rolled asphalt roofing, or sheet roofing, is widely used because it’s an affordable roofing material, which is relatively easy to install. Typically, it is made from asphalt-coated fiberglass or asphalt felt. If you decide to install rolled asphalt roofing, you can expect it to last for about 5 to 10 years or more, depending on how well it is installed and the wear and tear it is going to be subjected to.

Below are a few tips on how to install asphalt roofing.

Roof Type

If your house has an inclined roof, you can install single roll asphalt roofing. If it’s flat, you can go for double rolled asphalt roofing for increased protection.

What You Need to Know Before You Install Rolled Asphalt Roofing

1. Clean the Roof Surface

Before you proceed with the installation, it’s important to clean the roof surface thoroughly; otherwise, debris will make your job more difficult and can even compromise the roofing.

2. Lay the Asphalt Strips

Lay a strip of rolled asphalt material starting from one edge of the roof, and secure it with nails. When you’re done with the first strip, take another one and place it next to it, making sure they overlap. Repeat this step until you cover the entire surface of the roof.

3.  Cover the Edges

Cut some strips from the asphalt roll and place them on the edges, making sure they cover the ridge. Use roofing cement to secure the strips properly.

Find Professional Help

Even if you’re a DIY’er, you will need some help to roll out the material, so that you can place it on the roof and cover it. If you’re not confident that you can do it yourself, it’s best to let experienced roofers do the job. Improper installation can damage the rolled asphalt roofing material, reducing its lifespan.

Seva Call can put you in touch with professionals in your area who will be able to help you. Our service is fast and free.

How to Apply Roof Coatings to Metal Roofs

Tuesday, January 7th, 2014

How to Apply Roof Coatings to Metal Roofs - Roofers

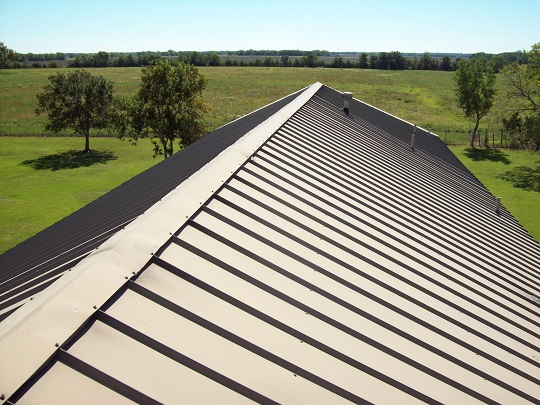
Prolong the life of roofs and significantly lower cooling costs by applying elastomeric roof coatings to metal roofs. Doing so will make the roof sustainable, requiring only periodic recoating, and delaying the need for costly roof replacement.

It is important that the person who will perform the job have some experience and knowledge about roof coatings, metal roofs, and working safely on a roof.

Before starting the job, the type of roof should be considered. Is the roof suitable for elastomeric coating? Bare metal roofs at least three months old offer better adhesion. Also, what is the condition of the roof, fasteners, and seams? Are there problems with corrosion, leaks, or drainage? Can these metal roof problems be resolved easily?

Once you’ve sized up the work to be done, follow these basic steps to applying roof coatings to metal roofs.

Step 1: Prepare the Area.

Clean the surface of the roof by pressure washing it using a strong cleansing product to eliminate contaminants. Then, rinse the area thoroughly and leave it to dry.

Step 2: Make Necessary Repairs.

Tighten any loose metal fastener or replace if necessary. If you have an older roof, apply a generous layer of crack and joint sealant over flashings, seams, joints, and fastener heads.

Put polyester roof fabric (4 to 6 inches) into wet compound and recoat with the sealant. Fix all gaps following the same steps.

If there are any panels, flashings, or other hardware with more than half an inch of a gap, these should be replaced. Any surface corrosion must be removed.

The appropriate metal primer should then be applied.

Step 3: Apply the Coating

Once you’ve finished cleaning and repairing the roof and the sealant has been completely dried, you can then apply the elastomeric coating.

First, apply a primer, or basecoat, and then a topcoat that offers excellent durability and resistance to dirt. In most cases, the application is done with the use of an airless spray designed for elastomeric roof coatings. A gallon of basecoat covers around 120 square feet while a gallon of topcoat covers around 100 square feet.

You want to coat the roof evenly and coat all flashings and seams well. Any areas that collect water should be given an extra coating. It is advised to hire an experienced roofer for consistent spray application.

Steps 4: Inspect the Roof

When the coating has dried adequately and you can walk on it, carefully go over the roof to check for any areas where the coating is thin or for any seams or flashings that were not properly sealed. If you find these problems, correct accordingly.

Hire an Expert!

Seva Call can assist you in finding a professional roofer who knows all about roof coatings for metals roofs. Contact us, and we’ll locate up to three of the most capable local roofers and put you directly in touch with them. Find the professional help you need now.

Asphalt Roof Shingles Colors

Monday, January 6th, 2014

Asphalt Roof Shingles Colors - Roofers

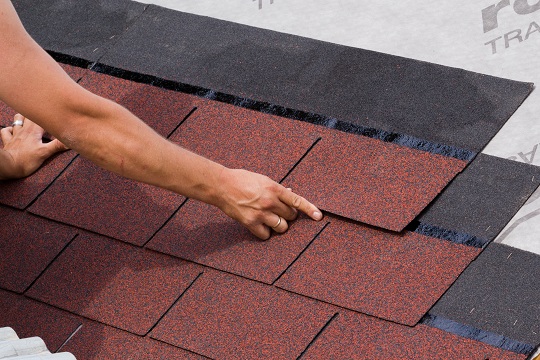
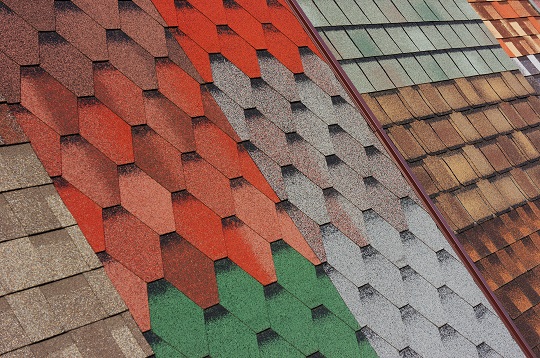
Asphalt roof shingles are a very popular roofing material for a number of reasons, including durability and competitive costs. Also, they are available in a wide range of colors, satisfying most tastes and needs. When it comes to choosing asphalt roof shingles colors, there are several factors to consider to be happy with your choice and the end result, namely the roof of your house.

Here are some tips to help you pick the color of your asphalt roof shingles.

Don’t Choose Your Asphalt Roof Shingles Colors from a Catalog Only

Asphalt roof shingles are available in many colors, but when you pick your shingle shade, it’s important to see the real thing before purchasing it. Colors can vary on paper or on a computer screen. To be sure you get what you want, ask the roofer to show you asphalt shingles in different colors, and think about how they would look on your roof.

Express Your Style with Asphalt Roof Shingles Colors

Each house should express the individuality of the owner. This is true for the roof as well. When you choose the color of your asphalt shingles, you will probably be drawn to particular colors, which can vary, depending on taste and style.

One thing to remember though, when you pick the color of your asphalt shingle, is to try to see the whole picture. Picture your house with that shingle color on it, and see if it fits.

Architectural Style and Asphalt Roof Shingles Colors

Some shingle colors are better suited to particular architectural styles, just as some houses look better with a certain shingle shade than another does. The roof of your house and the house itself are a whole, so you need to find the best option available when it comes to roof shingle colors in order to add value to your house.

Confused about choosing between the many asphalt shingle colors available? Contact Seva Call and we’ll connect you with a local expert who can make it easier for you.

Asphalt Roof Cleaning

Thursday, January 2nd, 2014

Asphalt Roof Cleaning - Roofers

Roof maintenance is essential if you want to keep the full functionality of your house and preserve the value of your property. The roof maintains the structural integrity of your home, allowing you to enjoy the comfort you’ve created inside for you and your family. To make sure your house is in tiptop shape it’s necessary to perform regular asphalt roof cleaning.

Here are some tips on asphalt roof cleaning and why it is a must.

What Are the Most Common Asphalt Roof Cleaning Methods Available?

Roof shingles are deteriorated by exposure to the elements. Moisture can lead to mildew buildup and staining. To restore the appearance of your roof, you can use several asphalt roof-cleaning methods.

Pressure Cleaning

This method is recommended for concrete, metal, or tile roofs. It doesn’t involve chemicals, which is a plus for landscaping, but it can be time-consuming and harmful if the roof is not strong enough. It is best to consult an expert before you proceed to clean your roof using this approach.

Chemical Solutions

> Chlorine Bleach

To clean your roof, mix chlorine and water, and use the resulting solution to remove the stains on your roof shingles. After using this solution, rinse thoroughly.

This method ensures fast cleaning and does not damage the roof. However, it is important to protect yourself and your property when performing this operation. Plants can be harmed by chemical solutions, so make sure you keep the chlorine solution away from them.

> Sodium Hydroxide

Another way to clean your roof is to use special cleaning products containing sodium hydroxide. This substance effectively cleans roof shingles, but it is also toxic and can damage the roof if there’s too much sodium hydroxide in the solution.

Find a quality sodium hydroxide cleaner if you choose to use this method, and look for professional help if you’re not sure about how to do perform asphalt roof cleaning.

Need Help?

If you’re not sure about the best cleaning method for your roof, let experts do the job. TalkLocal can put you in touch with up to three professionals in your area who can take care of your needs. Our service is effective and free.

How to Repair Aluminum Siding

Monday, December 30th, 2013

How to Repair Aluminum Siding - Roofers

Aluminum siding is one of the most popular types of external cladding for homes. It is affordable, easy to install, easy to maintain, and now comes in various colors to suit many homes.

While it is a low-maintenance material, it is prone to different kinds of damage. For instance, aluminum siding can be dented by a simple hard knock. Keep your house’s siding in top shape with these tips on how to repair aluminum siding.

Repair Dents on Siding                                           

Step 1: Take a No. 6 self-tapping screw and drive it into the deepest area of the dent. Use locking pliers to pull the screw until the dent is in effect pulled part of the way. Before doing this, however, make several holes (1/8-inch in size) in the dented section if there’s a bigger dent. The holes will allow the filling compound to adhere firmly.

Step 2: Sand the dent area until it is bare. Using a wide putty knife, apply auto body filler.

Step 3: Smooth out the dent area. Use medium-grit sandpaper to work down the area until it is even and smooth or flush with the rest of the area. Then, paint with a matching color paint that is suitable for aluminum siding.

Replace Damaged Corner Caps

Your project to repair aluminum siding will not be complete if you don’t check the corner edge caps of the siding, which are also prone to damages. Here’s how to replace them:

Step 1: Take off all the damaged corner caps. Use a pry bar to remove the nails underneath.

Step 2: Put in the replacement caps. Beginning at the lowest end, insert the new cap beneath the bottom edge of the cap above it. Nail down the replacement with aluminum nails. Repeat until the last cap is installed.

Step 3: Seal the caps. When you reach the final cap, use a utility knife to cut the nailing strip off the top. Apply some silicone sealant on the backside of the cap; insert it under the edge of the side strip. Press down.

Keep Your Siding Well-Maintained

The steps above should make it easy for you to repair simple aluminum siding problems. However, anytime you require professional help for complicated siding repairs, TalkLocal offers a free service to quickly match you with qualified service providers in your area. Contact us now to speak with the right professionals in minutes!

Flat Roof Membrane Installation Made Easy

Tuesday, December 17th, 2013

Flat Roof Membrane Installation Made Easy - Roofers

One of the problems with having a flat roof is preventing water and snow from pooling on the roof. Some install pipes or use tar paper and gravel to make a flat roof watertight. By installing a flat roof membrane made of different compounds, including synthetic rubber, water can be directed to flow off the roof.

The membrane is UV-resistant, and it’s easy to spot leaks. Here’s a quick guide on how to install a flat roof membrane:

1. Prepare the Roof                      

The roof must be clean in order for the flat roof membrane to adhere well. Usually, these membranes are installed on top of roof shingles. Make sure you use a cleaner that is suitable for the type of shingle on your roof.

However, if you are installing a flat roof membrane before roof shingles have been installed, use a solution of water mixed with a little oil-free liquid soap to clean the roof.  Allow the roof to dry before installing the membrane.

2. Make Sure the Membrane Fits

Measure the dimensions of your roof, and trim the flat roof membrane to the required size. Trimming is important to ensure a correct fit, not too long or short. Once the membrane is trimmed, spread it out on the roof and move it about until it fits properly. Make any necessary adjustments.

3. Install the Membrane

Now, you’re ready to attach the membrane. Open the bonding adhesive and mix very well before using. Starting in one section, remove the membrane from the roof.

Using a paintbrush, apply the adhesive onto the roof and then onto the back of the membrane. Be sure not to use too much adhesive around the edges to avoid messy sides when the membrane is attached.

Press down the membrane over the roof. Remove air bubbles by running a roller brush over a section. Continue to the next section, and so on, until the entire flat roof membrane is attached.

4. Final Steps

Finish up by cleaning the seams of the flat roof membrane with soapy water (same solution as in Step 1). Then, put seam tape along the seams. Leave the roof alone for several hours to let it cure.

Need Roofing Help?

Installing a flat roof membrane requires a lot of elbow grease, but the steps above should help you get the job done. Most homeowners, however, choose to hire a professional to take care of the installation. TalkLocal offers a free service to help you find the right service professional. Contact us now to find a qualified roofer in your area.