Archive for the ‘Roofers’ Category


What is a Roof Valley?

Monday, August 26th, 2013

What is a Roof Valley? - Roofers

If you are planning to take up a home improvement task or doing your own roofing this season, you may need an answer to the question, what is a roof valley? A roof valley essentially is the joint where two slopes of a roof meet. This is the place where rainwater collects and flows down. Proper installation and waterproofing of a roof valley are very important to make sure water does not enter the roof.

There are essentially two types of roof valleys: open valleys and closed valleys. In the case of an open valley, a trough is created with a waterproof material along the valley. This lets all of the water drain down. In the case of a closed valley, shingles are applied all over the valley and the water simply runs over them naturally. While both methods have been almost equally effective, the closed valley is the preferred style these days because of the high efficiency of ice/water shield waterproofing material and also the larger aesthetic appeal.

Installing a Roof Valley

1. To successfully install a roof valley, first of all, carefully line the valley with an ice and water shield and nail it in place. It is better to have someone help with the right positioning of the shield.

2. Once done, take the metal flashing, place it in the center appropriately and start nailing that in place, too, after carefully pressing it down to stick to the shielding.

3. Use metal flashing strips no more than 10 feet long and make sure the upper one overlaps the lower one by at least 6 inches. This will ensure that no water gets in. Once done, cover up the flashing with the help of roofing cement.

4. Next comes the roll roofing. It is best to apply two layers of roll roofing, the first one with the mineral side facing down and another layer with the mineral side facing up. Having done that successfully, carefully shingle the valley and seal the shingles with roofing cement. You are now good to go with a waterproof roof valley.

Need a Roofing Contractor?

Roof valley installations are best performed by trained professionals. So if you need a professional roofer, let us at TalkLocal help you choose the best one in your area for free and connect you directly to an expert professional who will take care of your roofing needs.

Hurricane-Proof Home: Roofing and Siding

Wednesday, August 21st, 2013

Hurricane-Proof Home: Roofing and Siding - Roofers

Before a hurricane hits, it’s always best to prepare your home. The roof is highly vulnerable to damage from powerful, high-speed winds, so you cannot have a hurricane-proof home if your roofing is not ready to withstand the coming storms. You should also consider reinforcing your exterior siding or installing impact-resistant siding, especially if you live in a hurricane-prone area.

Inspect and Fix

Inspect roof shingles or tiles to see if they are all intact. If any are loose, they can become dangerous projectiles during a storm and cause damage to the material underlying the roof, so make sure to fix them using roof cement. Use asphalt cement for asphalt roof shingles. If any shingles or tiles are missing, make sure to have them replaced immediately.

Glue and Seal

Another quick fix to secure roof shingles is to apply flooring adhesive. Using a caulk gun, glue down the shingles by applying adhesive along the underside of their edges. You should also reinforce the trusses or rafters of your roof by applying construction adhesive along their sides at the spots where they are connected to your roof deck. Reduce water damage caused by heavy rains by sealing off any spaces where cables enter your home.

Secure Your Garage, Windows, and Doors

If you have a comprehensive plan for a hurricane-proof home, you should already have these areas covered. Otherwise, make sure your garage doors are braced and you have storm shutters installed to protect all of your windows and doors, which in turn will help protect your roof.

When these areas are not reinforced and hurricane winds get into them, it creates pressure inside that pushes up the roof while the force of the wind above creates a pull that can result in the roof flying off.

Hurricane Straps

During a new home construction, consider installing metal hurricane straps to your roof, which will ensure that it is fixed to the rest of the house. This option is possible in an existing home, but retrofitting would be a lot more difficult, because there is not much space to work around.

Siding Considerations

For new construction or if you’re looking to replace your old siding, building codes in hurricane-prone areas specify the use of fiber-cement siding in building homes because they can hold up well during a storm, even with 150 mph winds.

Vinyl siding is weather-resistant too, especially compared to wood and stucco, which can be easily destroyed by wind and water damage. While vinyl is impermeable and deflects wind, you still need to make it more resistant to forceful winds by attaching them tightly to the wall using fasteners.

Leave it to the Pros

When it comes to ensuring a hurricane-proof home, the smartest thing to do is hire qualified professionals to get the job done. Contact TalkLocal now, and we’ll search your area for qualified contractors fast and free of charge. Get your roof and siding storm-ready as quickly as possible with Talk Local.

Roof Shingles Repair Wind Damage

Monday, July 29th, 2013

Roof Shingles Repair Wind Damage - Roofers

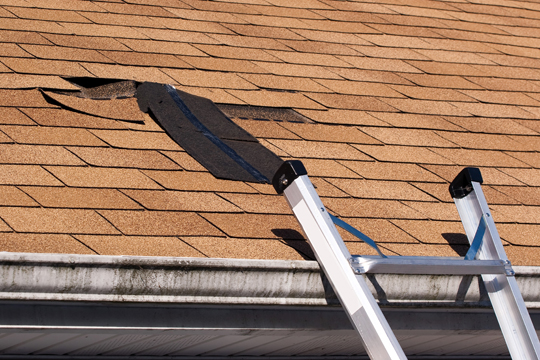
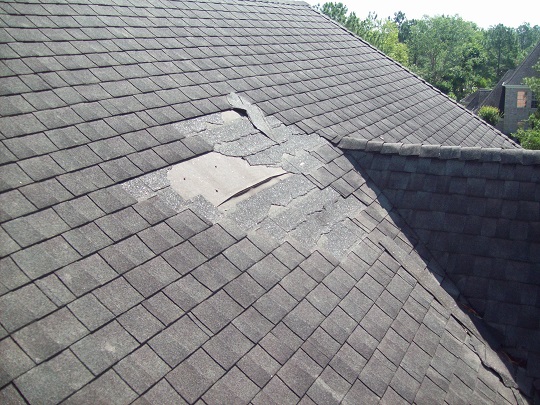
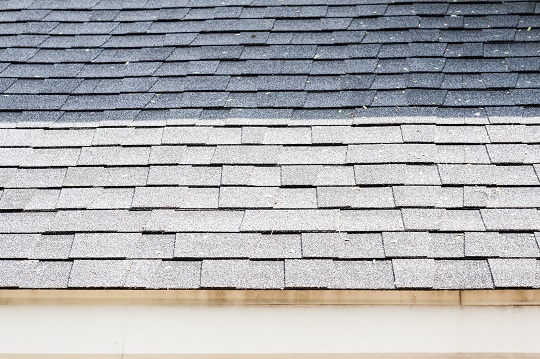
The shingles on your roof cover and protect the frame underneath and make you house look nice. So when wind damage tears off patches of shingles it may look unkempt and strange.  Shingles are meant to be wind resistant, but improper installation or severe weather can uproot them and damage your roof.

Roof Shingles Repair Wind Damage

The majority of shingles have a wind resistance of 60 miles per hour, whereas specialty shingles can withstand up to 130 mph gales.  The difference between the two types is the product quality, the amount of cement put on, and the number of nails used to hold them down.  Specialty shingles require six nails per while regular ones use four.  The two additional nails and dabs of cement increases the shingles’ performance when there is high wind.

Common Causes of Shingle Damage

The most common problem with shingle installation that causes damage is that they are improperly nailed. Most of the time when shingles fail in high wind situations, the issue is that they are nailed above the sealing strips.  This is against manufacturer guidelines, but sometimes when a contractor is in a rush they will forget to take the necessary time to inspect the work.

Another problem is that the nails are driven in too far.  When pneumatic or automatic nailers are used, and the compressor is set too high, the nail head can cut through the fabric on top of the shingle and leave the shingle virtually unattached.

Improper placement will also result in roofing shingle wind damage.  If the shingle panels are offset, and your roofer does not catch the mistake or tries to cover it up, they will be blown off in severe weather more easily.  When the sun’s heat begins to melt the glue tabs underneath the shingles another problem will occur.  If the shingles were set properly they would adhere to the roof below but in this case they will adhere to other shingles so if one shingle fails it will take many more with it.

Find Help Installing Shingles

When installing shingles on your roof you should look for a reliable contractor who will not cut corners.  Make sure that they follow the manufacturer’s instructions for the best possible installation.

If you are looking to hire a roofer, use TalkLocal to be connected with reliable local contracting businesses almost immediately. Simply input your problem, location, and availability, and Talk Local will do the rest.  Within minutes you will be connected to a qualified professional over the telephone.

How To Save Energy With Home Improvements: Roofing

Saturday, June 22nd, 2013

How To Save Energy With Home Improvements: Roofing - Roofers

Although your first instinct when trying to figure out how to save energy with home improvements may be to invest in better appliances, perhaps you should consider updating your roofing. We all know heat rises, and therefore your roof is your last line of defense when it comes to insulation.

Find out why saving on energy is important and how to do it with your roof.

What Does Saving Energy Mean For You?

With all the talk of “going green” today, it isn’t likely you have been immune to the outpouring of information on energy usage. In case you have missed it, here’s how it works.

To produce energy, we mostly rely on fossil fuels. These fuels are not only irreplaceable, but they emit what are known as greenhouse gasses. These gasses destroy the atmosphere and are thought to contribute to global warming, which has been blamed for the increase in extreme weather. If none of that convinces you, perhaps the impact on your wallet will. Using less energy means you spend less money. Simple.

Roofing Solutions

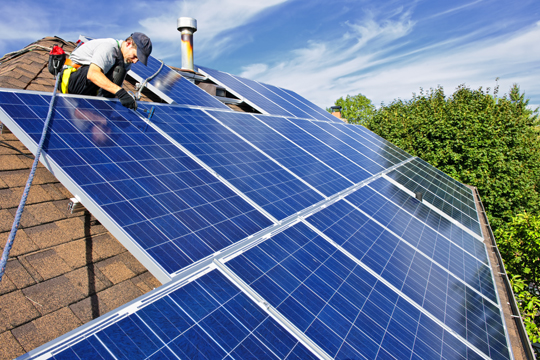
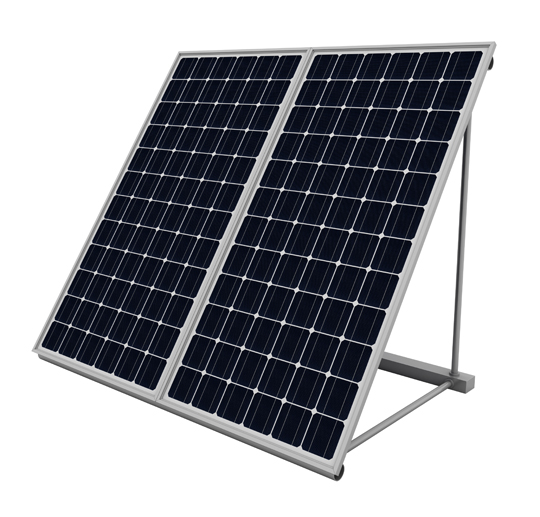
A more pricey answer for how to save energy with home improvements is to install solar panels. Although it is rare to be able to function entirely off of solar energy, using solar panels can decrease your energy usage. The panels use the sun’s energy and convert it into electricity you can use to power things in your home.

A less expensive option is to install insulated roofing. Although this type won’t generate its own energy, it will prevent heat from escaping during the winter or entering in the summer.

Also, do not forget about reflective roofing, which also helps to prevent the sun from heating up your attic and subsequently your home. The reflective materials cause the sun’s rays to bounce off instead of absorbing into the roof.

Start Saving!

To find out more about what energy-efficient roofing can do for you, consult an expert. TalkLocal can find a roofing professional in your area that is highly qualified. The best part is that our service is absolutely free, and you will be speaking to a qualified professional in minutes. We also leave you with options, so you can make the final choice.

How To Stay Cool In The Summer Heat: Roofing

Tuesday, June 18th, 2013

How To Stay Cool In The Summer Heat: Roofing - Landscapers

If you are pondering how to stay cool in the summer heat, your roof is a good place to start. If your home is topped with black tar shingles or other dark-colored roofing materials, you may be suffering from the heat unnecessarily.

Cool metal roofs, reflective roofs, and even thermal-activated roofing tiles provide consumers with a multitude of options depending on your needs, location, and budget. Energy Star-approved roofing saves money and keeps buildings cooler. Some of these even keep absorbed heat on reserve for later use.

Let’s look at how to stay cool in the summer heat through the use of smart roofing.

Reflective roofs are just what they sound like. Applying reflective or white, heat-resistant paint to a roof serves several purposes. It drastically lowers the surface temperature of the roof, which in turn reduces how much heat is absorbed and redistributed. Reflective roof paint was recommended as an accessible, cost-effective solution by the federal government in 2003. Since then, technology has advanced. But reflecting roofing remains effective and is a great solution for families on a budget.

Cool metal roofing is reported to lower home cooling costs by up to 40 percent annually. This is a good solution for steep-slope and low-slope roofing alike. Cool metal roofing works in two main ways. It is reflective, providing similar benefits to a painted, reflective roof. It is also emissive, so it radiates heat outward, essentially sending it upward. Emissive metal roofing has been shown to reduce urban air temperatures as much as 12 percent. On a hot day, that can make a tremendous difference.

Thermal-activated roof tiles are an amazing advance in both heating and cooling and are a key in how to stay cool in the summer heat. These tiles measure the heat outside, and turn dark (to absorb heat) or reflective depending on the weather. This makes roofs incredibly efficient, leading to drastic savings year round. They are especially valuable in areas with unpredictable weather patterns, while eliminating the need to redo your roof paint for each new season.

Making alterations to improve the efficiency of your home’s roof serves many purposes. Aside from how to stay cool in the summer heat, reflective roofs save on electric bills and help the environment by using less energy. Many insurance providers give discounts for energy-saving modifications like energy-saving roofing.

When you consider the benefits, there’s really no reason not to invest a little time and effort on staying cool and saving money.

How To Take Advantage Of These Roofing Options

You won’t be able to replace or modify your roof by yourself. Luckily, TalkLocal can get you on the phone with a number of professionals who service your local area. We only connect you with relevant companies and professionals so you don’t have to wade through a sea of unqualified help.

Best Roof Shingles

Friday, May 24th, 2013

Best Roof Shingles - Roofers

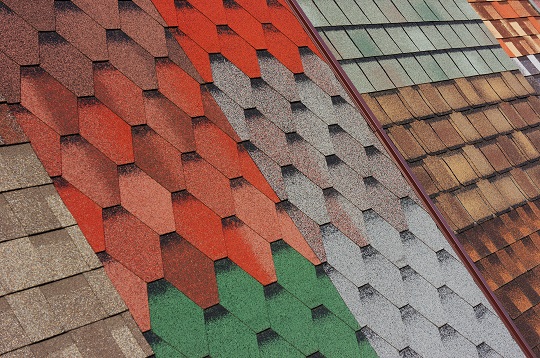
Roof shingles protect your home from the elements. However, curled, cracked, or missing shingles can lead to serious damage to your home if you do not replace them immediately.  The best roof shingles for your home will depend on the aesthetics you desire and where you live.

Asphalt Shingles

Asphalt shingles are the most common type of roof shingles. These shingles are very budget-friendly and come in various colors and sizes. They fair well in hot and cold weather. Although they have a shorter lifespan than other shingles, proper installation and maintenance can help them last a long time.

Metal Shingles

Metal shingles are ideal for warmer, drier climates. Unlike asphalt shingles, metal shingles do not provide grip, so snow will slide off onto the head of an unsuspecting passerby or onto your freshly shoveled driveway. Metal shingles tend to be more durable than asphalt, and should ideally last as long as 20 years. However, metal shingles will also be prone to rust, which could lead to leaks.

Cedar Shingles and Ceramic Shingles

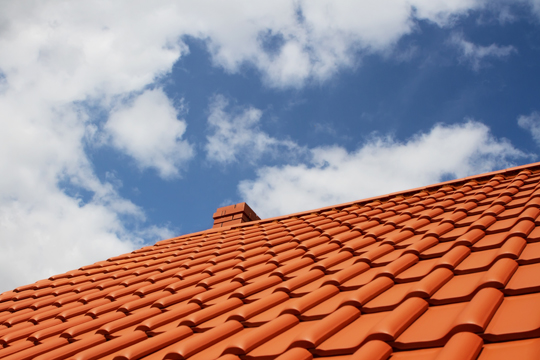
Cedar and ceramic shingles are typically more expensive than asphalt, but can also be more aesthetically pleasing. Cedar shingles can rot if not properly maintained, but otherwise have a long lifespan. Ceramic shingles also have a long lifespan, but both of these types of shingles are more common in warmer climates.

Find A Professional Roofer

Not only do you need the best roof shingles, but you also need a professional roofing contractor to properly install the shingles. Make sure the contractor you hire is certified and uses the best materials to protect your home. Improper installation can turn the best roof shingles into poor protection for you home.

If you are looking for a roofing contractor to install the best roof shingles on your home, use TalkLocal. We can connect you in seconds with quality roofers in your area, for free!

Roofing Over Existing Shingles

Sunday, May 19th, 2013

Roofing Over Existing Shingles - Roofers

Yes, roofing over existing shingles is possible, though not recommended. This process is less costly than stripping old roof shingles and installing new ones. It is also easier to do. In order to successfully install shingles over preexisting shingles, a few conditions apply.

Roofing Over Existing Shingles

1. The old shingles must be flat and only one layer can preexist. The existing layer should also be in good condition, though this is not absolutely necessary. You can add a layer of waterproof shingle under-layment on top of the existing shingles to reinforce the protection and prevent leaks.

2. If there are broken or torn shingles, glue the tear together or cut a piece to fit. Use roofing cement to adhere the shingles. You must ensure that there is a flat surface with minimal gaps.

3. You will also want to clean your roof of any twigs or debris that could disrupt the flatness of the existing layer or the adherence of the new shingles. Use a broom to knock off any debris.

4. Proper installation is key. Make sure the second layer of roof shingles is correctly installed in order to prevent any future damage. Have a professional roofing contractor determine if the conditions of your existing roof shingle are suitable for a second layer.

It is better to NOT layer shingles because the gaps created between the old shingles and the new shingles makes your roof more susceptible to weather. It will be harder to determine the location of a leak if you layer roof shingles. Plus, new roof shingle installation means you can put down a new water and ice shield. It is better to be safe than sorry when it comes to your home.

Find A Roofing Contractor

If you are looking for a roofing contractor, TalkLocal can help! We will connect you in just minutes with up to three roofing contractors in your area who will be able to help you!

How To Fix Chimney Leaks

Wednesday, May 15th, 2013

How To Fix Chimney Leaks - Roofers

While a chimney and a fireplace can bring a lot of warmth and coziness to a home, an improperly-maintained chimney can also bring a lot of water in the house.  This could lead to extensive water damage or even mold growth, requiring expensive repairs and time spent removing mold.  So what do you do if you’ve already spotted a water leak in your chimney?  Read on for tips on how to fix chimney leaks so you can protect your home.

Search for the leak

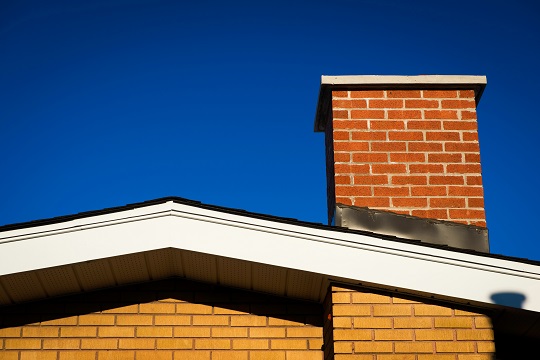
You’ll first want to inspect the chimney to isolate the actual leak location.  Check for wet and swollen drywall around the chimney area or other water-related markings on the materials around the chimney.  Oftentimes, the simplest cause will be a faulty chimney cap, so you may want to go on the roof to look for cracks and holes in your chimney cap.  Furthermore, inspect the flashing on the bottom of your chimney as that will prevent any water from leaking from where the chimney meets the roof.

If you chimney is brick or stone, you’ll also need to check that the mortar is still intact around all of the bricks.  If you see any holes or extensive damage, you may have found your water leakage source.

Chimney Cap Leaks

If you’ve determined the source of the water leak to be a cracked chimney cap, you have two options:  You can either replace the entire cap with a new, waterproof one, or you can have a copper cap fitted on top of the old cap. This will also need to be waterproof.

Brick Leaks

If the problem was found in the mortar or the bricks in your chimney, then the first thing you’ll want to do is plug up any cracks and holes with caulking.  Then you’ll want to reapply a masonry, waterproofing coating on the brick to ensure that your chimney doesn’t leak again.

Flashing Leak

Poorly-installed or maintained flashing can also be a serious water leakage source.  If you found the flashing to be the primary issue, you’ll most likely want to hire a professional roofer for this repair.  Improperly installed flashing can lead to even more water leakage and disastrous results.

Find A Quality Roofer

Fixing that chimney leak quickly can really mitigate a lot of water damage and potential mold as well, so get the leak fixed as soon as possible.  If you’re looking for a roofer, Talk Local can connect with up to three, high-quality, local, professional roofers in just minutes, for free!

Average Cost For Solar Panels

Monday, April 29th, 2013

Average Cost For Solar Panels - Roofers

From light bulbs to windmills, everyone is searching for ways to cut down on power costs. Solar energy is one popular go-to method that homeowners use in an attempt to decrease the costs of powering their homes. But, is it worth it? Knowing the average cost for solar panels is only helpful if you know your average rate of energy consumption (kWh).

Average Household Energy Consumption

The average U.S. household consumes 1kWh. At a rate of about 10 cents per kilowatt, that averages out to a bill of about $73 per month. Obviously, this number can vary greatly by region, so it is important to determine your own average energy consumption before making an accurate assessment.

What Is The Average Cost For Solar Panels?

On average, 100 sq. ft. of solar panels will generate 1kWh. The average household needs a 5kWh solar panel system in order to store enough energy to power the home when the sun is not shining. These systems average from $25,000 to $35,000 dollars to install.

Is It Worth It?

Depending on your region, there is likely not enough sunlight to fully power your home for 24 hours. Homes with solar panel systems generate 40 to 80 percent of their energy and rely on municipal power to make up for their remaining power needs. If your system could cover 100 percent of your power needs, it would still take 20 years to pay for itself — assuming your bill is around $73 per month. On the other hand, you would be significantly reducing the amount of fossil fuels being used to power your home, which does have a powerful effect on the environment.

Confused?

Call an expert. He or she can give you more accurate numbers, instead of just an average cost for solar panels. TalkLocal can get you in touch with one in your area for free. You will be speaking to someone who can help you in minutes.

Roof Insulation Types

Monday, April 22nd, 2013

Roof Insulation Types - Roofers

Your roof is one of the most important areas of your house to insulate. A well-insulated roof can save you money on heating bills during the winter and cooling bills during the summer.  There are many roof insulation types, and they each perform differently depending on the conditions, so you will need to choose the right type for your house.  There are three general types of roofing insulation to consider: Batt, blown, and sprayed insulation.

Batt Insulation

Batt insulation (pictured above) is packaged in large rolls and made of either fiberglass or cotton that is commonly used to insulate home roofs and ceilings.  While Batt insulation is usually the cheapest, the quality does not measure up to other types of insulation. Insulation works the best when it can completely fill the cavity of your roof so no heat can escape.  Batt insulation needs to be cut into the specific shapes of your roofing and has to compete with all sorts of wiring, junction boxes, and exhaust fans, making it difficult to insulate effectively.

Blown Insulation

Blown insulation usually consists of small particles of fiberglass or cellulose that is installed by spraying it into your attic through a hose.  These small pieces can fit snugly into almost all of the spaces in the attic, ensuring that all cavities will be filled effectively.  Fiberglass, while a little more expensive, is lighter than cellulose and stands up well against moisture.  If you live in a wet climate and expect a lot of moisture on your roof, avoid cellulose; it will rot out easily since it is made from shredded newspapers.

Sprayed Insulation

Spray foam is also a very common type of insulation. The major advantage of spray foam is that it you can apply it directly to the roof line, rather than leaving it on the attic floor like with blown insulation.  Spray foam insulation will stick to the roof and offer reliable insulation, and is also necessary if you have your HVAC system and ducts in your roof.  However, the major disadvantage to spray insulation is the cost, which is approximately three to four times what you would pay for blown insulation.

Find A Roofing Contractor

If you are uncertain about which of these roof insulation types will work best for your house, contact a roofing expert so that you can get a personalized assessment for your situation.  TalkLocal can make finding that roofing expert a breeze. Once you submit a service request through our system, you’ll be talking with a local, high-quality roofing professional in just minutes!