Archive for the ‘Roofers’ Category


New Roof Cost

Tuesday, April 16th, 2013

New Roof Cost - Roofers

A new roof is one of those rainy-day fund type of costs that you may have to deal with.  A storm that causes severe damage, a time-worn home; there are many things that can cause you to need a new roof.  This is an expensive deal, and may vary depending on what type of replacement roof you are looking for.

Here is a simple guide to help you figure out your approximate new roof cost. Again, these are only estimates. A roofing contractor should be able to provide you with a more accurate estimate depending on your home and the type of roofing you’re looking for.

New Roof Cost Guide

For the purposes of this guide all costs will reference an estimate for a roof size of 1,700 to 2,100 square feet.

Who Is Doing the Roofing? The number one difference in new roof cost comes from whether or not you do the replacement by yourself.  If you do decide to take on the task of roofing your own home, you will only face the cost of buying the materials.  You will have to sacrifice a lot of time, but it may be worth it, as hiring a roofing contractor can be costly.

Replacing a roof of 1,700-2,100 square feet with asphalt shingles can cost between $680 and $3,700.  If you hire a professional, the cost will run between $1,700 and $8,400.

Type of Materials Used: Another cost to consider is the quality and type of replacement shingles you want to use for your new roof.  You can decide to use wood, tile, metal, slate, or asphalt.  The choices are many.  Wood shingles for our example house size will cost between $7,000 and $20,000 on your own.  With re-roofers it can cost up from $12,500 to $19,000.

Tile roofing can run from $7,700 to $21,000 alone, and with professional help it rises to between $12,000 and $30,000.

Metal is more expensive, typically running $5,000-$21,000.  Hired roofers will cost between $12,000 and $40,000.

Slate materials will cost you between $17,00 and $84,000 and even more if you want to have the roof installed for you.

Size and Shape Of Your Home:  The cost of new roofing can be much higher if your roof is more than 1,700-2,100 square feet.  Each section of the roof also adds costs, so if your home is irregularly-shaped, this could affect the cost of a new roof.

Get Estimates to Replace Your Roof

If you are looking to get new roofing for your home, speak with a roofing company to find out your new roof cost. TalkLocal with connect you with up to three roofing professionals in your area, who will be able to answer your questions about your new roof cost.

Energy Efficient Roof Systems

Thursday, April 4th, 2013

Energy Efficient Roof Systems - Roofers

Becoming environmentally-friendly is the new thing to do.  Many people have recently developed an awareness of how to live in more eco-friendly ways, and one popular way to do so besides recycling is to build energy efficient roof systems.  There are a couple of different options you can choose from if you decide to pursue energy efficient roofing.

Energy Efficient Roof Systems

Not only do energy efficient roofs help to be environmentally-friendly but they also can save you a lot of money on your next utilities bill.  You may have to invest more money in the first place but in the long run it will pay itself off.

One decision to make when trying to build energy efficient roofs is between steeply-sloped and low-sloped roofs. Steeply-sloped roofs are what you typically see on homes.  These roofs stay cool by being made out of tiles and painted metal.  Clay and concrete tiles only reflect 10-30% of sunlight heat, but the colored metal and tile roofs reflect from 25% to 90%.  This solar energy really helps to cool your home and keep your energy bill low.

Low-sloped roofs are more commonly found on industrial or commercial buildings.  They are energy-efficient if they have singly-ply, cool membrane coats applied on them.  This has the consistency of paint and can be applied to various types of surfaces.  Applying this coat will also help with adhesiveness, durability, and reducing mold growth.  They act in the same manner as tiles by reflecting back sunlight and holding in solar energy.

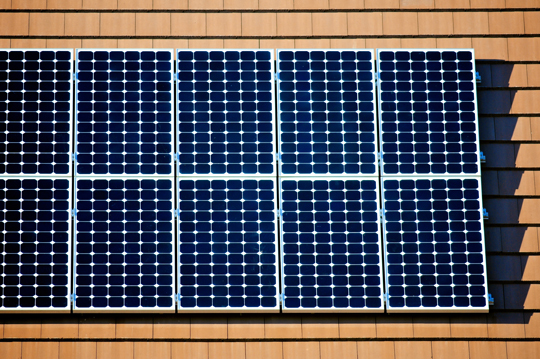
Other options include installing solar panels on your roof, or growing a garden up there.  Solar panels are good for trapping heat and providing energy for your home, lowering your energy bills.  Roof gardens are energy-efficient because they receive even more sunlight than ground-level gardens would.  Plants flourish and grow more quickly when placed on top of the building.  There are a lot of options when it comes to installing energy-efficient roofs, and you should consider them all.

Need Help Installing An Energy-Efficient Roof?

If you have more questions about energy-efficient roof systems, you could speak with a professional roofer in your area. TalkLocal will connect you with up to three, reputable roofing companies in just minutes. Just tell us what you’re looking for, where you are, and when you’re available, and we’ll find the right professional for you –free!

Solar Panels Installation Guide

Sunday, March 24th, 2013

Solar Panels Installation Guide - Roofers

Saving money on energy through solar panels is becoming more popular than ever these days, but it isn’t exactly common sense to install them. There is a lot more to the process than more traditional projects, like re-shingling your roof.

If you need to save money and want to help the environment, solar panels are perfect for you, and our solar panels installation guide can help get you started. Although you may need professional help in some cases, these steps will almost always get the job done for you.

A Quick Solar Panels Installation Guide:

1. Figure out what kind of panels you need. This is going to depend on how much energy you need to produce. Different panels come in a range of voltage and wattage so you can pick what you need.

2. Figure out the angle at which your panels should lie to be most efficient. This is based on meteorological information about your specific location and the way the sun will hit the panels.

3. Prepare the location. When you decide where you’re going to place your solar panels, build a platform for them complete with conduit from your home or business. Use concrete pillars and wood for the platform itself.

4. Mount the panels to the platform. You can use angle brackets at the points where you want your panels mounted, but be sure to center the panels’ front feet before securing them into place.

5. Secure the back legs. Use the information garnished from step No. 2 to help you angle the panels and secure the back legs appropriately.

6. Secure the solar modules. Strip the modules and pair them up to wire them in couples that should end up connected altogether at a central fuse box. Be sure to be careful when working with electricity!

7. Connect the exterior and the interior wiring. Use a solar breaker and a circuit breaker connection for this step.

8. Use the conduit to connect cables from the solar panels to the controls in the house. Connect them to nylon rope so they will be easier to thread through the conduit.

9. Use a grounding rod. Tap it into the ground, leaving about five to six inches free, and run copper wire between this rod and the fuse box.

10. Make the proper electrical connections inside. Be sure to be safe with this!

When In Doubt, Seek Help

Although it is possible to install solar panels yourself, it can be dangerous and tedious. We can help you find trustworthy professionals to do it for you and avoid any risks. TalkLocal connects you to the local roofers you need when a do-it-yourself project turns out to be a bit more difficult than you thought, so you TalkLocal today!

IKO Roof Shingles

Friday, March 22nd, 2013

IKO Roof Shingles - Roofers

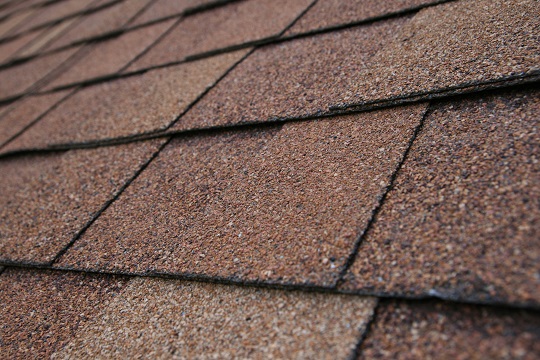
The type of shingles you choose to use for your roof is a very important decision. You want to ensure that you get high-quality shingles put on your roof for a fair price, because new roofing should be a long-term investment for your home. The roofing on your home seals rainwater out and can make your house more energy efficient.  You should not take this decision lightly.  IKO is a popular brand of shingles that has its benefits, but it is always important to check out a particular brand and compare it with others before making a decision. This article will provide an overview of IKO roof shingles.

Pros of IKO Roof Shingles

– IKO roof shingles are cheap – approximately $10 cheaper than many other brands.

– These shingles have a 6-inch exposure, providing a large surface area of protection.

– IKO shingles use a fast adhesive to help them stick to your roof.

– IKO roof shingles have been one of the top-selling shingle brands for several years.

Cons of IKO Roof Shingles

– IKO shingles are very thin, and use an older design, making them less durable than other brands.

– The sealing strips used by IKO have been known to fail, and the shingles have been known to be blown away or curled by severe wind or shredded by the nails used to hold them in place.

– There have been complaints about IKO not following up on their warranty for their shingles.

Choosing the Right Shingle Brand

The purpose here is not to convince you of which shingles to use. But it is important to research the brands that you choose to buy when improving your home. Use review sites to see what other consumers are saying about a particular brand, and try to get some feedback on any questions you may have. If you want to speak with a roofing contractor about shingle brands, TalkLocal can find one for you. We’ll connect you with up to three professionals in your area, so you can get the information you need in just minutes.

Most Energy Efficient Roofing Material

Thursday, March 21st, 2013

Most Energy Efficient Roofing Material - Roofers

Becoming environmentally friendly is the latest trend when it comes to designing and improving houses and buildings.  One way to do so is to build with energy efficient roofing materials.  An energy efficient roofing material can prevent the beating sun from overheating your house, or could be made with nontoxic, environmentally friendly materials – or both! There are many different types of materials that you should consider if you plan to be environmentally conscious. Here is a brief summary of some of the most energy efficient roofing material.

Metal Roofing– confusing right? It doesn’t sound that good for the planet but it is!

– Metal roofing is typically made from common, affordable materials. Steel is the most common component of metal roofing, but copper is also used, as are blends of zinc, aluminium, and steel. This roofing reflects more sunlight than non-metal materials, and often comes with an acrylic-based coating that further keeps the heat off of your home. Your home will stay cool on those hot summer days, saving you money on your air conditioning bill. Most of these materials are also recyclable or reusable.

– Metal roofing is strong, durable, fire resistant, highly weather-resistant.

– Metal roofing typically comes with long-term warranties, often lasting up to 50 years. The durability and strength of metal roofing also means that you will have to replace far less frequently than other roofing materials.

Tiles

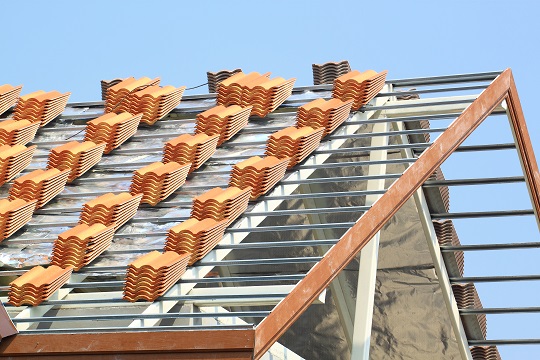
– Tile roofing can reflect up to 90% of solar energy, due to the thermal-resistant materials they’re made from: typically concrete or clay. These natural materials are also safer to dispose of than their chemical-based, plastic counterparts.

– Roofing tiles are installed individually, allowing for natural air flow between each piece, keeping your roof – and home – cooler.

– Tile roofing is weather-resistant, though not as durable in extreme weather conditions as metal roofing.

– This is more of a style preference, but tile roofing can be molded and shaped into cool designs to give your roof some flare.

Recycled Shingles

Recycled shingles can be made from any available roofing material, including metal, tile, or asphalt. While each material has its own energy efficient qualities, using recycled materials for roofing is better for the environment overall, and cuts down on waste.

Tip: Look for Energy Star-rated products when getting roof materials. Energy Star-rated products can save you money and are often environmentally-friendly.

Find A Quality Roofer!

If you have any questions about the most energy efficient roofing material, consult a roofing professional near you. TalkLocal will connect you with up to three high-quality roofing professionals in your area.

Install RV Awning

Wednesday, March 13th, 2013

Install RV Awning - Roofers

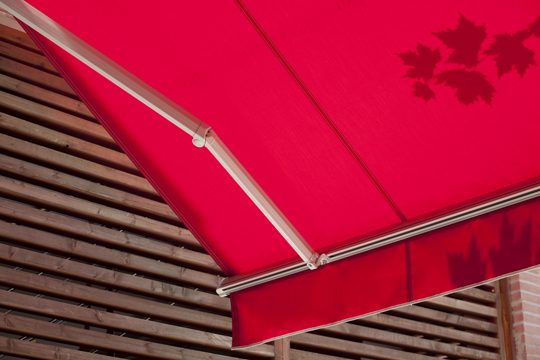
Learning how to install RV awning can help you save time, heartache and money. Even those who are not mechanically inclined in the slightest can easily accomplish this task. And, much like home awnings, these will help you steer clear of the elements when camping or living in your RV.

You will only need a few tools and a little patience to get the job done. You will need a screwdriver, the type of which will vary. Keep both by your side just in case. You will also need a tape measure.

1. Purchase supplies: You will need to purchase an RV awning that specifically fits your RV. Be sure to take proper measurements to ensure that you purchase the right awning.

2. The installation process: The first step in installing an RV awning is to screw the railing of the awning to the top of your RV with the screws that came with your awning purchase. Secure the railing, but do not screw them in too tight or you could run into trouble later. Unroll the awning and place the tension arm. Unfold the support legs to place on the floor. Attach the bottom brackets.

3. Protect your awning: Natural elements can take a serious toll on your awning. You can easily protect your awning by not letting it flap in the wind. You can purchase a de-flapper at any RV supply store. Tie-down ends and stakes can also help secure your awning so that it is not damaged by the wind.

Get A Professional To Do It

If you do not want to take the time or effort to complete this task by your lonesome, count on an expert roofer. TalkLocal provides customers information about businesses that cater to them in the local area. All you have to do is fill out some brief information on our website and you will have highly-qualified professionals calling YOU in minutes!

Residential Roof Inspections

Sunday, March 10th, 2013

Residential Roof Inspections - Roofers

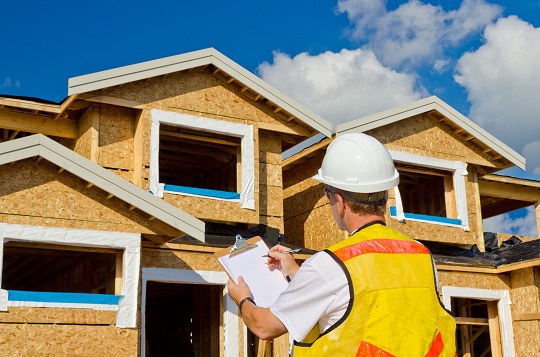
Residential roof inspections are often required before a mortgage or home loan can be secured. During these inspections, all parts of a roof are inspected – the shingles, the gutters, the flashing, and even the inside of the roof from the attic. Roof problems usually result in expensive repairs, so inspecting the roof also helps owners identify any problems before they become too serious.

How to Pass Residential Roof Inspections

If you are getting your roof inspected, there are a few steps you want to take to ensure your roof passes the inspection. Checking the inside of your roof (from the attic) is a good place to start.

1. When you get to your attic, start looking around for any evidence of water. Dark stains, puddles, and sagging or cracking rafters are indicative of water in your attic. If there appears to be water, look at the wood for a clue as to the age of the leak. Dry and firm wood indicates an old leak. Lesser-quality woods may have even begun the rotting process if left alone long enough. If there is any water damage, you will want to find a roofer to fix this before your inspection.

2. The next thing you will want to inspect are the shingles on your roof. To do this, grab a ladder and place it against your house. Climb your ladder and stop when you are at roof-level and able to gauge the condition. Shingles that appear to be cracking or splitting or even missing should be fixed or replaced. Asphalt shingles with dark patches likely need a new granular coating to ensure their effectiveness. Also, if you saw areas of the roof that appeared to be sagging when in the attic, you will want to have someone take a look at those areas as well.

3. Next up to inspect are the flashing and gutters around the roof.

4. Check for any loosely attached downspouts and make sure everything is working effectively.

5. Check to make sure all the gutters are not clogged or leaking. If you have trouble recognizing leaks like this, you can try pouring some water down the roof to test the gutters and downspouts. You will also want to inspect the flashing around the chimneys, vents, and walls. If there are any problems with the flashing, you will want to get them fixed or replaced.

Further Assistance

Certified roof inspectors are paid to recognize breakdowns and faults in your roof, so ensure this doesn’t happen by following this checklist. If you would like to have a roofer help you repair your roof, consider using TalkLocal to find a roofing company for you. TalkLocal is a free service that will connect you with top-quality, reputable roofing professionals in your neighborhood within minutes. Just enter in your specific problem, location and availability, and up to three companies will call YOU directly, saving you the time and stress of finding one yourself.

How to Waterproof a Roof

Saturday, March 9th, 2013

How to Waterproof a Roof - Roofers

A roof is one of the most important structural features of a house. An inadequate roof means the rest of your house may be subject to damage during a big storm. Regardless of whether you have a flat roof or a slanted roof, ensuring that the roof is waterproof is an important step in making sure your home isn’t damaged by water. If you want to know how to waterproof a roof, don’t worry – it’s not too difficult.

How to Waterproof a Roof

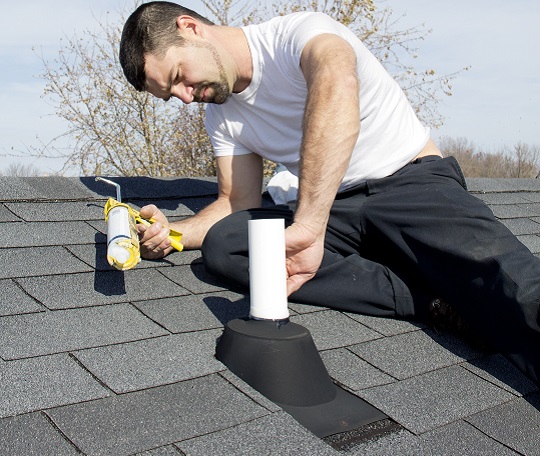
1. The first thing you want to do is gather the necessary equipment and the materials: find a ladder, silicone sealant or something similar, and a caulking gun.

2. Climb the ladder to get onto the roof and try to identify any spots on the roof where it may be most susceptible to water damage. This means any points where water may slip under the shingles and any places where shingles have been damaged or displaced.

3. Once you identify these areas, seal the three open sides of the shingles using the can of silicone sealant and caulking gun. Make sure the sealant actually seals the openings to ensure no water can get through the roof. If it doesn’t work on your first try, continue sealing the gaps of space under the shingles to waterproof the roof. If there are any gaps left, water can seep into these spaces under the shingle and cause water damage to your roof and in your attic.

4. In addition to the shingle openings, you want to seal any other openings you may see. Check the flashing used around the vents and chimneys to determine if there are any poorly sealed areas. If there are, seal them tightly with the silicone to protect against leakage.

Additional Help

If you would prefer professional help, consider using TalkLocal to find a roofing company for you. TalkLocal is a free service that will connect you with top-quality, reputable roofing professionals in your neighborhood within minutes. Just enter in your specific problem, location and availability, and up to three companies will call YOU directly, saving you the time and stress of finding one yourself.

Flat Roof Tar

Sunday, March 3rd, 2013

Flat Roof Tar - Roofers

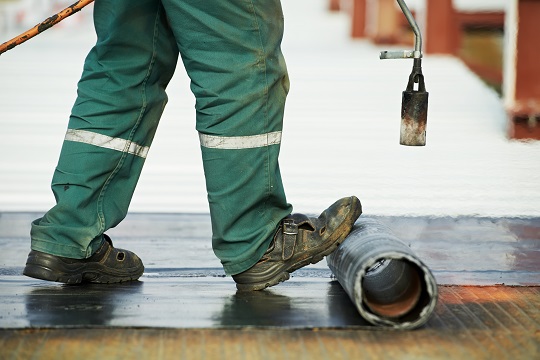
A flat roof is very susceptible to water damage unless steps are taken to prevent this. Some people prefer to install pipes that are designed to guide water away from the roof, while others prefer using methods involving tar. Traditionally, most flat roofs use tar or tar paper that is applied to keep the building watertight. Gravel or something similar is then used to protect the tar. If you  live in a home with a flat roof, knowing how to keep it watertight can save you major headaches and money.

Applying Flat Roof Tar


1. Gather your materials. You will need a roller, an extension pole, and enough tar (or tar paper) to cover the surface of your roof. For the tar, we recommend finding a product that is white to help it reflect UV rays.

2. Prepare the roof surface for the tarring. This means cleaning and drying all of the surfaces where tar will be applied.

3. Before you begin the tarring process, make sure the conditions allow for a clean setup. Make sure the temperature is not too hot or too cold, or else the tar may melt too quickly or not seal at all if it’s too cold. With this in mind, it is time to start tarring.

4. Keep in mind, not all tar products are the same, so you will first want to read the directions on the container of the tar.

5. Start in the corner of the roof that is furthest from where your ladder is. Using a roller, spread the tar around with smooth strokes to cover the entire area. A second or even third coating can help to protect areas such as flashings or pipes that may be more at risk for water damage.

5. An alternate method is to use tar paper instead of just tar. These papers do essentially the same thing, but the application process is slightly different. Rather than coating areas, you apply strips of tar paper to areas that need to be kept watertight.

Further Assistance

If you would prefer professional help, consider using TalkLocal to find a roofing company for you. TalkLocal is a free service that will connect you with top-quality, reputable roofing professionals in your neighborhood within minutes. Just enter in your specific problem, location and availability, and up to three companies will call YOU directly, saving you the time and stress of finding one yourself.

Detecting Roof Leaks

Friday, March 1st, 2013

Detecting Roof Leaks - Roofers

A roof leak is something that can be extremely dangerous and costly if not dealt with properly. If you suspect your roof may be leaking, you should waste no time looking for its source. Water damage can be very costly, as it ruins roofs, ceilings, walls, and even your floors. Detecting roof leaks early enough allows you to ensure all this is prevented and your repair costs are minimal.

Detecting Roof Leaks

Detecting certain roof leaks can be pretty simple. When there are water stains on walls and ceilings of your home, you can be certain you have sprouted a leak. However, most leaks aren’t as obvious as these, so there are other places that you will need to check.

Your attic is often the first place to show any water damage. Shingles are placed on roofs to prevent water from reaching the roof, but when a shingle breaks or comes loose, your attic is very susceptible to water damage. Check the attic for puddles of water. If these aren’t present, check the ceilings of the attic to see if your roof is in the process of sprouting a leak. If you do detect any stains, put a nail through it to see if any water falls out from above. Detecting water stains can be difficult at times, so using this nail trick can be helpful in detecting roof leaks. Another thing to keep in mind is that flat roofs are more susceptible to sprouting leaks than sloped roofs.

If you believe you have a leak and are unable to find the source, consider waiting until it is raining and wait in the attic to hear for sounds of leaks. Bring a flashlight and look around for any signs of water damage or water running down a wall or beam. Find the source and call a roofer immediately before the damage gets worse.

Additional Help

If you have detected a roof leak in your home and want to get it fixed before the damage becomes any worse, consider using TalkLocal to find a roofing company for you. TalkLocal is a free service that will connect you with top-quality, reputable roofing professionals in your neighborhood within minutes. Just enter in your specific problem, location and availability, and up to three companies will call YOU directly, saving you the time and stress of finding one yourself.