Archive for the ‘Roofers’ Category


Flat Roof Water Drainage

Thursday, February 28th, 2013

Flat Roof Water Drainage - Roofers

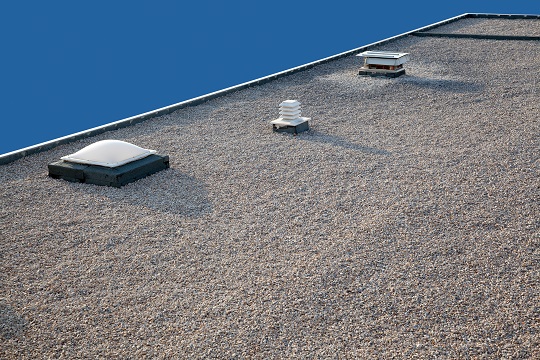
A flat roof has its advantages – they offer more stability and surface than do slanted roofs – but flat roofs also have their disadvantages. Flat roofs are prone to water damage and need to be re-coated and sealed every couple of years to prevent leaks. If not properly maintained, a flat roof can sprout leaks and replacement costs may be much higher than maintenance costs. Any issues you may have with flat roof water drainage can be handled if you maintain the roof properly and utilize the right tools.

Flat Roof Water Drainage

There are a few flat roof water drainage solutions that can help you avoid structural damage and leaks to your roof.

Scupper drains are an inexpensive drainage solution designed to provide efficient drainage by guiding water that would otherwise gather, towards the water downspout. Although this is a fairly simple system, a licensed plumber should install the scupper drains to ensure its effectiveness.

– An internal drain is an alternative option if you’re not looking to spend too much money. These can be combined with an existing home drain system to ensure your flat roof is drained of water effectively. An internal drain is installed into areas where water pooling occurs and works by installing metal inserts to guide the water away from the roof. This system is slightly more complex than using scupper drains, but they are roughly as effective as each other. To be safe, a licensed plumber should install this drainage solution.

There are some other less commonly used methods as well like using drainage helperstrue-sloped isulation, and step-sloped insulation. These methods generally require more steps and more money, so it is best to stick with the first two methods.

Flat roof water drainage can be successfully done if you utilize the right methods. Having a system of drains and gutters allows the water to flow to the ground while preventing damage to your roof. If you have a flat roof and want to avoid paying expensive replacement fees, get your roof inspected today.

Additional Help

Using these flat roof drainage solutions, you can avoid running into problems that can cause damage to your roof. If you are looking for a professional plumber to install these drains, or you would like a consultation from a roofer, consider using TalkLocal. TalkLocal is a free service that will connect you with top-quality, reputable roofing contractors in your neighborhood within minutes. Just enter in your specific problem, location and availability, and up to three companies will call YOU directly, saving you the time and stress of finding one yourself.

Roofing Shingles Prices

Sunday, February 17th, 2013

Roofing Shingles Prices - Roofers

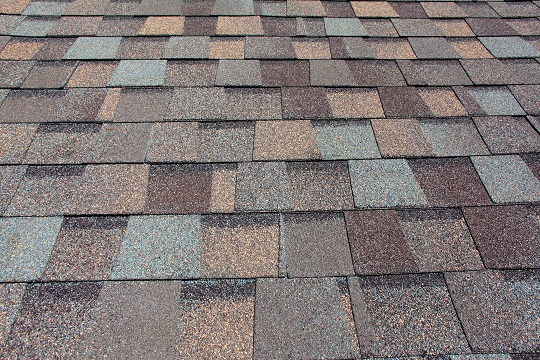
Looking into installing a new roof? Shingles are one of the best and most common roof coverings in the United States. If you are considering shingles for your roof, here is some information about roofing shingles prices and installation costs.

Types

First and foremost, quality is a factor in pricing. There are two types of shingles: steel and asphalt. Steel shingles last longer than asphalt and is the most expensive type of shingle, at around $50/shingle compared to asphalt, which is fewer than $10/shingle. Thicker asphalt shingles and corrosion resistant steel shingles are the most expensive of the types that are $10/shingle and $80/shingle, respectively. For roofing, don’t look for the cheapest shingles. It is a worthy investment because a roof should last around 20 years until it needs to be re-roofed. Due to its longevity, a new roof is costly. Choosing the cheapest shingles will only require frequent repair in the long run. Shingle manufacturers have warranties for their higher quality products. Read these warranties as preconditions, as you may not be able to use the warranty in some cases.

Installation Costs

Labor costs vary the most when planning to redo your roofing. The size of the roof, steepness, and potential shingle removal are all variables in the final determination of price for the roof. Choose these contractors as carefully as you choose your shingles. Remember good roof installation will lead to less roof repairs later. The average cost of installing a roof is about $2.18 per square foot.

Additional Help

To find high quality roof contractors in your area use TalkLocal. We will connect you with up to three roofing contractors in your area in just minutes!

How to Paint a Galvanized Metal Roof

Saturday, February 16th, 2013

How to Paint a Galvanized Metal Roof - Roofers

While galvanized metal roofs are usually weather-resistant, they’ll eventually begin peeling and rusting, making them extremely unattractive. In these cases, the peeling and rusting usually signifies that it’s time to give your roof a fresh coat of paint.  Read on for step-by-step directions on how to paint a galvanized metal roof.

1. Scrape down the roof

You need to remove any accumulated rust on your galvanized metal roof so that you can repaint it successfully.

– Take a putty knife or paint scraper to remove as much old peeling paint and rust from your roof.

– Follow that up by using a power washer to clean the rest of your roof and to remove debris.

2. Remove any mildew or algae

Mildew and algae can actually compromise the galvanized roof’s integrity and may lead to expensive problems in the future, so this step makes sure your roof is clean and protected.

– Make a mixture of 1 part bleach, 1 part trisodium phosphate, and 4 parts water.

– Apply that solution all over the roof.

– After allowing it to dry, wash it off with water.

3. Prime and paint the roof

– Choose an appropriate galvanized metal primer and prime your entire roof.  Wait until the primer dries completely before applying the actual paint.

– For the top-coat paints, you’ll want to choose the appropriate type of paint for your climate.  You may want to talk with a painting expert so you can choose the best paint for the conditions your roof is in, but you’ll generally want to use an acrylic latex paint.

– Apply at least two coats of paint to the roof so that you have even and complete coverage over your entire roof and allow it to completely cure (it can take up to 2 weeks).

Additional Help

Painting a galvanized metal roof can be time consuming, labor intensive, and potentially dangerous if you don’t know what you’re doing.  It’s highly recommended that you at least consult with a professional roofing contractor who is experienced with galvanized metal roofing.  TalkLocal makes it really easy to talk with roofing professionals, connecting you with a high quality local professional in just minutes.  You’ll have your roof painted in no time!

Types of Roof Pitches

Friday, February 15th, 2013

Types of Roof Pitches - Roofers

If you are thinking of re-roofing your home, you might assume there are endless options with regard to the available roof materials: asphalt, metal, wood, composite shingles, etc. An important factor you should consider before choosing a material is roof pitch. In other words, pitch is the angle(s) of your roof. Read on to learn more about types of roof pitches.

Often symbolized as a fraction, the roof pitch tells you how steep an angle is in terms of inches. For example, a roof pitch of 4/12 means that for every 12 inches in horizontal distance, the roof rises (or drops) 4 inches. More simply, it is the slope of the roof (the rise/the run).

Types of Roof Pitches

There are many different types of roof pitches. Here is a list of some of the most common (in no particular order) along with a short description of each:

Cross-Gabel: has many triangles offsetting less-angled, flatter sections

Saltbox: usually has one very long side contrasted with one short, steep side

Flat: self-explanatory

Skillion: has a single sloping side, usually found on a single part of a home. It resembles a “half-triangle.”

Mansard: a common type of roof pitch containing four slopes, two on each side of the house. There are two lower slopes and two higher slopes.

Hip: similar to a pyramid shape, except that instead of the four sides coming up into a point, there is a flat surface where the four corners meet.

Additional Help

If you have successfully classified your roof pitch type and are ready to contact a roofer for the job, use Seva Call to locate one near you. Seva Call is a free service that will connect you with top-quality, reputable professionals in your neighborhood, within minutes. Simply enter in your specific need, location, and availability and Seva Call will contact multiple roofers, who will then call YOU directly, ready to help.

Roof Vent Types

Thursday, February 14th, 2013

Roof Vent Types - Roofers

Roof vents are an extremely important part of your house, and knowing which roof vent types to choose is an important decision that shouldn’t be taken lightly. Roof vents help move air by allowing hot air to escape and cooler air to flow around your home.  This prevents excess moisture in the summer and mold growth in the winter. The climate and your type of roof are two factors you need to consider before choosing between roof vent types.

Roof Vent Types

There are a couple different roof types, beginning with the basic types. A basic roof vent increases ventilation while still preventing rain from seeping in. These vents have no mechanical parts and are fairly easy to install. If your roof is compatible, then there’s no reason to pay more for a complex vent.

Another common type of roof vent is a soffit vent. These come in a variety of shapes and sizes and are installed underneath the eaves. These vents allow airflow between the attic and the house’s exterior. Cooler air comes through the roof vents while hot air is vented through other roof vents. If you go with this option, soffit vents should be installed on both sides of the house to equalize the pressure. Often times, these vents are used in combination with ridge vents that are installed on the top of the roof. These vents are usually longer vents that run through the length of the roof and are also covered to ensure rain is kept out while still allowing hot air to vent from the roof. In combination with the soffit vents, ridge vents can take care of any air ventilation problems.

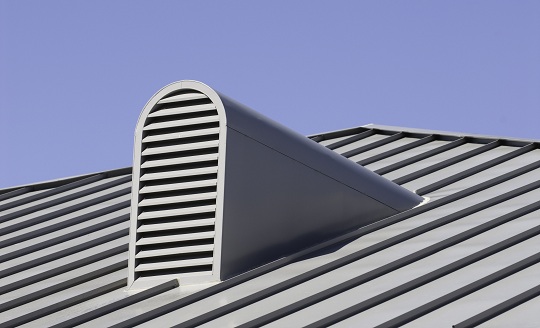
There are some other roof vent types like wind turbine vents, gable intake vents, and dormer vents. These vents are less common as they are usually more specialized vents and depend on the structure of your roof. Usually, the less complicated vents are recommended as they cost less and still do the job effectively.

Additional Help

If you would like to have new vents installed or need help replacing an old one, consider using TalkLocal to find a roofing company for you. TalkLocal is a free service that will connect you with top-quality, reputable roofing professionals in your neighborhood within minutes. Just enter in your specific problem, location, and availability, and up to three companies will call YOU directly, saving you the time and stress of finding one yourself.
Types of Awnings for your Home

Friday, February 8th, 2013

Types of Awnings for your Home - Roofers

Benefits of Awnings

Awnings are a great solution for homeowners seeking shelter from the elements. Simply stated, they are protective coverings that attach to a structure without the aid of support columns. Awnings are designed to cover doorways, windows and outdoor living spaces. Read on to learn more about the benefits and types of awnings for your home.

They not only add color and architectural interest to your home, awnings also offer much-needed shade to keep you cool and help you save on monthly energy bills during the summer. Conversely, awnings will keep you warm and dry during the rainy season.

In addition, awnings provide interior protection from the sun. Harsh UV rays can wreak havoc on fabrics, furnishings and flooring inside your home. Protect your investment by installing awnings over sliders, windows, and doors, especially if you live in a climate that is sunny year-round.

Types of Awnings for Your Home

Before making a decision, you need to learn about the common types of awnings for home use. At first glance, you may think there are many different types on the market, when in reality there are only two – retractable and stationary.

Retractable

You envisioned your new patio as a place to share good times with family and friends. Unfortunately, you have done little outdoor entertaining because of the broiling sun and frequent rainstorms.

Consider a retractable awning to cover large expanses like your patio or deck. Retractable awnings consist of an all-weather fabric cover placed over an aluminum framework. Each manufacturer offers proprietary designs to differentiate them from the competition. These awnings open and extend out as needed and retract when not in use. You can choose from electric or manual operating systems. Retractable awnings mount on vertical wall surfaces or along the roof-line.

Wind is the main enemy of the retractable awning. Sudden gusts can cause their lightweight materials to flap and twist, damaging the frame and moving parts. If you live in a windy area, consider purchasing a motorized awning with a sensor. The awning will automatically retract when winds become a problem.

Stationary

Stationary awnings are used to cover much smaller areas and rarely include moving parts. Mount them over windows to provide indoor shade from the afternoon sun. They are also ideal for your home’s entryway to protect waiting guests from sun, rain, and wintry precipitation.

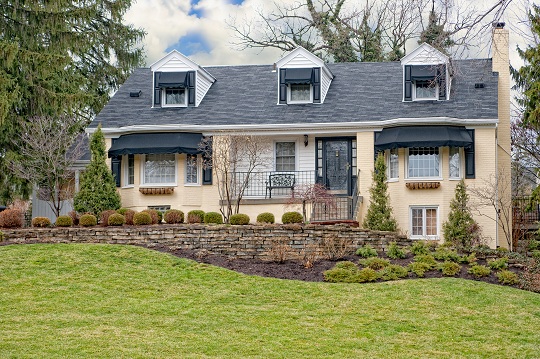
Stationary awning styles range from flat sloped to domed, and convex to concave. Some have side panels and others feature open gables. Their valances can be straight or scalloped. Stationary awning materials include aluminum, canvas fabric, and fiberglass.

Still can’t decide? 

If you are still having trouble choosing between the different types and styles of awnings, don’t fret. TalkLocal will connect you with reputable awning or roofing companies in your area to help with your decision. Your awning dilemma will be solved in no time!

Roof Shingles Curling Up

Friday, January 11th, 2013

Roof Shingles Curling Up - Roofers

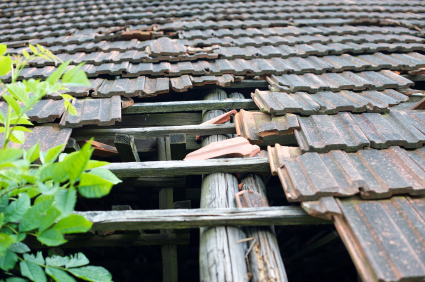
Are your roof shingles curling up? Shingles that curl up at the edges of the shingle tab are signs of a worn-out roof that needs replacement as soon as possible. When inspecting your roof for damage, it is important that you walk with caution. Curled up and damaged shingles, especially in cold weather, are prone to breaking. For your own safety, avoid stepping on raised or cupped shingles.

Curled-up shingles typically result from the wear and tear of severe weather, including very high or very low temperatures.  If you live in an area with severe winters, experts recommend choosing shingles with cold climate certification. In warmer climates, extreme heat can cause the asphalt around the shingles’ protective granules to bubble. This usually occurs when roof temperature exceeds 140 F. Prevent premature aging by making sure the ventilation below the shingle is adequate. Check your attic insulation, particularly in places where the insulation touches the roof, to make sure there is not a lack of ventilation. In places where insulation touches the roof, heat beating down on the shingle cannot pass through to the attic and causes higher shingle temperatures. Normal continuous airflow in an attic can easily keep the shingles away from those damaging short-term peak temperatures.

If you notice an aging roof with curled up shingles, use TalkLocal to find a reliable roofer that works for you!

Home Roof Inspection Checklist

Friday, December 14th, 2012

Home Roof Inspection Checklist Roofers

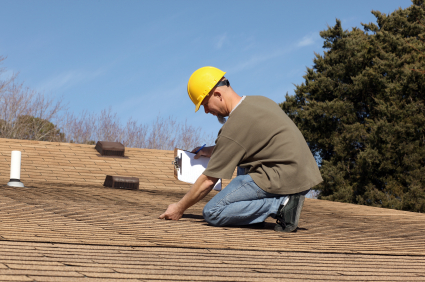
As a home owner, one of the most important things to do is conduct inspections of your house regularly to make sure everything is functioning as it should, and so you are able to make repairs as problems arise. Conducting a home roof inspection is an important task, especially if you experience heavy amounts of rain or snowfall. Normally, roofs should be durable enough to last 15-20 years, but in such circumstances, they may need to be replaced sooner. Use a home roof inspection checklist like the one we’ve provided below to inspect the quality of your roof today.

– Look for leaks, cracks or stains on your ceilings. These usually mean there are holes or damages in the roofing.

– Inspect your roof at least twice a year, preferably before and after the winter seasons.

– When inspecting, look for buckling, curling, missing or blistering shingles on your roof.

– Look for other damages, such as holes perforated by branches or other sharp objects.

– Look for looseness of materials around your gutters, pipes and/or chimneys.

One or more of these signs may suggest that it’s time to get some repairs done. If you are unsure of whether you need roofing repairs, getting a certified roof inspection may be a good idea. Try using TalkLocal, a free service that will connect you with multiple roofers in your neighborhood within minutes. Just enter in your specific problem, location, and availability and TalkLocal will contact top-quality, reliable roofing companies who will then call you directly, ready to help. Save time searching for the right, affordable roofing specialist on your own, and let TalkLocal do it for you!

Temporary Roof Repair for Leaks after a Storm

Thursday, December 6th, 2012

Temporary Roof Repair for Leaks after a Storm Roofers

Have you ever been awoken in the middle of the night by a violent storm? It can seem very frightening: rain pounding the roof, trees swaying about, winds pummeling the sides of the house. The worst part is knowing these sounds may mean damage to your roof. You may not be able to get a repairman to the site immediately, which is why you should perform a temporary roof repair for leaks after a storm. This guide will show you how.

The first thing you need to do when your roof is leaking is take care of your house. You should mop up any leaks from the floor so that there is no internal damage along with the external damage.  When you find the leak put a thick towel down.  On top of the towel you need to place a watertight bucket or cooler.  This will stand to gather and hold the water that leaks through until a repair can be made.

As soon as it stops raining, you need to determine the source of the problem and how extensive it is.  Work your way up to the roof by first checking out the attic.  Inspect the insulation to see if it is wet and to make sure there is no mold.  Many people will encourage you to caulk the leak to deter further leaking, but unless you have prior roofing knowledge you shouldn’t do this.  Caulk could actually damage the shingles and roofing rather than help.

Covering your roof with a temporary cover will allow you to stop the roof from leaking even more.  You will need a tarp, some wooden stakes, rope, a ladder, and gloves.  You need to measure the distance from the roof to the ground and get twice that amount in rope for each corner of the house.  Install the stakes into the ground as an anchor for the rope.  Tie a rope to each hole in the corner of the tarp and lock it into a stake.  Do this for all four corners so the house is entirely covered by the tarp.  This should hold until a roofer can come by and fix your roof properly.

Continuing Problems

If you need professional help as soon as possible, use TalkLocal. This free concierge service will  search for reliable local roofing businesses that can meet on your schedule, even if that means right now! Simply go to the TalkLocal website, input your problem, location, and availability to be connected within minutes to  someone who can help.

Should I Repair or Replace my Roof

Wednesday, December 5th, 2012

Should I Repair or Replace my Roof Roofers

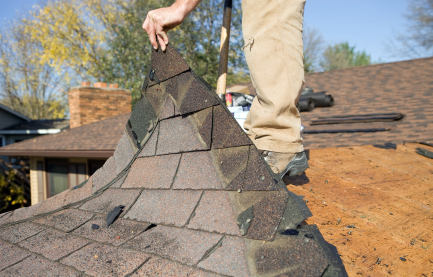
Roofs are one of the most critical parts of a home to repair and maintain. The roof keeps the home dry and prevents any water damages. With damaged or worn shingles, water can seep through the roof, rot the wood, and cause bigger problems for your house. You should be repair loose shingles immediately because they are easily damaged during storms. If you keep asking yourself , ” Should I repair or replace my roof?”, you should estimate the time it would take to do each and see what works best for you. Take into consideration how long the job will take and if the weather will permit. Also, how much are you willing to spend? You should also consider the age of the roof. Roofs that are under twenty years old should be fine with just a repair. Furthermore, loose roof shingles are easy to fix and can be done without a professional.

Materials

– Pry Bar

– Roofing Cement

– Hammer

– Replacement Shingles

– Galvanized 1 ¾ inch roofing nails

– Ladder

How to fix loose shingles

1. Climb the ladder to the roof. Remember do not go on the roof when is wet or slick.

2. Examine roof for loose shingles. To check for loose shingles, try to lightly pry at shingles. If they come up easily then they are loose and need to be repaired.

3. Pry the tab portion of the shingle to expose the nails that attaches them to the roof.

4. Slide the pry bar under the nail and pry out the nail. Repeat until all the nails are out of the loose shingle.

5. Remove the loose shingle and examine it and the shingles near it for damage. If the loose shingles is damaged, remove and trash damaged shingles. If is loose shingle is not damaged, insert the shingle back into place and re-nail the shingle down with an additional roof nail.

6. Apply roofing cement on the underside and edges of the original or replacement shingle and press it back into place. Use utility knife if necessary to fit the replacement shingle in the spot of the trashed shingle.

7. Nail the original or replacement shingles into place.

8. Cover nail heads with some roofing cement.

If you want shingles replacements from a professional, use TalkLocal to find the best roofers in your area.