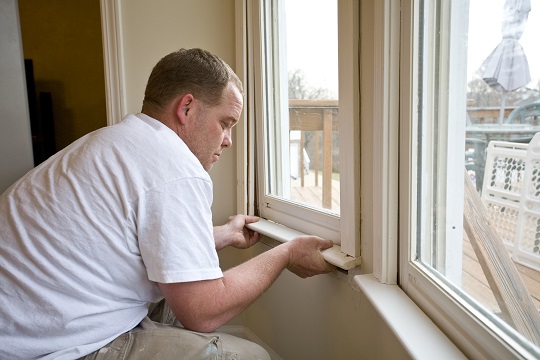
Archive for the ‘Window Replacement’ Category


Be Ready: 4 Smart Ways to Plan for Hurricane Season

Sunday, April 19th, 2015

Hurricane Season

Everyone loves the return of warm weather in the spring. However, for those of us on the East Coast, the rising temperatures come with something new to worry about – hurricane season starts in 6 weeks. If you live in a hurricane danger zone, it’s wise to start preparing now; readiness is the best way to ensure your safety and minimize damage to your home if a storm hits. Here are some tips to make sure you’re prepared for the worst.

Protect Yourself with Information

One of the easiest ways to stay safe during hurricane season is simply to stay well-informed of any dangers to yourself or your property. Learn the elevation level and flood-proneness of your home, and keep yourself updated on severe weather forecasts with your computer, TV, radio or smartphone.

Make an Emergency Plan

Knowing what to do in the event of a hurricane emergency can make a big difference. Make sure that you keep basic disaster supplies (water, flashlight, radio) accessible in your home. Also, make an evacuation plan with your family (set a meeting place and time) and practice it.

Hurricane-Proof Your Home

Doors, windows and other openings are the main points of failure when a building is damaged by a hurricane. Also of concern are dead or shallow-rooted trees, as well as lawn or deck fixtures that could become projectiles in strong winds. Fortunately, there’s a thriving industry of hurricane-proofing for these things. If you’re having trouble finding a hurricane-proofing contractor in your area, TalkLocal may be able to help.

Prepare for Repairs

If your home is damaged by the storm, getting everything fixed quickly is an essential part of returning to normal life. Have your local handyman’s number in your phone – if you don’t know who that is, use TalkLocal to find an available one near you.

Proper hurricane preparations start long before the storms have hit the ground but, as with all natural disasters, they can be daunting to think about. There are no shortcuts for educating yourself or keeping your family ready for an emergency, but for the pre- and post-storm housework, we’re here to help. Check out our Android/iOS apps or website to get connected to hurricane service professionals near you.

Replacing Windows with Milgard Windows

Thursday, March 20th, 2014

Replacing Windows with Milgard Windows - Window Replacement

Milgard is one of the most popular brands of window products, known for its quality and range of options. With new Milgard windows to replace your old windows, hiring a professional installer is recommended to maximize your investment. You don’t want new windows that are poorly installed.

So, whether replacing one or multiple windows, proper window installation is necessary to ensure the optimal performance of your Milgard windows. Here are the recommended first steps for homeowners looking to replace their windows.

Replacing Windows with Milgard Windows

Step 1: Get the measurements of the window(s) to be replaced, and provide this information to your Milgard windows dealer. Measure the window at three points – top, middle, and bottom – both vertically and horizontally, and use the smallest dimensions.

Step 2: Choose your window frame material and style. Milgard windows come in various materials such as wood, fiberglass, vinyl, and aluminum. Various operating styles are available from single and double-hung windows or sliders to casement, awning, picture, garden, arch and bay windows, or skylight windows.

Even you’re just replacing a small window or just one window, make sure to consider the architectural style of your home and overall style of your existing windows when choosing replacement windows. You can request for a Milgard windows guide brochure or schedule for a consultation with one of their experts for help in choosing the best Milgard windows for your home.

Step 3: Get in touch with your Milgard windows dealer for the product information and price as well as installation.

Step 4: Get multiple quotes from contractors to do the installation work. Some Milgard windows dealers also offer installation services. Hire a contractor who has strong recommendations and qualifications, and one you’re most comfortable with.

Step 5: Once you’ve agreed with the service terms, schedule the job. Also, seek advice from your installer about options that can add to your window’s energy efficiency, function, or visual appeal.

Step 7: Get your home ready. Prior to the start of the work, prepare your home for the project. Check with the installer how many days the installation will take, so you can plan accordingly. Expect an interruption in your routine and daily activities, especially if the windows to be replaced are in a busy room like the kitchen. Keep pets and children away from the area. Remove all fragile and valuable items from the work area as well as anything you may need to use while the job is on going.

Locate a Milgard Windows Installer

Contact TalkLocal for help in finding the service professional you need. We can match you with qualified contractors in your area in much less time than doing the search yourself. Imagine the time and effort you’ll save and we won’t charge you anything for it. Try TalkLocal now!

Flood-Proof Home: Windows and Doors

Monday, March 17th, 2014

Flood-Proof Home: Windows and Doors - WIndow Replacement

Floods are devastating events that can do a lot of damage to your property. You don’t have to experience their ravaging effects to think of ways to improve your flood-proof home policy. You may think that your area is not prone to floods, but the truth is that you never know, so it’s best to be prepared.

How Can You Protect Your Doors and Windows?

Are your doors capable of withstanding a flood? Think about this issue and plan a thorough protection ahead in order to protect yourself from harsh weather. Here are several things that you can do if you want a flood-proof home:

Use a Flood Shield

A flood-shield is a sort of small gate to your home that will prevent water from going inside. These shields are easy to install and highly resistant to strong impacts. This type of barrier is suitable for all types of doors and windows and can be made of different materials such as concrete, wood, or PVC. They come in different sizes and with various sealing mechanisms, so you can choose the type that fits your door best.

Get Covered

There are flood insurance programs that can be helpful. If you know that your house is prone to flooding, it is recommended to find an appropriate insurance. Heavy rain, storms, and hurricanes are not covered by standard insurance, so you need to find alternative ways to secure home protection.

To flood-proof your home, it’s essential to make sure your doors and windows are in good condition. If they’re not in tiptop shape, it’s best to repair them to ensure you benefit from the maximum protection you can get.

Need Help?

If you want to secure your home against floods, and need professional assistance, Seva Call can put you in contact with local window professionals in no time. With us, you’re just a few clicks away from getting the help you need.

Window Screen Repair Tips

Friday, March 14th, 2014

Window Screen Repair Tips - Window Replacement

It’s common for window screens to be torn or damaged. If the window frame is still intact, window screen repair is quick and easy. Here are the steps to fix and restore your window screen to good condition:

Step 1: Remove the old screen spline. Use a pointed tool like an awl or a screwdriver with a narrow tip to pry it out. Discard the old spline because it’s most likely already brittle and cannot be reused.

Step 2: Position the window frame securely. Secure the two longest sides of the window frame to the surface you’re working on by placing blocks of wood all along their inside area. The blocks will prevent the frame from bending inward when you attach the new screen.

Step 3: Arrange the new screen. Take the replacement screen material and position it over the window frame, overlapping it by about ¾ of an inch to a full inch. Make a 45-degree cut on each corner of the screen just a little beyond the groove of the spline to keep the screen from folding up in the corners.

Step 4: Install and trim the new screen.

To install the replacement screen, start by pushing in the new spline at one corner. Push both the spline and replacement screen into the groove using a screen-rolling tool. Continue doing this around the window frame. Take out the spline and roll again if there are wrinkles.

Once window screen repair is done, use a utility knife to cut out any extra screen material. Make sure the blade of the knife is sharp, because a dull one will only pull the screen and damage it instead of cut it. When cutting, the blade should be above the spline and facing out of the frame.

Ensure Adequate Screen Tension

An important part of window screen repair is making sure the screen has proper tension. Too loose and the screen will droop. Too tight and the screen can bow inwards in the aluminum sides, particularly on large windows. To get the right amount of tension or slack, put a heavy object like a brick in the middle of the screen once you’ve rolled it in on the first two connecting sides. Finish installing the new screen and remove the object from the center.

Let a Pro Fix Your Window Screen

If you’re looking for professional window screen repair, Seva Call can help you find qualified professionals in your area. Let us know what service you need and we’ll match you with the best local contractors in no time and at no cost!

Installing Energy Saving Windows

Wednesday, March 12th, 2014

Installing Energy Saving Windows - Window Replacement

The additional expense of choosing energy saving windows over regular windows is a worthwhile investment for homeowners who are currently looking to replace their current windows as part of a home renovation project or those currently building or buying a home.

Benefits of Energy Saving Windows

– Cost Savings: You can enjoy up to 20 percent energy cost savings annually when you upgrade to energy saving windows.

– Comfortable Home Environment: Windows designed to improve energy efficiency offer year-round comfort to your home. They reduce drafts and can retain heat during cold weather while keeping temperatures cool inside your home during summer.

Making the Most of Energy Saving Windows

Window Frames: It can be a challenge to find windows without the ideal environmental footprint since, although the glass panes are energy efficient, the window frames are made of materials that have a lasting and detrimental environmental impact.

For instance, many window frames today use vinyl, which is a type of plastic that is made through a toxic process and will remain in the environment for thousands of years.

There are also wooden window frames that although can be sustainably grown do require periodic painting.

Aluminum frames could be more environmentally friendly but are less energy-efficient since they easily conduct heat. When choosing windows, consider all your options and choose one, which has the least environmental footprint as possible.

Spacers: Energy efficient windows have spacers that secure their glass layers together at a certain distance. Look for new energy saving windows with new spacer technologies that are designed with materials like fiberglass, vinyl, reinforced thermoplastic, and silicone foam, which have poor conductivity but high, in thermal efficiency.

Location and Size: These are key factors to the energy efficiency of windows. Most windows should be located on the south side of a house. Design the proper overhang for your southern windows so they will allow light and heat during winter and shade you from the sun’s direct heat during summer. On the north side of a house, windows should have minimal glaze and are ideally small in size to allow maximum cross ventilation in hot weather.

Ensure Proper Installation

Just as choosing high quality windows is important, so is their installation. Windows that are poorly installed will not do their job. Seva Call can assist you in finding the best local contractors to install your new or replacement windows. Contact us now!

How to Fit PVC Windows

Friday, March 7th, 2014

How to Fit PVC Windows - Window Replacement

Being able to fit your own windows at home can save you the cost of hiring professional window installation. Although this task can be quite challenging for the average do-it-yourselfer, with preparation and patience, you can successfully complete it. Here is some advice to help you get started on your PVC windows project.

Measuring

Getting the correct measurements of your window openings is a must. When taking measurements, you should measure the opening at the top, middle, and bottom both inside and outside the walls. Keep in mind that you cannot cut down PVC windows to size, so it’s crucial to get the size correct since you cannot alter the window to make it fit the opening if you got the wrong measurement.

If the window is a bit smaller than the opening, it will be easier to fit and just do something to disguise the extra space rather than the opposite if the window is too large. So, don’t rush. In fact, measure, and then check your numbers twice over.

Toeing and Heeling

Before actually installing the PVC windows, you have to “toe and heel” them which is simply bracing the window glass. Basically, the hinges of the window glass need to be adjusted on their planes horizontally, vertically, and laterally. By doing this, you will be able to move the sash away from the frame.

Do Not Over Tighten the Screws

Tightening the screws too tightly or over packing them can result in a bent framework, which would be costly to correct. So, resist the urge to screw the windows in too tight.

Getting an Extra Pair of Hands

It will be very difficult for one person to carry these heavy PVC windows and put them into position without help, so get someone to assist you with lifting and fitting the windows. If there’s no one in your household who can assist you, you can hire a contractor while keeping your costs to a minimum by simply hiring for the jobs that you really need help with, such as the heavy lifting.

Working Carefully

As with all other do-it-yourself projects, it’s crucial that you take your time in fitting your PVC windows. Make sure every stage of the process is done properly before moving to the next. Most remedial work is due to improper window installation. You don’t want to exert all this effort just to end up paying a professional to correct your mistakes.

Turn to a Pro

If this project seems too challenging for you to tackle, leave it to a professional contractor. TalkLocal can help locate qualified service professionals in your area within minutes. Get expert help quickly with TalkLocal!

Design Tips for Custom Window Systems

Tuesday, February 25th, 2014

Design Tips for Custom Window Systems - Window Replacement

Sometimes even with plenty of choices, the standard windows do not meet the specific tastes of certain homeowners. By ordering custom window systems, it’s possible to have windows designed and manufactured just for your home. Many manufacturers of window products allow you to bring them your ideas and design to create your unique windows.

Since they are custom made, almost any design imaginable can be accommodated. Ordering custom window systems is the perfect solution when:

– You have windows that are taller or wider than normal

– You’re looking for unique shapes

– You’re looking for elaborate window grill designs

– The window frames are angled or curved

– You want beveled or stained glass windows.

Window Hardware

Starting with the hardware will help you create a uniform and polished look for your windows.

Choose window handles and hinges with a new finish that complements the existing decorative metal fixtures in your home such as light fixtures, drawer handles, door handles, etc. Some popular choices are nickel and bronze finishes.

Interior Décor

When choosing the interior finish of your custom window systems, match it with the interior trim of your home for a pleasant, seamless effect.

For example, if the trim is stained wood, then some complementary choices would be stained wood windows, almond-colored vinyl windows, or fiberglass windows in any shade of brown.

Likewise, windows in white finish are perfect if your interior trim is white.

If you’ll be having wood custom window systems, a nice upgrade to your entire interior would be to paint the windows as well as your interior trim and doors a shade that is lighter than the color of your interior walls. For a dramatic effect, use a color that’s darker than your walls.

 Curb Appeal

Your windows have a huge impact on how your house looks from the outside. A safe design approach for your custom window systems is to go for a color that matches the exterior of your home.

Choosing windows in a contrasting or bright color will add some personality to your house and will draw attention to your nice, new custom window systems. Consider using a color that’s a shade darker than your exterior house siding, or choose one of the tones from the color palette of your home’s stonework.

Get the Exact Look You Want

Hire a professional contractor to get your custom window systems installed exactly how you want them. Seva Call specializes in matching homeowners with the right service professionals. Use Seva Call now to find qualified contractors in your area.

Saving on Replacement Window Pricing

Friday, February 21st, 2014

Saving on Replacement Window Pricing - Window Replacement

Getting new windows put in can be an expensive project. The average replacement window pricing ranges from $3.99 to $5.50 total per inch, including material costs ($212 to $289) and installation costs ($56 to $160). As you can see, there’s a wide range of replacement window pricing, and this is due to many different factors, one of which is your location and the cost of living there, which affects the prices of materials and labor fees.

Ensuring smooth and quality installation is one way to save on the replacement costs. The best way to avoid costly mistakes and ensure a quality job at a reasonable price is to hire licensed and bonded contractors who are experienced in carpentry and window replacement work. Ensuring that installation is done with the proper materials and techniques will also help prevent costly problems with maintenance and warranty.

Money-Saving Tips for Replacement Window Pricing

1. Typically, replacement window pricing is quoted by installers based on industry standard rates. It is possible for a contractor to give you a cost estimate of the job even without visiting your home.

2. As mentioned above, many variables come into play when calculating replacement window pricing. The skill or expertise of the contractors should be considered, as well as the seasonal professional rates. In terms of location, those who live in or around major cities will have higher costs.

3. If your window replacement job is complex (you prefer intricate window designs or configurations), you should expect total material and installation costs to increase at least 5 percent, and even up to 14 percent.

4. When obtaining estimates from contractors, check if the services quoted for include all necessary work such as framing the window’s opening or fitting decorative elements.

5. Going for higher-priced windows is usually worthwhile, because they normally feature better construction and operation, finishes that are more hardwearing, and energy-efficient glass.

6. You can save on replacement window pricing by getting multiple bids from vendors. Just make sure you provide all vendors with the same description of your project with all complete information, so you can get the most accurate estimates.

7. You can also save on installation cost if you’re flexible with your project schedule. Scheduling your job during the installer’s non-peak period will usually get you a discount.

8. Save on replacement window pricing by shopping for windows online, or ask a dealer about discontinued or incorrectly ordered products.

Find a Trustworthy Windows Installer

You can spend hours or even days looking for the right contractors. With Seva Call’s free service, you don’t have to. Let us know about your project and we’ll connect you quickly with up to three professionals who can take care of your window replacement project to meet all your requirements. Contact Seva Call now!

Putting in Glass Replacement Windows on Aluminum Frames

Wednesday, January 29th, 2014

Putting in Glass Replacement Windows on Aluminum Frames - Window Replacement

Aluminum window frames are durable, but they won’t stop the window glass they encase from breaking. Nonetheless, when the windowpane breaks, it is easy to remove the aluminum frames to open them and put in glass replacement windows.

Use the following steps to restore your window. Of course, before you start, make sure you order the correct glass replacement windows from your local window retailer.

Instructions

Step 1: Wear heavy-duty gloves that will prevent broken shards of glass from cutting you. Very carefully remove the pieces of glass that fell from the window assembly.

Step 2: Take down the entire window assembly from the frame on the wall. If replacing fixed windowpanes, there should be screws covered by plugs that secure the frame to window opening. Use a screwdriver to pull away the plugs so you can remove the screws, loosen the window assembly, and remove it.

If dealing with sliding type of windows, lift the assembly upward from the base until the bottom of the frame can be removed from its track.

For hinged-type windows, simply remove the assembly by removing each of the screws that secure the opening mechanism onto the frame.

Step 3: Remove all screws that hold together the window frame. In aluminum window frames, glass panes are sandwiched between the frame’s inner and outer segments. When you loosen the screws and remove them, you will be able to detach the parts that keep the frame together. You can then locate a rubber gasket surrounding the glass pane.

Step 4: Take out the rubber gasket with care since you will be re-using it. Run a damp cloth around the window seat to get rid of any dust, dirt, or tiny glass pieces. Put the rubber gasket all along the outside edges of the glass replacement windows.

Step 5: Slide the replacement window into the frame. Put back the frame in the reverse order of how you disassembled it. Tighten the screws to hold the glass replacement windows securely in place.

Step 6: Put back the new window assembly into the opening. Ensure a perfect fit by putting back all the screws in the right holes.

Need Quick Help Fixing a Broken Window?

A broken window is a security risk. For the fastest and most convenient way of fixing broken glass windows, call in a professional. You also don’t have to spend extra time searching for local window experts. Seva Call can get you connected with reputable contractors in your area in no time. Call us now.

Installing Pella Replacement Windows

Tuesday, January 28th, 2014

Installing Pella Replacement Windows - Window Replacement

Pella is a well-known manufacturer of door and window products for new construction and replacement projects. Because of the wide range of choices in material and style, Pella replacement windows are some of the most popular options for homeowners who want to upgrade their old windows.

Pella offers windows made of primed or unfinished wood (Mahogany, Pine, Douglas Fir, and Alder), aluminum-clad wood, Duracast fiberglass composite, and vinyl. Pella replacement windows come in various styles including:

– Casement

– Awning

– Double-Hung

– Single-Hung

– Sliding

– Bay or Bow

– Special Shapes (i.e. Full Chord, Full Circle, Octagon, Springline, Rectangular, etc.)

– Specialty (i.e. French/Push-Out/In-Swing French Casement Windows, Tilt-Turn and Hopper Windows)

– Custom

Pella Replacement Windows Installation Process

Step 1: Measure the openings.

Getting the exact measurement of your window openings is critical to making sure your Pella replacement windows will perform as expected and contribute to the energy efficiency of your home.

Measure the opening vertically and horizontally across three areas: top, middle, and bottom. Get the width by measuring from jamb to jamb. Get the height by measuring from the windowsill’s top to the header’s underside.

With all measurements taken, choose the smallest width and height measurements for the final dimensions. A local window specialist can assist with this step to ensure precise measurements.

Step 2: Remove the old windows.

Your old windows must be removed carefully to prevent the walls of your home from being damaged. It’s also important that old windows be disposed of in a responsible manner, so they will be hauled away by local Pella window replacement contractors at no additional cost.

Step 3: Ensure the new window is weather tight.

Be extra careful in making sure that your Pella replacement windows are uniform, plumb, and level in the openings. Insulation should be installed between your windows and wall.

Also, check that windows are well sealed to your walls to keep water and air from getting into your home.

Step 4: Finish and clean up.

Test to ensure that every new window is working properly. All hardware should be installed.

Depending on your preferred finish, the windows would either be painted or stained. If necessary, replace both the window’s interior and exterior trims and apply desired finish.

Once all the finishing work is done, the Pella installer will clean up and vacuum the work area. They will explain to you how to operate and care for your new Pella replacement windows.

Find a Local Pella Certified Windows Installer

All Pella window replacement projects are completed by installation professionals who have been specifically trained by Pella to be distributors and installers of their products. For help locating a certified Pella contractor in your area, contact Seva Call. We’ll connect you with local Pella experts in no time for free!