Archive for the ‘services’ Category


Repainting The Interior of Your Home

Wednesday, November 4th, 2015

beforeandafter

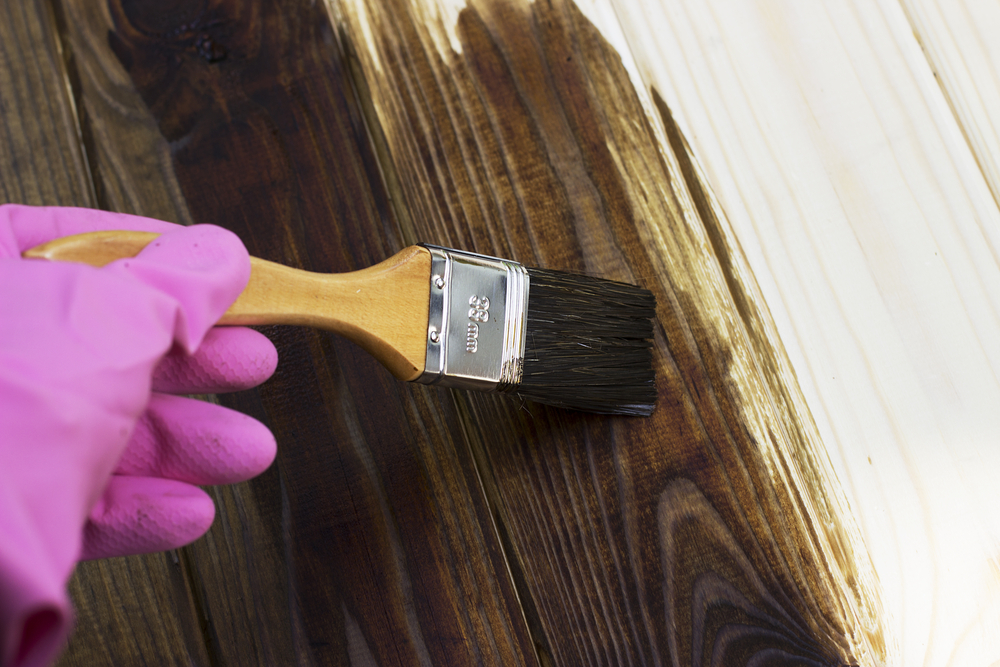
Maybe it’s the lack of vibrant natural light, the predominance of reds, golds, and browns, or the stunning beauty of the pure white snow soon to come; but for some reason, there’s a huge misconception that painting is more of a task to do in the warmer months. Sure, the freshness of spring may put you in the mood for all things new- including a color change, but autumn is as good as any a time to paint the interior of your home. In fact, it may be the best time. Here are some advantages to repainting the interior of your home during the fall months:

Not as Humid — The heat and humidity in the summer months actually makes it harder for the paint to dry and cure properly. The excess moisture from the humidity prevents it from evaporating, and it doesn’t bond to the wall. This will cause issues with the texture of the paint and result in an uneven coat. It also makes the paint dry a lot faster.

Moderately Cooler Temperatures — Those temperate weather seasons like Fall and Spring are great for opening the windows to let the paint fumes out without worrying about letting the heat or A/C out with it. Once the winter hits, painting would put you between fumes and freezing; in the summer it’s that or the fiery heat.

Saves Time for Other Projects — By repainting the interior of your home during the fall or even winter months, you will have time for other projects like gardening, patio upgrades, and painting the exterior of the house — projects that are best done in the spring and summer.

If you’d rather skip all that hard work and relax, let TalkLocal find you a professional that can handle it for you. Best part is — painting contractors are likely to score you a good deal because the colder months are their slower months.

Burst Water Pipes

Thursday, October 8th, 2015

shutterstock_333883721 copy

No one wants to deal with a burst water pipe but every year, millions of Americans are caught off guard by this nuisance. If you have a burst pipe, it’s critical to act quickly to minimize the damage. To act fast, you need to know exactly what to do. Here are a few basic tips that will help you better handle any burst water pipes.

Steps to Follow

1. As soon as you notice a burst water pipe, turn off the water supply and remember the leak’s location. The water main valve is usually where the pipe gets into your house or under the sink.

2. Once you’ve turned off the water supply, you need to drain your plumbing system. To do that, turn on all cold-water taps and make sure you flush the toilets.

3. Switch off the water heating, and turn on your hot water taps to continue drainage.

4. Turn off the power. Water from burst pipes may damage your electrical wiring. This can destroy your appliances and puts you in danger. Turn off the electrical system, but make sure it isn’t wet. If any of its parts are wet, stay away from it because you might be electrocuted. Call an electrician right away.

What to Do Next

Before you fix the leaking pipe, you need to clean up the leaked water. If you caught the pipe burst early, chances are there’s not much water around the house. However, if it’s been dripping for a while, you need to be careful because the structure of the house may be affected.

You can try to repair the pipe yourself if the leak was caused by a loose fitting. You can also replace the broken pipe segment with a new one.

Looking for a Plumber?

In an average of just 90 seconds, TalkLocal can put you in touch with a local certified plumber who can repair your pipes in no time.

Steps to Planting Fall Flower Beds

Tuesday, October 6th, 2015

colorful flower bed ideas

Your garden can be just as beautiful in the fall as it is in summer. Planting fall flower beds will keep your garden looking pretty even when your summer flowers begin to die. They are also less likely to inhabit any pests, which we think is a huge plus.

Steps to Planting Fall Flower Beds:

Step 1: Clear out weeds and dried leaves from your current flowerbed. If you don’t have an existing flower bed, locate where your new flowers bed will be. You can work with the space you have whether big or small.

Step 2: Buy soil that contains the right nutrients for winter flowers and bulbs. Distribute the soil in your flowerbeds.

Step 3: Observe your flower beds to find out the amount of sunlight they get. This information is helpful in choosing the best flowers and bulbs to plant in your fall flower beds. Once you’ve made your flower choices, buy bulbs online or check the local garden center if they have your chosen bulbs available.

Step 4:  Each bulb your purchased will come with instructions on how top plant them. First, use a garden trowel to dig a hole in your flower bed in the depth indicated on the bulb packaging. Then, proceed to follow the directions for planting. Pay attention to giving enough spacing in between each bulb. Cover the bulbs with soil. Don’t forget to stake the correct plant markers beside the bulbs.

Step 5: Choose the flowers to include in your fall flower beds. Plant them around the planted bulbs, using the plant markers as your guide to avoid planting directly above the bulbs. Some perennials are perfect for fall gardening such as Chrysanthemum, Toad Lily, Aster, Goldenrod, Russian Sage, and Helenium. These flowers will remain vibrant throughout autumn up until the first hard frost. Their bright colors will make pretty borders and entire fall flower beds.

Step 6: Give your flower beds thorough watering.

Looking Forward to Planting Fall Flower Beds?

Get expert opinion and help for your fall gardening project or for any landscape job you currently have. TalkLocal is your link to the best landscape designers and contractors in or near your area. We’re experts in matching homeowners with the service professionals they need and we don’t charge you for it. Try us now!

10 Things You Missed When Inspecting Your New Home

Thursday, September 24th, 2015

rsz_roof_inspection

For the past few weeks or months, all of your web browsing has been on Zillow. Your weekends have been packed with open houses. Your heart has been broken into tiny little pieces with thoughts like, “It looks so much better in the pictures,” or  “If only this was closer to work,” and “I’m sorry, I just can’t see past the staging…or maybe it’s the smell.”

Now, you’ve finally found a house you can live in, complete with features you can live with, square footage you can fit into, and a mortgage that won’t make you starve to death in a community that’s sure to grow on you.

Here are 10 nagging things you suddenly notice:

1. The mysterious bumps, creeks, and whirring sounds that grate your nerves once all the buzz of moving in quiets down.

2. Filth. The bathroom tiles look as if they were actually caulked with dead skin cells and soap scum.

3. Greed. Did they really need to take the batteries out of all the smoke detectors?

4. Shotty appliances. You could practically ride your noisy, shaky washer/dryer to work in the morning.

5. Wow, little Stevie sure has grown up fast. These 2 wall-markings are only 6 months apart. Wait…who is Stevie?

6. The hidden infestation. Should we be wearing black since you evidently live in a cricket graveyard?

7. The deception. The porch appeal was so well-executed a week ago. Did the homeowner not know that weeds have roots or is Prickly Lettuce just shy during open houses?

8. Holes. Chipped paint. Cracked linoleum. Bad carpentry work. Here, here, here and here! Once you see it, you can’t unsee it.

9. The stain in the carpet. Then you realize: someone else’s life is in your carpet. It’s not your carpet and will never be your carpet. You need to pull up all of the carpet.

10. The Neighbors. They seem so nice during the day but once the moon comes out, they turn into real party animals…party werewolves.

At least, that’s what happened to me. In fact, we hadn’t lived here for a month and already a storm caused our electricity to go out because the surge protectors weren’t properly installed (or something), said the electrician I found through TalkLocal.

Now – a new surge box, a full closet-makeover, a new kitchen countertop, and three broken appliances replaced later – it’s finally sinking in: home is not a place you discover by following a local listing and a map, but a place you create by following your heart.

And, if maintenance and repair needs are threatening to break the bank and your heart, let TalkLocal take the hassle out of finding a local pro. Because when things break while you’re making a home, it’s hard enough to keep it together.

Weed Control Tips: Making Dead Weeds Stay Dead

Monday, September 21st, 2015

weed control_pic

Even after a neighbor sent a picture teasing Brian and Amber about their unruly lawn while mockingly suggesting that she (the neighbor) was embarrassed to merely walk her dog pass the home let alone live next door, it was weeks before the new homeowner’s found time to finally start that long overdue garden weed control project.

“While weeding, I found nesting birds, mating crickets, and a praying mantis living in the thriving new ecosystem my negligence had created”

–  Amber from Pennsylvania (via email)

What’s worse: they soon realized that their tactics simply weren’t the best way to control weeds. In other words, their time, effort, countless little pin pricks, and allergic reactions had been all but wasted as their garden quickly succumbed to out of control weeds.

“The weeds are coming back with a vengeance. It’s as if our work  had only paved the way to an era more wild than the last. We feel overwhelmed,” wrote Amber.

Well, Amber, the phrase “grow like weeds” is a truism for a reason. So, if you want to reduce the resilience of your weeds to something you can keep up with and manage, then follow these weed control tips:

Nip It In The Bud: Don’t have time for a major weeding session? Amber and Brian would have fewer weeds to deal with if they had simply removed the flower heads every week using gardening scissors or hedges. Flowers lay down new seeds and help spark rebirth.

Don’t Neglect the Roots: Of course, if you neglect the root network, then our weed problem will only grow more entrenched over time. Dig deep when weeding and pull the weeds from as close to the root as possible. In addition, find and dispose of lone root fragments because they actually may flower.

Break Up The Soil: To make uprooting less labor intensive, ensure that the ground is moist from either your sprinklers or a recent rain shower. Then, use a shovel to break up the soil in areas where the roots may be especially deep.

Apply Herbicide at the Right TimeAerating the lawn after applying weed control could render the herbicide inefficient. That is why you must aerate the lawn prior to applying the herbicide.

Get the Right Herbicide: Furthermore, when you choose your herbicide, don’t forget to carefully read the instructions on the label to make sure that you choose the right one for the weeds in your yard.

Repeat: Excessive rain or lack of it can neutralize the effect of herbicide, and weeds will start germinating. This is why you might need to apply pre-emergent herbicide repeatedly.

Ground Cover: Sunlight-starved seeds and root networks will have a harder time growing in uncovered ground. Landscape fabric, mulch, or mulch alternative layered to about two inches in thickness should be strategically placed to allow sunlight where plant growth is desired.

Brian and Amber have a lot of work ahead of them despite their efforts. Fortunately, with these weed removal tips in mind, they have the knowledge to produce lasting results in their lawn. However, if you don’t have the time to go through these steps and need someone to take care of those pesky weeds for you, TalkLocal will connect you with a local pro who will make those pesky weeds history.

How To Prevent Bathroom Mold: Fight Bathroom Tyranny

Monday, September 14th, 2015

shutterstock_269885711

We would all face complete social isolation if our friends knew how disgusting we truly are – naturally, we devote a good deal of time to keeping our bathrooms clean. Nasty bathroom stuff, as I understand, is the current politically correct term, comes in a variety of smells and textures; the most stubborn of which is mold. The longer it’s left alone, the more of your wall it’ll seize; this can damage your air quality and even get you sick. We here at TalkLocal care about your friendships and your lungs, so we’ve collected a few tips on how to prevent and tackle bathroom mold.

Fun fact: adults with one or more friends spend 80% more money. Luckily, compared to split restaurant checks and snacks for hosting, the cost of welcoming people into your home without triggering a gag reflex is rather inexpensive.

Here are 5 tips to prevent bathroom mold:

That Fan Exists for a Reason

You know that annoying, loud fan you sometimes switch on instead of the lights? It’s actually your first line of defense against mold – nasty organic stuff like fungi require damp conditions to grow, and good use of your fan can evaporate a good portion of the water on your walls. It’ll also clear out humid air. To be especially careful, make sure your fan is equal to or above 70 CFM, and make sure it runs for at least a half hour after a bath or shower.

Restrict Access

Mold loves to stick itself between bathroom tiles. You will not love the smell this produces, nor the weird sensation of walking with wet feet on moldy tile. Restrict the mold’s access to your tile by sealing your grout lines annually. Even if you’re not concerned about mold, this will waterproof your tile, which is wise considering everything you do in the bathroom involves water.

Take Matters into Your Own Hands

If you’re the type of brute who hears “fruit flies” and wonders where you put the flyswatter (I am such a brute), you might prefer something hands-on, like drying your walls off with a towel or squeegee after showering or bathing. This is the most effective method but, efficiency-wise, is next to washing your clothes with a laundry board. It might be necessary, though, if you have an already-existing mold problem.

If You’re Past Prevention…

No worries. Everyone, at some point, deals with a mold-infested wall. All you need is a brush, detergent or bleach, and a towel. Mix detergent with water half and half or use a 10% bleach and 90% water solution, dip in the brush and scrub away the tyranny. Reclaim your freedom like a true American.

When All Else Fails

You know what’s also pretty American? Paying a qualified professional to do take out the bathroom tyrant for you. Like any true American, you’re  busy, or sometimes have unmanageable mold problems, like black mold (in this case, seriously, get a professional).You’re also a conscious consumer, so you love free things. TalkLocal is free and will take care of finding a bathroom cleaner for you.

Get started today and reclaim what is rightfully yours so you can invite friends over without distress.

Prepare Your Vegetable Garden Before Winter Arrives

Friday, September 4th, 2015

shutterstock_175956125

An unprepared vegetable garden is no match for even a slight frost…so to make next year’s work easier, your garden must be protected. That’s why now is the time to prepare your vegetable garden. Winter is coming — and, unlike in Game of Thrones, it won’t take seven years to arrive. Follow these four easy steps to protect your garden from the harsh weather conditions.

1. Clear out old plants. This will prevent growth of undesired mold or disease and take a step out of your way next year. Rotting plants can pollute the soil and ruin subsequent crops, so be sure to get up all of the roots. This debris can be used for composting.

2. Setting aside an area for composting will give you great soil come next year. Dig trenches in your garden and fill them with organic debris. The heat from the trenches will facilitate the decomposition process, helping create extremely fertile soil.

3. If you have immature vegetables that might die during the winter, you can preserve them for the next season by digging them up (get up all of the roots without harming them) and burying them headfirst with the roots sticking out of the ground. As strange as it may sound, the relative warmth of the soil will keep the vegetable from dying in the frost.

4. Cover the soil with a tarp to protect it from direct exposure to frost. Frost can damage the soil, making it less suitable for rearing plants in subsequent years.

Whenever dealing with gardens, the best possible option is to seek the assistance of a professional landscaper. With TalkLocal’s assistance, you can find one with the right experience and schedule you need – for free. Don’t wait for the winter to draw any closer; head over to TalkLocal and let us show you how easy it is to find a local landscaper before Jack Frost comes knocking on your door.

Labor Day Is Just Around The Corner

Wednesday, September 2nd, 2015

shutterstock_140378680

Not only is Labor Day another holiday where one can relax from the typical stress of a work day, it also gives you an excuse to have a cookout with your family and friends. We all know cookout = great food.

We handpicked some of our favorite dishes to save you from having to play “pick a card any card” with your recipe box this weekend.

Here are our two favorites:

Bacon Ranch Potato Salad (aka the Greatest Potato Salad Ever), Courtesy of The Recipe Critic

shutterstock_6680095

INGREDIENTS

– 2 pounds potatoes, cut into bite-sized pieces
– 1 (16 ounce) container sour cream
– 1 (1 ounce) package ranch dressing mix
– 1¼ cups cooked bacon, crumbled
– 1½ cups shredded Cheddar cheese
– 2 bunches green onions, thinly sliced

INSTRUCTIONS

1. Bring a large pot of water to boil over high heat add the potatoes and reduce the heat to medium high and boil for 12-15 minutes or until fork tender. Drain and rinse under cold water.
2. In a small bowl whisk together the sour cream and ranch packet until blended.
3. In a large bowl, add potatoes, bacon, cheddar cheese and green onions.
4. Stir in the sour cream ranch mixture until blended and coated well.
5. Refrigerate for 2 hours before serving.

Credit

 Southern Creamed Corn, Courtesy of Patrick and Gina Neely (so you already know it’s good)

shutterstock_281291156

INGREDIENTS

-8 ears corn, husked
-2 tablespoons sugar
-1 tablespoons all-purpose flour
-Salt and freshly ground black pepper
-1 cup heavy cream
-1/2 cup cold water
-2 tablespoons bacon grease
-1 tablespoons butter

 INSTRUCTIONS

1. In a large bowl, cut the tip off cob. Cut the kernels from cob with a small paring knife. Using the back of the blade, scrape against the cob to press out the milky liquid.
2. Whisk together sugar, flour, and salt and pepper, to taste. Combine with corn. Add the heavy cream and water. Mix.
3. In a large skillet over medium heat, heat bacon grease. Add corn mixture and turn heat down to medium-low, stirring until it becomes creamy, about 30 minutes.
4. Add the butter right before serving.

Credit

Both recipes take no more than an hour to cook, which means more time for you to relax. You can also check out our Pinterest board for more quick and delicious recipes.

Since Labor Day is a day of rest, let us here at TalkLocal take care of things for you. Need to clean your house before your cookout? We can find you a maid service while you kick back and relax.

Enjoy your holiday!

Essential DIY Tools for Your Toolbox

Monday, August 31st, 2015

shutterstock_324217205

There are more useless money-suckers than good products these days; this is especially visible in the market for household maintenance tools. You search for cool DIY tools, expecting something at the crossroads of utilitarian and innovative, but all you seem to find are Allan keys with vice grips, PSI gauges, and sextants attached.

Here at TalkLocal, we think a sextant sounds like something nobody is interested in, so we’ve compiled a list of DIY tools to help you declare independence from your contractor and feed your increasingly addictive DIY hobby.

Essential DIY Tools

These should be in any toolbox:

– Adjustable wrench
– Screwdriver set
– Tape measure
– Electric drill (worth the price, trust us)
– Level
– Hammer
– Nailset
– Pliers
– Utility knife
– Flashlight
– Sandpaper and sanding block (whenever dealing with wood)
– Safety goggles and gloves
– Super glue
– Duct tape and WD-40 (seriously)

Useful Extras (Your pipes won’t burst without them but they’re not superfluous):

– Crowbar
– Staple gun
– Rubber mallet (good for tapping together laminate)
– Dremel
– Hot glue gun
– Automatic nailer and circular saw (useful for woodworking projects)
– Jigsaw (another useful woodworker’s tool)
– Multi-tool (those Swiss Army knife-things with a million tools – if you think they look unwieldy and useless, consider that these are essentially whole toolboxes you can fit in your pocket!)

Gather these together over time; they’re too expensive to buy all at once, and you might not end up needing all of them. Instead, get the ones that seem necessary for the project at hand, and make sure it’s a project you actually can tackle yourself so you don’t waste money

For all of those tasks too big, too onerous, or too time-consuming for a mere mortal with a toolbox, let us handle it. Go onto TalkLocal and our unique search system will put an end to that obnoxious research-call-repeat headache.

DIY Furniture Refinishing: Make Old Furniture Shine Like New

Wednesday, August 26th, 2015

Does your furniture look like it’s about to go past the point of no return? Only the most unsightly furniture needs complete refinishing (if you just have a few white rings, check out this article where we focus on furniture makeovers). However, if your table is severely chipped, extensively worn, or deeply blemished, then these DIY furniture refinishing tips will help you strip the old finish and lay down some new shine.

shutterstock_280851356

STEP 1: Stripping Old Finish

Most finishes can be stripped with sandpaper, but if they prove stubborn, you’ll have to use special products. Which product depends on the type of finish. Fortunately, applying the most effective tools to remove each finish is a simple first step in an equally simple (yet labor intensive) process.

Finish: paint, shellac, acrylic, lacquer, varnish

Required: High-grit sandpaper fixed to a sander or block

Many finishes can be scraped up with 150-grit sandpaper. Move to 220-grit to get the finer areas and then remove excess dirt with a damp rag. If sanding proves ineffectual, you might have to take a trip to the hardware store for specialized products.

Finish: Acrylic or paint

Required: Chemical stripper

Only use chemical stripper in a well-ventilated area with gloves and goggles as its ingredients are caustic and dangerous to the eyes. Apply with a rag and clean it up with steel wool by rubbing along the wood grain.

STEP 2: Applying Wood Stain

After stripping the old finish, wetting the surface of the wood will show what it’ll look like with finish applied. Incorrect or poor color can be corrected by applying wood stain with a rag. High-quality hardwood responds best to gel stain. Wipe in the direction of the grain, taking care to distribute it evenly, and remove excess with another wet rag.

Let the stain dry. If its appearance is not satisfactory, the stain can be liquefied by applying more on top, which will allow you to remove it or change its distribution.

STEP 3: Laying Down New Finish

Here’s our guide to picking the best finish for your furniture. In this walkthrough, we’ll cover two common ones – which to use depends on how much you’ll be using this furniture. If heavily, opt for oil-based polyurethane, which is more durable than water-based finishes; if not, use wiping varnish, which will look a bit sleeker.

 Applying polyurethane requires a few steps. First, apply the base layer with a foam or bristle brush in the direction of the grain. Let it dry overnight, even it out with 280-grit sandpaper and clean off any dust. When the surface is even, lay down a second coat as you would a layer of paint, brushing with the grain (pop bubbles by brushing them over).

Applying wiping varnish is essentially the same procedure – just take care not to lay down excess varnish, as it can result in unsightly buildup when dry.

Take a moment to admire your work! Refinishing furniture is not a simple task; if you’ve done it yourself, that’s something to be proud of. If this long and messy procedure isn’t for you, try a much simpler solution: TalkLocal. Our free and unique system will match you up with the perfect pro to get that furniture refinished on your  schedule – and it’s a lot more fun than watching finish dry.